We’ve already covered how to completely prevent partitions from mounting under macOS, but sometimes you want a partition mounted and ready to use but still want the benefit of it not cluttering up your desktop. For example, many people want their Time Machine partition constantly mounted and backing up throughout the day but don’t need it to be visible at all.
Finder’s preferences allow for hiding all volumes from the desktop but offer no control on a volume-by-volume basis. Therefore, we’ll show you how to use the Terminal to hide mounted volumes on a case-by-case basis.

Note: While the volume we will use to illustrate this method is a Time Machine drive, the process will work to hide any volume.
How to hide volumes on Mac
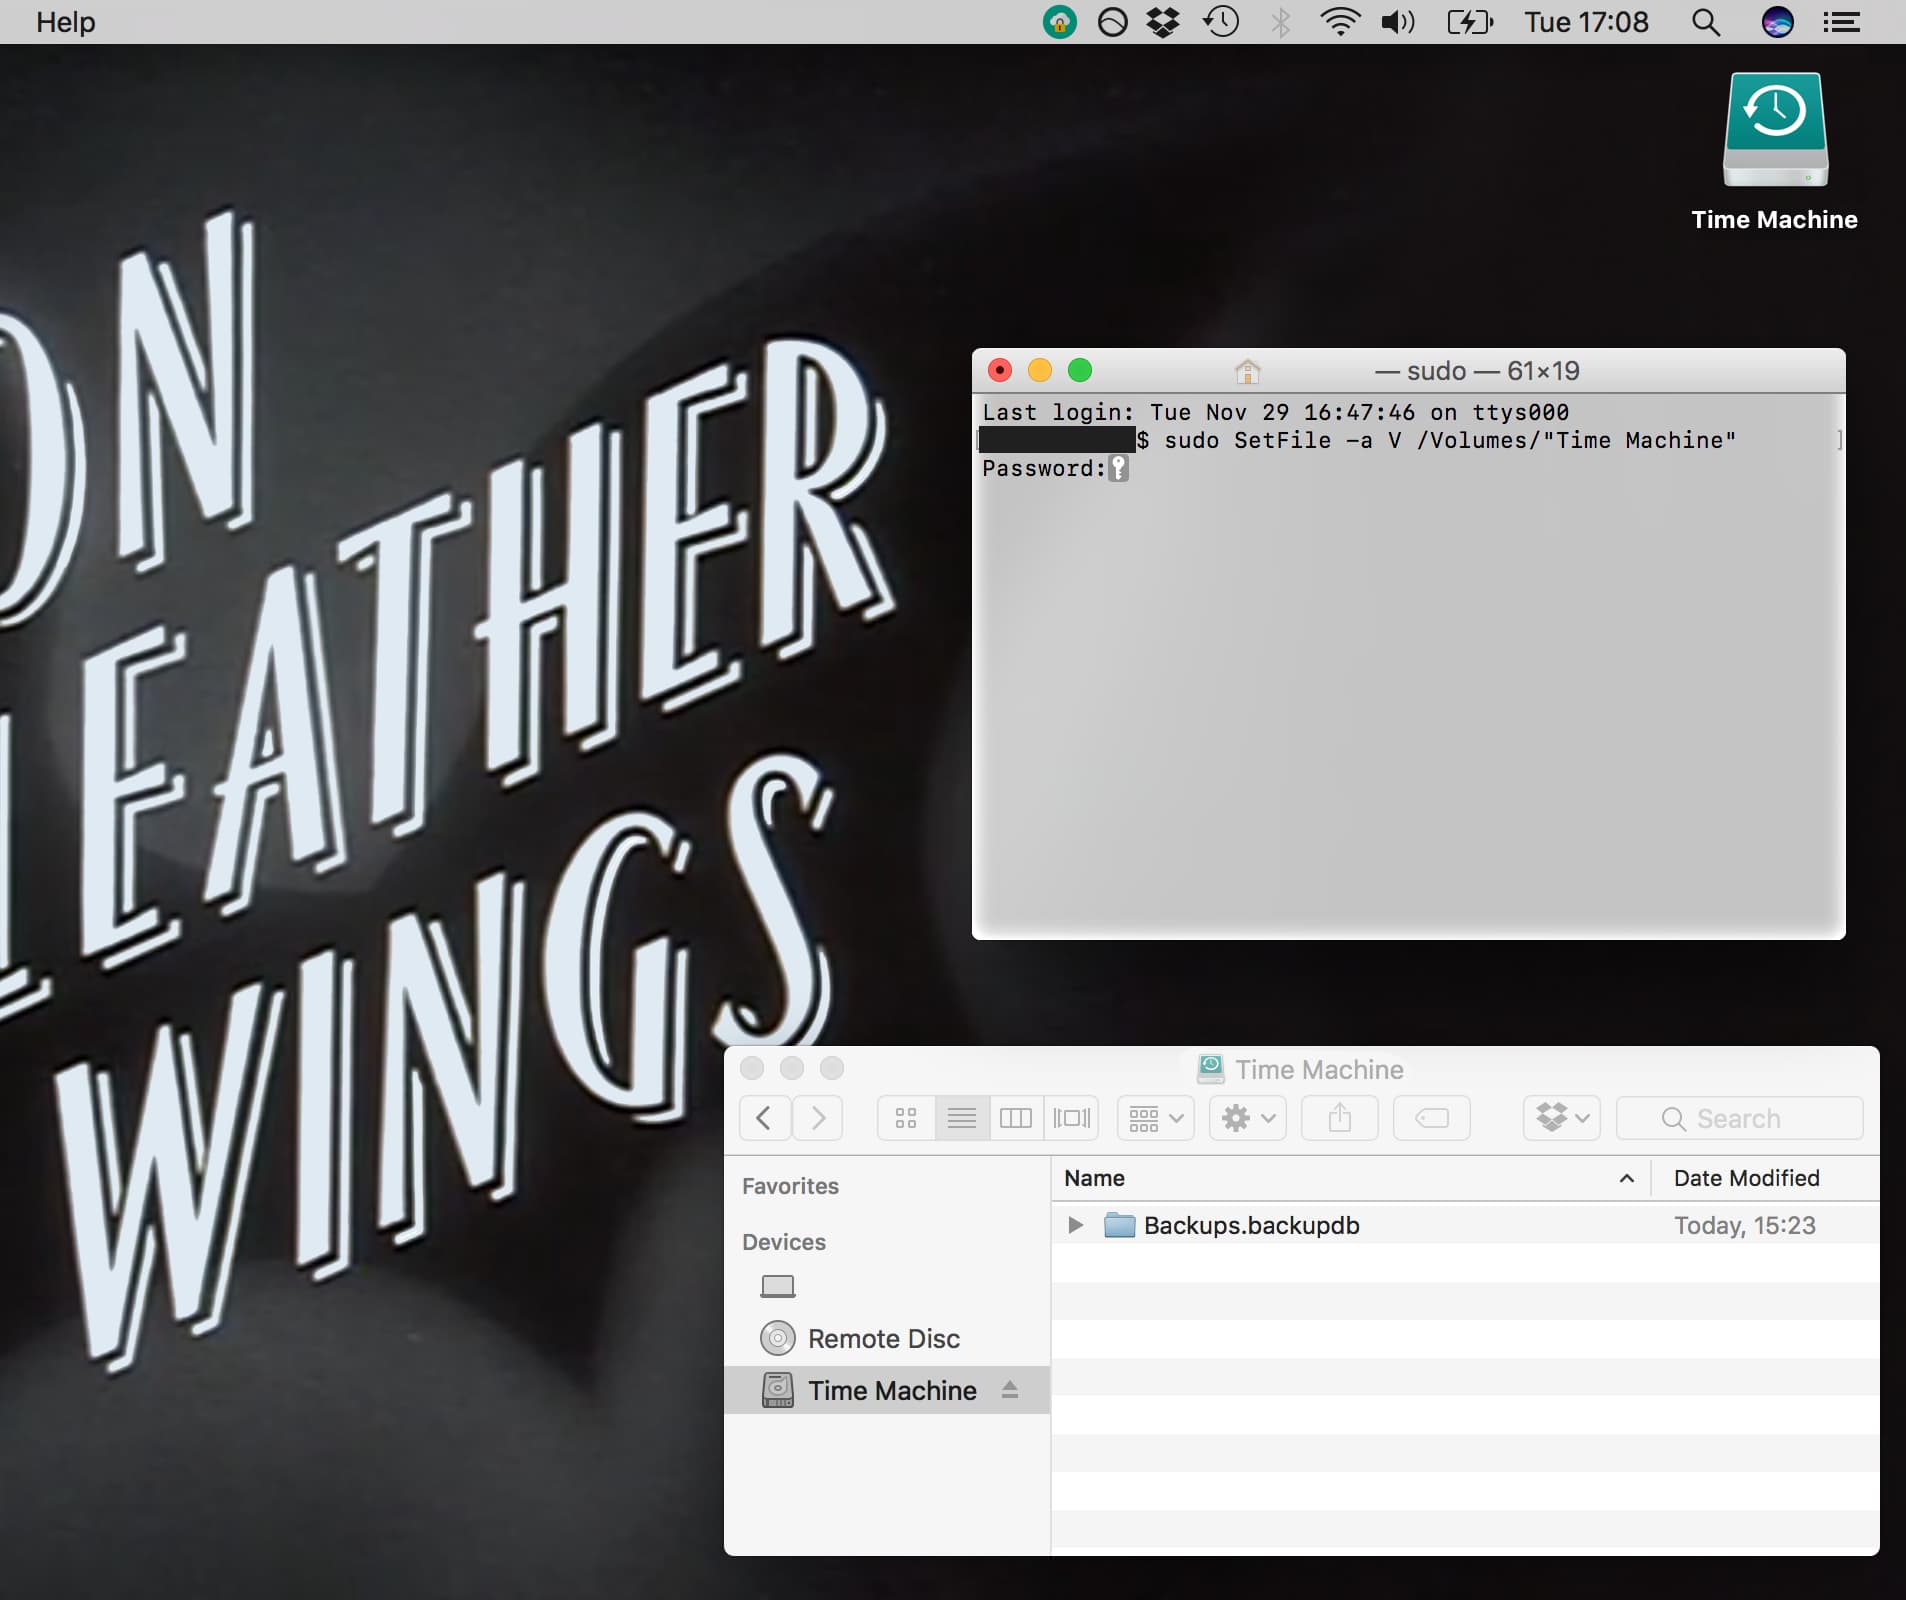
1) Ensure the volume that you want to hide is mounted and visible in the Finder, desktop, or Disk Utility.
2) Make a note of the chosen name of your volume, for example, Time Machine or Storage.
3) Launch Terminal and type the following command, replacing “Drive Name” with the name of your own volume, which you noted earlier (keep the quote marks):
sudo SetFile -a V /Volumes/"Drive Name"
4) Enter your password when prompted.
Note: Install command line developer tools if you’re prompted to do that.
5) Next, in Terminal, type:
killall Finder
Your volume should now have disappeared from the desktop (and also the Finder sidebar on some macOS versions). However, it’s still mounted. To verify this, open Disk Utility from /Applications/Utilities or via Spotlight and confirm that it is not grayed out in the sidebar. In the case of a Time Machine, you can also tell the volume is still mounted by performing a backup with the volume hidden; I use the menu bar icon to check that this is working.
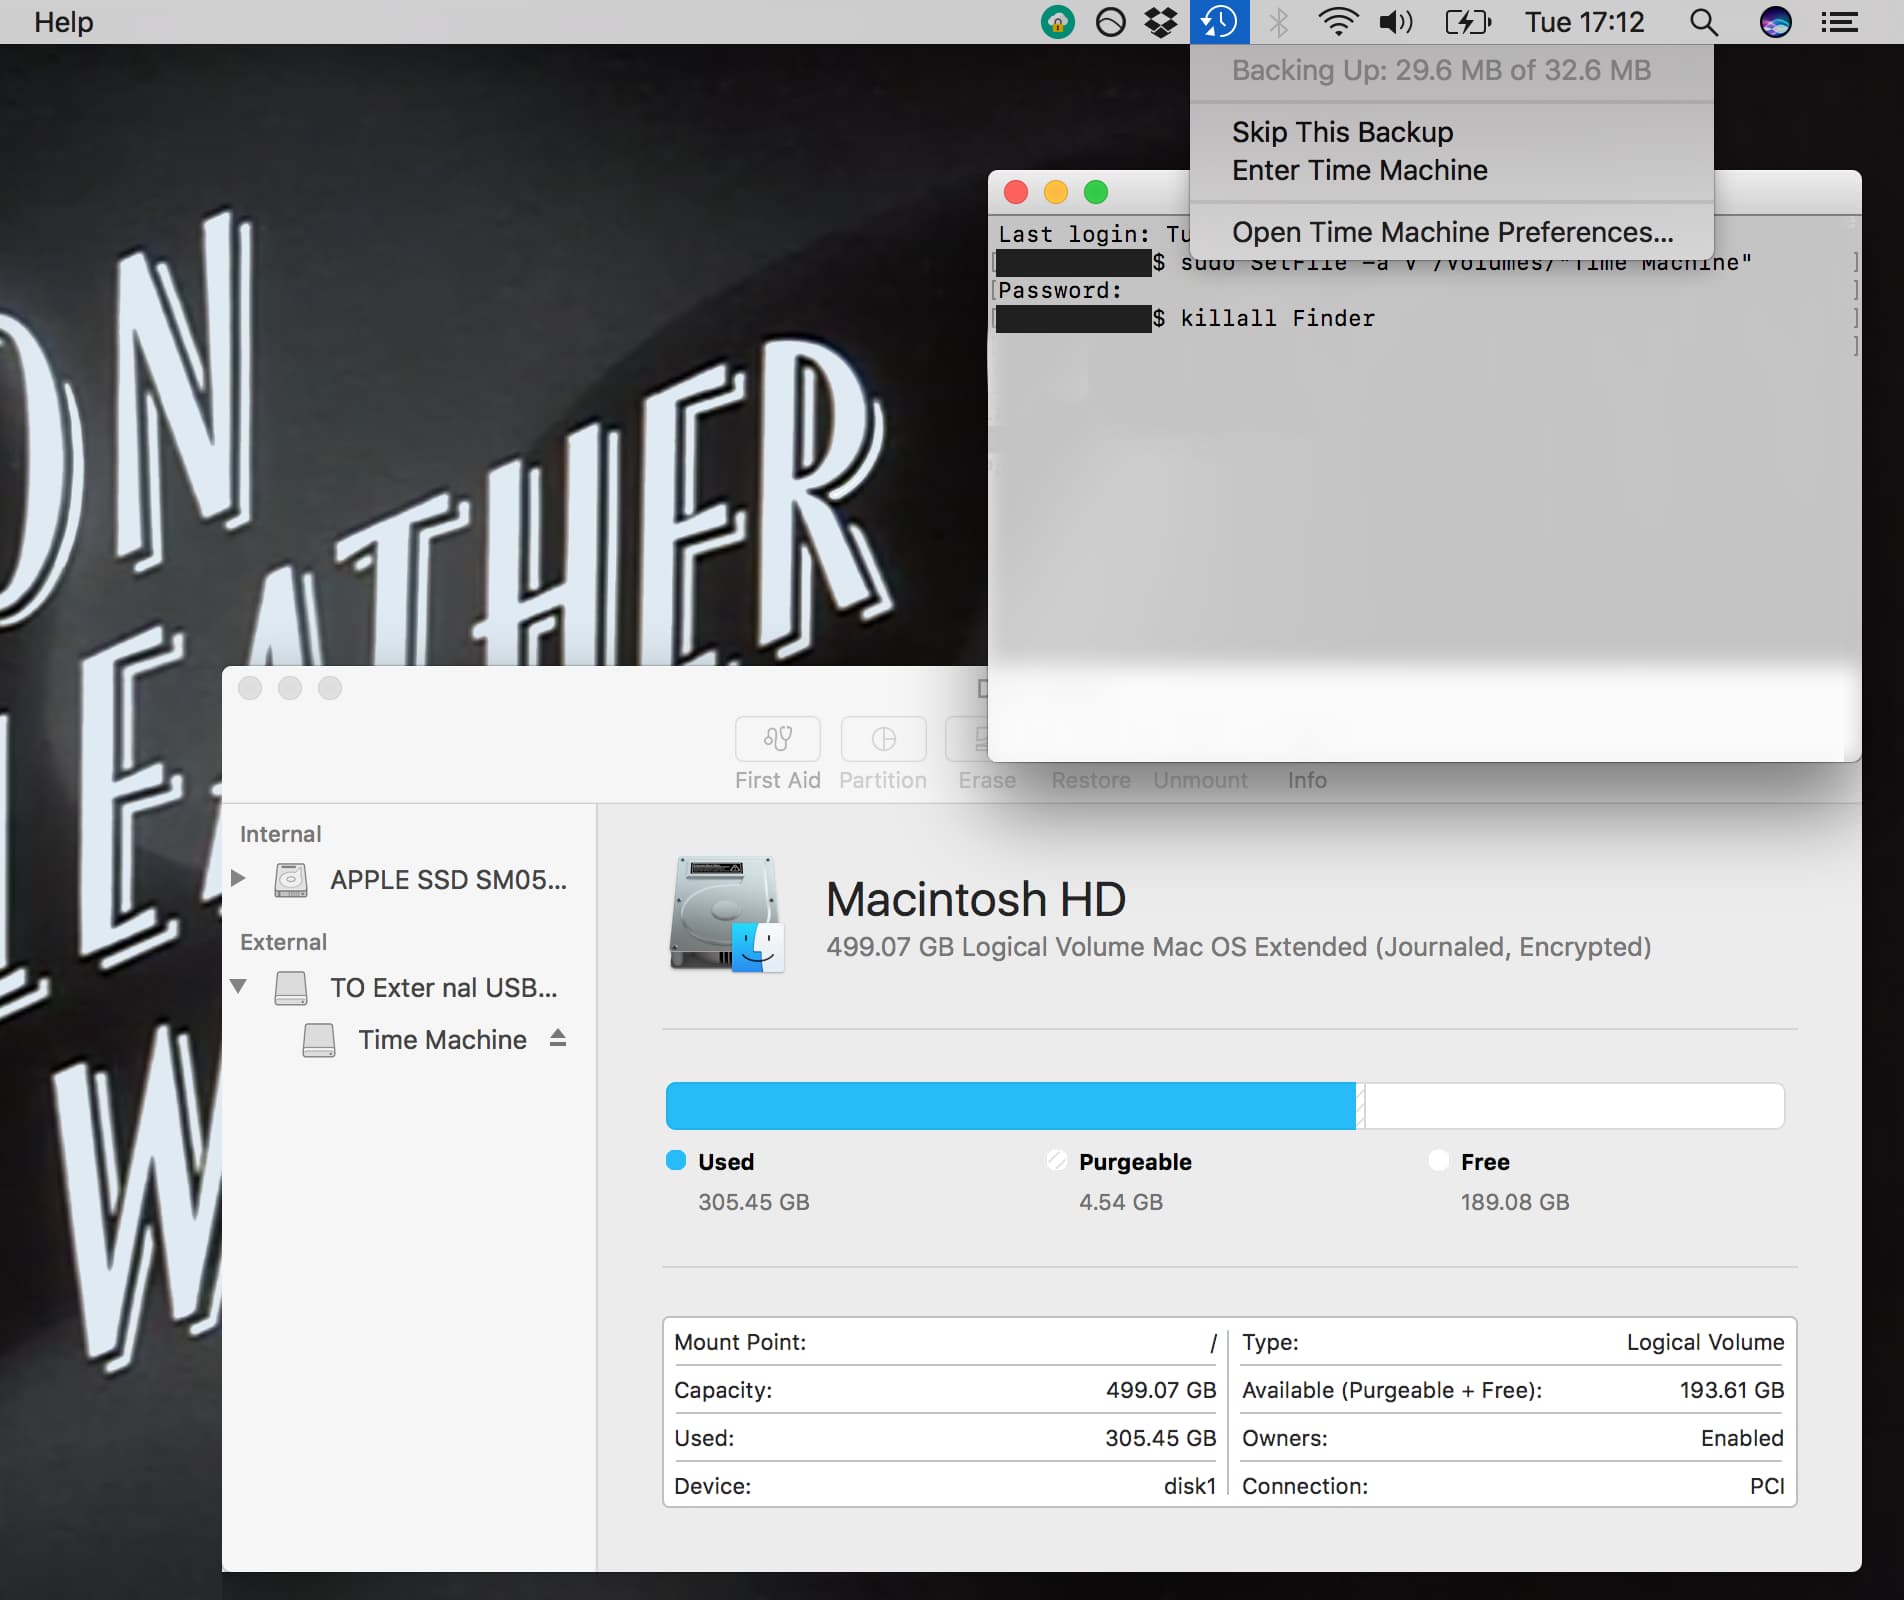
As you can see from the above screenshot, the Time Machine volume is no longer on the desktop but is still shown as mounted in Disk Utility. The Time Machine menu bar icon is showing a backup in progress, as we would want.
Bringing hidden volumes back
In the case of accidentally hiding the wrong volume or simply wanting to undo your changes, follow this procedure:
1) Open Disk Utility and ensure the volume that you want to make visible is mounted.
2) Make a note of its name, for example, Time Machine or Storage.
3) Launch Terminal and type the following. Don’t forget to replace “Drive Name” with the name of your own volume, which you noted earlier (keep the quote marks):
sudo SetFile -a v /Volumes/"Drive Name"
Note the lower-case “v” in this command as opposed to the upper-case in the hiding command. This is the attribute controlled by “-a”; “V” means “invisible,” and “v” means “visible.”
5) Enter your password when prompted.
6) In Terminal, type:
killall Finder
7) This will ensure that your volume is once again showing on the desktop and in the Finder sidebar.
Though I personally use this command solely for a Time Machine volume as I tend to access all other mounted volumes frequently, its use seems justified for this case alone, and others will definitely have wider use for it. It certainly makes for a cleaner desktop and Finder for those who like to have finer control over their set-up.
Are there any volumes besides Time Machine that you always want mounted and invisible? Let me know in the comments.
Check out next:
- How to add, mount, unmount, erase, and delete volumes using Disk Utility on Mac
- How to exclude specific files, folders, disks, and categories from showing up in Spotlight search results on Mac
- How to fix hard drive, flash drive, SSD, phone, or other USB device not connecting to your Mac or disconnecting repeatedly