Use Workflow 1.7 for iPhone to quickly save notes and images
 Mike Wuerthele
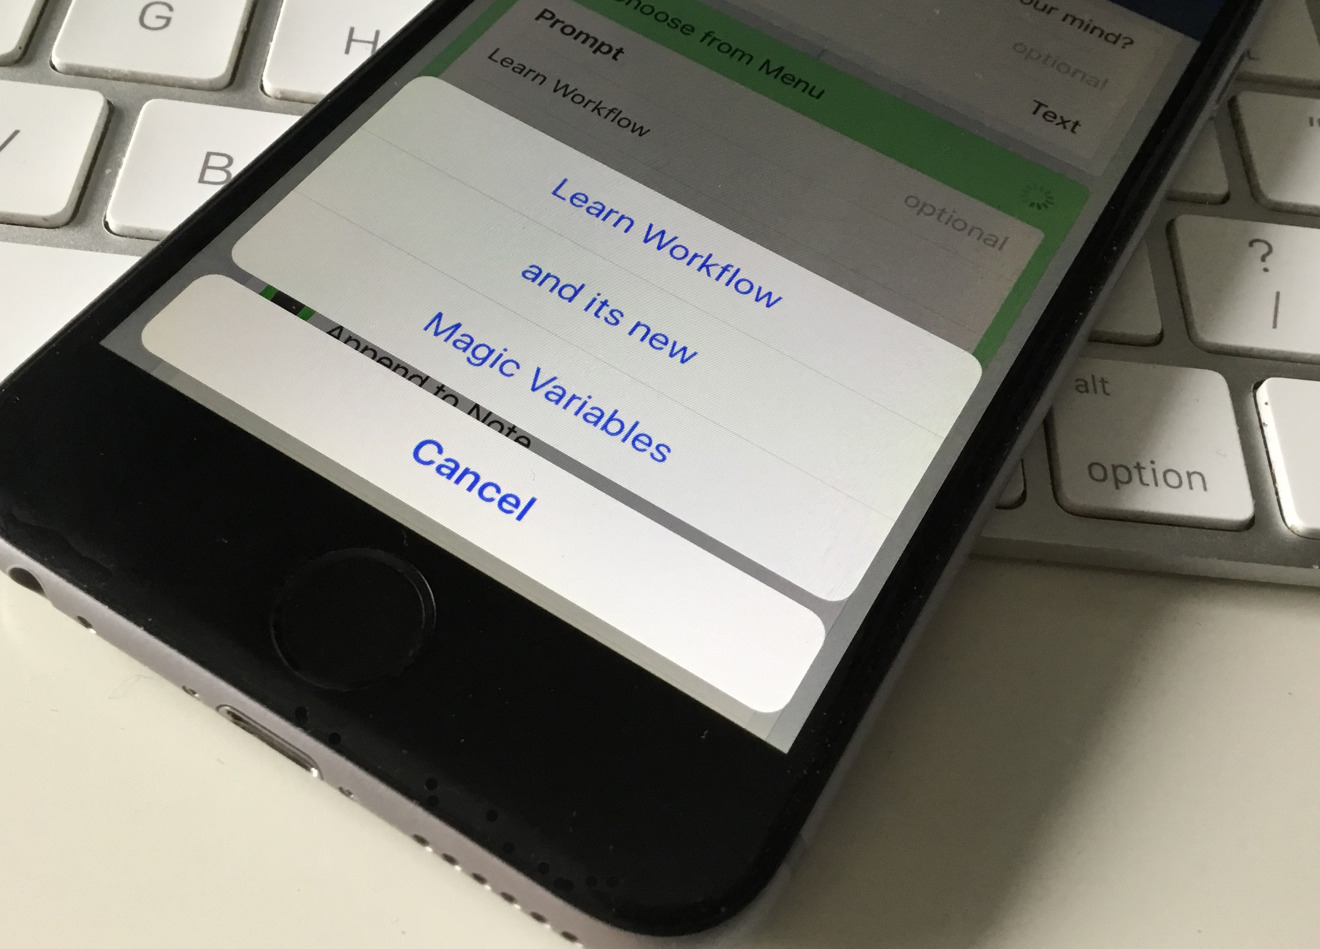
The latest update to automation app Workflow 1.7 latest update makes it simpler to get started and better to streamline multi-app user processes. AppleInsider walks you through setting up your first workflow, and tailoring it specifically to what you need.
We're an ungrateful lot. If we have an idea or see something we want to photograph, we complain that we have to get our phones out, open an app and maybe even create a new document.
Workflow can pare this down, though, especially with its new 1.7 release which adds a feature that will make it easier to get started with automating your iPhone. The newly added feature is called Magic Variables and rather than just say that it's very nice, let's see it in action — we're going to create a Workflow from scratch.
When we're done, we'll be able to pick up our iPhones, jot down what's on our mind and then get Workflow to save it wherever and however we want while we get on with our busy lives.
Workflow 1.7 works on both iPhones and iPads. It's perhaps most useful on the iPhone but it's easiest to write new workflows on the iPad version because you can see all of your tools in one view.
Let's get going:
Open the app and tap on "Create Workflow."
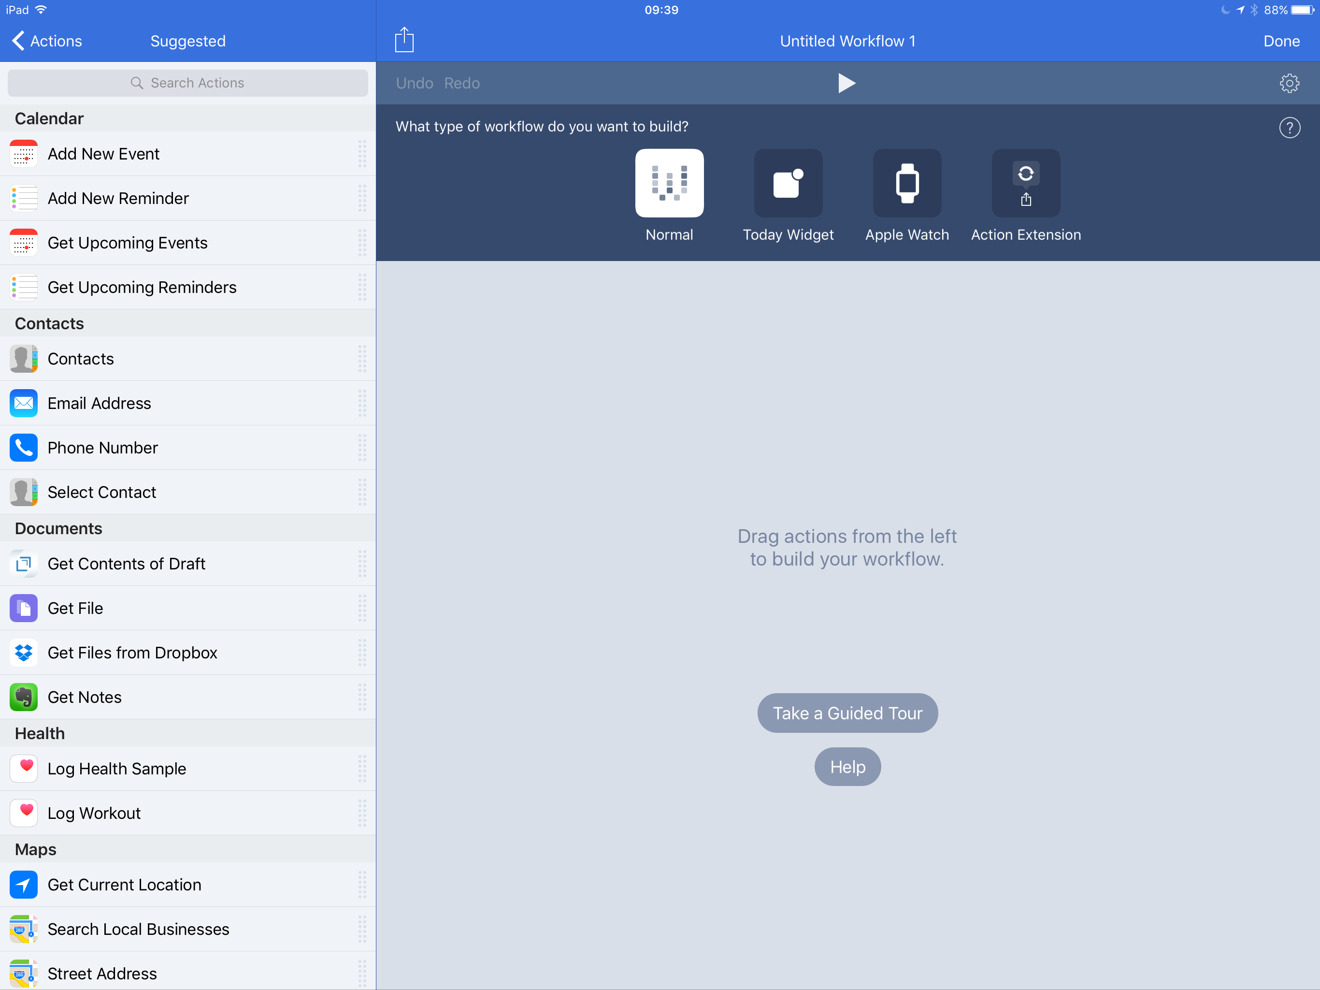
On the right is where you will do all your work. On the left is a list of things you can do - and it is a long list. On an 12.9-inch iPad Pro you have to scroll nearly three times to see the list and that's not even the whole thing.
There are hundreds of what are called "Actions." You can make a QR code, get a Google Street View image, post to Instagram and more. What we're going to do is tell Workflow to let you write some text and then what to do with it.
Tap on "Search Actions" at the top left and type the word "Ask." An action called Ask for Input appears at the top of the list: place your finger on it and drag over to the grey area on the right. When you let go, you've just added your first action.
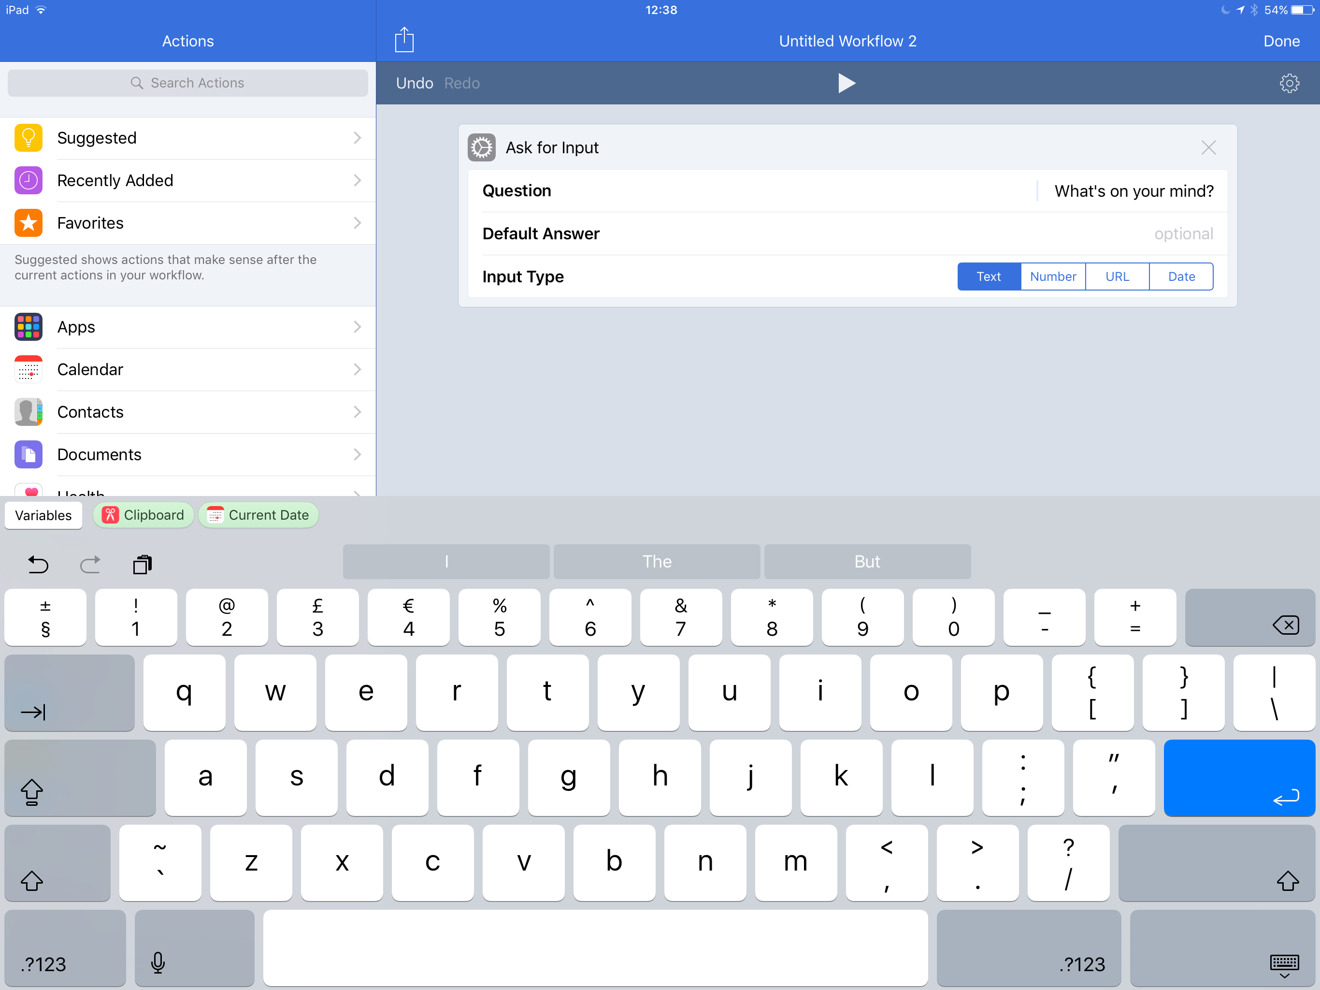
When you dragged, Workflow expanded that Ask for Input from one line into a dialog box. Just edit the first line where it says "Question." Type in "What's on your mind?" and hit Return.
When you run this, your iPhone or iPad will ask you what's on your mind and we want Workflow to do something with your answer. Say, you're an Evernote user — tap on "Search Actions" and type "Evernote." In the half dozen actions you get, the first is "Append to Note."
You could instead create a new note, but remember that whatever you put in this Workflow will happen every single time you run it. So you could be creating new notes all day. If that's what you want, that's great — but instead we'll have just one single note that we keep adding to.
Drag "Append to Note" over to your workflow and again it expands to show you options. Name the note something like Jottings. Ignore the next line about Mode - that decides whether you put your new text at the end of the note or the start - and tap on "Choose" next to "In Notebook."

If you are an existing Evernote user then Workflow will show you an alphabetical list of all your notebooks. Pick one and tap on it.
You're done. You've created a workflow. So let's use it. Toward the top of the Workflow screen there is a Play button, a triangle. Tap on that.
Workflow now asks you what's on your mind. It's not the prettiest thing you'll ever see on your iPhone or iPad. You're also not going to write a great deal of text in it, but you can got down some writing and then tap OK.
Workflow then moves on to the next step, which is to append your text to a note in Evernote. If you've not got a note called Jottings, Evernote and Workflow create it, then they pop this text in.
That's it. Your text is saved in Evernote without you even opening the app.
You can't do anything else while Workflow is running, it can't do your tasks in the background. But, once you've written the text and tapped OK you can put your phone down and know that it's getting on with the job.
Similarly, you can pick up your phone and be doing this quickly because of a Workflow setting. Tap "Done" to say you're finished running the workflow and then tap on the settings cog.
Here you can give your workflow a name and choose an icon — but you can also say where it appears.
All of your workflows are going to be available to you within the Workflow app but if you also, for instance, choose Today Widget from the bottom of the settings screen, you can get quick access to it.
You tap in Workflow to say that you want this to be a Today widget. Then once you've set this up, it's always going to be available to you from the lock screen of your iPhone. The way you set it up is the same as for adding anything to the Today screen and you start by swiping left on your iPhone or iPad.
Swipe past your front homescreen and you get the Today view which may have a column of information on it like the news or perhaps weather. At the bottom of that column - you may have to scroll down - there will be an Edit button. Tap on that.
A screen opens called Add Widgets which has two lists of apps, one after another. The first one is every app that you or Apple have already selected to appear on the Today screen. The second is a potentially long list of all the apps you own that have something to show on Today.
The top list has a red circle with a minus sign next to every item: that's how you remove ones you don't want. The second list has a green circle with a plus sign next to each one and that's how you add them.
Scroll down to Workflow and tap on the green plus. That immediately pops Workflow up onto the first list and you will find it as the last entry. When it's on that first list, it also has a grab handle that lets you move it up and down. The higher up the list you place Workflow, the higher up your Today screen the app will appear.
Drag Workflow to the very top so that it's always going to be the first thing you see when you open Today. Then tap on the Done button and you're back in that regular Today view with Workflow in place.
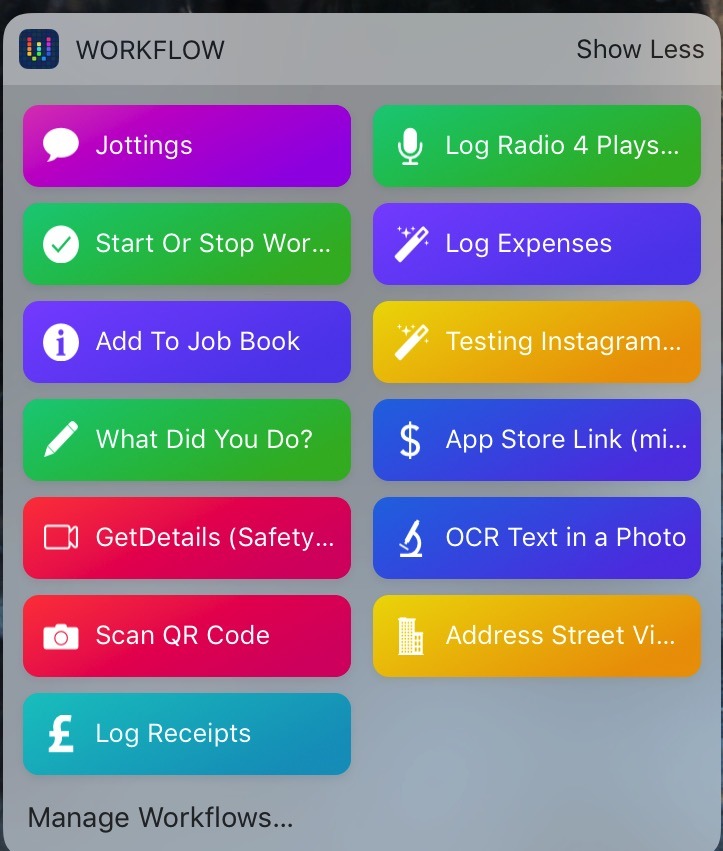
Usually you'll see Workflow there as one section with four buttons, arranged in two rows. However, there is a Show More that will list as many as you want. Once you've got so into Workflow that you're creating many of these, tap Show More and then the Manage Workflows button that appears.
That lets you decide which of you workflows you want in Today and also the order they appear in.
What about the Magic Variables, then?
You've just done all of this without hearing the phrase Magic Variables until now, but you've been using them nonetheless.
In previous versions of Workflow, once you'd got something like a piece of text about what's on your mind, you had to store it in a variable. You had to drag the action Set Variable over to your workflow and give it a name.
Then later, when you wanted to send that text to Evernote or wherever, you had to fetch it back first with the action Get Variable.
These actions still exist and you'll end up using them in the more complicated workflows you create, but what's new and magic is that Workflow remembers that you got some text. It remembers without your having to save it anywhere first.
Strictly speaking, what you get from one action like "Ask For Input" has always been remembered for the next action but then it's forgotten. Partly because Workflow would lose track like this and partly because your brain would too, it was always sensible to do this business of saving to variables along the way.
Now it's not necessary. In this example, the difference isn't going to break the bank in terms of how many steps are needed for the workflow but it does mean it's simpler to see what you're doing. Previously we'd have had four steps to do this job, here we have just two.
You can imagine that this ease is increased when you're working with many, many actions in a row but rather than picture it, let's do it.
Part two - making things more complex
Say you do have an Evernote account but sometimes you just want to save a note to Dropbox. Also, let's say you're an OmniFocus user and sometimes you just want to make a quick To Do entry. The same workflow can do all of these.

The difference between them is just where you save your text. The action where you enter some text remains the same. It's only that you want to offer a choice so in your same workflow, tap again on "Search Actions" and start to type the word Choose.
Tap and hold on the "Choose From Menu" action that appears, then drag it over to your workflow and underneath the Ask for Input step.
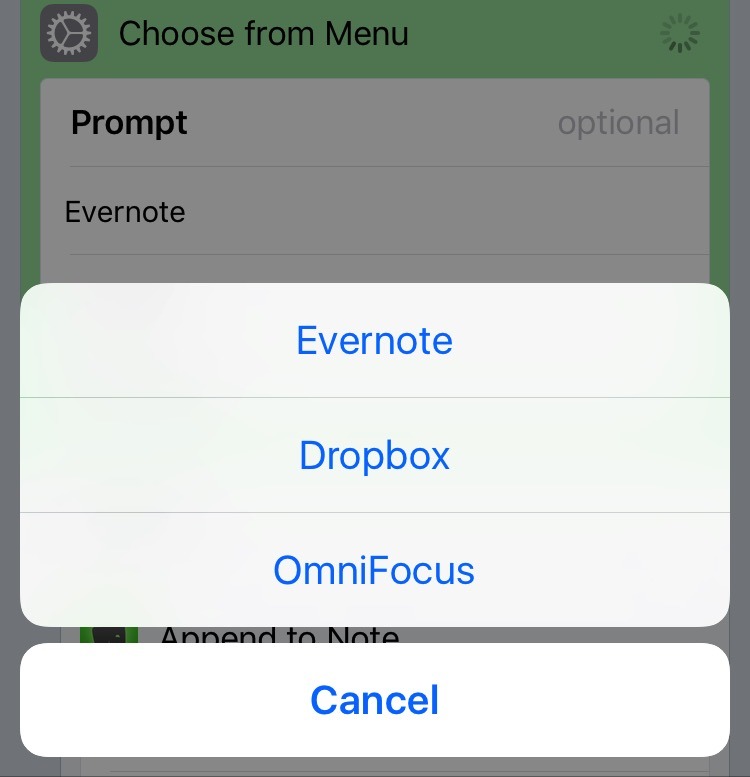
As ever, it expands from one line to a dialog box that you need to fill out. Tap on Prompt and type "Where do you want to save this?".
Then tap the word One and type to replace it with Evernote. Tap Two and write Dropbox.
Last, tap "Add New Item" and when that appears, type in OmniFocus.
You've seen how each action expands out from a title line to a dialog box when you drag it. Now that you've added three options to Choose From Menu, it expands further to list those three in grey boxes underneath.
These grey boxes are headers for different sections of the workflow: they are where you put the different things that will happen depending on the choice.
You've already done one of them: you've created the Evernote option. Tap and hold on the "Append to Note" action and drag it into this new Evernote section. Let go when Workflow makes a gap for you between Evernote and Dropbox.
Now you just have to fill out the other two sections in the same way. In both cases you will again tap on "Search Actions" and look for a particular action, then drag it to the right section.
For Dropbox, drag the "Append to Dropbox" File action. Then fill out the File Path. For simplicity, just give the file a name: Dropbox will automatically save it to the top level, but if you want to go crazy with relative or absolute pathnames, you can.
For OmniFocus, drag the Add OmniFocus Item. This is harder than many because it expands out to so many options that it's hard to see where you're dragging. Drop it between the heading OmniFocus and End Menu.
If you're an existing user of OmniFocus, then you'll recognize all the options. For this example, all we're interested in is the very first one called Name.
Tap on that. Now you're going to directly use this new Magic Variables feature. Remember that you got some text earlier when you asked what was on your mind. Workflow would've forgotten that by now after you've been through these further steps, but not in the new version.
On the top row of your keyboard, there's a magic wand button. Tap that.
Workflow now shows you the whole of your workflow with every action greyed out but each automatically-created magic variable highlighted. These are the buttons between the action steps and they are named for the type of information they contain.
Between your first two actions there is a Magic Variable called "Ask for Input." That means it contains whatever text you enter when you run this and the workflow asks what's on your mind. Tap on "Ask for Input."
As soon as you do, Workflow returns you to your previously-scheduled programming - and it has popped the "Ask for Input" Magic Variable into the Name field of the OmniFocus action.
This means that when you run this workflow and make some note, then when you choose OmniFocus from your menu, that note becomes a task in the To Do app.
Now, OmniFocus has a Today widget. So does Evernote. You could just use, those but with this single workflow, you can write some text and then decide where to send it.
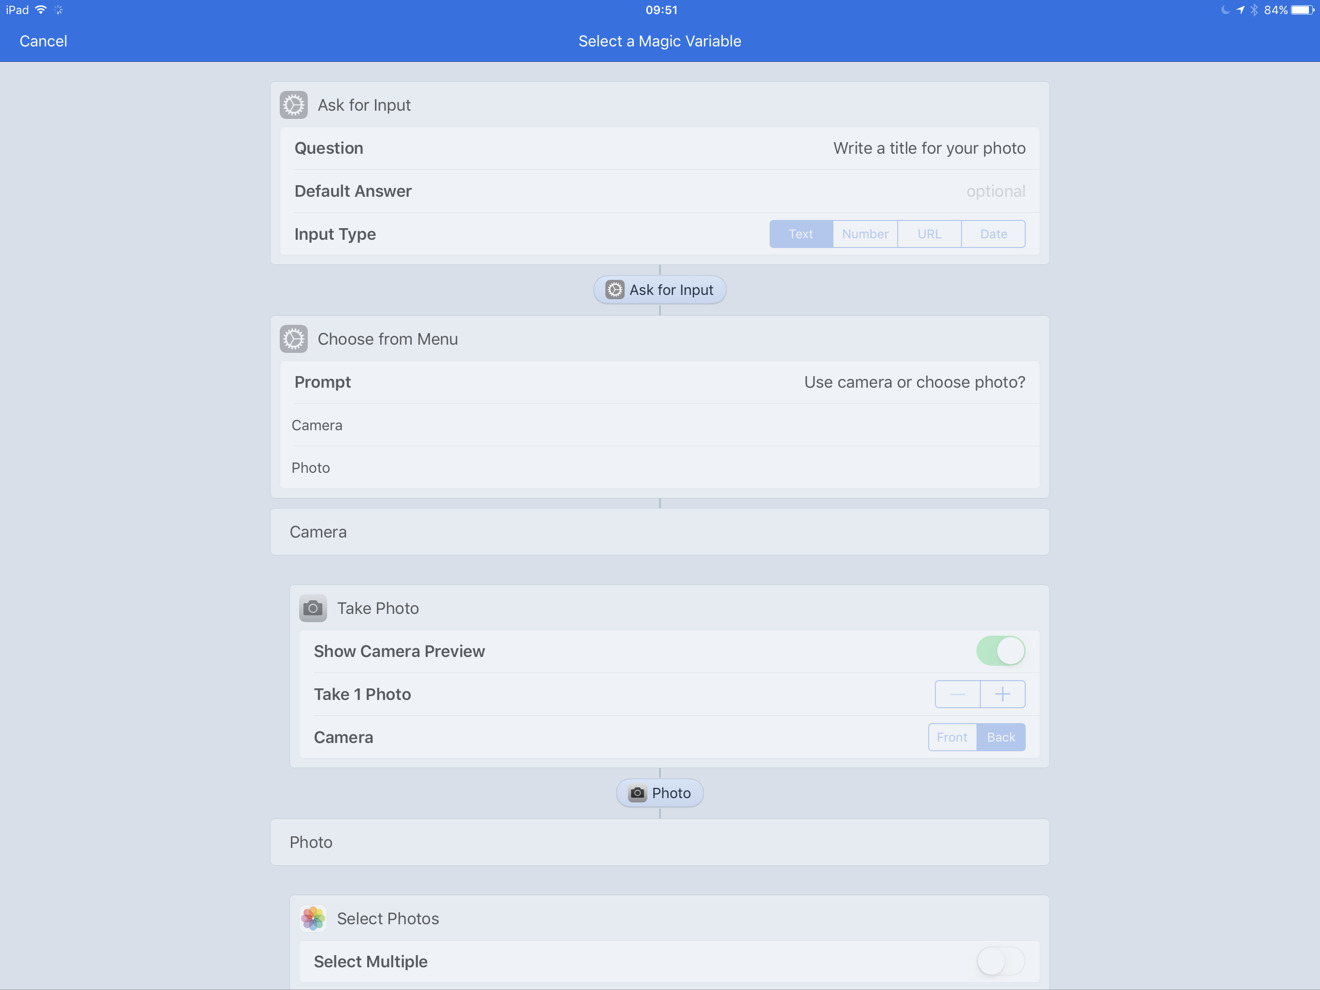
You can also send to multiple places. Or using all of this same example but getting a photo instead of text, you could create a workflow for saving receipts, or business cards, or any of the other slips of paper you have to deal with during the day.
When you get into Workflow, you rapidly wonder what you used to do without it. Still, getting into it has been hard because you have to learn how to use it and even after you completely get what it does, you just can't think of an example to try.
The new Magic Variables make it easier to learn how to use it, though, and hopefully this tutorial has given you some ideas.
Workflow retails for $2.99, requires any iOS device capable of running iOS 8, and occupies 116MB of device storage space, which grows very slowly as workflows are generated.


 Malcolm Owen
 Christine McKee

 Amber Neely

 William Gallagher