

While some users prefer the tactile feel of a solid mechanical keyboard, others opt for a streamlined and simple look. In the tech world, Apple is the king of modern design. However, this poses a problem for users who prefer Windows 10 or Windows 11, or who may be working in a Windows-only organization.
The good news is that even if you’re using a Windows PC, you can still take advantage of Apple’s peripherals with your machine. One of the most popular accessories from Apple, its wireless keyboard, is simple to set up for Windows. (Note: The embedded video tutorial focuses solely on connecting an Apple wireless keyboard to Windows 10.)
Step 1: Confirm the wireless keyboard is charged or has fresh batteries
To connect an Apple keyboard to a PC, first make sure your wireless keyboard is charged. If you have an older Apple Wireless Keyboard, check that you are using fresh batteries. If you have the newer Apple Magic Keyboard, ensure that it has been charged with the cable it comes with, although it might have some charge out of the package.
Note: Apple’s wireless keyboards are configurable to work with Windows 10 but require slightly different steps toward the end.
Step 2: Enable Bluetooth on the Windows PC
Next, you need to enable Bluetooth on your Windows PC machine. To do this, follow the steps below, depending on what Windows version you are using.
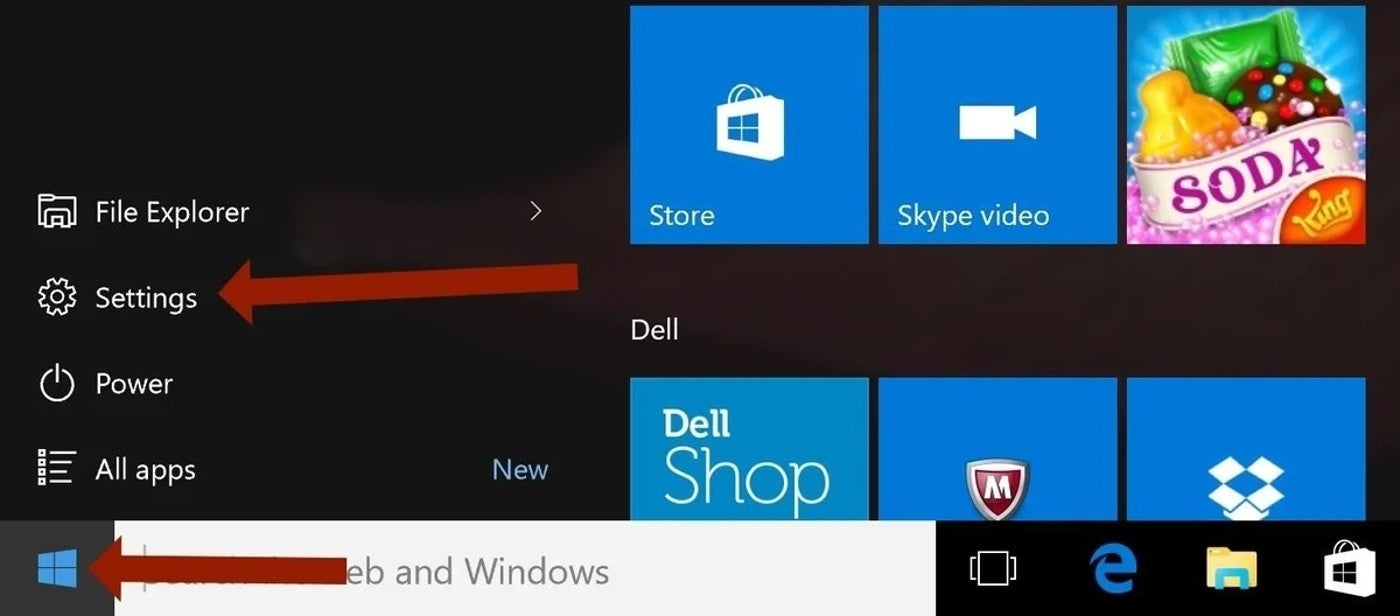
For Windows 10:
- Go to Start (Windows icon on the bottom left of your desktop) and then Settings (Figure A).
- Click on Devices and select Bluetooth & Other Devices.
- Switch the button to On to enable Bluetooth.
Figure A
For Windows 11:
- Go to Start and then Settings.
- Click on Bluetooth & Devices.
- Enable Bluetooth (Ensure the Bluetooth devices option is enabled to permit connecting the Apple wireless keyboard to the Windows PC (Figure B).
Figure B

Step 3: Search and connect your Apple wireless keyboard
Now that your Bluetooth is On, it’s time to connect the Apple wireless keyboard to your Windows device. The steps below vary slightly depending on whether you are using Windows 10 or 11.
To scan, search and connect the Apple keyboard on Windows 10:
- Go to the Windows, Settings, Bluetooth & Other Devices windows.
- Click on Add Bluetooth Or Other Devices (plus icon).
- A new window will open. Click on the top icon for Bluetooth.
Your device will start scanning for the Apple keyboard (make sure the keyboard is turned on and its batteries have power).
To scan, search and connect the Apple keyboard on Windows 11:
- Go to the Windows, Settings, Bluetooth & Other Devices windows.
- Click on Add Device (plus icon).
- A new window will open. Click on the top icon for Bluetooth.
Your device will start scanning for the Apple keyboard (make sure the keyboard is turned on and its batteries have power).
Whether you are using Windows 10 or 11, once your PC starts scanning and searching for your Apple keyboard, you will see a list of Bluetooth devices that are available for pairing.
Click the option that says either Magic Keyboard, Apple Magic Keyboard w Number Pad or Apple Wireless Keyboard depending on which model you have and click the gray Pair button (Figure C).
Figure C

You will see a popup window that offers a passcode; this is when the setup for the two types of Apple wireless keyboards differs. If you have the older wireless keyboard, type the code on the screen and hit the Enter/Return key on your Apple keyboard.
If you have a newer Apple Magic Keyboard or the model with the numeric keypad, confusing behavior may occur. Windows 10 seems to read the newer Magic Keyboard models as a separate device, complete with a screen, so it will present a code in the window and text asking that you compare and confirm the passcodes, under the assumption that it wants you to compare displayed text on another screen. Since the Magic Keyboard doesn’t have a screen, you can just click Yes or Connect, depending on which Windows version is operating. At this point, you should be connected.
To test the keyboard, click on the search bar and try to enter text. If you want to be sure, follow the same steps above to get to the Bluetooth settings pane and under Magic Keyboard (Figure D), Apple Magic Keyboard w Number Pad or Apple Wireless Keyboard, it should say Connected.
Figure D

How to disconnect an Apple wireless keyboard from Windows 10 and 11
To disconnect the keyboard, click your keyboard’s name and click the Remove device button that pops up. When it asks if you’re sure you want to disconnect the device, click Yes.
Editor’s note: This article was updated by Ray Fernandez.