Today, most people consider MOV files to be an outdated format, and since it's more convenient to use MP4 files, you'll want to know how to convert MOV to MP4. If you still have an extensive collection of old MOV files taking up space on your Mac, you can convert them into an MP4 file format with a little bit of patience by following these step-by-step instructions.
Our favorite method is the online converter CloudConvert. It's free to use, quick, and works on both Macs and PCs as long as you have an internet connection. In this guide, we'll show you how to use CloudConvert to convert MOV files to MP4, and we'll go over a couple of offline conversion options as well.
How to convert MOV to MP4 in browser
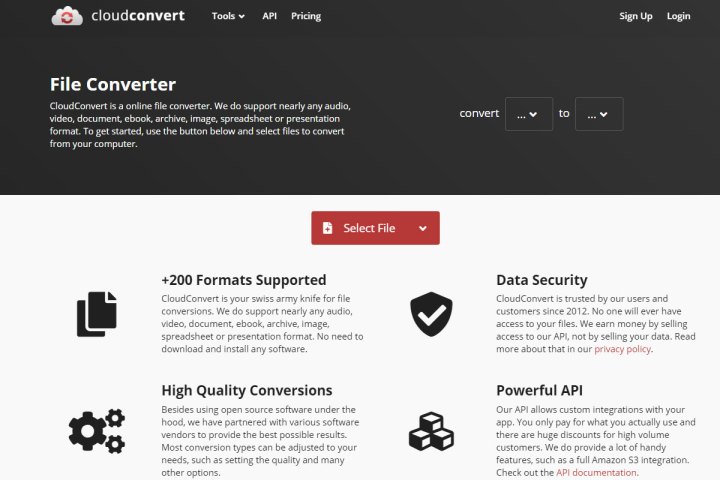
To convert MOV to MP4 files, we prefer to use CloudConvert, a freemium online service designed to handle a wide range of file formats with little to no hassle. (It is free to use, but there are premium versions of the service that you can opt to subscribe to. And the free service may or may not require you to sign up for a free account. But more on that later.)
It’s been our go-to choice for years, but given you have to upload your video files to a remote server, keep in mind that the company that converts your video may have access to it. And when using online conversion methods, we think it’s worth noting that you should always practice some level of restraint with converting potentially inappropriate or private videos. But CloudConvert appears to be a great online file conversion option with no serious complaints against it that we know of.
We also recommend Online-Convert.com as another excellent conversion tool.
Here's how to convert MOV to MP4 using CloudConvert:
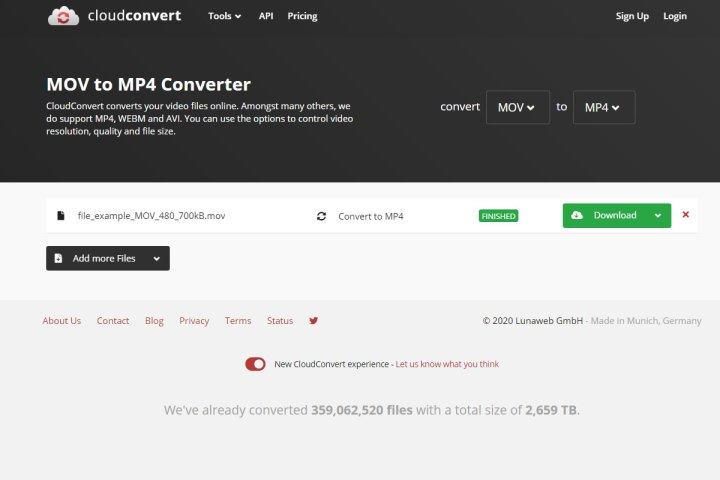
Step 1: From the CloudConvert homepage, click the Select file button. Pick the MOV file you’re going to convert, then select Open from the File Explorer screen’s bottom corner.
Step 2: On the next page, select the Down arrow icon next to the phrase Convert to. Then, choose MP4 from the menu that appears.
Step 3: Select the Convert button to the right. Once the conversion is complete, CloudConvert may automatically play your newly converted video file for you so you can see if the conversion is how you want it to look. If the video looks fine to you, you can download the file by selecting the green Download button.
The file will go to your Downloads folder, and from there, you can watch your MP4 video on any compatible device or platform.
Note: While the conversion service is free and doesn't require signing up for an account to use, there is a caveat. It's only free and doesn't require an account if your video file is small enough that it doesn't exceed your allotted daily "conversion credits," which is 10 credits/minutes. So if you have a large video file that you know is going to take longer than 10 minutes to process, you'll need to sign up for a free account first. Free accounts grant a maximum of 25 conversions/minutes a day. If you need more than that, you'll need to get a paid subscription.
How to convert MOV to MP4 on Mac
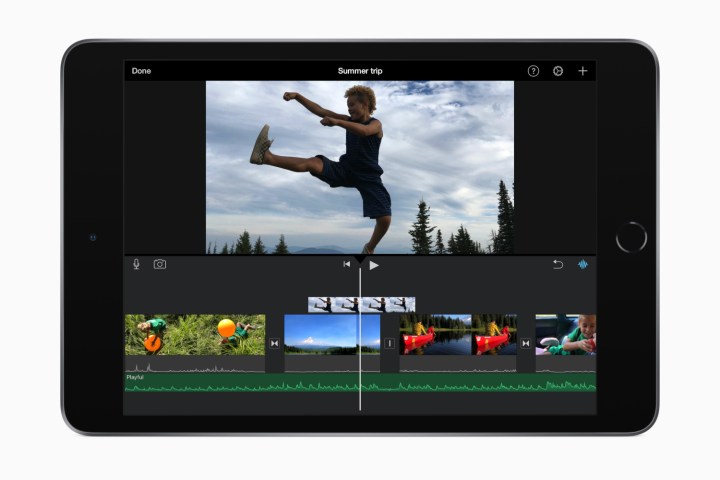
Macs come with a surprisingly versatile video editor built right in, and it's completely free. We're talking about iMovie. The best part about using iMovie to convert MOV to MP4 is how simple the entire process is. Let's dive right in.
Step 1: Launch iMovie.
Step 2: Select File from the top-left menu and then choose New movie.
Step 3: Select Import media.
A file browser will open, and you can select the MOV file you want to convert.
Step 4: Select the MOV file to convert, and then choose Import selected.
Step 5: The MOV file will appear in iMovie.
Select it so a yellow box appears around the file. Then select File > Share, and then choose File in the drop-down that appears.
Step 6: Choose 1080p for the resolution and then select Next.
Step 7: Select a file name and location for your file. iMovie will automatically convert the file to MP4. Easy!
How to convert MOV to MP4 on Windows
Converting a MOV file to MP4 on Windows is not as easy as it is on Mac, but it's not impossible. You can do it with third-party apps such as Handbrake, but it's a lot easier to use the built-in Photos editor.
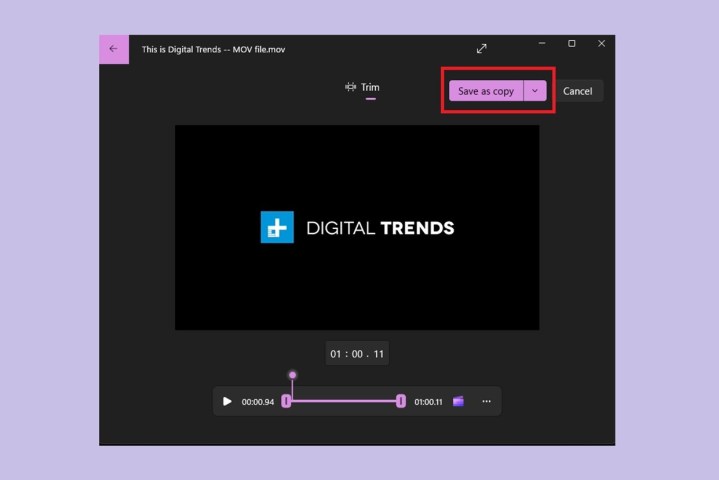
Step 1: Right-click on your MOV file and then hover over Open with and select Photos.
Step 2: When Photos opens with your MOV file displayed, select the Video trim icon at the top of the Photos app window. The icon should look like a simple image icon with a pencil in front of it.
Step 3: At this point, it gets a little weird, but stay with us. If you need to trim your video go ahead and do so.
If you don't want to trim it, it is still important that you at least attempt to do so, so that the Save as copy button becomes clickable. Move the trimming sliders around, release the sliders, and them move them back to their original positions (if you don't want to trim the video).
Then select the Save as copy button.
Step 4: Find where you want to save your file, and then click on the Save as type drop-down menu.
Select MP4 from the list.
Step 5: Click Save.
There are plenty of ways to convert an old outdated MOV file to a shiny new MP4, regardless of which platform you're on. Many tools are baked right into the operating system, as with Windows Photos app and Apple's iMovie. Then there are third-party options such as CloudConvert, which can handle pretty much any file type you throw at them, (even flv). You never again have to worry about that old MOV file.
Editors' Recommendations
- How to check your CPU temperature
- How to choose an external hard drive
- How to convert FLAC to MP3 on Mac, Windows, and web
- How to forget a network on a Mac
- How to get Android apps on a Chromebook