How to install Unity Engine on macOS for VR application creation

If you've been interested in creating VR applications on macOS but you've been worried on the cost of entry, you needn't worry any longer. You can install the powerful 3D tool suite Unity Engine Personal Edition. Unity Engine Personal Edition is free for your personal use and tutorial purposes. Once you become a big time VR application developer, you can then get one of Unity's commercial licenses.
VR applications creation has some requirements
If you're developing simpler non VR or AR applications, then you can just follow the download and installation procedures below. Otherwise, if you plan on making and running VR applications in an HTC Vive headset, then you'll need to see these minimum requirements.
- You need to install macOS High Sierra. Updates to Metal and GPU drivers have been made to macOS High Sierra that facilitate the adoption of VR capable applications on macOS.
- You must have access to a decent GPU. With GTX 1060 to GTX 1080ti driver support from Nvidia as well as Apple's own eGPU development kit running an AMD RX 580, you can now have the required power needed to develop and run VR applications.
- You'll need to install the macOS version of SteamVR. For now, you'll need to enable the beta branch to get VR support but once we get some more VR applications in the macOS Steam app store, it will be part of the default installation.
How to download and install Unity 3D Engine
- Navigate with a browser to https://unity.com/.
- Click on Get Unity.
- Click on Try Personal.

- Check the box to agree to the Terms of Service.
- Click Download Installer.

- Double click the UnityDownloadAssistant dmg file you just downloaded.
- Double click the Unity DownloadAssistant** icon.
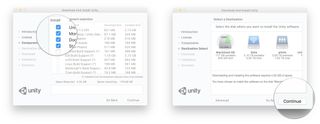
- Click Continue.
- Click Continue again.

- Select the Components you wish to Install. This can be left as default.
- Click Continue.
- Select the installation Destination.

- Click Continue.
- Once the installation is complete click Close.
At this point, Unity will launch automatically. You'll presented with an option to sign in. You can create a Unity account or use your Facebook or Google accounts to log in. Once we've logged in successfully, you need to do some License Management.
How to set up your licensing and profile
- Log in with a Unity-specific account, Facebook, or Google.
- Select Unity Personal.
- Click Next.

- Confirm that you don't use Unity in a professional capacity.
- Click Next.
- Click Start Using Unity.

How to start a project
- Click New project.
- Enter a Project name
- Make certain that the project is set to 3D.
- Enter a save Location..
- Click Create project.

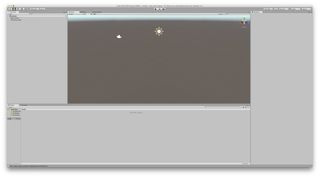
When all is said and done you should now have an empty project 3D project ready to go!

Don't be slackin' get crackin'
You're now ready to make some awesome 3D VR applications. Stay tuned for a Unity Engine tutorial on creating and running a very simple VR application on macOS using the HTC Vive! Are you creating some applications in Unity? Tell us about them in the comments!
Master your iPhone in minutes
iMore offers spot-on advice and guidance from our team of experts, with decades of Apple device experience to lean on. Learn more with iMore!
Most Popular


