How to backup and wipe your old iPhone or iPad before selling it or passing it on
 Malcolm Owen
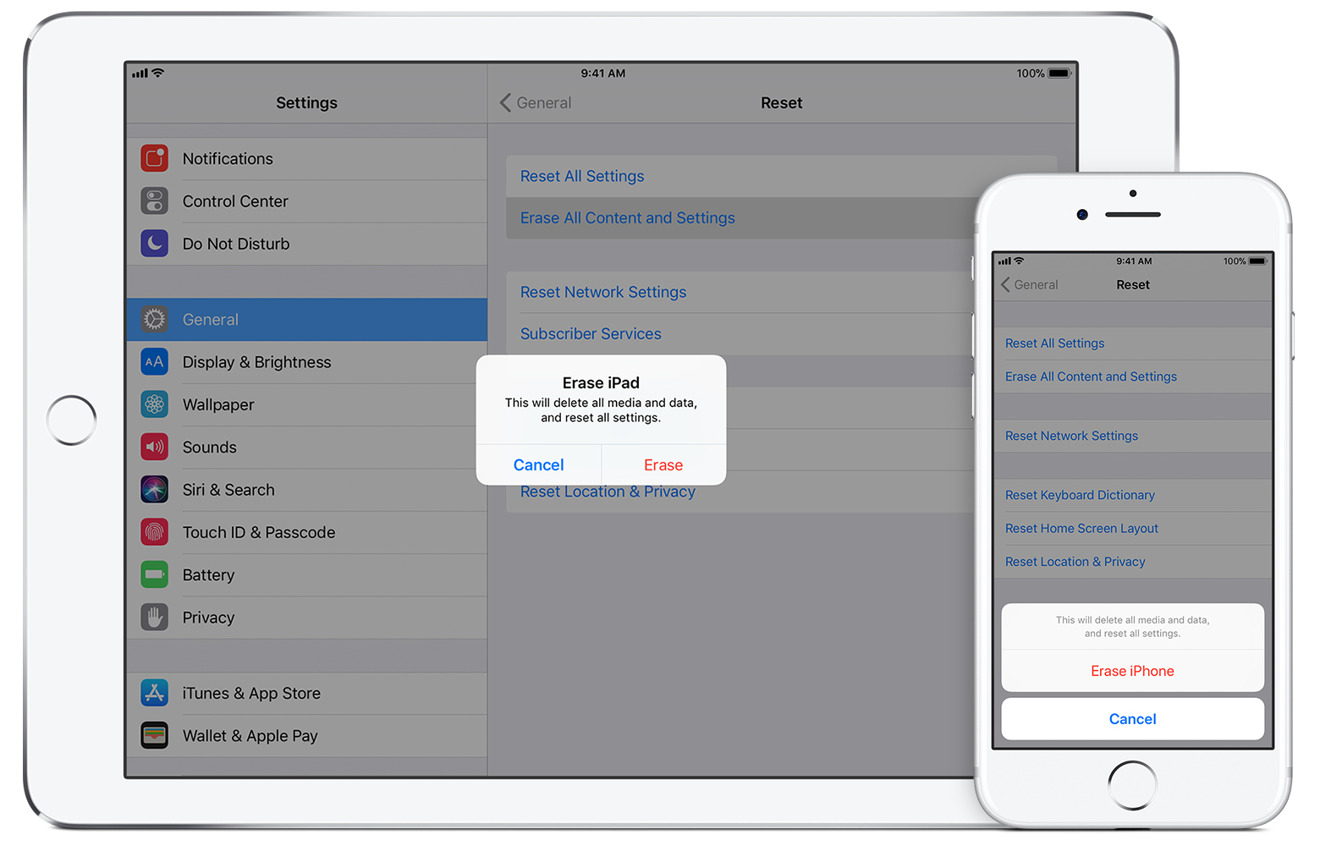
While those who receive iPhones and iPads this holiday season may be quick to set up their shiny new device, not everyone puts as much thought into preparing their old hardware for sale or regifting. AppleInsider details how to back up your data from the old hardware, as well as wiping it ready for its new owner.
The holiday shopping period is a prime time to acquire hardware, typically as a gift for a friend or loved one, though many will also take advantage of the sales to upgrade their own devices. Be it as a present to themselves or provided by the generosity of others, acquiring a new iPhone or iPad usually means replacing the old one still being used.
Before handing it off to someone else, such as by selling it on for some extra cash or passing it along to another family member, steps need to be taken to protect any personal data stored on the iPhone or iPad. In practice, this means backing up the mobile device and wiping all of the data, making it ready for the next user to set up.
Backing Up
Aside from using a third-party service, there are two main ways provided by Apple to back up your iPhone and iPad. The first involves connecting the iOS device to a Mac or PC and backing up via iTunes, while the alternative involves storing your data in iCloud.
Each method has its advantages and disadvantages, such as differences in time taken to backup and to restore, and the different types of data backed up in each process. Apple's support pages details the main differences between the two ways, including what data is backed up and excluded in each case.
It is also possible to create backups using both methods, which will decrease the chance of data loss. Even so, the main thing is to back up your data, regardless of the method or the quantity of backups produced.
iCloud backups
Backing up data to iCloud is the easiest option, as it can be performed over Wi-Fi, automatically encrypts backups, and can be retrieved from any available Internet connection. As this backup uses Apple's cloud storage service and is limited by the Internet connection speed, it is likely to be more useful for smaller backups under 5 gigabytes in size, otherwise users may have to pay to expand their iCloud allowance and face long upload times.
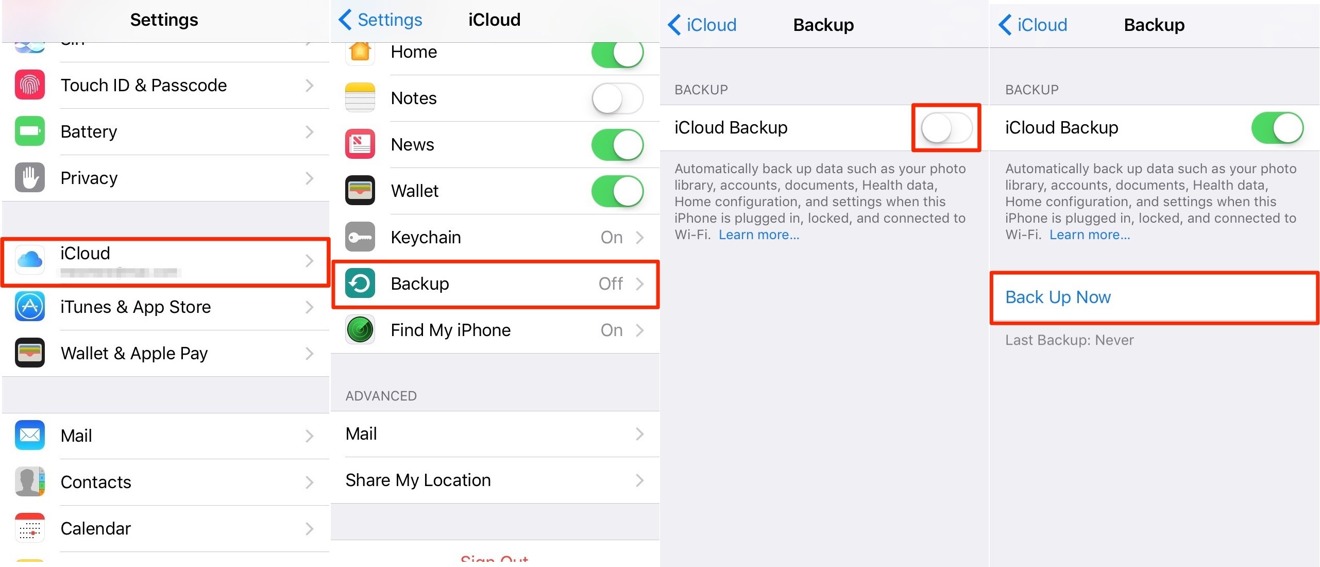
To back up to iCloud, enter the Settings app on your chosen iOS device, tap your name, and then the option for iCloud. Scroll down the list until you see Backup, tap the option, then the toggle on the side.
A warning will appear onscreen advising the device will "no longer back up to your computer automatically when you sync with iTunes" and giving the option to cancel the process.
After tapping OK, select "Back Up Now," though if no Internet connectivity is present, it will wait until the next time it detects a connection.
iTunes backups
If you have a Mac or PC handy, backing up your iOS device through iTunes is probably the quickest way for larger amounts of data, with storage limited only by the capacity of the host computer. Normally encrypted, it is also possible to back up data to a local device without using encryption, though doing this will mean passwords, Health, and HomeKit data will not be included in the backup itself.
To use this method, connect the iPhone or iPad to the computer using a Lightning to USB cable. At this point, a message may pop up requesting a device passcode and to 'Trust This Computer,' which need to be passed or accepted in order to continue.
Select the device when it appears within iTunes, typically by clicking the icon to the right of the media type selector within the application.
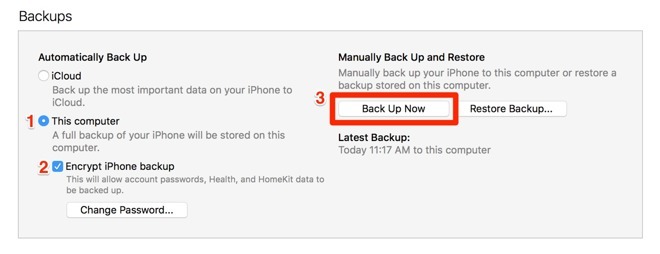
Within the Summary menu is a section detailing the backup program set up for the device, if any is applicable. In this menu, select "This Computer" as the backup destination.
A tickbox towards the bottom can be enabled to encrypt the backup, and it is recommended to do so. As part of this, users will have to create a password for the backup, that will be required for decryption.
On the right are two buttons marked "Back Up Now" and "Restore Backup" with the former able to start the backup process. As one would expect, the "Restore Backup" button can be used to reinstate the archived data.
Wipe Out
Clearing out the iPhone or iPad is a relatively simple process, and leaves the device in a state that makes it easy for the new owner to set it up from scratch, without any of the previous user's data appearing.
First, if you own an Apple Watch, you need to unpair it from the iPhone. Apple provides instructions for the unpairing process, which also involves the erasure of the Apple Watch itself.
After backing up the device, Apple recommends users sign out of iCloud, iTunes, and the App Store. Go to the Settings app and tap on the user name at the top, then scroll to the bottom of the page and select "Sign Out."
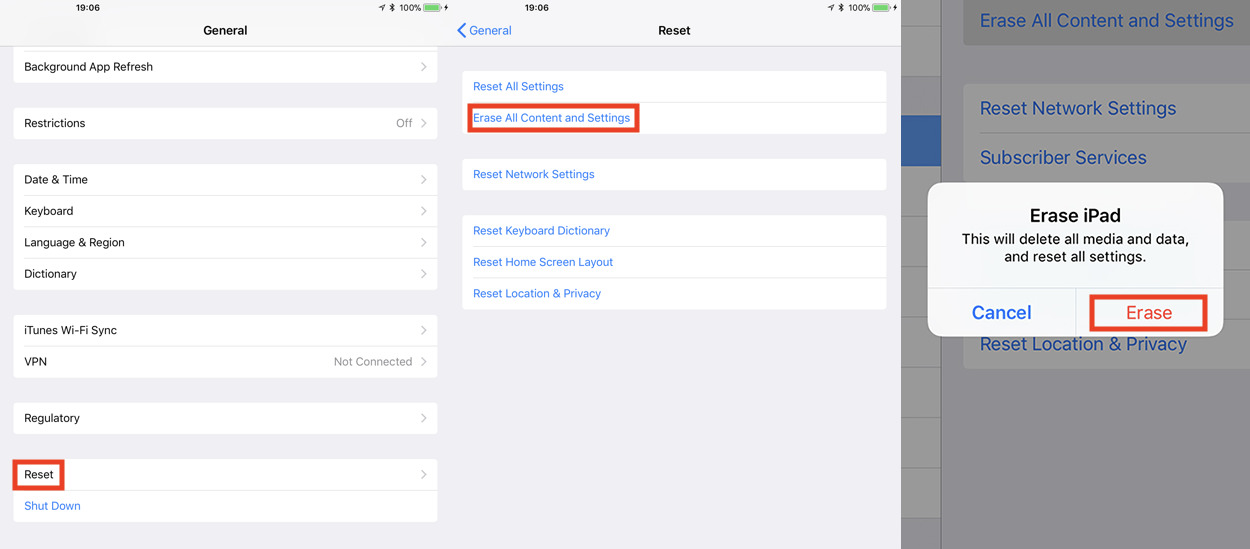
Staying within Settings, go to the General section and select "Reset," followed by "Erase All Content and Settings."
At this point, you may be asked to enter an Apple ID and password if Find My iPhone is enabled. The device passcode or Restrictions passcode are also likely to be requested at this time.
Lastly, a final "Erase" warning prompt will appear, with options to cancel the procedure or to complete it with a tap of the "Erase" button.
Remote Erasure
In the event that the iPhone or iPad has been passed on to another party before erasure, there are still things that can be done to safeguard the data and iCloud.
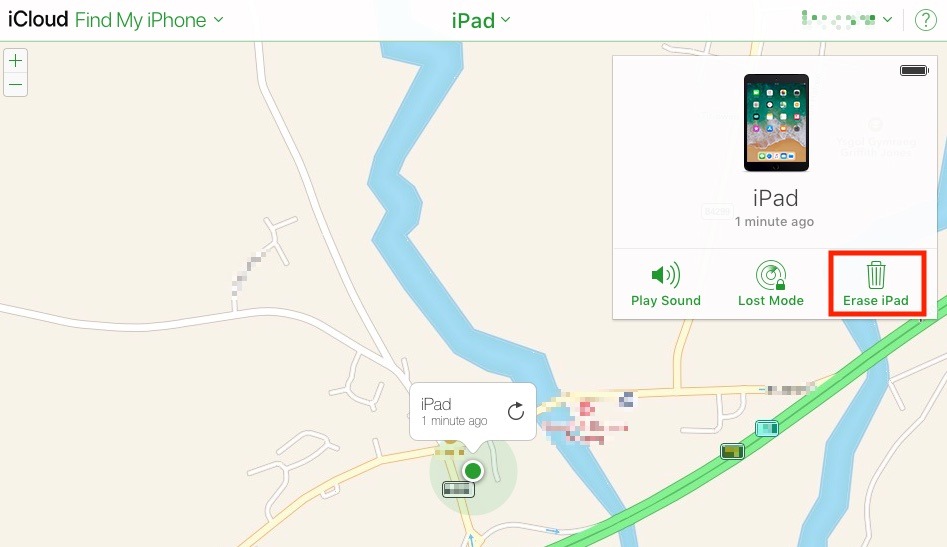
If Find My iPhone is enabled, it is possible to remotely wipe the device by logging into iCloud.com or the Find My iPhone app on another iOS device, selecting the hardware in question, and selecting "Erase." Once completed, another option will be provided to "Remove from Account," which should be selected.
If this is not possible and there is no way to get the device back from the new owner to remove any signed-in accounts, it is highly advisable to take a number of steps to secure connected accounts. This includes changing the Apple ID password to prevent changes to data stored on iCloud, removing payment details linked to Apple Pay via iCloud.com, and deregistering iMessage from the device.
Other Considerations
It is key to remember that not all data is backed up in either of Apple's two archival processes. For example, iCloud backups will not include any data already stored in iCloud, such as Contacts, Calendars, and the iCloud Photo Library.
The method used for backing up will also depend on the amount of data being archived. Larger backups tend to be better served by the iTunes-based process due to the potential speed and capacity advantages, while lightly used devices may have smaller caches of data that would be suitable for iCloud backups.
The location of backups also affects how fast a backup can be restored to a device, with iCloud archives able to be retrieved over any Internet connection, but limited to the connection's available bandwidth. Restoring backups via iTunes will be quicker, but does require the iPhone or iPad to be connected to the Mac or PC used for storage, making it less practical for urgent restorations away from the desktop.
Lastly, it is worth suggesting that backups should be performed regularly as a matter of course, not just for when the device is being replaced. There are mechanisms available for automatic backups to take place, and it is highly recommended that they are used on a regular basis.


 Marko Zivkovic
 Amber Neely
 Christine McKee

 Mike Wuerthele and Malcolm Owen

 William Gallagher