Video: How to downgrade from macOS High Sierra to Sierra
 Vadim Yuryev
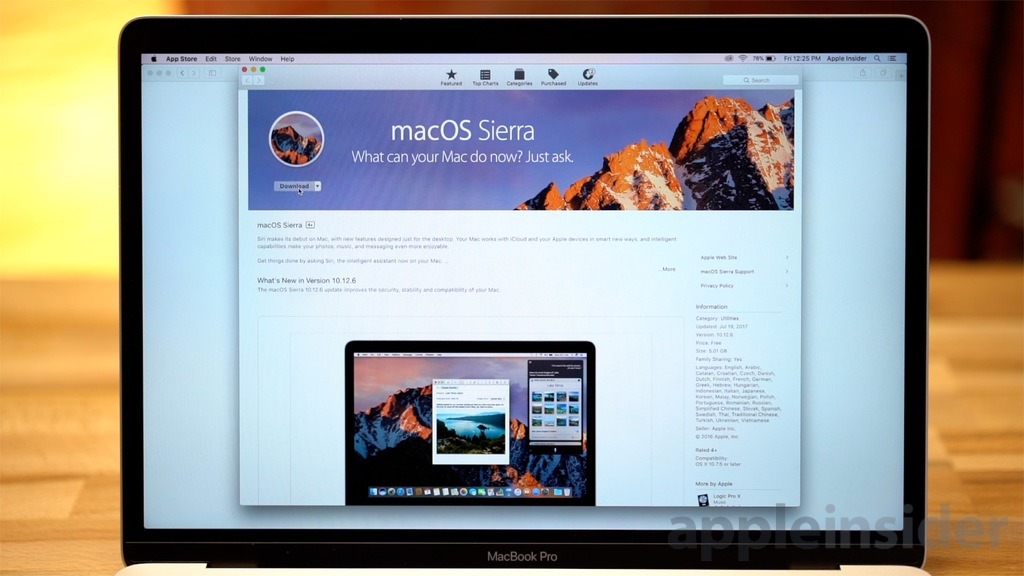
MacOS High Sierra is Apple's newest operating system for Mac, but some users might have issues with applications or home server setups not working correctly. AppleInsider shows you how to downgrade, if you must.
Assuming you've got a mac older than the iMac Pro that works with macOS 10.12 Sierra, there is a way to revert to the older system.
If you're one of those users having trouble and have decided to go back, the first step is to download the Sierra installer. Apple has a convenient support page, with links on how to download the installer from the Mac App Store.
Once the download is complete, you'll see an error saying that the application is too old to run on your machine. But, we can circumvent this by making an external install drive. First, make a backup of all your data, because the rest of this procedure will erase your system drive. Also, if you're on a MacBook or MacBook Pro, now would be a good time to connect to power.

Insert a USB flash drive. When the USB drive shows up in finder, rename it Sierra. Open the Terminal.
In the terminal window, enter: sudo /Applications/Install\ macOS\ Sierra.app/Contents/Resources/createinstallmedia — volume /Volumes/Sierra and hit enter.
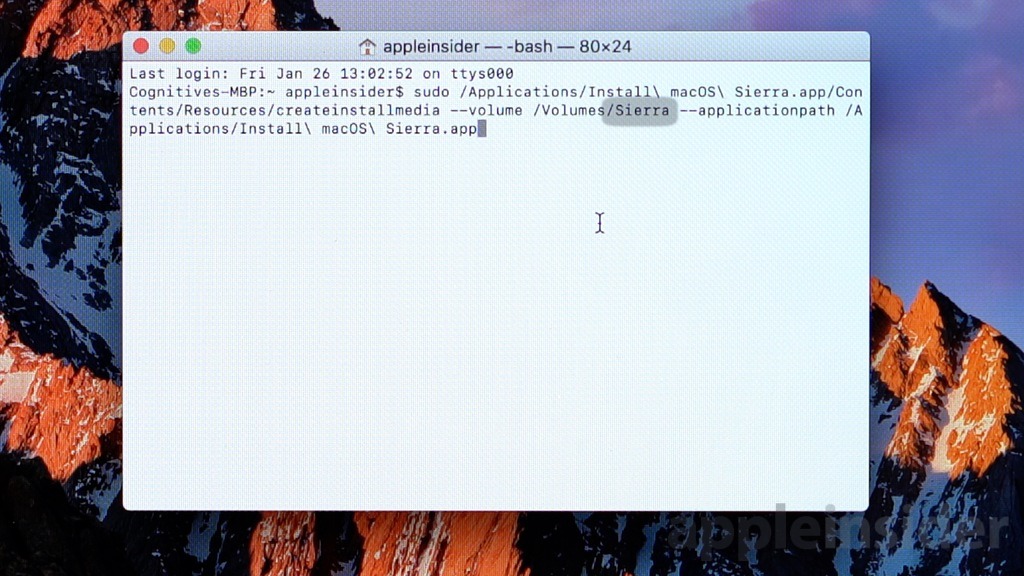
A little lock icon will show up for user password validation — just type in your password to authenticate and hit enter.
You will be asked for permission to erase all the data on the drive. Type the letter y, and hit enter. Terminal should now start copying the boot files to the USB drive.
Once the process is complete, you can close the terminal, and eject the USB drive.
Once your data is backed up, click the Apple icon in the upper left corner of the screen, and select Restart. Hold down Command+R, and keep holding the keys until your computer restarts and a loading bar shows up. After it's finished, click Disk Utility, then continue.
You are about to erase your system drive — make sure you have your backup!
Select your startup disk, which is usually named Macintosh HD. Just formatting the drive won't do, as it will allow only APFS for SSD-based machines.
Instead, hit Cancel and click Partition. Change the format to Mac OS Extended (Journaled), and then click Apply.
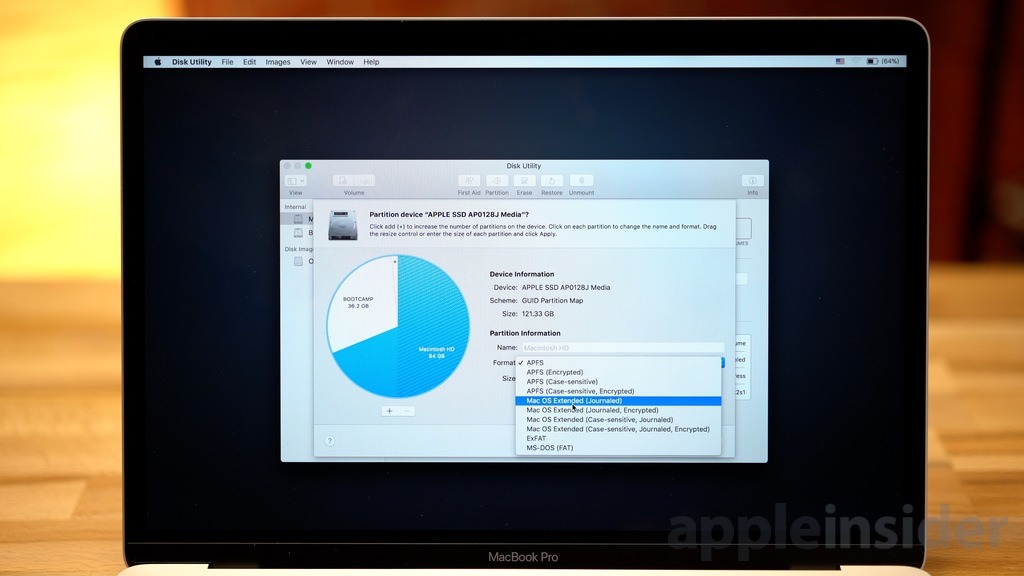
Click Partition on the next popup, which will erase all the data on the drive, and warn you accordingly.
When the process is complete, you drive is reformatted to allow a MacOS Sierra installation. Click the Apple icon once again, and Restart the system.
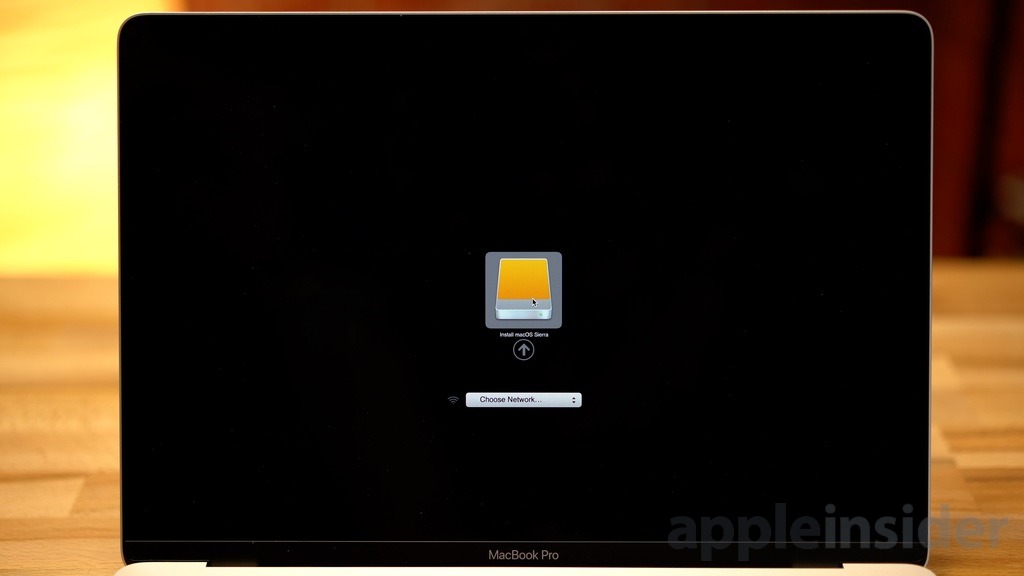
This time, hold the Option button until it restarts to the system selector screen. Plug in your USB installation drive.Once it shows up, click Install MacOS Sierra.
After it loads, click Install MacOS, and continue. Once you've read and agreed to Apple's terms and conditions, click on your main drive. Which we assume is still called Macintosh HD, then click Install.
Continue through all the pop-ups to begin the installation.Once the installation is complete, choose your language, and hit Continue to complete the rest of the installation process.
When complete, open the Mac App Store, and update to the latest macOS Sierra software — just make sure not to accidentally reinstall macOS High Sierra. This won't turn off notifications to upgrade to High Sierra, you'll still get those daily. Fortunately, they can be turned off permanently.


 Malcolm Owen
 Christine McKee

 Amber Neely

 William Gallagher