If you own a MacBook Pro chances are pretty good that you’ve investigated something like the OptiBay which lets you replace your optical drive with a second hard disk. After I did a review of the device a few months ago I started to look at installing a copy of Windows 7 on my Pro for things like League of Legends and the occasional Windows app.
Unfortunately Boot Camp Assistant doesn’t like it when you’ve modified the Pro and there are some other snags that you’ll run into along the way. Through a few hours of trial and error I’ve come up with solutions to the problems that I’ve faced, so it’s time to pass on those fixes to you in hopes that maybe you won’t waste as much time as I did. Here is my step by step guide to install Windows 7 on MacBook Pro:
What You Need
- A flash drive, 4 GB or larger
- A copy of Windows 7, in ISO format
- The Windows 7 USB/DVD Download Tool
- Roxio Toast
Overview
The Boot Camp process is relatively straightforward. The Assistant will download a set of drivers for Windows to install and then it will allow you to select the size of the partition that you want to make. After the partition is created, your machine will restart and the Windows installation begins. From here it’s a matter of clicking Continue a number of times and then you’ll have a dual-booting MacBook.
Well, almost.
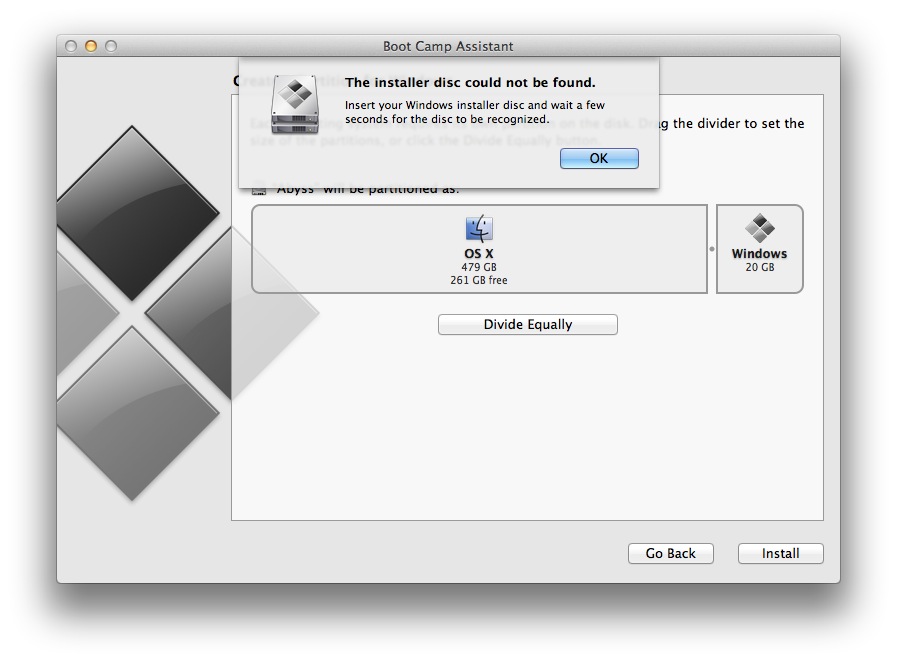
If you have a MacBook Air, Boot Camp doesn’t look for an optical drive. But if you have a MacBook or Mac Pro it will scream at you when you load it up. You can ignore the warning, but the assistant will stop dead in its tracks once you’ve selected your partition size. “The installer disc could not be found” is going to be the message that gives you fits.

The <3 of EU tech
The latest rumblings from the EU tech scene, a story from our wise ol' founder Boris, and some questionable AI art. It's free, every week, in your inbox. Sign up now!
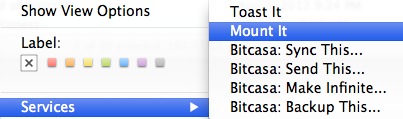
Once you have that completed, make sure that you have installed Toast. Locate that copy of the ISO on your Mac and right click it to open the menu, select Services, then use the Mount It option. This will “fool” OS X into thinking that you have a physical optical drive and the Windows 7 disc loaded into it.
This is the solution to “The installer disc could not be found”. While the obvious answer here is to mount the disc image with OS X’s tools, they won’t work because the Assistant knows that you don’t have a physical disc in place. It’s quite possible that there are other ISO mounting apps that will work for this, but I can only verify that it works with Toast.
Now that you have the bootable USB and the ISO mounted, start Boot Camp Assistant and follow the steps. You’ll have two options that you can select at first.
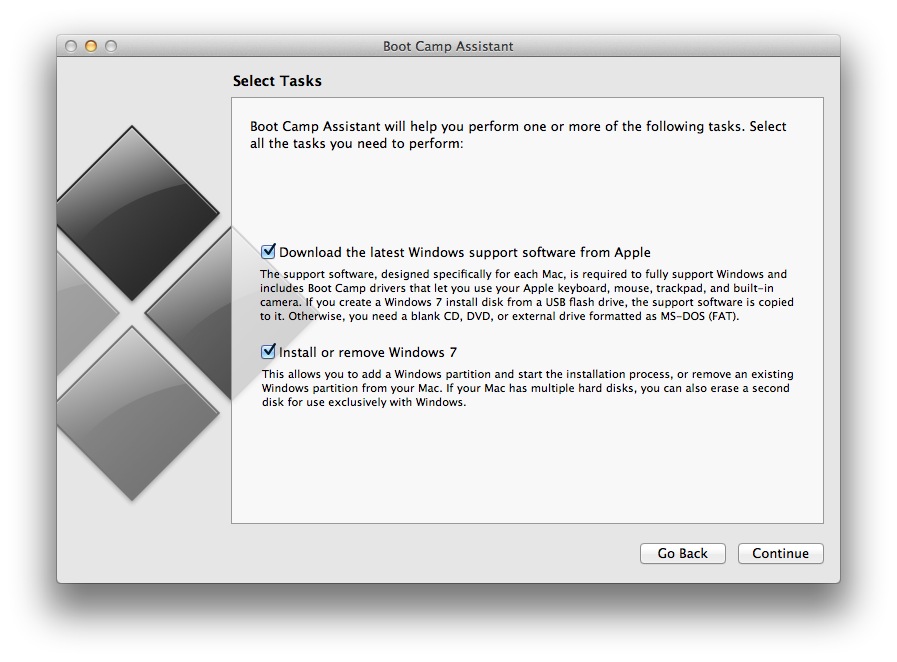
Make sure that both are checked, and then proceed to the next screen. On here, select “Save a copy to an external drive” and then click Continue to choose the path that you want to use. You can not save these files to the bootable USB without some prior customization, so I suggest a second USB drive or just saving them to a folder on your desktop.

If all goes well, you’ll have a dual-booting installation of Windows 7 on your Mac or MacBook Pro, no optical drive required.
Potential Problems
There are some snags along the way, and but they’re fortunately quite easy to avoid or work around. The first problem is that Boot Camp Assistant under Mountain Lion does not appear to format the partition to FAT, which is required for Windows to install. Fortunately you can do this yourself during the installation process. Just select the partition labeled BOOTCAMP and click Format. This does not appear to have any ill effect on your OS X installation, but please make sure you have a current backup in place.
You’ll probably think that your computer has frozen during the installation, as you’ll get stuck on a solid gray screen for periods that seem to last longer than they should. Don’t fret. On many occasions I had to wait 3 or 4 minutes on these screens before the installer would continue. Be patient.
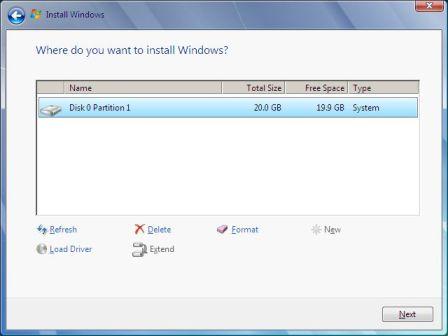
The next problem you’ll likely encounter is more of a curiosity than a serious issue. Chances are you’re using a smaller SSD as your main drive, with a large-capacity, spinning drive as your secondary. It would make sense to install Windows to that second drive, but it doesn’t always work. On a couple of occasions it appeared that no master boot record was written to that drive, as opposed to the main drive where it worked every time. Your milage may vary, but I eventually relented into a 20 GB partition on my SSD rather than dealing with the headache of a missing MBR.
The final (and perhaps most frustrating) problem that you’re likely to encounter is a Windows error on installation. Chances are it will be “error 0x8030024” which tells you “Windows is unable to install to the selected location” after you’ve pointed the Windows installer to the partition that you want to use.
The problem here seems to lie in having more than one drive active in the system. The answer? Disconnect one of the drives. I know, it’s a pain in the tail, but I can tell you from my experience that it worked flawlessly. Interestingly the Windows installer doesn’t always stall when you have two drives installed, and there doesn’t appear to be any logic to whether it will work or fail. But if it fails, just disconnect the second drive and restart the installation.
Oh, and one last tip – If you find yourself stuck with a bad Windows install, or booting into Windows by default, restart your computer and press the Alt/Option key right after the beep. Keep it held down until you see a menu pop up with the available installations, just as you would to boot into recovery for OS X.
So there you have it. It’s not quick, it’s not easy, but if you need to have a copy of Windows 7 on your Pro and you don’t have an optical drive, this method will work. Have problems that I haven’t covered here? Drop them in the comments and let’s see if we can get your questions answered.
Image: Benjamin Nagel via Flicker
Get the TNW newsletter
Get the most important tech news in your inbox each week.