

Ever since Apple switched to Intel architecture back in 2006, Macs have been able to run Microsoft Windows natively without any kind of emulation software, such as Microsoft Virtual PC. Why would you want to use Windows, I hear you scream, when OS X is a perfectly good operating system? Well, you might have some software that only works on Windows (specialist software, for example) or you may just fancy a change from OS X. Whatever your reason, let's see how you can get Windows up and running on your Mac.
Try Parallels Desktop or VMWare Fusion.
Choose How You're Going to Run It
In short, there are two ways of running Windows on your Mac.
- You can use Apple's Boot Camp to create a Windows partition on your Mac's hard drive, allowing you to boot either into OS X or Windows when you start your Mac.
- You can run Windows side-by-side using a virtualization package such as Parallels Desktop or VMWare Fusion.
Both ways have their advantages and disadvantages, of course. Running Windows under Boot Camp will give you a slightly better user experience as your Mac's system resources are being used exclusively for one operating system, Windows, not two. The disadvantage is that if you want to use OS X, you will have to save everything you're doing in Windows and reboot your Mac. Of course, Boot Camp is great if you're going to be using nothing but Windows, but if you want to use both Windows and OS X side-by-side, then it isn't an ideal option.
Personally, I would recommend a virtualization program. The two leaders out there are VMWare Fusion and Parallels Desktop, and both of them offer pretty much the same set of features. You've also got the beauty of being able to run other operating systems, such as Linux, using these programs (Linux can be run under Boot Camp, however it isn't supported by Apple and can be a bit temperamental).
The beauty about virtualization programs is that you can run both OS X and Windows side-by-side, and both programs feature a "Unity" interface whereby your Windows applications appear in OS X and can be launched natively, meaning you aren't committed to working inside Windows. The disadvantage about these programs is, however, that they hog system resources like there's no tomorrow, so don't even try installing it on an older Mac as you'll experience a lethargic, sluggish Mac and your Windows experience will be pretty unbearable.
Either way, let's take a look at how to do it.
Installing Windows Using Boot Camp
Before we start installing Windows using Boot Camp, you'll need to make sure of a couple of things first.
- Make sure you've got a (legal) copy of Windows on a bootable disk. You can't install Windows from a disk image (unlike virtualization software).
- Back up your Mac completely using Time Machine.
- Grab either a blank disk or a USB stick so that Boot Camp can install the Windows drivers for your Mac's hardware (keyboard, sound card, graphics card and so on).
- You'll need at least 16 GB of free space on your Mac's hard disk (no installing to external drives here) for 32-bit versions of Windows, and at least 20 GB free for 64-bit versions. If you're unsure what "bit" rating your Windows is, check on the box or on the disk. Most installation disks nowadays come with both versions included (your Mac will most probably want 64-bit).
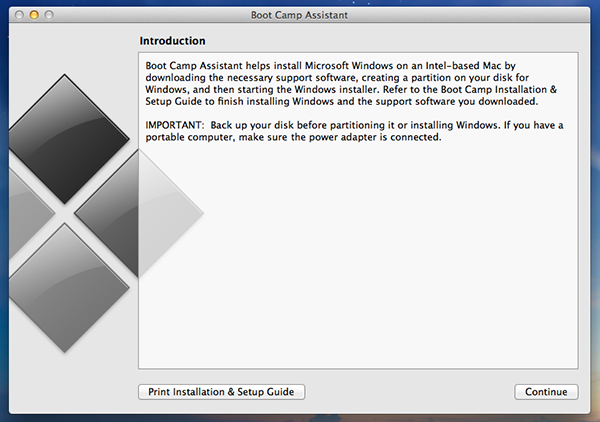
Now, go into the Boot Camp Assistant, which is located in your Utilities folder (bet you never saw it before!) and fire it up. You'll need to have administrator rights to your Mac before you start tinkering around with it.

The first thing you'll need to do is create a partition for Windows. It needs to be at least 5 GB in size and also leave 5 GB of free space on your Mac after the installation is completed. Of course, the size you'll need depends on what you're going to be using Windows for. If you're going to use it for loads of high-end stuff, then whack up the partition size to at least 50 – 60 GB (remember, Windows can take up to around 10-15 GB of space depending on what's installed). After you've chosen your ideal size, click on Partition.


Boot Camp will then start partitioning a portion of your Mac's hard disk drive for Windows. Although this partition can still be seen by the OS X operating system (and you can access files from it), you can't use it for OS X.
Once Boot Camp has finished partitioning, you'll then be prompted to insert your Windows installation disk (remember, Boot Camp won't work from ISO disk images) and restart. Your Mac will then restart and load up Windows setup.


When selecting the destination for Windows, remember to select the partition that Boot Camp has just created for you (which should be labeled BOOTCAMP). You may also need to format it before installing Windows (most versions of Windows recommend the NTFS file system, which is unsupported by OS X without the use of third-party software, however you can format it how you like). Run the Windows installation procedure as normal and let your Mac boot up into Windows.
You will then have to install the relevant drivers for your Mac's hardware (keyboard, webcam, sound card etc.). Don't worry – this is all done automatically for you. You'll need to dig out the OS X install disk that came with your Mac, as all the drivers are on there. Insert it and follow the on-screen instructions.
You'll find under Boot Camp that hot keys on your Mac (such as volume up, volume down and disk eject) all work under Windows and that it emulates a default PC keyboard (including Control+Alt+Delete for closing applications that are unresponsive). Most external devices also work (including the Magic Mouse, although not using the gestures you are used to in OS X) and most software is compatible. Be wary, though, about using third-party backup services, as these can sometimes corrupt the Windows partition, so before installing, check their compatibility with Boot Camp.
Once you've set everything up, then you are free to use Windows! You can choose which operating system to boot up by holding down the Option key when you power up your Mac - a screen should appear with the two boot options. If you wish to set a default operating system to boot up into, then go to System Preferences then Startup Disk and select which disk you would like as default.
Running Windows Virtually
I'd highly recommend going for one of the paid options, as you'll find the performance a lot better.
The second option available to you is running Windows virtually using a virtualization software. There are a couple of decent commercial options out there on the market, VMWare Fusion and Parallels Desktop, along with a free option VirtualBox. If you are just going to be running Windows for short periods of time, then grab VirtualBox – it pretty much does what it says on the tin and it's quick and easy to install. But, if you're going to be using Windows on your Mac for longer periods of time (or if you want it to run high-end apps, such as games) then I'd highly recommend going for one of the paid options, as you'll find the performance a lot better.
There really isn't much difference between Fusion and Parallels Desktop and at the end of the day, it really boils down to personal preference. Both support the latest version of Windows (Windows 8) and both are optimized for Mountain Lion and the Retina display on the MacBook Pro. You could spend hours reading through long technical comparisons of the two products, but really, there's not much there.
Before you decide to run Windows virtually, you'll need to make sure your Mac is up for it. You'll need a fast processor and plenty of RAM (I'd recommend a minimum of 4 GB) because remember, your Mac is now having to run two operating systems and all virtualization packages are often massive resource hogs. A good way to do this is to check the recommend system specifications on either VMWare or Parallels (click on the System Requirements tab) support sites (details on VirtualBox can be found here, but they are less specific).
With virtualization packages, you can usually set up Windows from either a disk image (ISO file) or from the original installation disk. You can also install other operating systems as well (such as Linux) – check your software's documentation for supported operating systems. For this tutorial, however, I'm going to show you how to get Windows 8 up and running on VMWare Fusion 5 (note that previous versions of Windows have a similar setup procedure).
Creating a New Virtual Machine
Load up VMWare Fusion and click on File then New (alternatively, press Command + N). You will be presented with the New Virtual Machine Assistant.


If you're installing Windows from a CD or DVD, then insert it into your Mac's disk slot at this stage. Fusion will then detect the operating system being installed and continue automatically. If you're going to be installing it from a disk image (like I am), then click on Continue without disc.
In the next window, you will need to select your disk image. Go ahead and click on Use operating system installation disc or image and select the image file (usually in the ISO format) that you would like to install, then click on Continue.


Confirm the operating system of choice in the next dialogue (make sure Fusion has accurately identified whether you are planning to run a 32-bit or 64-bit version of Windows: 64-bit versions are denoted by the term x86 in Fusion).


You'll then be asked to choose a username and password for your Windows account, plus enter the license key that came with your software. To save yourself a lot of extra time and effort, go for the Easy Install option – Fusion will automatically install all drivers so you get the best experience from your Windows virtual machine.


After this step, you can choose the level of integration between your Mac and your Windows virtual machine. Personally, I would go for More Seamless as it allows you to share documents and applications easily across both operating systems, but if you are simply going to be running Windows for a few tasks, and aren't bothered about sharing documents (or if you don't mind dragging and dropping relevant files) then go for the More Isolated option.


Fusion will then show you the default settings for the operating system you have chosen (in the case of Windows 8, it will use a maximum of 1 GB of RAM and create a virtual machine with 60 GB of storage space on my Mac). If you want to customize these, then click on Customize Settings. You will then be presented with a Preference pane, similar to the System Preferences in OS X, where you can customize and tweak your virtual machine to your liking.
Here, for example, you can choose how much RAM your virtual machine will use (the more the better), what network settings should be used and others. If you're just starting off using Fusion then leave the settings as they are – tinkering around with them may cause your virtual machine to be slow or sluggish.
After you've finished tailoring your virtual machine to your liking, click on Finish, choose a location to save your virtual machine (if you've got an SSD drive in your Mac, then I'd recommend saving it there so files can be accessed quicker) then click on OK. Fusion will then boot up Windows setup – just follow the instructions to get Windows up and running!


Once you've installed Windows and got everything setup, Fusion will prompt you to install VMWare Tools, which makes your virtual machine smoother and easier to run. You don't have to install them , but I would highly recommend that you do so. If you don't want to install them straight away, then you can always click on Virtual Machine then click on Install VMWare Tools... and install them whenever you want.
Try Parallels Desktop or VMWare Fusion.
Enjoy Using Windows!
The final step now is to enjoy using Windows! You'll soon find that with whatever method you are using (no matter where it is Boot Camp or a virtualization software package such as VMWare Fusion) the integration with your Mac is seamless, and sometimes it can be a better experience than running it on a dedicated Windows laptop!
I hope this guide has made the setup process a bit easier. It's not really that difficult – all you really have to do is follow the steps and don't take shortcuts, otherwise this could screw up both your Windows and OS X installations on your Mac! As always, please feel free to share any handy tips or comments for the benefits of our readers in the comments section below.


