Today we continue our march through the row of personal system preferences with a long look at the Language & Text preference. As its name implies, within it you’ll find several settings for configuring the language your Mac and Mac’s keyboard use, spelling options, text substitutions, and formatting based on geographical region. These features are available via four tabs. Let’s make our way forward.
Language
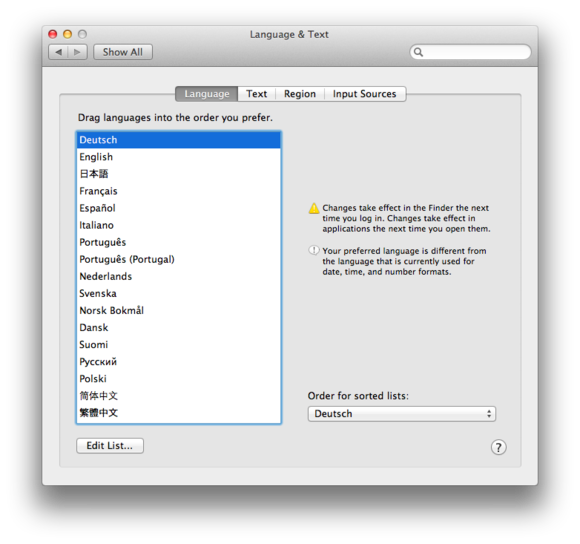
Comfortable as the Mac appears to be with the language you natively speak, it’s actually a citizen of the world in regard to language support. It supports dozens of languages as well as a smattering of variations among specific languages (British, Australian, Canadian, and United States English, for example). You find these languages in this first tab.
Here you have the option to sort languages in the order you prefer. In the United States, you’ll find English as the first entry. If you’d prefer that your Mac use a different primary language, simply drag its name to the top of the language list. When you change languages, the Finder will use the new language after you log out and then log back into your account. If an application is capable of using the new language, it will do so the next time you launch it. So, in this case, you needn’t log out.
If an application doesn’t support the first language you’ve chosen, it will try the next language in the list. If that one doesn’t work, on to the next language until a compatible language is found. This is helpful for those who read and write more than one language and one of those languages is less commonly used.
If you don’t find the language you need in the list, click the Edit List button at the bottom of the window. A sheet appears that contains a load of languages (many of which you likely didn’t know existed). To add one of these languages to the main list, just tick the checkbox next to it and click OK. You can then drag that language to the top of the list, if you like.
Finally, you can choose the sort order of lists based on the traditions of a particular language. You can also choose sorting variations for certain languages—Sinhala and Sinhala (Dictionary Sort Order), for example. Just click the ‘Order for sorted lists’ pop-up menu to choose the sorting language.
Text
The Text tab is one you should definitely visit. Here you configure text substitutions and exert your influence over spell checking.
As much fun as it is to read these words, let’s do something a bit more interactive. Launch the Notes application, type (c)—complete with the parentheses—and press the space bar. Wow, your Mac just swapped in the true-blue copyright symbol ( © ) for those three characters you typed. Return to the the Language & Text window and you’ll see why. The first substitution in the list says that (c) should be replaced with ©. Likewise, TM becomes ™. And if you care to enable them, the big ol’ fractions you type become smaller and more elegant.
This is cool enough on its own, but cooler still is that you can create text substitutions of your own. Let’s give it a try.
Click on the plus (+) button at the bottom of the window. In the empty field that appears under the Replace heading, enter ilmm. Click just to the right of it to expose the empty field under the With heading, enter I love my Mac!, and press Return. Now zip back to the Notes app, type ilmm, press the space bar, and oooh with awe when you see the text expanded to I love my Mac!
While I’m certain you’ll type this sentiment time and again, a more practical use for this kind of thing is using a shortcut that expands to an email signature or a common bit of boilerplate text that you use for your business. I might have cbsig expand to Chris Breen, Macworld senior editor, for example. (Hint: If you want a text substitution that includes line breaks, simple press Option-Return where you want the break when entering text in the With field.)
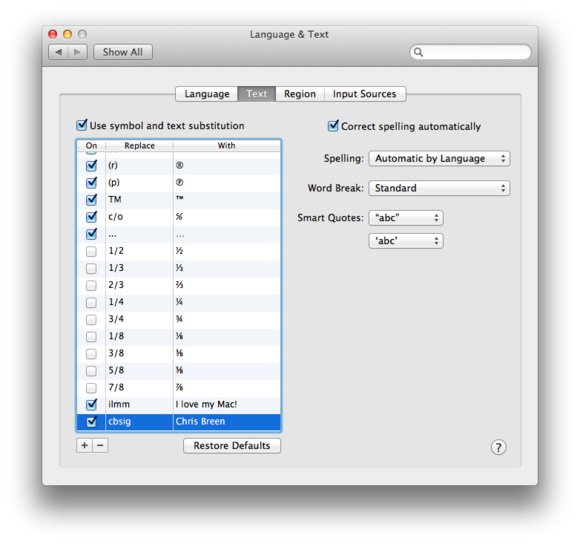
To the right you find options for spelling correction. If you’d prefer that the Mac not butt in at all, switch off the ‘Correct spelling automatically’ option. You can also have your spelling corrected automatically based on the language chosen in the Language tab or specify a particular language whose spelling conventions you wish to use. For example, if I were writing an article for the Australian edition of Macworld, I’d choose Australian English from this pop-up menu. That way, color would be corrected to colour and water would be changed to beer. (This is a playful joke. I love the Australians, honestly.)
You can also choose conventions for word breaks—Standard, English (United States, Computer), Finnish, Greek, or Japanese. And, from their respective menus, you can choose which characters will be used for double and single smart quotes.
Region
As you travel around the world, you discover that citizens of other nations do not format dates, times, and numbers as you do in your home country. Of course their currency is also different. And few countries use anything other than the metric system for measurements. It’s within the Region tab that you can control how your Mac displays this kind of information.
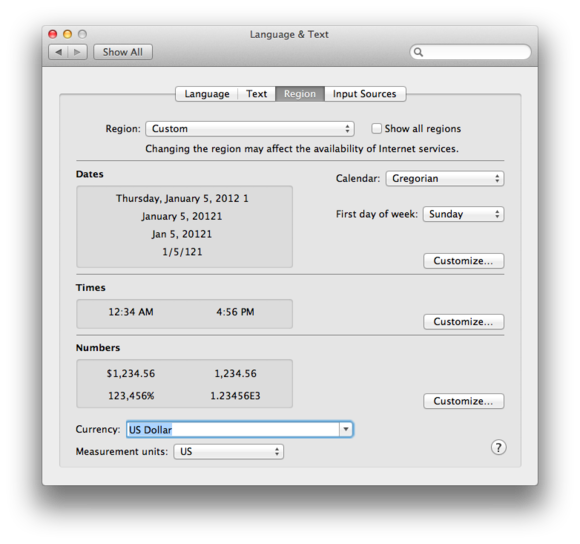
Near the top of the window, you’ll spy the Region pop-up menu. Your Mac should display your home region—United States, in my case. When you choose a different region—United Kingdom, for example—the dates, times, numbers, currency, and measurement units entries change below. These entries will be reflected in any applications that display this sort of information—the Finder, Calendar, and Mail, among them. If you want to see more regions, enable the ‘Show all regions option’ and click the Region menu. You’ll see dozens of additional regions, some of which offer variations.
But you needn’t stick strictly to these templates. If you choose to, you can customize how dates, times, and numbers are displayed within your region. For example, suppose you’re an American who prefers the way much of the rest of the world displays the date—5 January 2012 (5/01/2012) rather than January 5, 2012 (1/5/12). Click the Customize button in the window’s Dates area and in the Short, Medium, Long, and Full fields, drag the date entry so that it appears before the month—5/1/12 appears instead of 1/5/12. You can customize these fields further by dragging other entries to them.

For example, if you want to add the week of the year so that it appears when you click on the menu bar’s clock entry, just drag the ‘Week of Year‘ bubble to the end of the entry that appears in the Full field. Click OK and when you then click on the menu bar clock, you’ll see something like ‘Friday, January 11, 2013 2‘ (as January 11th is part of the year’s second week). When you make this kind of alteration, the Region pop-up menu will change to read Custom.
Input Sources
If you have an inability to imagine what life is like outside your country’s borders, you may believe that Apple ships Macs that work exactly as they do on your home turf. The keyboard is arranged in what we consider the traditional QWERTY order, typing Option-4 invariably produces the ¢ character, and the Mac smells like home cookin.’ (Okay, Macs do smell like home cookin’,—even when that cookin’ involves a heap of cumin and curry powder—but otherwise, no.) It makes little sense to print English alphanumeric characters on keys when another region’s language doesn’t use them. And therefore, the QWERTY arrangement makes little sense on these Macs.
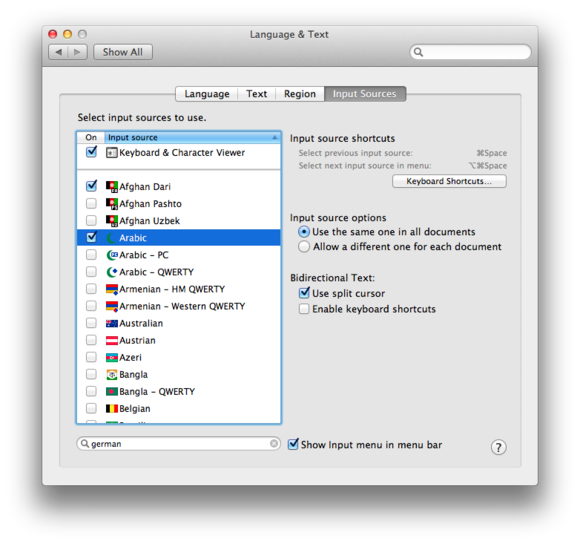
But for some people, there are times when they need to type in a language that didn’t ship as the default for the Mac they’re currently using. And that’s a big part of what the Input Sources tab is about. Here you find yet another list of languages. When you select the United States, the stars-and-stripes appears in the menu bar. Click this flag and you can choose any other language that you’ve enabled in the Input Sources tab. Select one of these languages and the Mac’s keyboard will be remapped to use that language as well as the character set that accompanies it.
For example, if I enable the Canadian French – CSA input source and choose it, when I type Option–4 I don’t see the ¢ character, but rather than € symbol. If I choose Afghan Dari and type, I see a series of characters completely unfamiliar to me.
To the right of the list of languages, you find that you can choose to use the same input source for all of your documents or use a different one for each document.
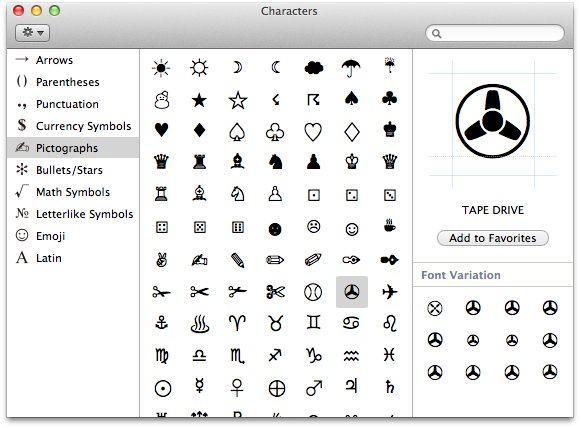
Within the list of languages, you’ll spy a helpful option at the very top of the list—Keyboard & Character Viewer. Enable this option and its symbol will appear in the Mac’s menu bar. Choose Show Character Viewer from this menu and a window will appear that contains loads of uncommonly used characters including arrows, punctuation, currency symbols, pictographs, bullets/stars, math symbols, letter-like symbols, and Emoji and Latin characters.
You can page through these symbols, seeking the one you want, and then double-click it to insert it into the document you’re currently working with. Or, if you’re looking for a variation of a character that you do know how to type—an asterisk, for instance—type that character in the Characters window’s Search field and a group of variations appears in the window below. Again, just double-click the character you want to insert.
When you select Show Keyboard Viewer, a representation of the Mac’s keyboard will appear in a small window. You enlarge this window by clicking its green Zoom button in the top-left corner (or just drag one of the window’s corners).
This window can be helpful in a couple of ways. First, if you’ve forgotten how to type a character you rarely use—the ¥ symbol, for example—you can find it by pressing one or two of the Mac’s modifier keys. In this case, press the Option key and you’ll find that you can produce this character by pressing Option-Y. Hold down Shift and Option and another group of characters appears.
It’s also helpful when you’re using an input source other than the one you normally use. You may be unaware, for example, that to produce the German keyboard’s Z character, you press the Y key on a keyboard designed for English-speaking countries.
And that’s the Language & Text system preference—one that’s full of options that can make it easier to type as well as type in your preferred language.
Next week: Notes on notifications