

It's hard to imagine using iCloud's mail service in anything other than Mail for Mac OS X or iOS, yet iCloud has had a decent webmail interface for some time. Although many Mac and iOS users have little to no need to use such an interface, there are certain features that provide greater control over your iCloud's email address that you just can't access via a traditional desktop client.
This tutorial will explain iCloud's webmail interface and some of its features that you can use to make your iCloud email account do even more.
Accessing iCloud
To access iCloud's webmail interface, simply visit iCloud.com and log in with your credentials. Once you've logged in, you can select Mail from the Launchpad-style home page.


iCloud Mail
iCloud's webmail interface looks very much like a cross between Mail for Mac OS X and iOS. A traditional 3-column view displays your folders, list of messages and the message body, along with contact information at the top.
The toolbar provides access to a search box as well as icons you'll no doubt already be familiar with, such as Archive, Trash and Reply.


If you'd prefer not to view the folders or want the extra space to read emails, you can collapse the view using the Hide Mailboxes option, just above the list of messages.
As you can see, it's all fairly standard stuff and if you've been using Apple's Mail apps for any length of time, somewhat familiar. Let's take a look at some of the features of iCloud's webmail interface that makes it worth exploring.
The next few features will be accessible via iCloud's mail preferences which you can access via the settings cog, located on the top-right of the window, and selecting Preferences.
Email Forwarding
If you've decided to switch away from iCloud for email or would prefer your emails to also be archived at another email address, iCloud can be set to forward your emails to another address.
Within iCloud's Preferences, select the General tab if you're not already in it, and you'll be able to then activate mail forwarding.
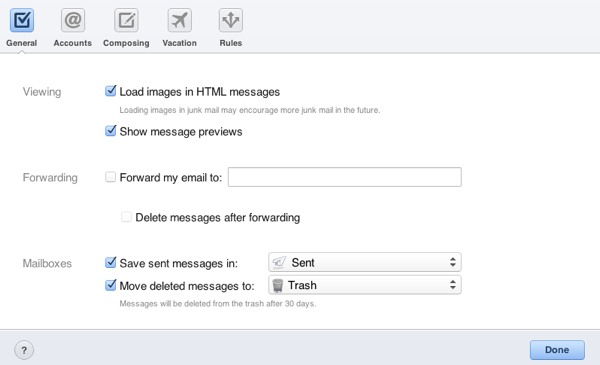

As soon as you enable forwarding, iCloud will divert a copy of any emails received to your chosen email address. They'll still appear to be from the original sender and you can even choose whether or not to keep them within iCloud by checking the option Delete messages after forwarding.
Mail Aliases
iCloud includes the option to add additional email addresses, known as aliases. These are ideal for when you're wanting to send and receive mail using iCloud but would prefer not to give out your personal email address.
A good example would be for temporary listings, such as Craigslist. Instead of publishing you personal email address, you can create an alias and use that. You can send and receive from an alias and all emails still go to your iCloud inbox, but you can delete or disable the alias at any time, preventing further emails from being received.
Step 1
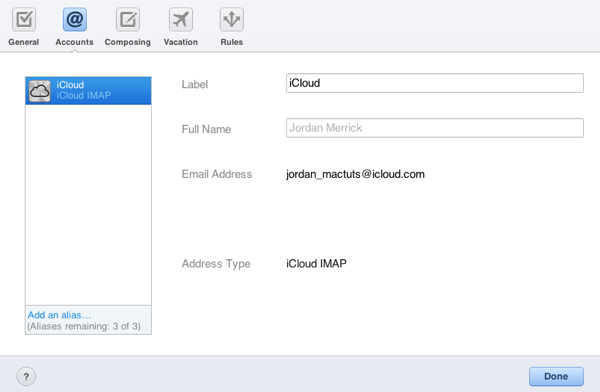
After entering iCloud's mail preferences, select the Accounts tab. You'll be presented with your current iCloud address and the ability to add up to three additional aliases.
Step 2
Clicking on Add an alias will display a window for you to enter a new iCloud mail alias. You are able to specify the address, ending in @icloud.com, as well as a label to remind you what its purpose was.

A useful feature of aliases is that you can also specify a different name than your own. Whilst it wouldn't be ideal to use for a business, in a pinch you could create an alias for your new home business that has the company name, looking somewhat more professional (though it's always best to have your own domain name in an email address).
You can set a colour for the messages when they arrive into your inbox as well, though this is only reflected on the iCloud webmail interface and doesn't alter the appearance of emails when received on your Mac or iOS device.
Removing a Mail Alias
To delete a mail alias, click the Delete Alias button. When deleting an alias, only you can re-use it and it will never be able to be used by anyone else. This is so that you don't create a temporary alias that might have received confidential information, only for someone else to use the same alias and attempt to request it again.


Be careful though, if you plan on creating a new iCloud account in the future, an alias name cannot be used for an iCloud account. This means you can't create an alias for a family member and be able to convert it to a full iCloud account at a later date. In this instance, it's better to simply create a new iCloud account and use mail forwarding.
Mail Aliases in Mac OS X and iOS
iCloud's mail alias feature does work with Mail for Mac OS X and iOS. Any aliases you create will be accessible by Mail and able to be used when sending and receiving mail.


You can select which alias to send from when composing a new mail message using the drop-down menu that will appear within the window.
Default Email Address
Should you use mail aliases then you can specify which email address you'd like to default to when sending new messages via iCloud's webmail interface.
Under the Composing tab of iCloud's preferences, you can select from which email address you'd prefer to send. This will automatically populate with whatever mail aliases you've previously created.


Again, the changes only apply to the iCloud webmail interface but it will mean any messages you send will, by default, use the option you select here. You can override this selection using the drop-down menu within iCloud's compose window.
Vacation Notice
Whilst vacation notice messages aren't really suitable for use outside of a work environment, there may be times when you need to use one. iCloud includes the ability to set a vacation notice that will automatically respond to any messages you receive.
Unlike certain providers such as Microsoft Exchange and even Gmail, there's very few options that you can change. In fact, there's just two - enable or disable the notice and what the notice says. You can't schedule the notice, unfortunately, so you need to remember to disable it!
Vacation notice is available under its own tab in iCloud's mail preferences. There's a simple checkbox to enable or disable it and a text area to enter your desired response.


Rules
iCloud was one of the last big email providers to implement server-side rules, something that Gmail users had been able to use for a long time. Nevertheless, they're a feature of iCloud that we should all be aware of as it's one that many of us just aren't aware of.
You'll probably have used rules within Mail to organise your messages at some point. Rules allow you automatically perform certain actions on messages, such as move them to a folder if they contain a certain word in the subject or have them go straight to the junk folder if they're from that company you keep getting messages from, despite unsubscribing a hundred times!
The problem with Mail's rules is that they only work if Mail is open on that particular Mac. If your Mac is switched off, all of those emails that you had wanted to automatically manage will just go to your inbox.
Server-side rules are the same sort of thing except that they are applied to messages as they arrive and before they ever get to your inbox. This way, it doesn't matter which device you're using, the rules will be applied by iCloud's mail server so that they are filed before your Mac or iOS device receives them.
Step 1
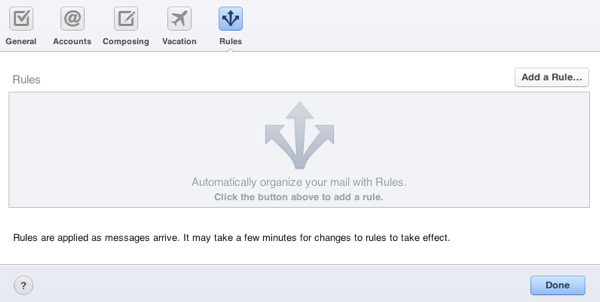
Rules can be configured via iCloud's mail preferences, under the Rules tab. To add a rule, simply click the Add a Rule… button.

Step 2
You're limited to the criteria and actions that your rules adhere to when compared to rules within Mail, though there are still plenty of options to allow for better mail management. I'm going to set up a rule that automatically moves any emails with a certain subject to the Junk folder.
Under the heading If a message, select has subject containing. I've specified that the subject be "SUPER SCAM EMAIL!".
Step 3
Now that we've specified our criteria to check messages with, let's set up the action of moving any messages that meet it to the junk. Under the heading Then, select Move to Folder and then select Junk.


Using the above criteria, any messages with the subject "SUPER SCAM EMAIL!" will automatically find its way to the junk folder and our iOS device or Mac won't be notified of a new message.
Edit or Delete Rules
All currently enabled rules are listed within the Rules tab
You can edit or delete rules by clicking Edit for the rule you'd like to alter. The rule's criteria will appear and you can alter it however you wish or delete it accordingly.
Wrapping Up
Although there's little need to use iCloud's webmail interface if you're constantly using your Mac or have an iPhone with you at all times, there are some features that can only be configured through it.
My favourite feature is the ability to configure server-side rules as iCloud's spam filtering has become a little bit less reliable in recent months but the majority of spam I've received was easily filtered by configuring some rules that would automatically move the messages to the Junk folder.
If you've never used iCloud's webmail interface before, you'll likely never have known about mail aliases or vacation notice, so I recommend logging in and exploring everything that iCloud's website has to offer.


