Back in 2011 when I worked for PC World, Google gave me a Sprint Nexus S 4G review unit with the brand-new Google Wallet app on it. I set up a pre-paid card and took the phone around to a handful of retailers around downtown San Francisco, testing to see how paying with a phone worked in the real world.
The results were mixed: some interactions were fast and simple, but I went to a Peet's Coffee and an Office Depot where the terminals just didn't work. A few days after the article went up, I went to a Whole Foods where the terminal wasn't even plugged in, and the cashier directed me to another terminal nearby. All in all, it was clear that the system was a bit too rough around the edges to truly revolutionize the idea of the wallet. And I came away from the experience knowing that I certainly wasn't going to be leaving home without a wallet any time soon.
Three years later, Apple Pay has entered the scene with its own mobile payments platform. For the average consumer, the Apple Pay experience is not very different from the Google Wallet experience, except that retailers have had three extra years to get their act together and upgrade their terminals to adequately support NFC-based payments. Behind the scenes, Apple Pay does act quite differently from Google Wallet; see our “How mobile payments work” primer here for a more in-depth discussion of where Apple and Google fit into the card network and how tokenization works on Apple Pay. In this article, we'll just focus on the user experience.
Setup
Setting up Apple Pay is about as easy as it gets. Open Passbook, select Set up Apple Pay, and you'll come to a screen where you can either key in your card details manually or take a photo of the card. If you want to snap a photo, you'll still have to manually enter the name on the card, the expiration date, and the security code on the back; the photo-snap option is really just for entering that 16-digit number. At that point, you'll have to agree to some terms and conditions, and Apple will have you select a means of verification, either through e-mail or via text, for example, where you'll be sent a verification code to key in to authorize adding the card to Apple Pay.
-
Apple first presents you with a Card Details page.Megan Geuss
-
You can snap a photo of your credit card to avoid having to key in all 16 digits. The photo is not stored on your phone.Megan Geuss
-
After agreeing to the terms and conditions, the bank will need to verify who you are. I chose to have a text sent to my main phone.Megan Geuss
-
This is the card information page. You can't see more than the last four digits of your actual credit card number or your Device Account Number.Megan Geuss
-
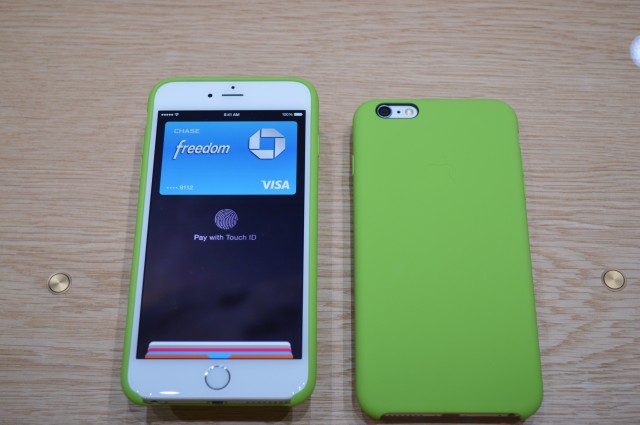
Once you start making transactions, you'll see a notice of the last one made under the picture of the card.Megan Geuss
Many complicated things happen behind the scenes during Apple Pay setup, and for that we'll again refer you to our longer piece on how Apple Pay works. To keep this brief, we'll just say that no actual credit card details, besides the last four digits of your card, are stored on your phone or on Apple's servers. Instead, your card network (Visa, MasterCard, American Express, etc) issues Apple a “token” that represents your card number during setup and Apple passes that onto your phone where it's stored in a separate, isolated chip called the Secure Element. It's that token, or Device Account Number as you'll see it referred to on your phone, that's passed to the merchant when you make a purchase.
Once all the relevant information has been input and verified, your device is ready to go. In my case, I set up a Chase debit card, which showed up as an image of the card without any card details except the last four digits of the card number. If you select the information button to the lower right of the card, it takes you to a card page where you're given the option to download the issuing bank's app, contact your bank, and see the last four digits of your card number and your associated Device Account number. You can also delete the card from the phone on this page.
Apple will work with banks to update expired card information that's stored with Apple Pay.
You then add more cards by selecting the plus sign in the top right. Once you start using a card, you can see the last transaction you made beneath the card (this is true for debit cards, apparently, but if you're using certain credit cards, you may have a few more transactions pop up).
If you go to Settings, you'll find a Passbook & Apple Pay menu option, where you can change your default card (this will be the one that automatically pops up when you start a transaction, although you can select another). You can also add a billing address, a shipping address, an e-mail address, and a phone number.
Using it in the field
From my week using Apple Pay, it's clear that the company made a conscious decision to get into the mobile payments space now because of the ecosystem supporting it, rather than just pushing forward because the technology was ready. And payments are a tricky thing because a single transaction involves so many players, and for any new scheme to work, it has to offer obvious benefits to most of them.
This time around, I didn't come in contact with a single NFC-capable terminal that simply didn't work or wasn't plugged in.
Actually, that's not true, but the single exception happened because of politics, not because of technical difficulties: I tried to buy something at CVS after I heard that it had stopped accepting Google Wallet or Apple Pay transactions. CVS, Rite Aid, and a number of other big-name retailers recently turned their back on these payment systems in favor of CurrentC, a retailer-backed initiative to try to sidestep the fees collected by card issuers. CurrentC won't be ready for use until 2015, but retailers are letting customers know now not to expect Apple Pay or Google Wallet support in their stores. When I got up to the checkout stand, the iPhone 6 I was carrying sensed the NFC reader, asked for my thumbprint on the TouchID sensor, and then gave a little haptic feedback shiver as if the information had been transmitted, but none of my transaction details were sent to the register. The cashier had no idea what to do or what was going on (“it usually works,” she told me) and she told me to try again. Nothing. Rather than hold up the rest of the line, I just paid in cash.
reader comments
126