
Protect your Mac with Sesame 2 multi-factor authentication

0082protect-your-mac-with-sesame-2-multi-factor-authenticationhero.jpg

"Security is a process, not a product." ~ Bruce Schneier
Computer security has come to the forefront of the news in the last few years -- from the large-scale external hacks on major corporations to the leaking of personally identifying information (PII) to internal breaches resulting in the distribution of government information.
All these scenarios point to one thing: Security is not a set-it-and-forget-it, all-in-one, off-the-shelf appliance or software application that will take care of any attacks. Not by a long shot.
Security is best viewed as a cake containing multiple layers. Each layer is representative of controls used to keep data secured from unauthorized access. The tried-and-true method of managing accounts -- a username and password for each user -- is no longer the only method of protection and has not been for quite some time.
An additional control added to prove the end-user's identity, alongside the username/password, is commonly known as multi-factor authentication. This involves including at least two forms of authentication to prove one's identity.
Something you know
Something you have
Something you are
A common example of 2-step verification or multi-factor authentication is a user account (something you know) and an implementation of biometrics, such as a fingerprint (something you are).
In another example is a security dongle, much like the one offered by Atama -- the Sesame 2. Sesame is a Bluetooth-based device that works in conjunction with the Sesame software downloaded from their site to control access to a Sesame-enabled computer by preventing any user from logging in with their account alone. If the Sesame 2 is not present, the computer will prevent access to all end users until the device is within range once again.
The setup couldn't be more straightforward. Simply download the .DMG from Atama's website, copy the Sesame.app to the Applications folder (Figure A), and run it for the first time to configure options.
Figure A
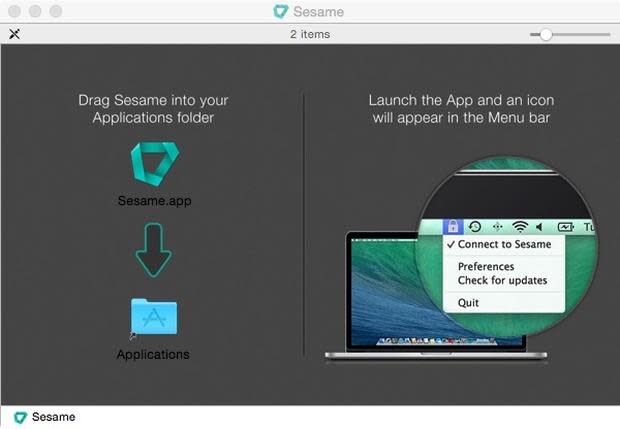
figure-a.jpg

Copy the Sesame.app to the Applications folder.
During the initialization process (Figure B), the wizard will go through the motions of setting up the dongle and establishing the first connection with your desktop.
Figure B
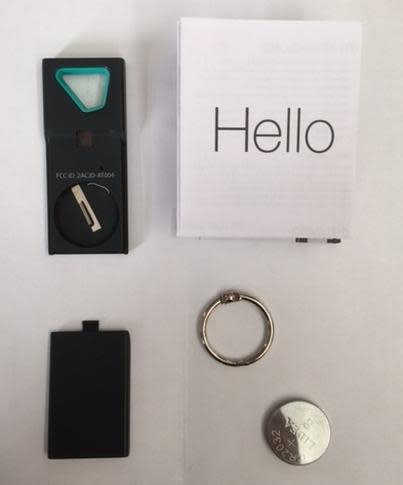
figure-b.jpg

The initialization process.
In order for the Sesame 2 to perform its duties, it must be kept on your person (Figure C) within the configured range.
Figure C

figure-c.jpg

The Sesame 2 must be kept on your person.
The device will be calibrated (Figure D) as such.
Figure D

figure-d.jpg

Calibrating the device.
An additional note during the setup involves setting the process to auto start upon booting the computer (Figure E). This is an important configuration, as it will ensure the desktop service will be protected even from reboots or shutdowns.
Figure E
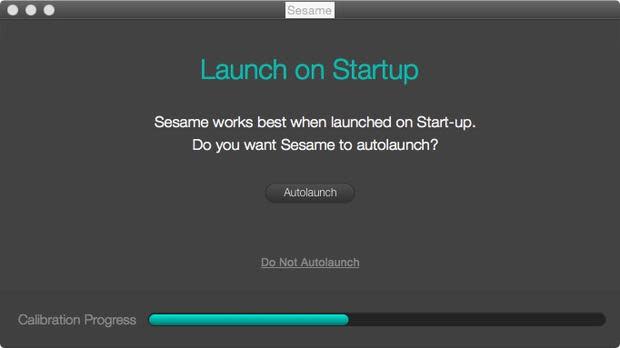
figure-e.jpg

Autolaunch on startup.
The following configuration pages will cover the crux of the security Sesame 2 provides. It addresses locking distance (Figure F) and timer (Figure G), plus how the system will become unlocked (Figure H). Particularly, the unlocked setting will allow for the setup of two-factor authentication that will require the computer to unlock only when both the dongle is present and a login account is successfully authenticated. Failure of either of these will result in failure on both factors, and access will be denied.
Figure F
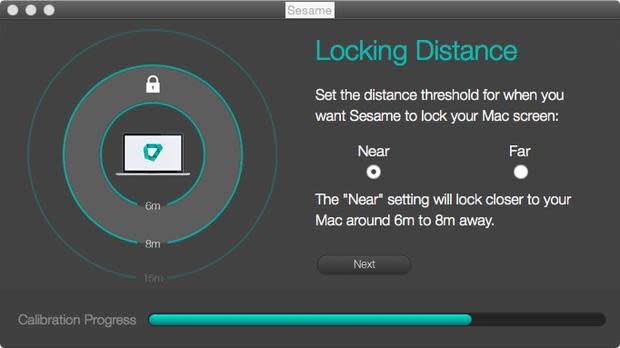
figure-f.jpg

Set the distance threshold.
Figure G

figure-g.jpg

When your Mac screen should lock.
Figure H
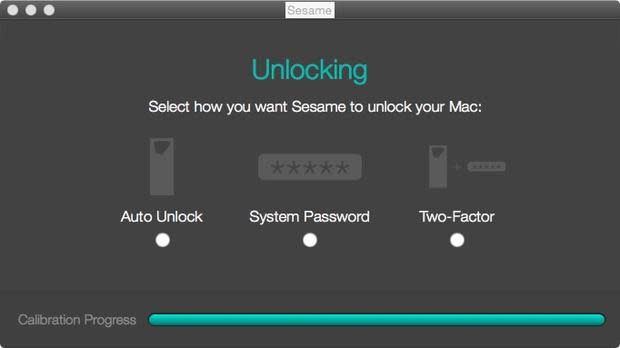
figure-h.jpg

How you want Sesame to unlock your Mac.
Once Sesame has been installed, configured, and linked to the desktop, an optional but useful feature is its integration with Apple Script to allow for preset actions to occur when stepping away from or returning to the configured range. Sesame also allows for personal actions to be added to the workflow to create scripts that work best for you (Figure I).
Figure I

figure-i.jpg

Integration with Apple Script.
The basis of Sesame 2 is to be able to ensure that end users lock their desktop while away from their stations. Since most users do not do this (and in many cases, leave their desktops logged in all the time), Sesame protects the desktop by enforcing a lock screen when the dongle has been removed away from the preconfigured range. Sesame also acts as a second factor in multi-factor authentication by requiring the presence of the dongle -- in combination with the end users account/password combo -- to properly authenticate and restore access.
In real-life testing, Sesame 2 performed its duties admirably, but it does have a few sticking points. In most corporate environments, the distances -- which are hardcoded into the software and set to a minimum of 6 meters (approx. 20ft.) -- are more than adequate. However, for SMB/SOHO, the minimum range will be not sufficient to trigger the lock screen automatically, even though it may still be triggered manually from the menu bar.
Another sticking point is the configuration process itself. In a small office of only several computers, setup shouldn't take much more than a few minutes per desktop. However, rolling out this technology to hundreds or thousands of machines could prove to be tedious without a 3rd-party centralized management suite or remote desktop application.
The lack of central management is a difficult sell for IT, but considering the price of admission for Sesame 2 (as low as $35/each) compared to other competitors offerings at thousands of dollars, the money saved could be put forth towards additional layers (or controls) to further lockdown the environment and enhance data security.
How does your organization secure Macs? Share your experience in the discussion thread below.
