Back in the Fall of 2012, a few months after I had taken it upon myself to start moving all my work from OS X to iOS, I came across Ole Zorn’s Pythonista. A Python interpreter for iPhone and iPad that could natively integrate with iOS system features, Pythonista opened up a new world to me, demonstrating how I could automate tedious tasks on iOS devices via scripting. Since then, other apps have come along and shown how iOS tasks can be automated with visual interfaces and pre-packaged actions (above all, Workflow and Launch Center Pro), but Pythonista is, in many ways, the crown jewel of iOS automation and scripting for advanced users.
There’s nothing quite like Pythonista on iOS. As I’ve documented over the past three years, Ole Zorn has slowly but steadily extended the app’s capabilities with native ties to iOS interfaces via a UIKit bridge, support for location and the Reminders database, and even matplotlib and motion sensors. As it stands today, Pythonista is, by far, the richest and most powerful scripting app to integrate with native iOS features. Despite the variety of options now available for iOS automation and the continued evolution of iOS that cut down the number of tasks I need to automate (case in point: Split View and using two apps at once), I love keeping Pythonista around for key aspects of my workflow that can’t be automated in any other way.
For the past several months, I’ve been using version 2.0 of Pythonista on my iPhone and iPad, which, after a few rejections from Apple, has been approved and is launching today on the App Store. A free update for existing customers, Pythonista 2.0 brings a refreshed UI, support for the iPad Pro, new modules, and, more importantly, a redesigned code editor and an action extension.
Behind the scenes, Pythonista 2.0 has played an essential role in helping me assemble my reviews of iOS 9 and the iPad Pro, with an action extension I rely upon for all my image uploads, OCR, text statistics, and more.
Editor
After more than a year without updates on the App Store, the biggest upgrade in Pythonista 2.0 is support for iOS 9 and the latest iOS screen sizes. Pythonista 2.0 runs properly on the iPad Pro1 with no upscaling, but it doesn’t support iOS 9 multitasking; this means you won’t be able to edit or run scripts while using the app next to something else.
You can, however, use the app itself in a split mode with the code editor on the left and the console/documentation on the right, which can be useful to write code and look up functions or output without having to swipe on the screen to change views.
From an editing standpoint, the most notable change is support for tabs to quickly switch between multiple scripts. Just as the console can be divided into multiple tabs for documentation and the web browser, the code editor can now host different scripts so you can move between them while working on a larger project. A tab can be opened by pressing the ‘+’ button in the top toolbar, or you can swipe left on a file in the left sidebar and choose to open it in a new tab.2
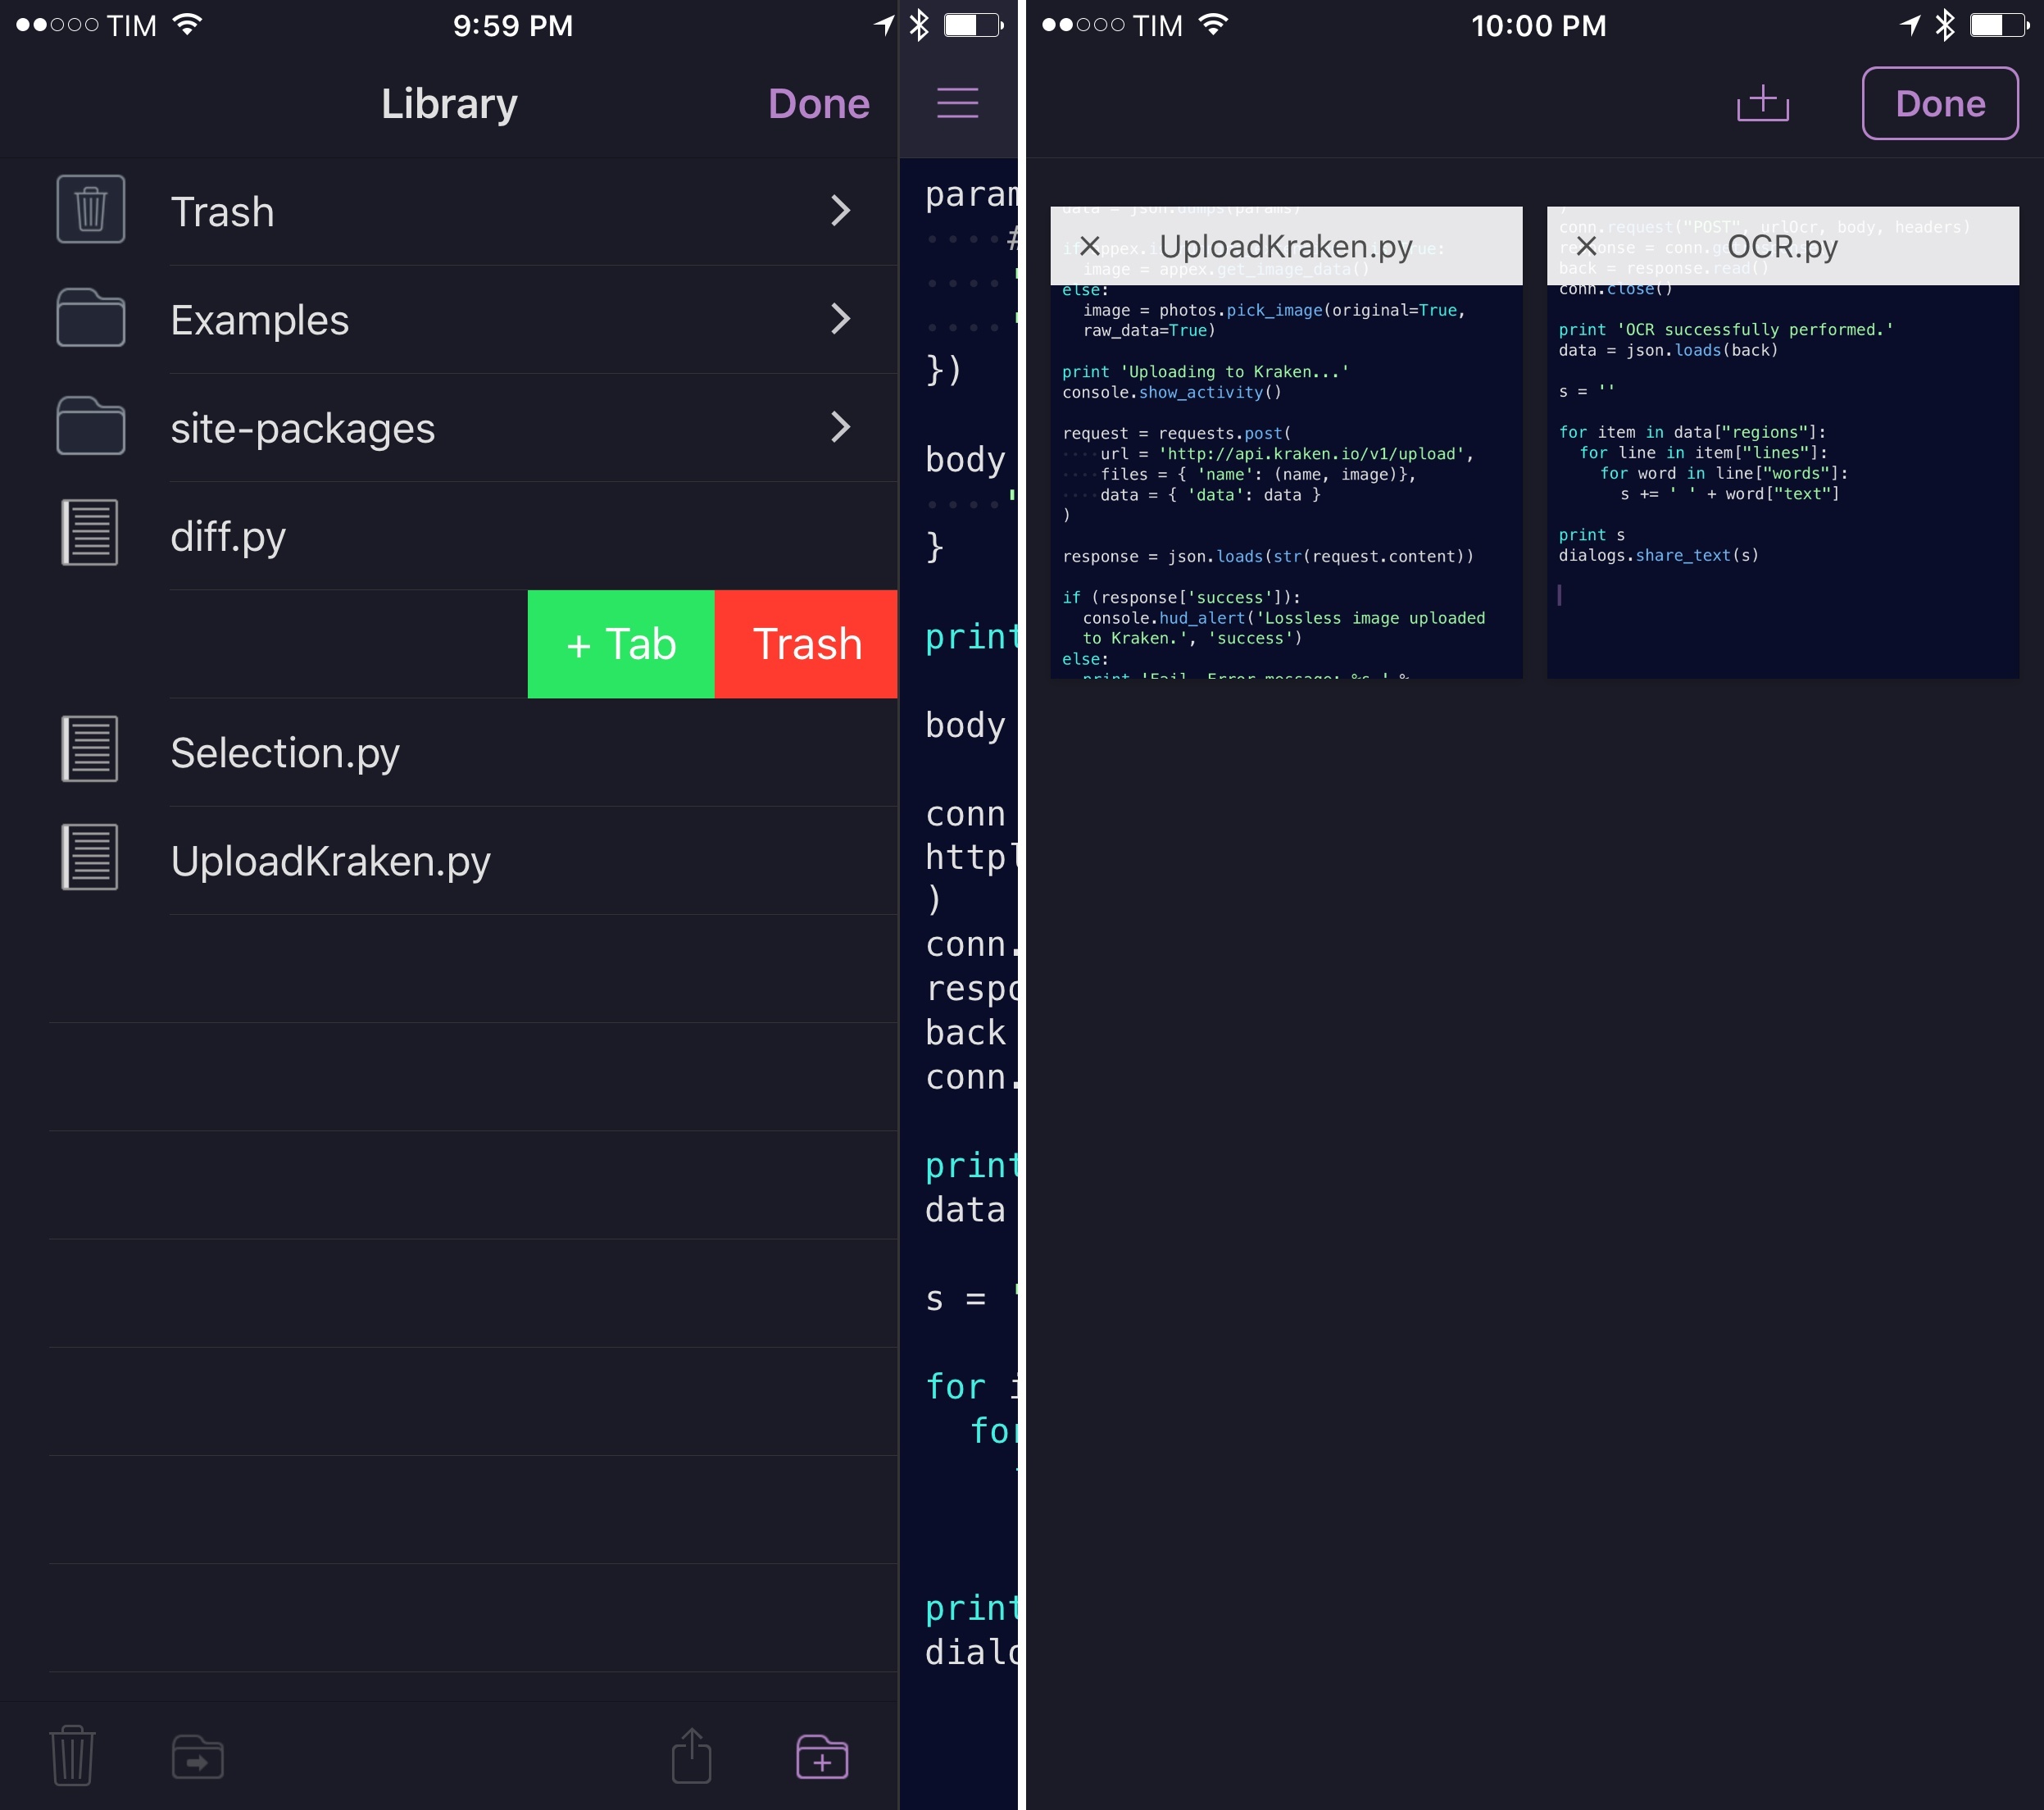
In my case, this has been useful to compare different versions of the same script and console output, as well as to work on scripts that imported functions from other scripts stored in sub-folders. If you’re running large codebases in Pythonista on iOS, tabs are a handy timesaver.
Generally speaking, Pythonista’s code editor has been polished and updated with tons of smaller improvements in this releases. Themes have been refined and extended with more choice and they look better now. The contextual sharing menu (top right) has a new look and it’s easier to create actions based on scripts that act on what you’re currently editing. When you select something in the editor, a new ‘Highlights’ option of the copy & paste menu lets you show all entries of the same selection in a script, so you can see where, say, you have to fix a mistake or where a variable is repeated.
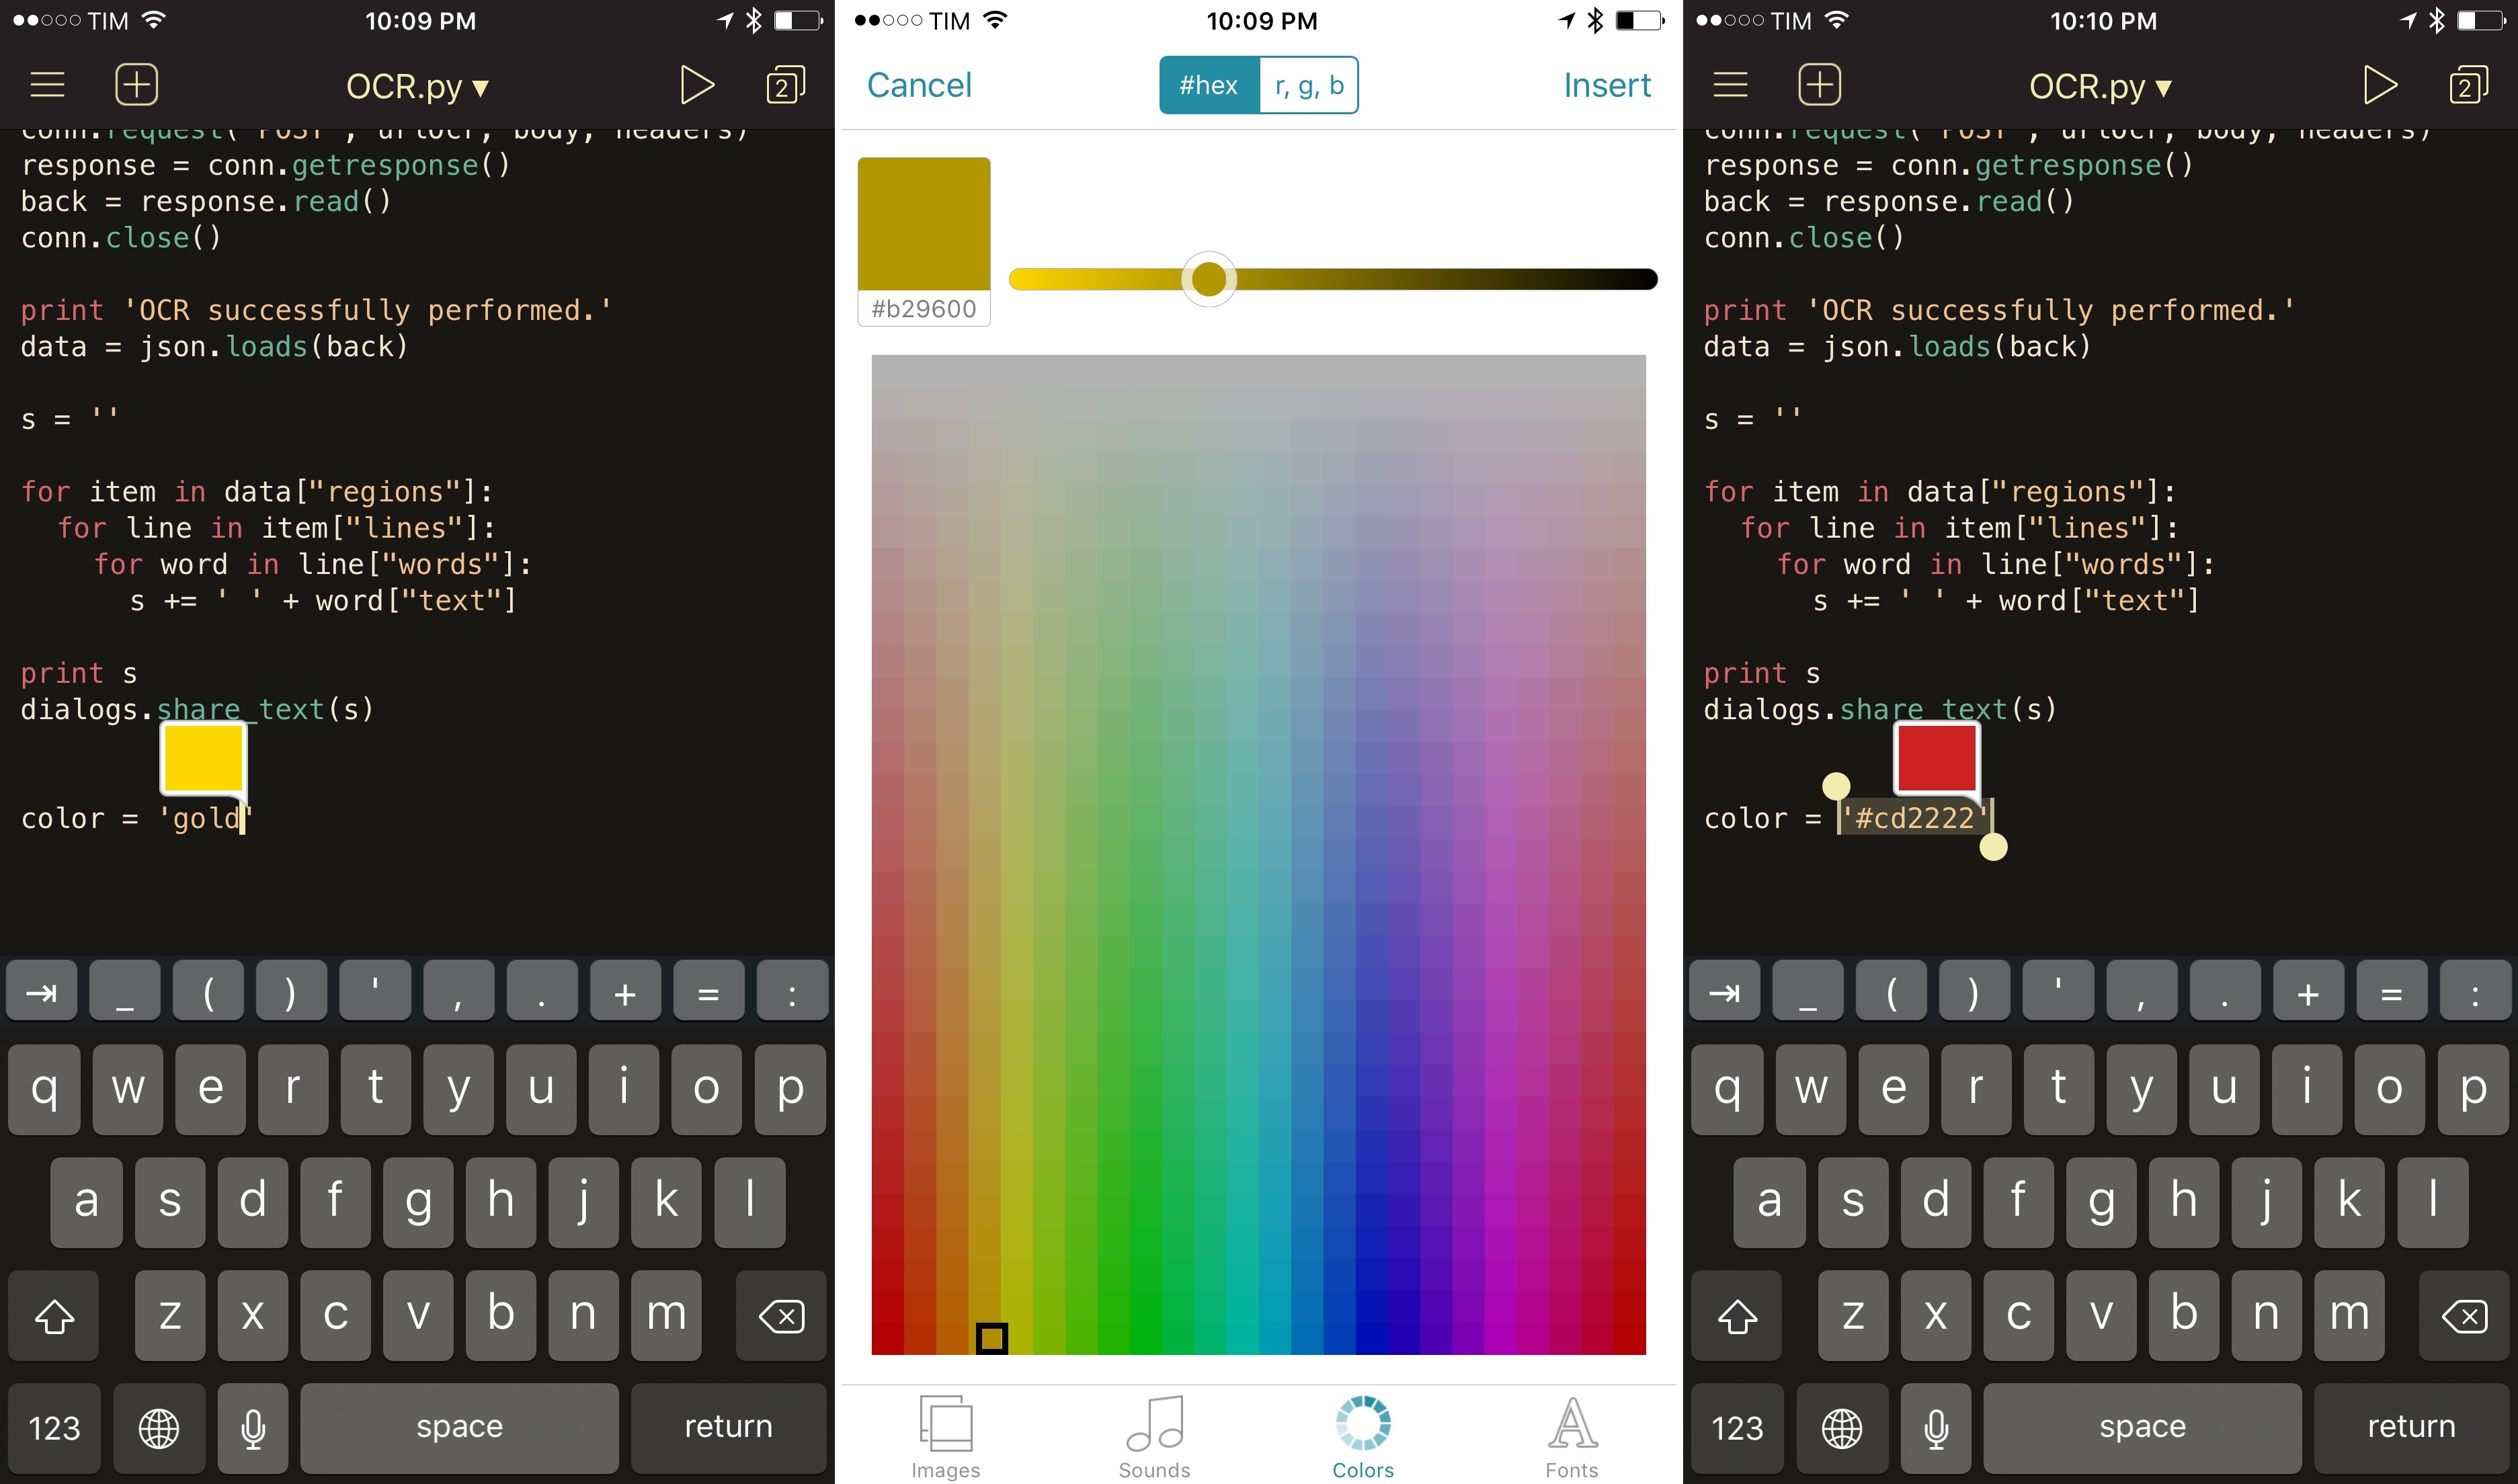
Perhaps my favorite touch, though, is support for color previews through a new popup panel. When the cursor is in a color string (either a color value or something like 'red'), the associated color will be previewed in a smaller popup next to it; tap it, and you’ll be able to tweak the color and insert its HEX or RGB value back into the script, replacing the color that was automatically selected by the cursor.
Extension
With version 1.5 released in June 2014 and no updates since, Pythonista missed out on the entire iOS 8 extension craze – which Workflow cleverly capitalized on with its powerful action extension. With version 2.0, Zorn is opening up Pythonista to integration with other apps with its own action extension that can be used to run Python scripts anywhere on iOS. I’ve been using the extension for two key scripts on my iPad and iPhone for the past few months, and it has allowed me to save hours I would have spent doing the same tasks manually each time.
Pythonista’s extension is powered by the appex module, which grants the extension access to input from the system share sheet. While you can run Python scripts from the extension without any appex functions (for instance, if you just want to run a script to access data from the clipboard, you won’t need the dedicated appex module), it’s only with appex that you’ll be able to read input from the share sheet and do something with it. The Pythonista extension works with four data types from the share sheet: text, URLs, images, and VCards. There’s also a function to check whether a script is being run from the extension and perform different actions if necessary.
The main idea is that, by integrating the extension with other apps, you’ll get the ability to run scripts that act on data shared by apps, such as links and images. While not as advanced as Workflow’s automation environment3, Pythonista’s extension will let you enjoy the full benefits of Python, bringing, for example, the power of scripts to Apple’s Photos app or Safari.
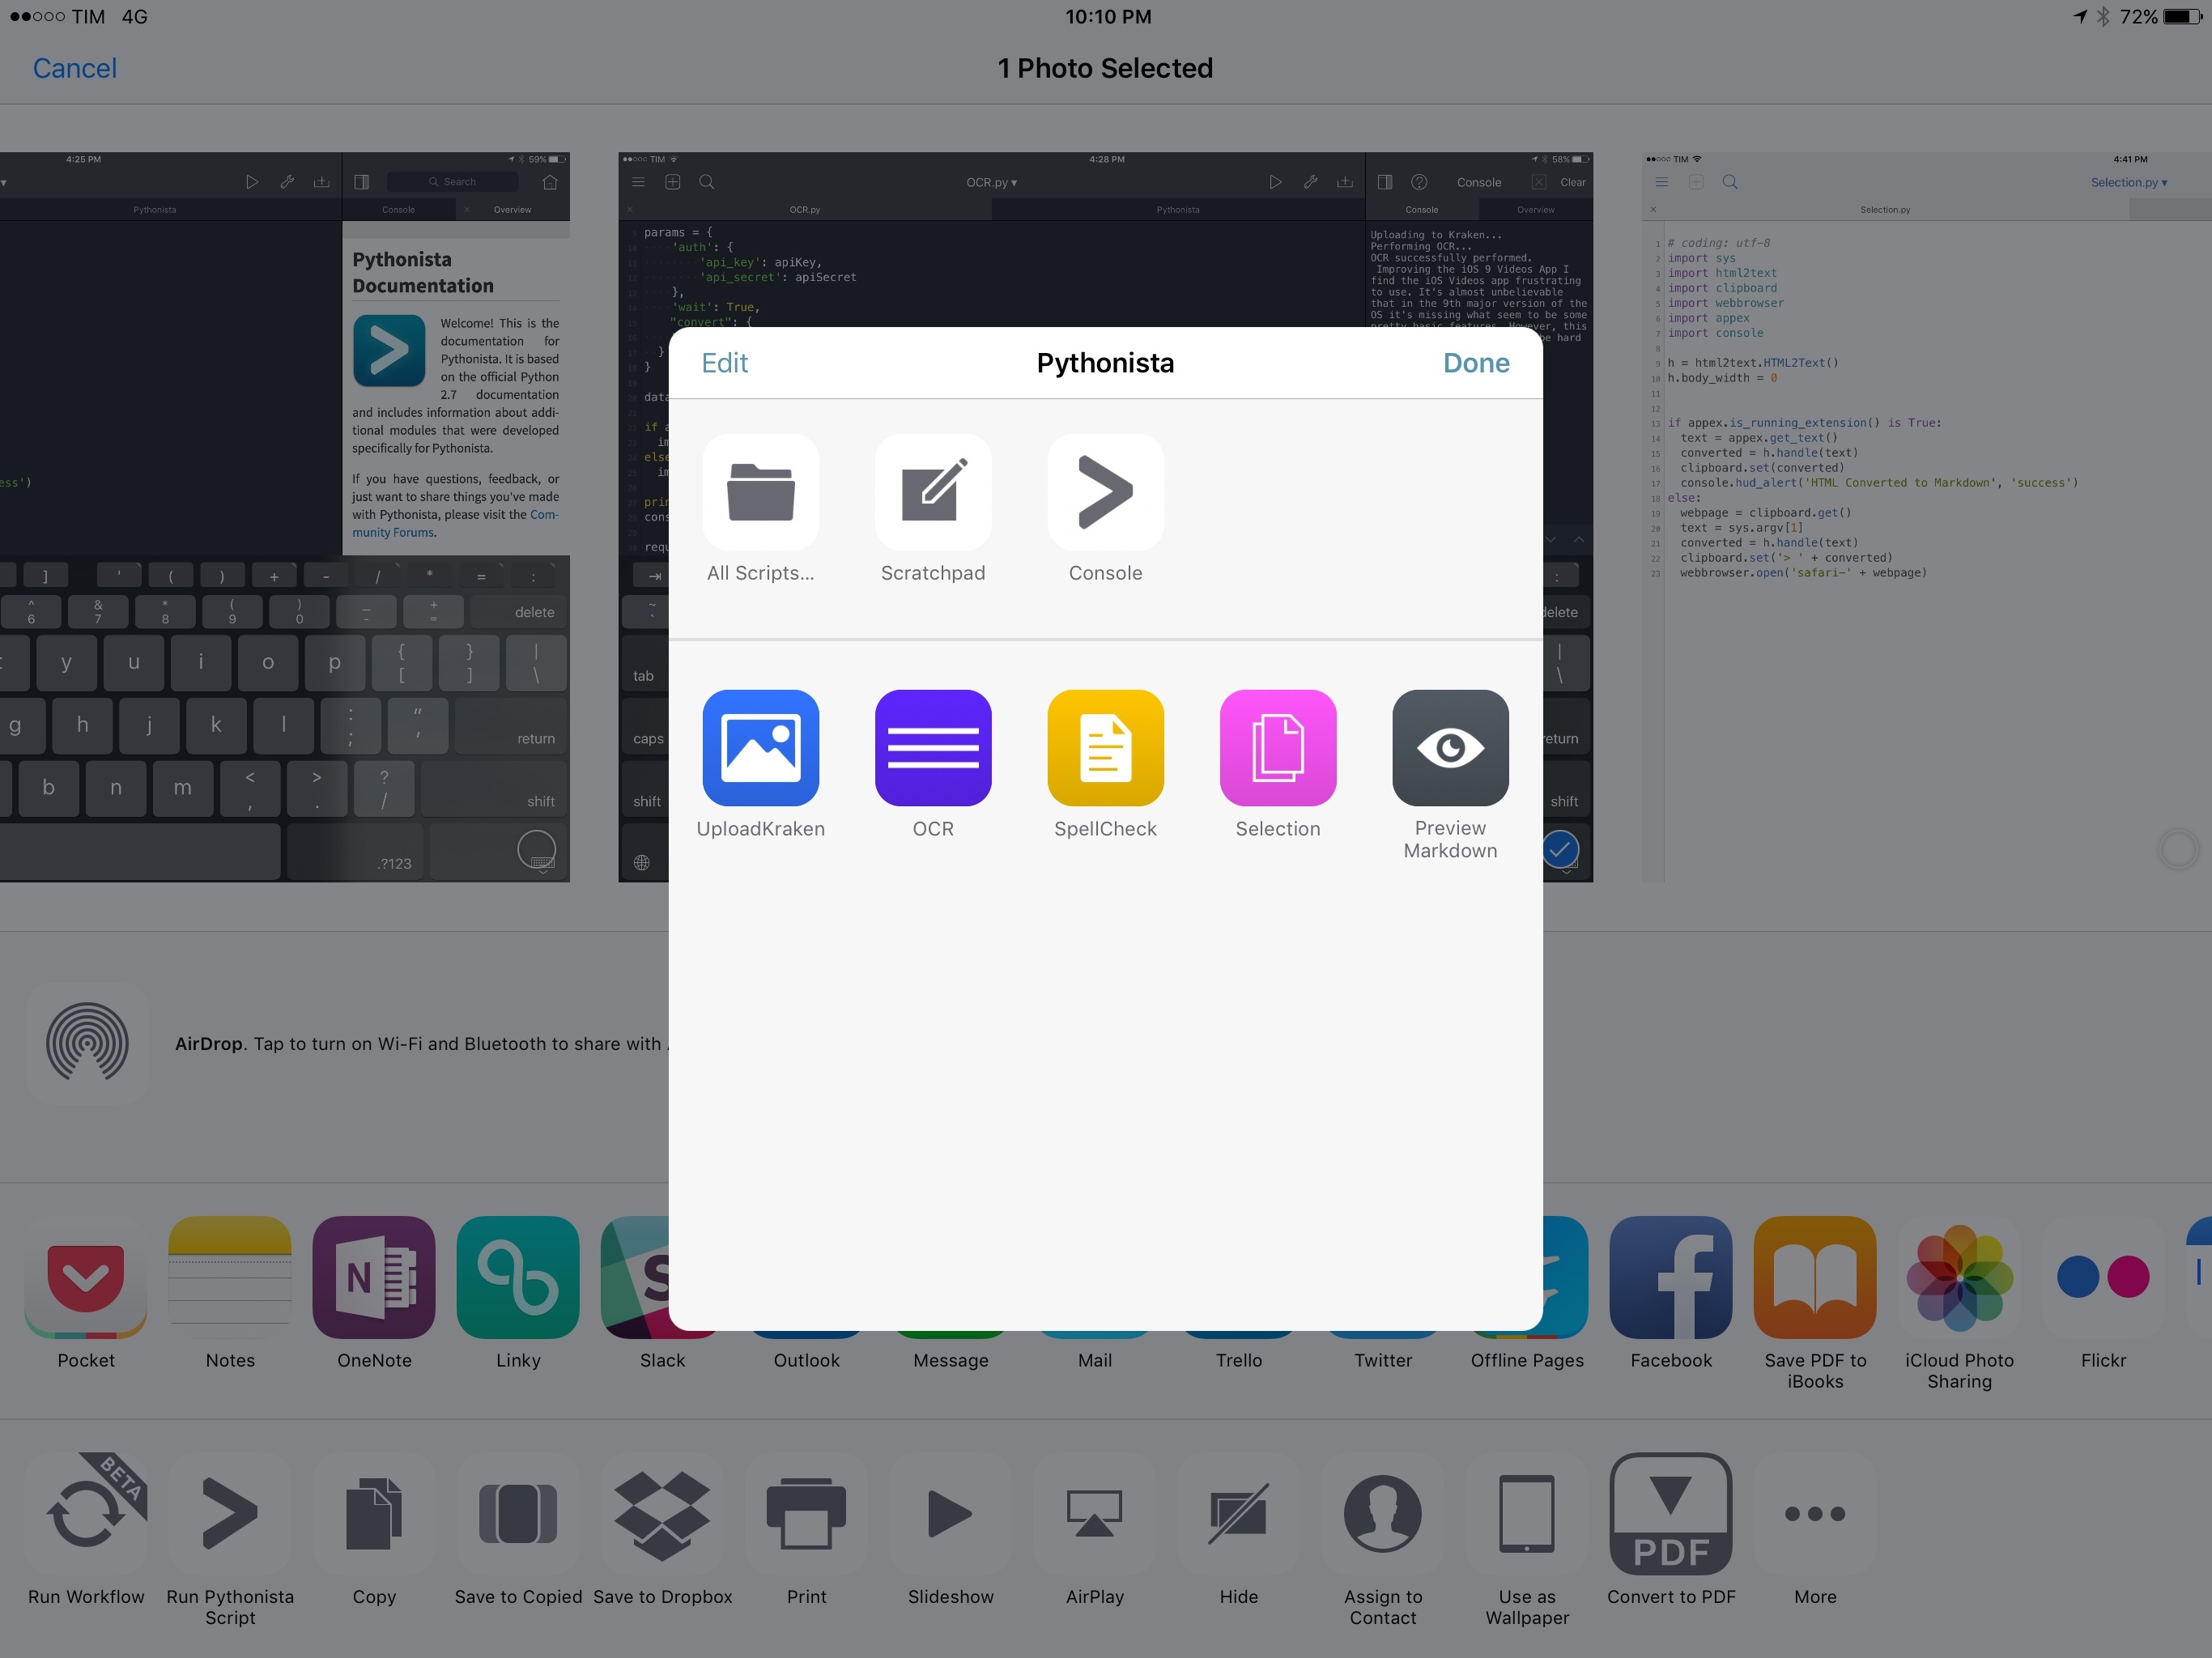
First, you’ll have to configure the extension to your needs. The extension is organized in two areas: at the top, you’ll find buttons to view and edit all your scripts directly from the share sheet or open an interactive scratchpad and console. I haven’t used these much, but it’s pretty amazing that you can edit scripts from the extension itself without having to open Pythonista at all.
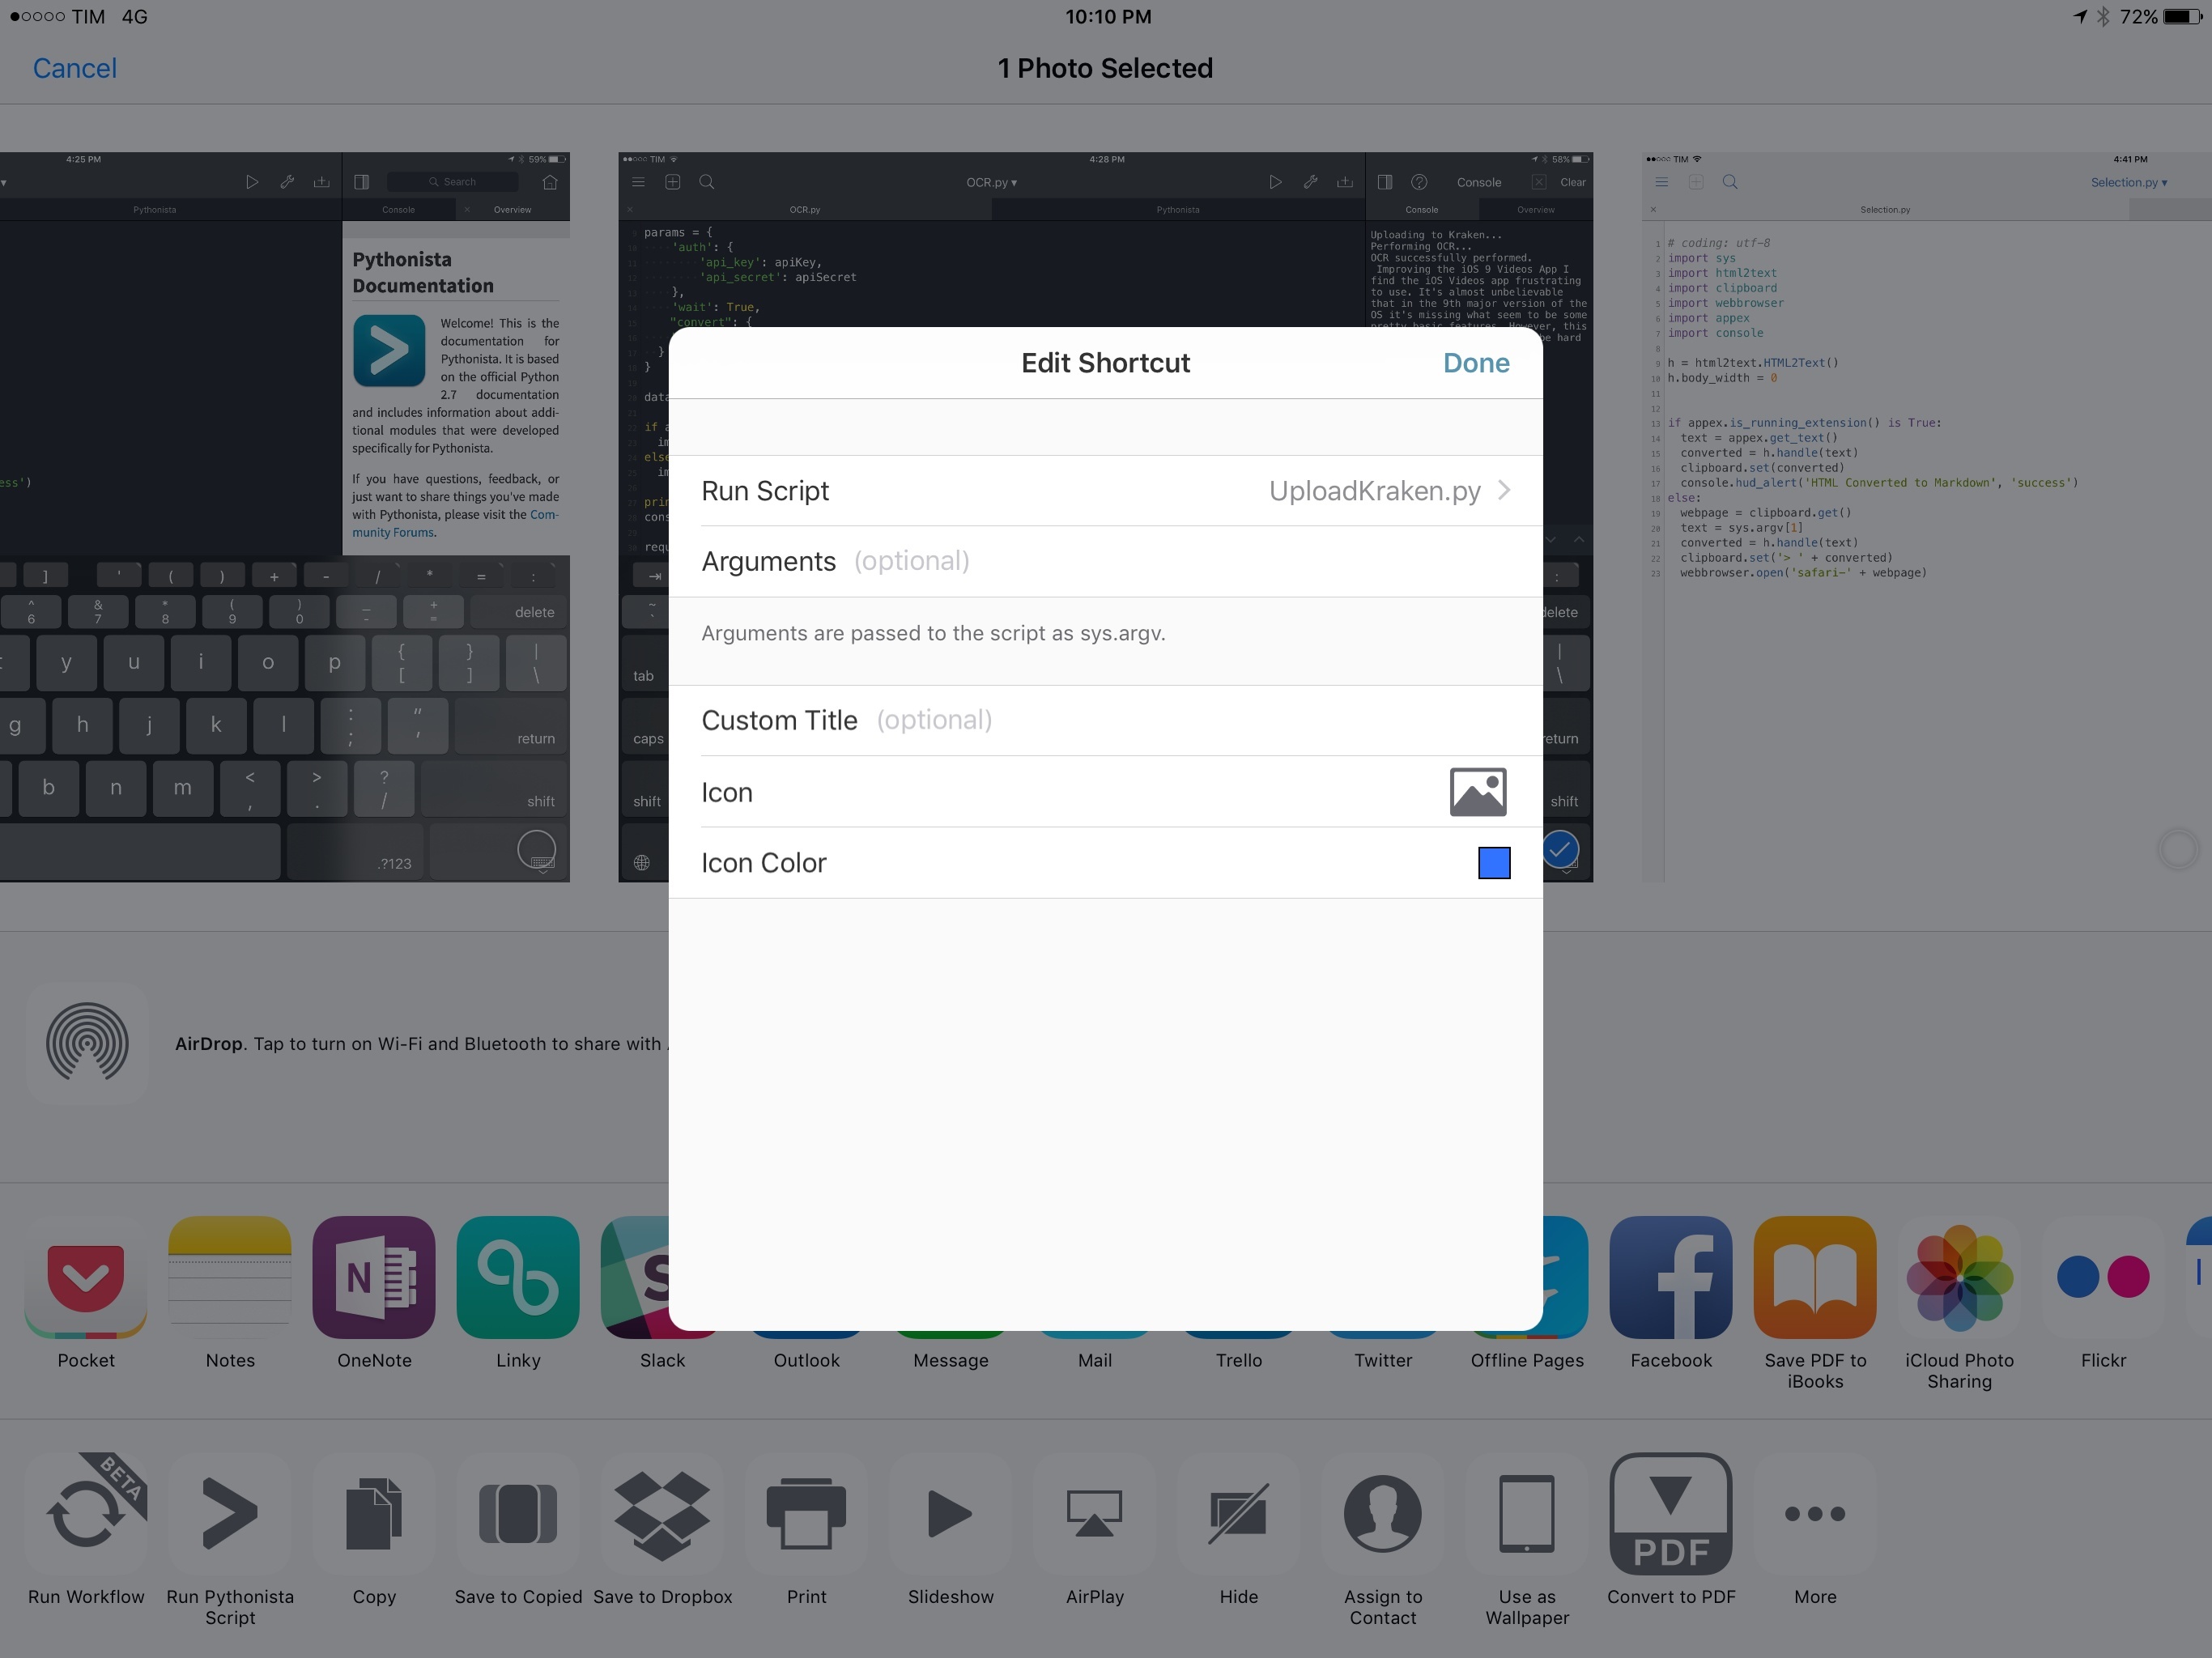
In the top left, an Edit button will enable you to add shortcuts for existing scripts, which can have a custom icon with a glyph and color of your choice. It’s important to remember that scripts can only be pinned to the extension this way – you won’t find a “make this script available in the action extension” option in the Pythonista app. If you want, you can also run scripts with custom arguments.
Once your script shortcuts are set up in the extension, you’re off to the races. To give you an idea of how I’ve been using the Pythonista extension in my iOS workflow, I’ve included some examples below.
Uploading Images
A few readers have asked me to share my image optimization and upload setup after I struggled for weeks to find an ideal solution. Since early 2015, I’ve been uploading all MacStories images to Kraken for lossy conversion: Kraken works great for us because it’s cheap, its lossy algorithm is comparable to the excellent ImageOptim (if not better) and it directly integrates with Rackspace Cloud Files, which we use to serve images via CDN.
Since last year, I’ve been optimizing and uploading all my images from the iPhone and iPad with a single script run from the Photos app thanks to the Pythonista extension. Because I already use Photos to manage all my photos and screenshots, Pythonista has enabled me to automate what would take ages with a web app (there are no iOS apps that can do what I need natively) – from an app I’m familiar with. This setup is only possible with Pythonista and it is, frankly, amazing for my needs – I’ve uploaded thousands of images with it. My iOS 9 review, my coverage of the iPad Pro, all my app reviews – if you’ve seen a screenshot from me on MacStories, it came from the Pythonista extension.
Here are the scripts I use to upload an existing image from Photos to Kraken with lossless settings, and then convert to lossy and mirror to Rackspace Cloud Files:
UploadKraken (from extension)
# coding: utf-8
import requests
import json
import appex
import datetime
import clipboard
import keychain
import photos
import console

timestamp = datetime.datetime.now()
name = timestamp.strftime("%Y-%m-%d-%H%M%S") + '.jpeg'

apiKey = 'YOUR_API_KEY'
apiSecret = 'YOUR_API_SECRET'

params = {
    'auth': {
        'api_key': apiKey,
        'api_secret': apiSecret
    },
    'wait': True,
        "convert": {
    "format": "jpeg"
  }
}

data = json.dumps(params)

if appex.is_running_extension() is True:
    image = appex.get_image_data()
else:
    image = photos.pick_image(original=True, raw_data=True)

print 'Uploading to Kraken...'
console.show_activity()

request = requests.post(
    url = 'http://api.kraken.io/v1/upload',
    files = { 'name': (name, image)},
    data = { 'data': data }
)

response = json.loads(str(request.content))

if (response['success']):
    console.hud_alert('Lossless image uploaded to Kraken.', 'success')
else:
    print 'Fail. Error message: %s ' % response['error']

from Kraken import kraken
final = kraken(response['kraked_url'])

clipboard.set(final)
import urllib, cStringIO, Image

file = cStringIO.StringIO(urllib.urlopen(final).read())
img = Image.open(file)
img.show()
Kraken (as function)
import urllib
import urllib2
import json
import console
import keychain

apiKey = 'YOUR_API_KEY'
apiSecret = 'YOUR_API_SECRET'
rackspaceApi = 'YOUR_RACKSPACE_API_KEY'

def kraken(image_link):
    params = {
    'auth': {
        'api_key': apiKey,
        'api_secret': apiSecret
    },
    'url': image_link,
    'wait': True,
    "cf_store": {
    "user": "macstories",
    "key": rackspaceApi,
    "container": "Kraken",
    "ssl": True
  },
    'lossy': True # Set lossy upload because UploadKraken.py doesn't upload as lossy first. This lets you compare image savings with the original image later.
}

    url = 'https://api.kraken.io/v1/url'

    console.hud_alert('Uploading lossy image to Kraken...', 'success')
    data = json.dumps(params)
    request = urllib2.Request(url, data)
    response = urllib2.urlopen(request)
    jsonRes = json.loads(str(response.read()))

    if (jsonRes['success']):
        print 'Success. Saved ' + str((jsonRes['original_size']-jsonRes['kraked_size'])/1000) + 'kb in total.' + '\n' + 'Optimized image URL: ' + jsonRes['kraked_url']
        return jsonRes['kraked_url']
    else:
        print 'Fail. Error message: %s ' % jsonRes['error']


def main():
    # If not called by other script, get image link from iOS clipboard.
    import clipboard
    image_link = clipboard.get()
    final = kraken(image_link)
    clipboard.set(final)

if __name__ == '__main__':
    main()
As far as the extension is concerned, the key part is lines 30-33 in the first script. Here, the script checks whether it’s running from the extension or outside of it (in the main app); if it’s running in the extension, it reads raw image data for a single image shared via the share sheet, which is used to prepare the initial upload to Kraken. If the script is not running in the extension (it returns False after the check), then a native image picker is presented, which also returns raw image data (as byte string) after picking an image.
Here’s a video of UploadKraken script running in the extension (recorded with Vidyo, may it rest in peace).
As you can see, the extension is able to show console output for a successful upload (though it can’t display the network activity spinner of line 36), it shows calculated image savings as returned by Kraken, and, at the end, it presents a preview of the final image upload as fetched from Rackspace Cloud Files.
This script, run with this setup from the extension, is how I’ve been uploading images used in MacStories articles for almost a year. And since the iPad gained Split View with iOS 9, it became even more convenient for me to double check screenshots, pick the ones I like, and upload them one by one for use in a blog post.
In fact, take a look at how I do it with the video below:
While I’m editing in 1Writer, I can bring up the Photos app in Split View, find the screenshot I need, and start the uploading process with the Pythonista extension. When it’s done (it can take a while for heavy screenshots), it’ll copy the final image URL in the clipboard so I can find the point in the document where I want to use the image and paste it in.
As someone who’s been looking for the perfect image optimization and uploading workflow for years, the combination of Kraken and Pythonista on iOS has saved me time, energy, and, ultimately, money. I love everything about this script and how it runs in the extension.
Automated OCR
The other script I’m regularly using through the action extension is based on Microsoft’s Project Oxford, and it lets me perform OCR on images and obtain extracted plain text in seconds.
Writing about apps and the App Store often, I find myself having to take screenshots of the App Store app on iOS, where descriptions for featured sections and pages are not selectable as text. Every time Apple launches a new collection or feature on the App Store, I have to take a screenshot and extract text from it with OCR if I want to quote that text on MacStories. Occasionally, the same problem occurs with webpages or apps outside of the App Store – just as an example, last week I had to extract text from a textshot shared by Jack Dorsey on Twitter.
Over the years, I’ve used a variety of OCR-powered apps to grab text from images, such as Prizmo. Dedicated apps are great if you routinely have to scan images and grab text from them; however, I may need to extract text from a screenshot once or twice a month, and when I do, it’s usually a time-sensitive news piece that I want to publish quickly. Thus, I wanted the process to be fast, automated, and customized to my needs.
Project Oxford is one of the many cool projects by Microsoft these days. Free to use within certain limits right now, among its APIs there’s a Computer Vision one with an OCR mode that, as Microsoft describes it, “detects text in an image and extracts the recognized characters into a machine-usable character stream”. Using Microsoft’s sample code and my own code for image uploads to Kraken, I put together an action extension script that, given an image shared via the share sheet, uploads everything to Project Oxford’s servers and returns text in a few seconds.
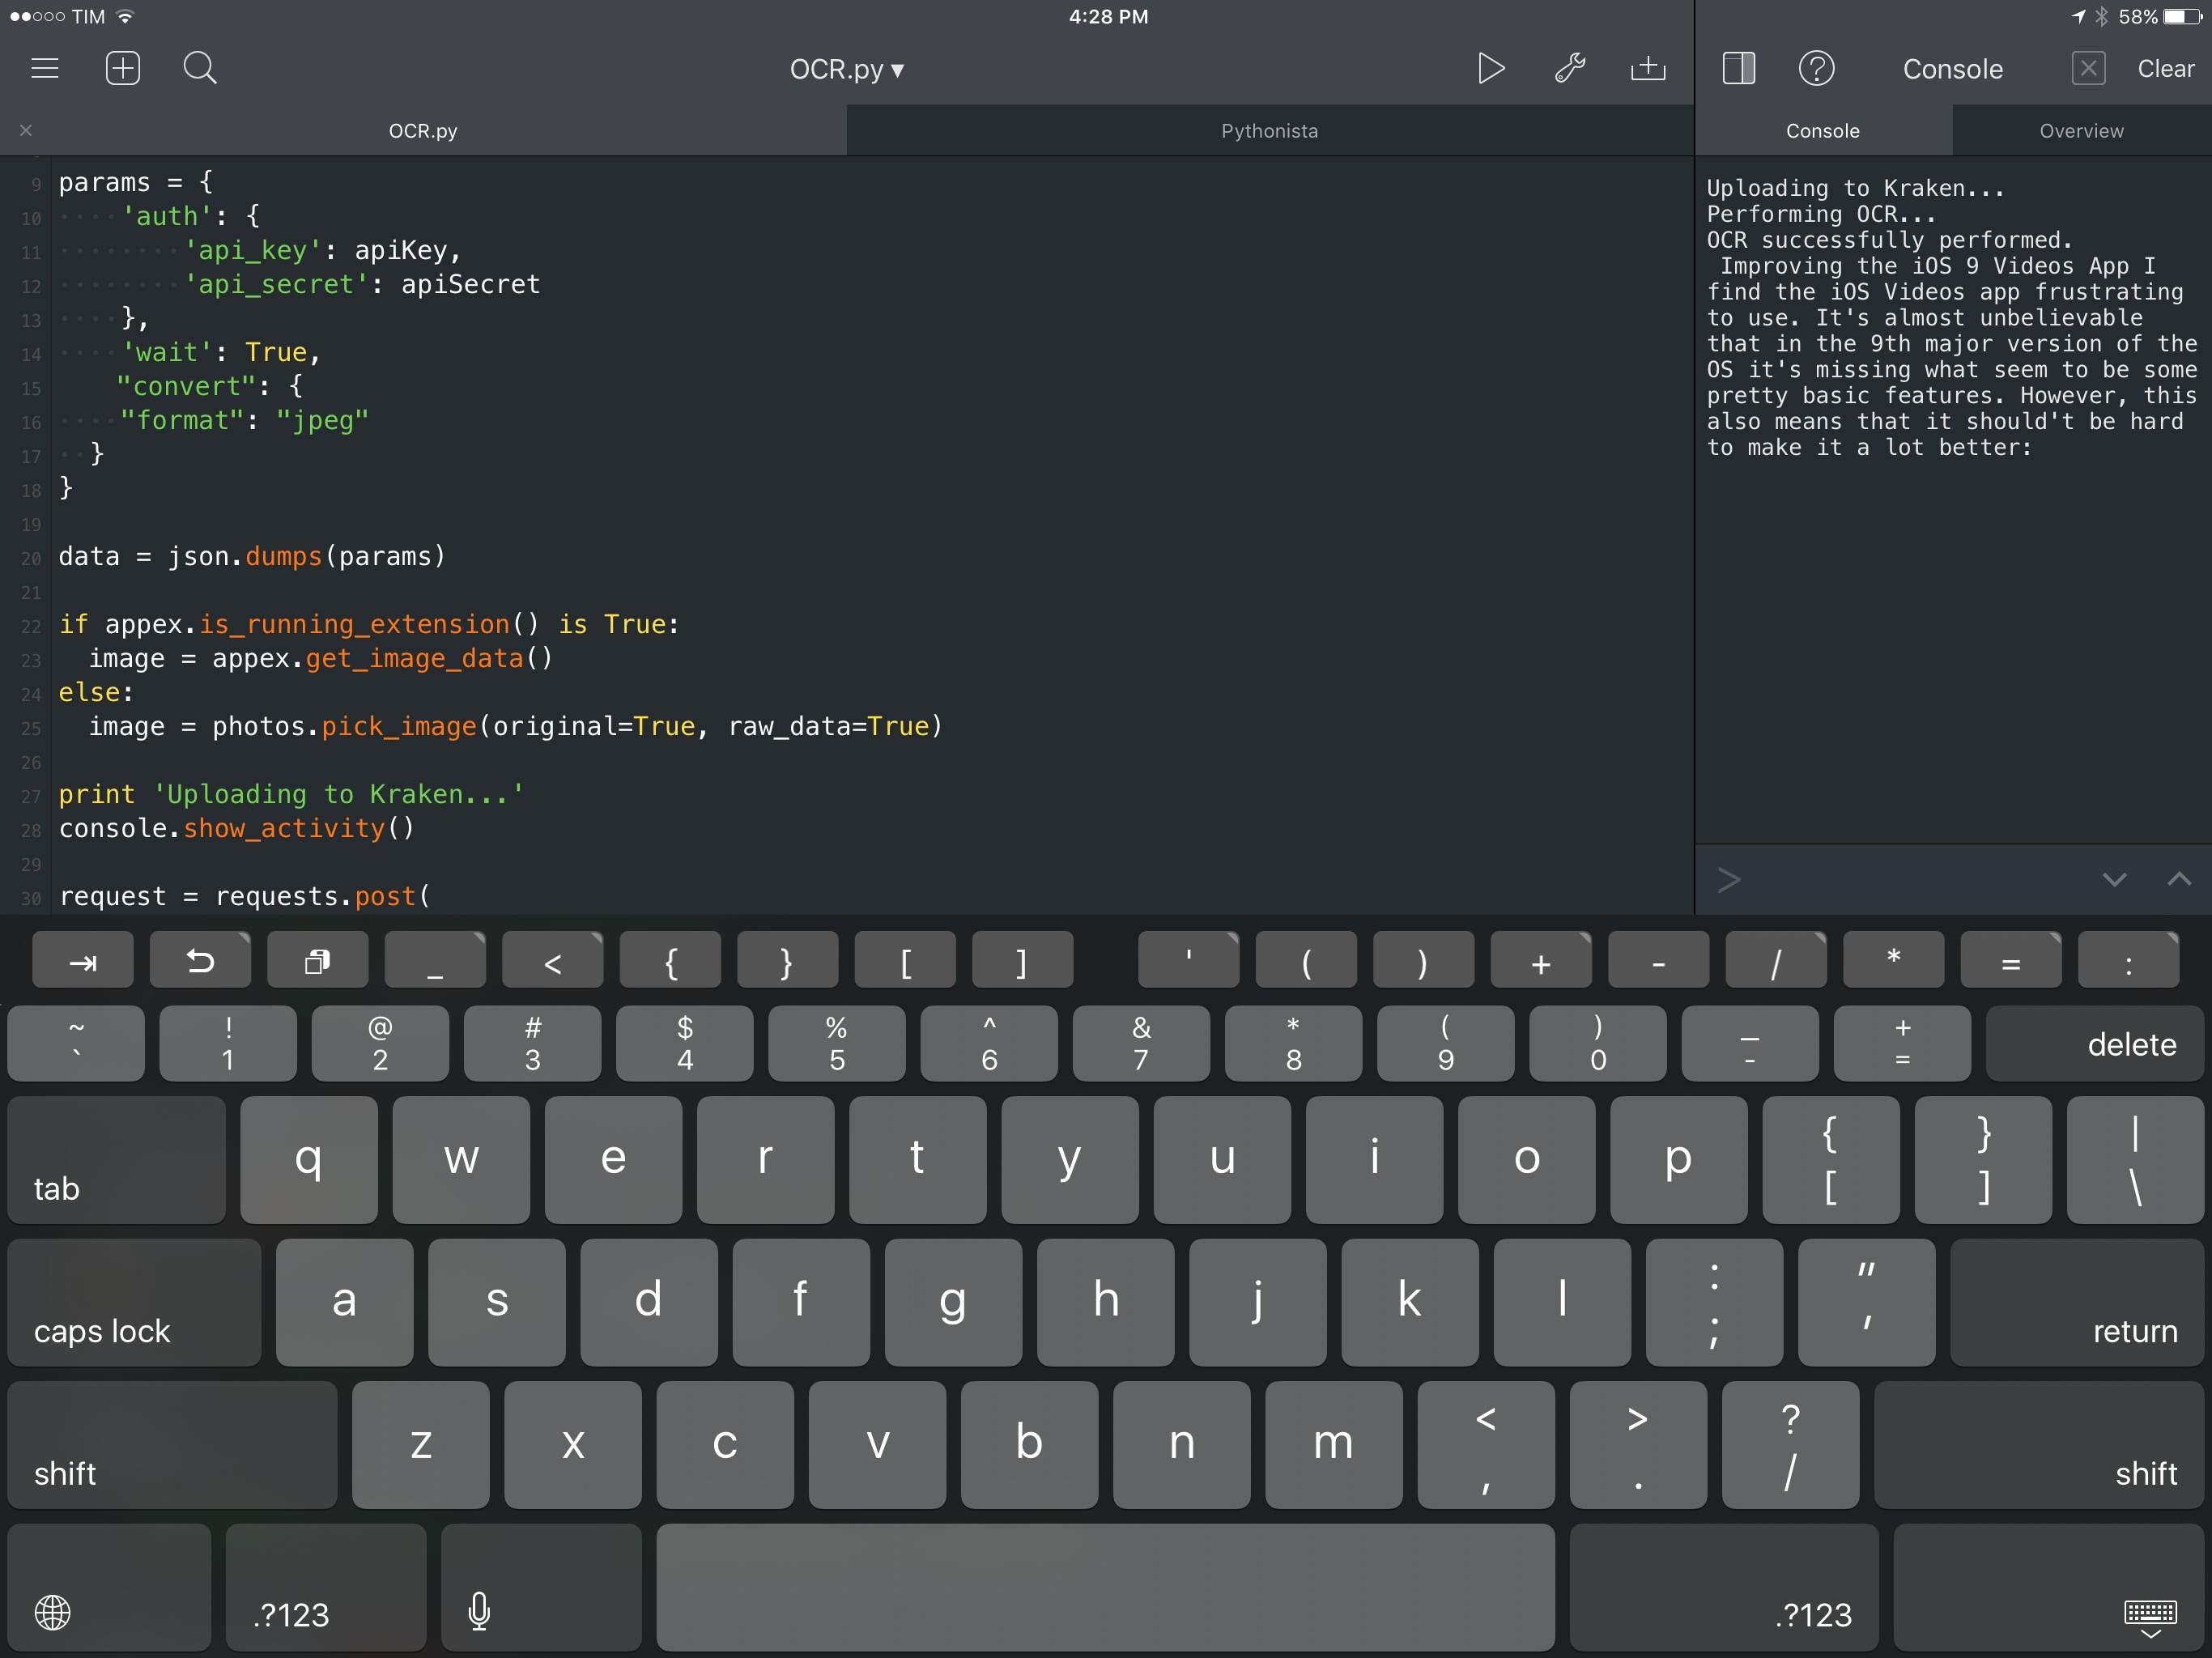
Here’s what the script looks like:
import httplib, urllib, base64, clipboard, json, requests, datetime, appex, photos, console, dialogs

timestamp = datetime.datetime.now()
name = timestamp.strftime("%Y-%m-%d-%H%M%S") + '.jpeg'

apiKey = 'YOUR_API_KEY'
apiSecret = 'YOUR_API_SECRET'

params = {
    'auth': {
        'api_key': apiKey,
        'api_secret': apiSecret
    },
    'wait': True,
        "convert": {
    "format": "jpeg"
  }
}

data = json.dumps(params)

if appex.is_running_extension() is True:
    image = appex.get_image_data()
else:
    image = photos.pick_image(original=True, raw_data=True)

print 'Uploading to Kraken...'
console.show_activity()

request = requests.post(
    url = 'http://api.kraken.io/v1/upload',
    files = { 'name': (name, image)},
    data = { 'data': data }
)

response = json.loads(str(request.content))

if (response['success']):
    console.hud_alert('Lossless image uploaded to Kraken.', 'success')
    final = response['kraked_url']
else:
    print 'Fail. Error message: %s ' % response['error']

urlOcr = '/vision/v1/ocr'

headers = {
    # Request headers
    'User-Agent': 'python',
    'Ocp-Apim-Subscription-Key': 'YOUR_PROJECT_OXFORD_KEY',
}

params2 = urllib.urlencode({
    # Request parameters
    'language': 'en',
    'detectOrientation': 'true',
})

body = {
    "Url": final,
}

print 'Performing OCR...'

body = json.dumps(body)

conn = httplib.HTTPSConnection('api.projectoxford.ai')
conn.request("POST", urlOcr, body, headers)
response = conn.getresponse()
back = response.read()
conn.close()

print 'OCR successfully performed.'
data = json.loads(back)

s = ''

for item in data["regions"]:
    for line in item["lines"]:
        for word in line["words"]:
            s += ' ' + word["text"]

print s
dialogs.share_text(s)
And here’s the script in action on my iPad:
The first half of the script (lines 1-42) is my Kraken script adapted to put an image on Kraken’s CDN and return its public URL. Project Oxford requires an image to be available at a URL so it can fetch it and analyze text contained inside it; for convenience, I use Kraken without mirroring to Cloud Files because I don’t need these images to be in the same CDN where I keep images for MacStories. Like with the Kraken script, you’ll need a Project Oxford API key to run this with your credentials.
The actual processing happens in lines 66-70, where the script posts the image URL to Project Oxford and gets a response back. In my experience, Project Oxford’s OCR API has been extremely fast with images where text is laid out with good contrast against its background – often faster than native apps which perform OCR locally on an iOS device. Results are also accurate 90% of the time – I’m impressed with Microsoft’s OCR and I wouldn’t be surprised to see more developers implementing it soon in their own apps.
In lines 73-83, the script assembles text from the response by combining words from each line from each region of text found in an image. Finally, extracted text is printed in the console and passed to the iOS share sheet via the dialogs module.
This script is another example of the flexibility of Pythonista’s new extension. With two taps, I can run an OCR script for any image in the Photos app, allowing me to extract text via an extension that lives alongside my photos, without forcing me to open Pythonista or another separate app.
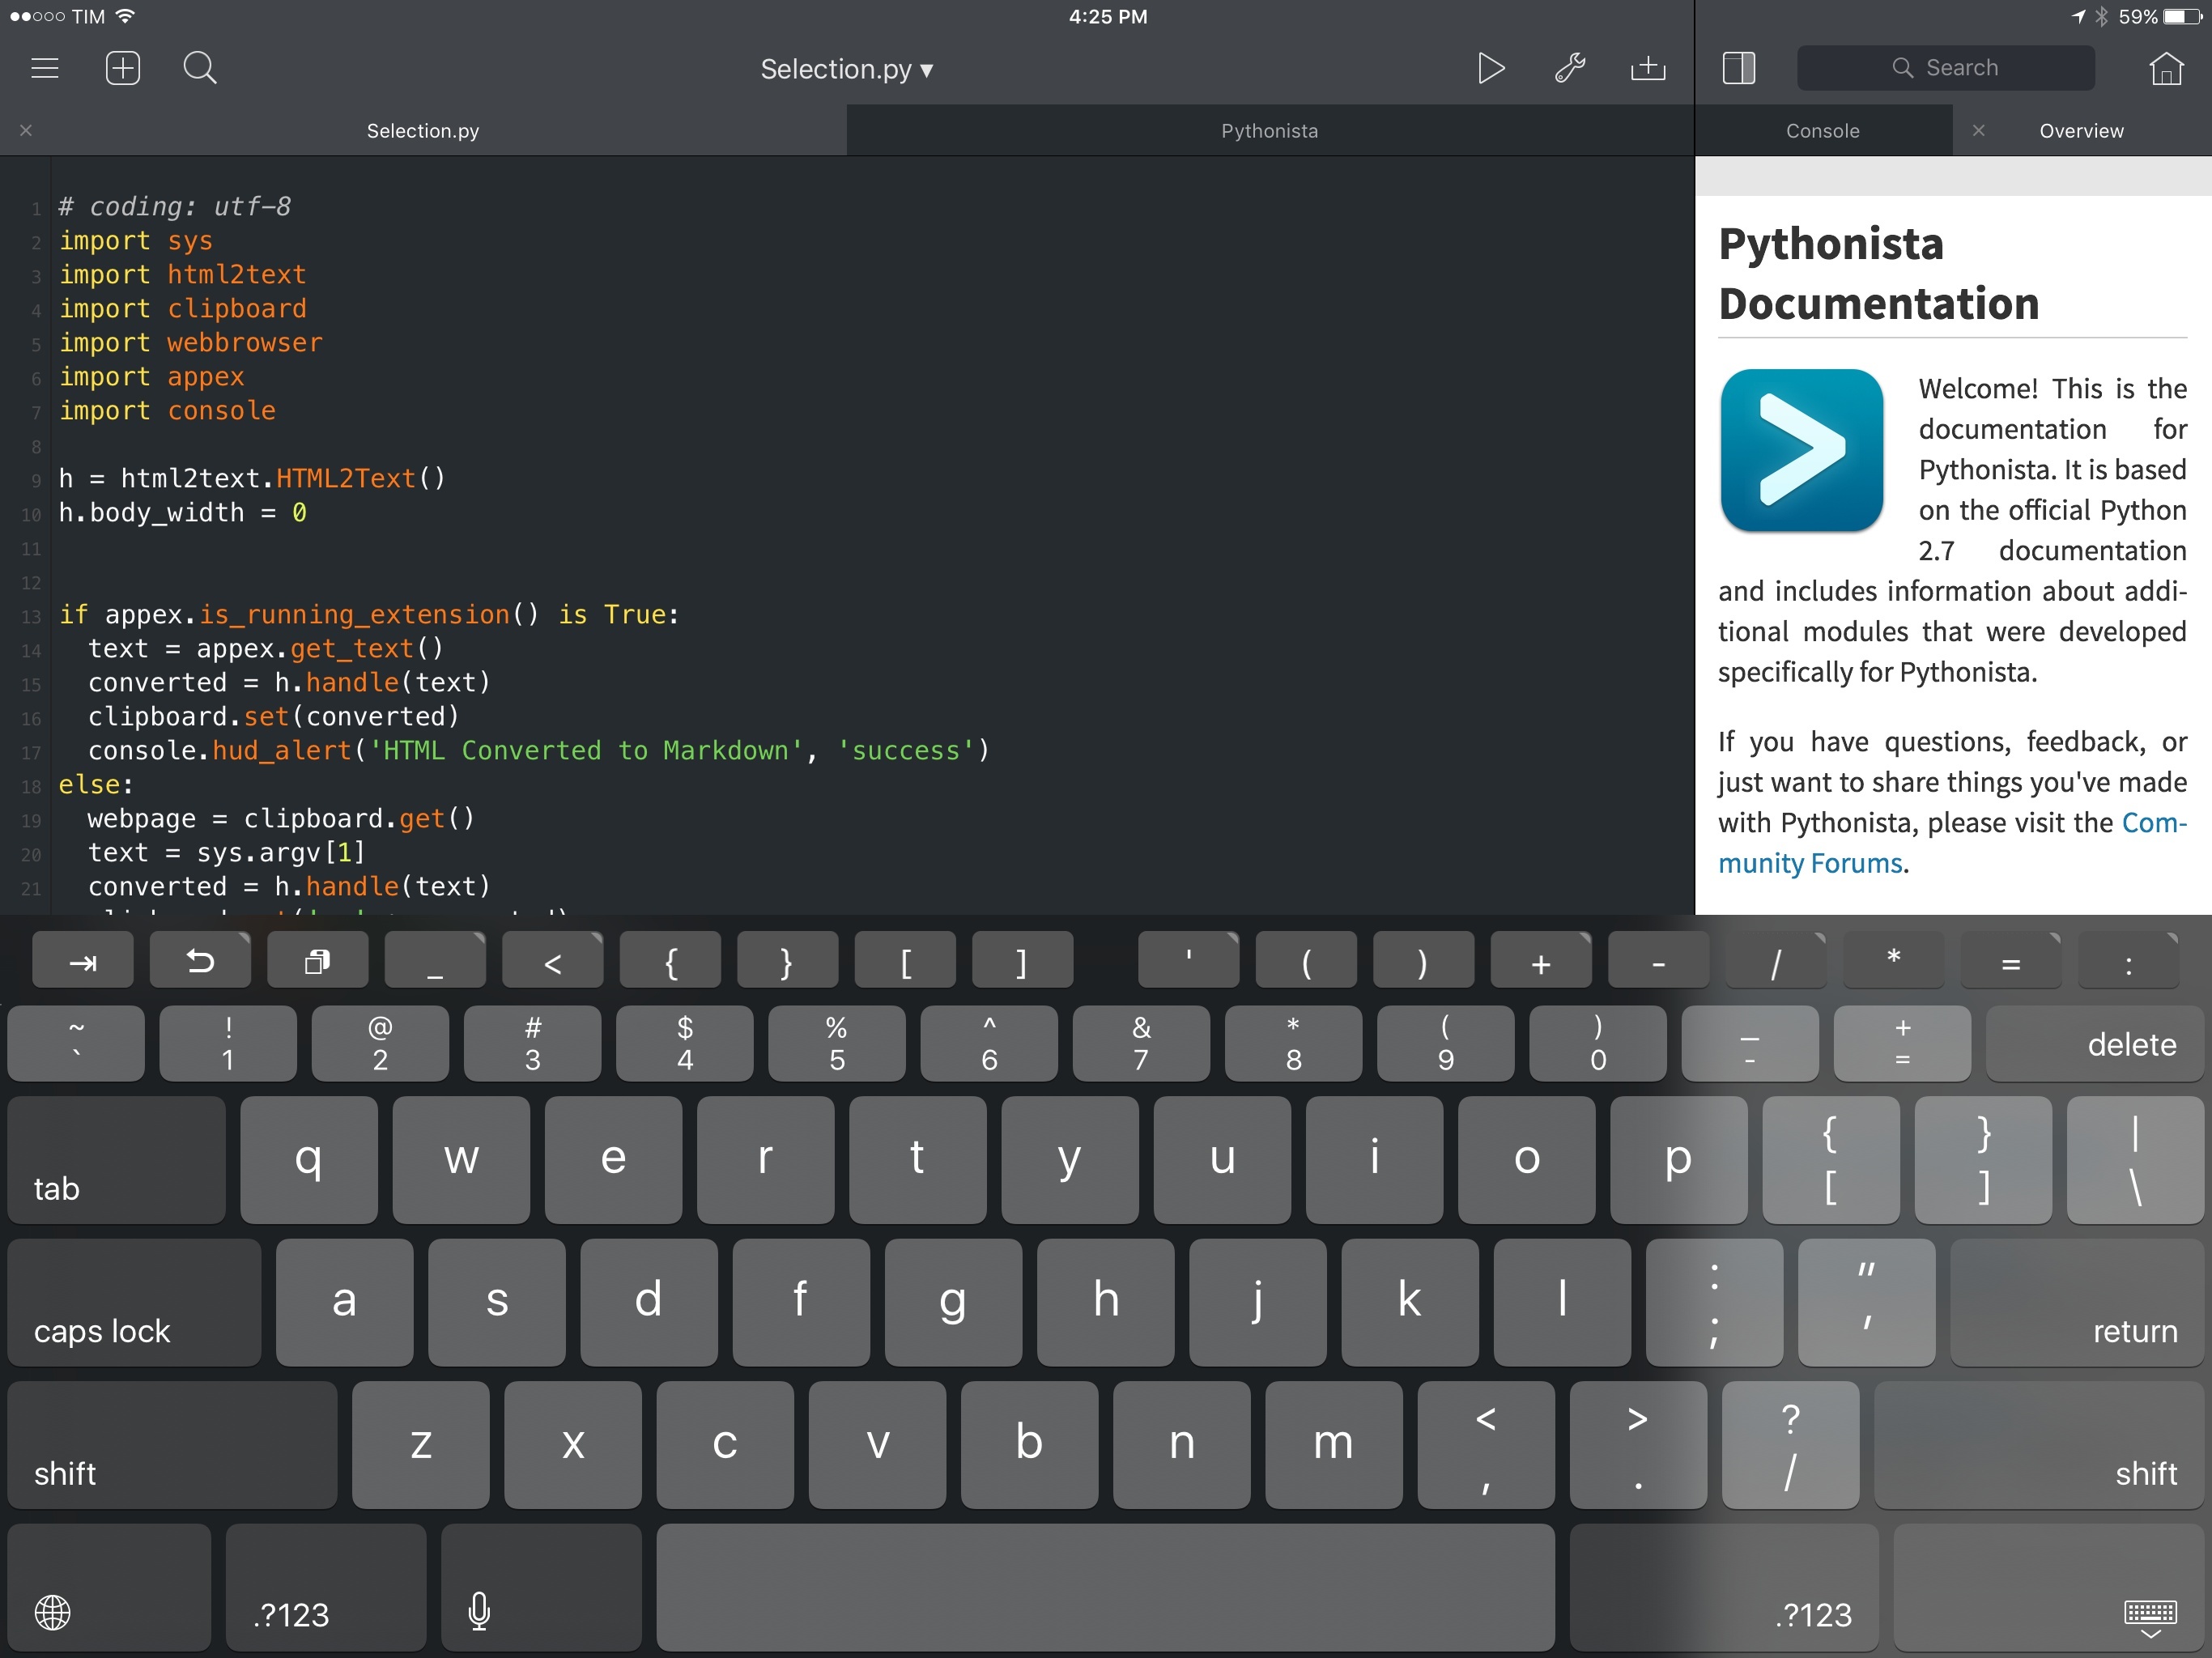
Converting HTML to Markdown
The third script I’ve been using both via the action extension and in combination with Workflow lets me convert HTML text to Markdown via html2text.
# coding: utf-8
import sys
import html2text
import clipboard
import webbrowser
import appex
import console

h = html2text.HTML2Text()
h.body_width = 0


if appex.is_running_extension() is True:
    text = appex.get_text()
    converted = h.handle(text)
    clipboard.set(converted)
    console.hud_alert('HTML Converted to Markdown', 'success')
else:
    webpage = clipboard.get()
    text = sys.argv[1]
    converted = h.handle(text)
    clipboard.set('> ' + converted)
    webbrowser.open('safari-' + webpage)
I use this script in two ways. If I want to create a new linked post for MacStories, I run this workflow to get text selected from a webpage as HTML, send it to Pythonista to turn it into Markdown, return to the original webpage and create a linked post draft in 1Writer. This has been working well for me – now, I create every linked post with this Workflow-Pythonista combination. Even better: thanks to iOS 9.2, action extensions based on webpage selections work in both Safari and Safari View Controller.
If I don’t need to create a linked post, I can run the same script to convert HTML text passed from the Pythonista extension to Markdown and copy it to the clipboard. This is useful because apps tend to only offer Markdown to HTML conversion; with the extension, I can enjoy the power of html2text anywhere, bringing Python to any app that doesn’t offer the functionality I’d like it to have.
Pythonista 2.0
There are dozens of other new features in Pythonista 2.0 I didn’t cover. The scene module has been completely revamped and it now allows the creation of even more complex games and 2D animations that can even utilize OpenGL fragment shaders. HTML, CSS, JavaScript, and Markdown files are syntax-highlighted in the editor and most files support Quick Look previews, while .zip archives can be extracted and a new Template menu lets you quickly create different types of files or import images from Photos. For advanced users, it’s now possible to take a look at the pure Python code of the Standard Library directly in Pythonista, and there’s a whole new traceback navigator to understand errors in scripts.
Three years later and now at version 2.0, Pythonista is still the app testing the unexplored possibilities of iOS. Nothing else on the platform gets close to the raw power and professional feature set of Pythonista, which has been skillfully engineered to work for Python novices like me interested in basic automation but also longtime Python coders, educators, developers who want to prototype their UIs quickly with Python, or kids learning their way around programming with games and animations.
Pythonista embodies the very idea of a post-PC app: reimagined for touch, deeply integrated with the mobile OS, and just as capable as traditional desktop alternatives – if not more powerful because of its relationship with iOS.
Pythonista 2.0 is a fantastic update, with a few omissions I’d like to see rectified in the future. Split View and Slide Over should be enabled to run Pythonista alongside other apps in some way4; the action extension should support more types of content with new functions, most notably webpage selections in Safari and documents shared by apps; eventually, it’d be interesting to see what a widget or a custom keyboard could do to extend Pythonista beyond the app and the action extension.
Pythonista 2.0 is an amazing programming app uniquely designed for iOS. For the work that I do on my iPad and iPhone, I need the combination of Workflow and Pythonista now more than ever. When the visual automation of Workflow doesn’t cut it, or when I find myself wishing for more control and personalization, I know I can fire up Pythonista and build whatever I want with it. Pythonista is the kind of app that Apple should celebrate and welcome on the platform with open arms.
Pythonista 2.0 is available on the App Store at $9.99.
- The iPad Pro’s software keyboard shines in apps like Pythonista where easier access to special characters and numbers can save a lot of time during editing. ↩︎
- I would like to have both split mode for the editor and this tab behavior for files in Zorn’s other app, Editorial for iOS. ↩︎
- Workflow’s action extension truly is on another level now: it works with any file type and it can be integrated with hundreds of existing actions. Also, Pythonista’s extension can’t launch the web browser (or other URL schemes) from the action extension, but Workflow’s can. ↩︎
- Essentially, Zorn made the call of disabling Split View to prevent rotation issues for game development in Pythonista. I understand the reasoning behind it, but as someone who doesn’t develop games in Pythonista, I can only imagine how nice it’d be to run the app next to Safari and StackOverflow threads. ↩︎