macOS comes with a security feature known as Gatekeeper, which can help prevent unwanted apps from launching on your Mac without your permission. It can also prevent potentially malicious apps from launching because it can be used to limit the kinds of apps that are allowed to open on your Mac.
In lieu of the recent Sparkle updater framework vulnerability having been uncovered in a variety of popular macOS apps, now is a great time to set up your Gatekeeper settings to prevent potential issues with malware on your Mac in the future.
In this tutorial, we’ll be showing you how Gatekeeper works and how you can configure it to keep your Mac just as secure as you want it to be.
What is Gatekeeper?
Gatekeeper is a security system Apple launched with OS X Mountain Lion and OS X 10.7.5 Lion that is still present in macOS today. The feature allows you to limit the types of apps that are allowed to launch on your computer, preventing unwanted apps from launching on their own and also preventing malicious apps from baiting and switching on unsuspecting users.
Gatekeeper is configured from the Mac’s System Preferences app, and from there, users can manually configure what their security options will be. As you might expect, Apple programs macOS to be as secure as possible out of the box and leaves it in the responsibility of the user if they choose to tamper with the stock settings (unless you’re on OS X Lion – then it defaults to the weakest security setting possible).
In what ways does Gatekeeper protect me?
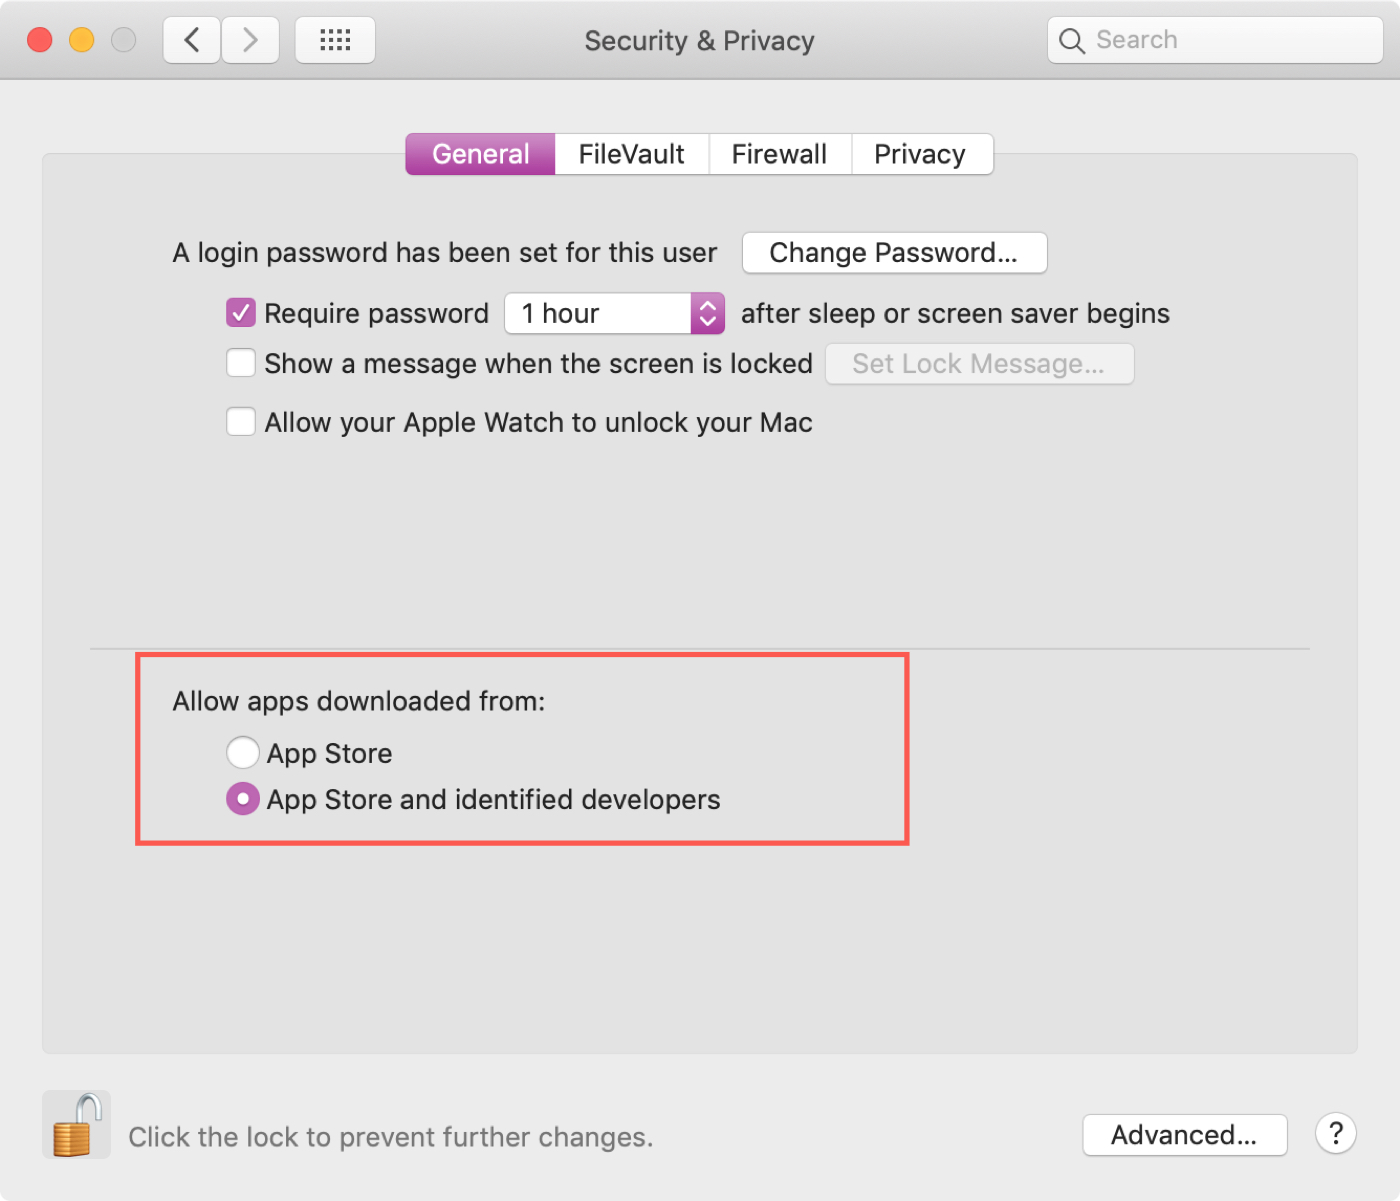
As noted in an Apple online support document, Gatekeeper can filter apps based on their origin, preventing apps that aren’t from a secure origin from ever opening on your Mac in the first place. The system comes with three different filter options:
App Store: Enabling this option means that only apps downloaded from the Mac App Store will be allowed to be opened on your Mac.
This is the most secure option and prevents any software downloaded from the internet, whether intentionally or by accident, from being launched executed on your Mac.
App Store and identified developers: Choosing this option means that apps downloaded from the Mac App Store and apps downloaded from the internet that have a signed Apple Developer ID certificate included in them will be allowed to launch, but not rogue third-party software downloaded from the internet that hasn’t been created by a developer with a signed Apple Developer ID.
This is a good medium-strength option, but then, it’s open to potential risks because any third-party app using a third-party update method could be susceptible to man-in-the-middle attacks, as we learned from Sparkle, and it’s always possible some hacker could come up with a way to spoof an Apple Developer ID certificate and include it in a malicious app.
How to configure Gatekeeper
So now that you understand the gist of what Gatekeeper is about and what it can do for you, let’s get into the nitty gritty of how to configure Gatekeeper with your favorite settings so you can use your Mac the way you want to.
There are a few steps you have to take to get to the Gatekeeper settings on your Mac, so just follow along with us using the steps below:
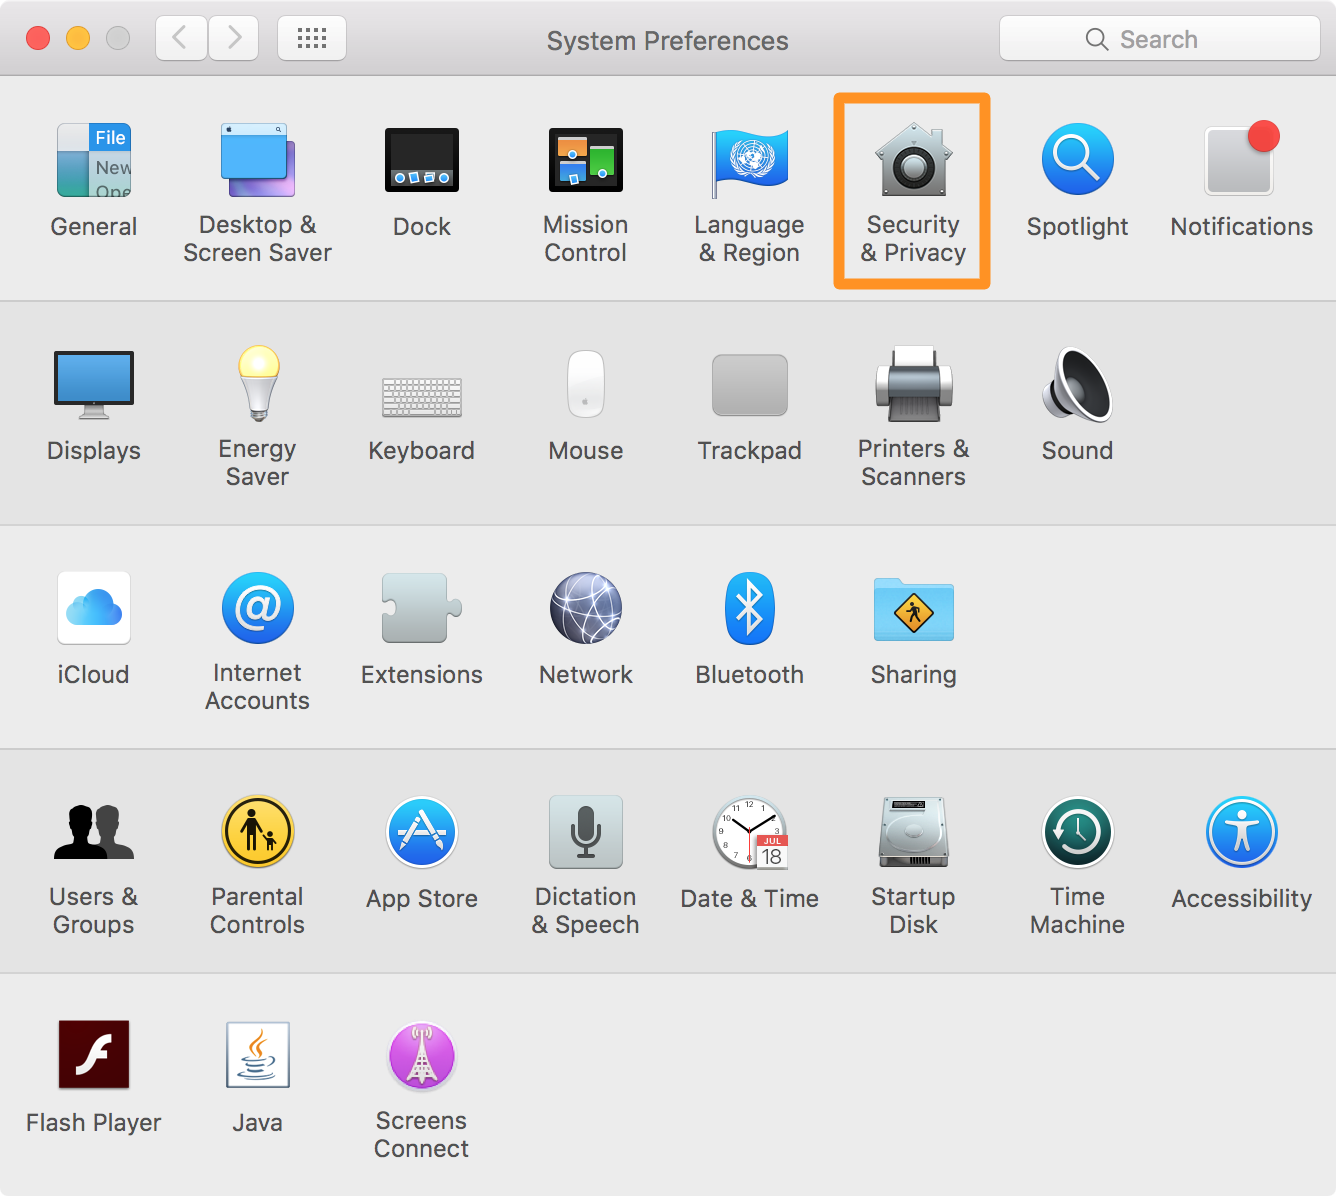
1) Launch the System Preferences app on your Mac and click on the “Security & Privacy” section.
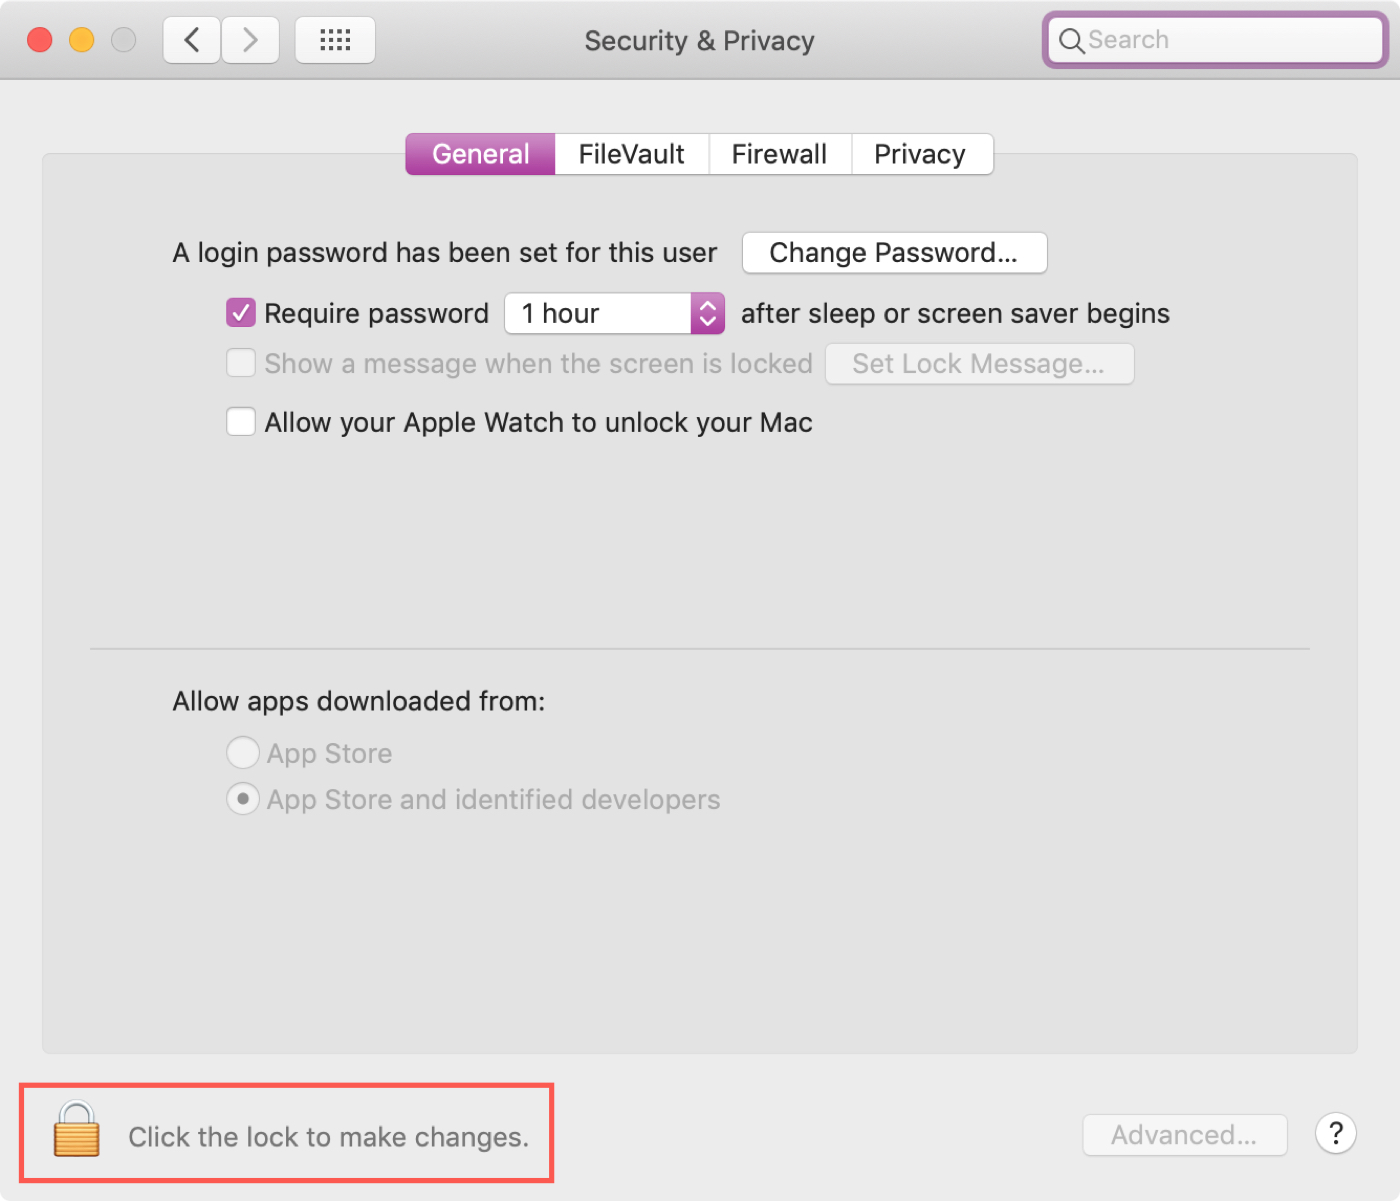
2) Click on the “General” tab if it’s not already open, and then click on the “Lock” icon at the bottom left of the System Preferences app to unlock the settings in this preferences pane.
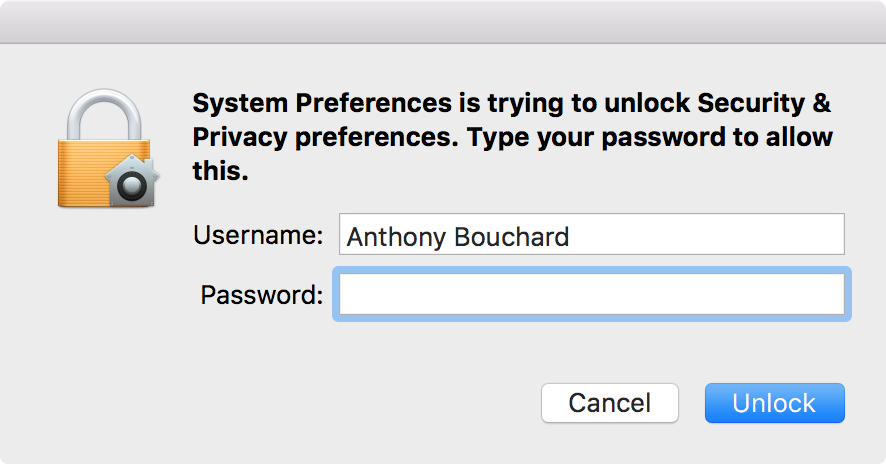
3) Upon clicking on the “Lock” button, you will be asked to enter your administrator password – go ahead and do that, then click on the blue “Unlock” button.
4) If your password was entered correctly, the Gatekeeper preferences section should unlock, allowing you to pick from:
- App Store
- App Store and identified developers
5) Select the best option for you, and then click on the “Lock” button at the bottom left of your System Preferences again to save and lock your settings.
So… what now?
Depending on how you’ve configured Gatekeeper, your Mac may or may not let you open some apps you’ve downloaded from the internet.
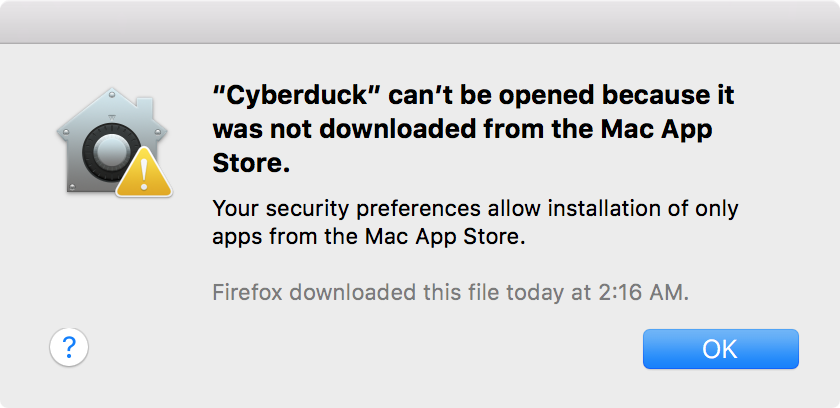
If you’ve chosen a more secure option, such as “App Store” apps only, then when you attempt to launch an app downloaded from the internet instead of the Mac App Store, you will be greeted with an error message, such as the one below:
The reason we’re getting this message is because Gatekeeper was set to only allow Mac App Store apps to run, and we downloaded Cyberduck from the developer’s website in our web browser. macOS knows that, and since it wasn’t downloaded from the Mac App Store, it prevented the app from executing to protect us based on our settings.
Just imagine – what if that was a malicious app instead of Cyberduck (which we know isn’t malicious)? If that were the case, Gatekeeper would have just saved us from potentially messing up our computer.
Gatekeeper isn’t perfect
Gatekeeper, as easy to use as it is, isn’t perfect. In fact, Symantec, a security research company known for their Norton antivirus software, notes on their blog that it has been possible for hackers to bypass Gatekeeper before, and it’s likely not the last time that a good hacker who knows what he or she is doing will be able to accomplish this.
For this reason, we want to emphasize that all Gatekeeper does is help improve the security of your system from malware. It’s not a full antivirus replacement, and it’s not going to replace common sense in those who need to practice safe internet downloading techniques. It’s a line of defense that can help you stay safe, but it’s not an impenetrable wall; all security systems have their weaknesses.
Conclusion
Gatekeeper is a useful security feature that comes with your Mac right out of the box, and we’d recommend taking advantage of it if you’re worried about your security – especially with the recent Sparkle updater vulnerability scare.
Related articles:
- About OS X system integrity protection aka ‘Rootless’ and how to disable it
- Why and how to use a VPN on your iOS device and Mac
- Ten ways to increase privacy in iOS
If you found the information in this tutorial helpful, let us know in the comments below.