When I walked into my local library and saw their new 3D printer available for patron use, I felt a wave of geeky excitement wash over me. Oh the things I could create—the only limit would be my imagination. Of course, there were likely a few other hurdles such as my (in)ability to model my vision in 3D CAD or the size constraints of the machine, but still, the possibilities!
Near infinite possibilities are great, but what specifically would I create first? The sort of amorphous blob that appeared in my mind initially wouldn’t make the most useful or interesting physical object. Luckily, novice 3D creators can jumpstart their creative juices by exploring www.thingiverse.com to see what others have created. From there, www.tinkercad.com allows anyone to access tutorials and learn how to create those yet-to-be-envisioned masterpiece.
At Thingverse, I discovered a wide variety of little plastic models of larger items and other miscellaneous bits I’d largely describe as trinkets. These things mostly reminded me of the many hundreds of little hunks of plastic currently residing in my daughters’ play room—once must-have toys that eventually contribute to the clutter in our lives. I’m pretty satisfied with the amount of plastic junk we already own, though.
Luckily, Tinkercad had a few more examples of 3D creations. The site also added the exciting dimension of personalization. I could create a keychain with my name on it, or dice with whatever characters I want on their faces. (Meh, maybe this 3D printing thing wasn’t quite as thrilling as it had first seemed. Things felt bleak.)
And then one day as I was preparing a bowl of cereal, I had my ah-ha moment. This challenge stared at me, daily, taunting me to find a solution—I’d finally fix the broken plastic top cap on our refrigerator door handle!

My wife and I have scoured the Internet for years searching for a replacement, but this particular model of refrigerator is long obsolete and renewal parts availability is low. We couldn’t justify replacing the entire appliance because of one small cracked part, so over time we grew accustomed to encountering this nuisance many times. If I could fix it, I would become a minor household hero.
So how do you go about creating an unbroken duplicate of an existing part? The library website indicated that all I had to do was submit a file in .STL format, and they would take care of printing it for me. The cost? A mere 10 cents per gram to pay for the filament material. To create the .STL file, the library recommend Tinkercad but also suggested AutoCAD123D and SketchUp as possibilities.
As a mechanical engineer, I’m already familiar with AutoCAD and use it often, so that’s where I decided to start. While I only have experience drawing in 2D, how much harder could it be to add one more D? Fairly hard, it turns out. While it can export to .STL, the basic version of AutoCAD I’m used to is only set up for 3D wireframe models, not solids, and my 2D skills didn’t quite jump off the screen the way I had hoped.
Defeated, I decided to pretend I’m just a regular person and not the CAD master I imagined. Maybe Tinkercad, the “free, Web-based 3D design tool for beginners,” wouldn’t be so far beneath me after all. Faced with an unfamiliar workspace and toolbar, I resorted to the online tutorials to learn this program. As it turns out, it’s not so difficult. I could drag basic 3D shapes (box, cylinder, sphere, tube, etc.) from the toolbar into the workspace, then move and rotate along three axes and resize by stretching or scaling. Multiple objects can be grouped together into one item, and any object can be toggled to become a hole. Unlike the real world, in the Tinkercad workspace two objects can occupy the same space simultaneously. If one object is a hole, it subtracts its own material from the other object, otherwise the duplication of material is disregarded.
Modeling my part in 3D involved visualizing it broken down into the available shapes. Each facet of the item had its own fascinating set of physical features, some more complex than others. Creating the flat parts and holes were easiest. Then it got more challenging as I added the curved edges, flanges, angled surfaces, and corners. The corners were deceptively tough; I struggled to stretch and move a sphere into an ovoid shape that matched the different radii in the X, Y and Z dimensions. It really gave me an appreciation of the detail and complexity in what at first appears to be a simple shape.
After nearly completing my first iteration of the design, I realized that I had more or less winged it on many of the interior dimensions and needed to be much more precise. I scrapped the whole thing and started again from scratch. Since I was farther along on the learning curve with attempt two, I had a much better understanding of how to use the adjustable snap grid, moveable workplane, and ruler to draw with precision.
Over the course of several evenings working on this project, I became increasingly fond of “Grand Bruticus,” as Tinkercad had auto-named my part. As the model came together, it was fun to see a nearly photographic representation of my item on the computer screen. Rotating the view, I could see how everything matched up. Soon enough, my model was ready for printing.
Uploading the 230KB file to the library website via their online form was simple. A week later, they notified me that my item was ready for pickup. This was Christmas Day for a weekend tinkerer.
This is where I would like to say that it fit perfectly, and my wife and kids high-fived me as I reached into the refrigerator to grab a celebratory beverage. But I was shocked to discover that my first-ever attempt to exactly duplicate a complex three-dimensional part didn’t quite come off without a hitch. It was very close but just a little too narrow to fit around the existing frame of the door. It turns out I made one hole smaller than the diameter of the shaft of the screw that went into it, causing my creation to crack when I forced the screw in.
-
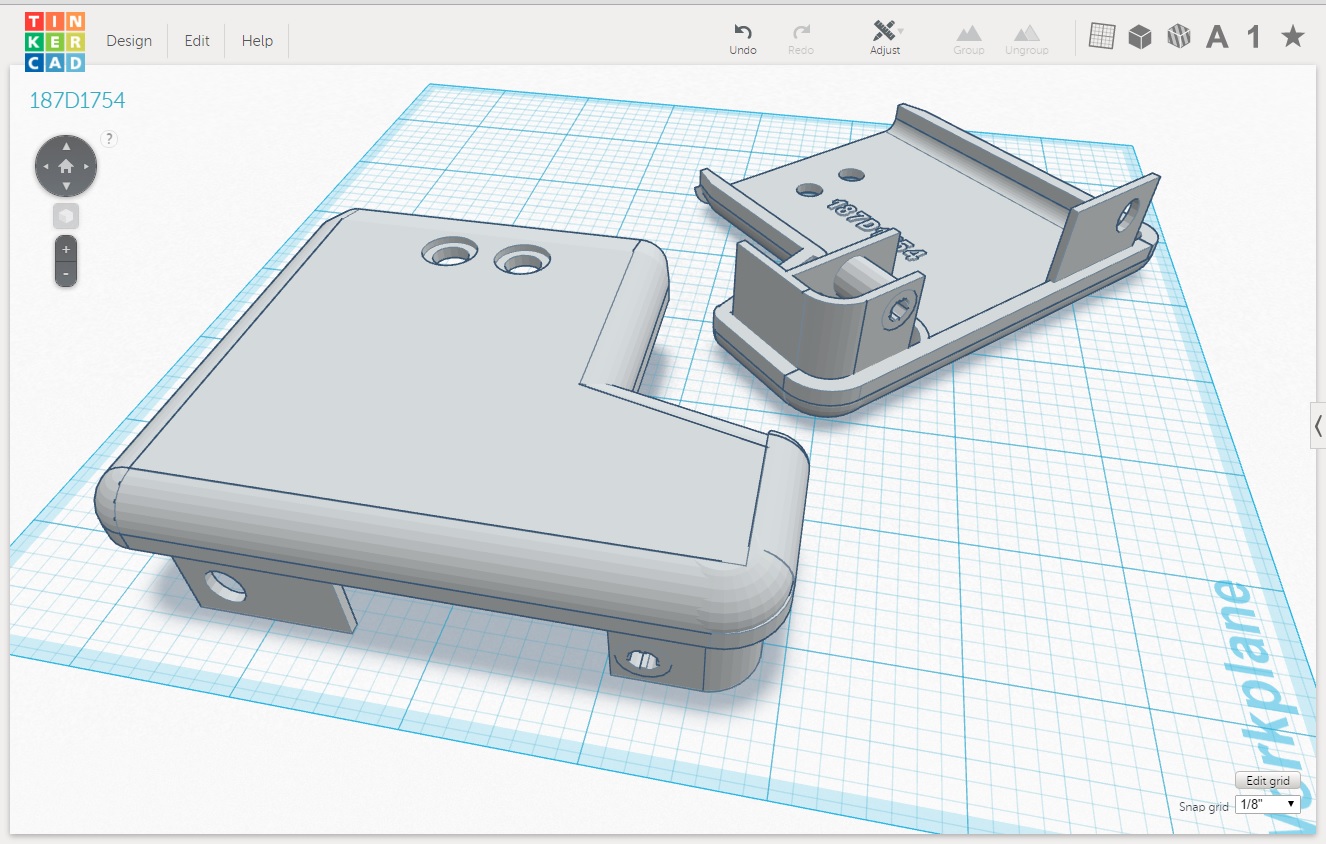
Eventually, we got there. Here's the top of my artwork.Grand Bruticus
-
And the bottom view.Grand Bruticus
Learning from my failures, I went back to the drawing board. Tinkercad made it easy for me to ungroup the shapes then move and stretch them as necessary. It didn’t take long for Grand Bruticus v1.1 to take shape on screen, then to become a 3D printed reality. This time, it fit just right. Now every time I open the refrigerator instead of feeling a tiny bit of irritation at the broken part, I feel a tiny bit of satisfaction. I actually created something useful. And yes, for at least a few minutes I was a minor hero in our household. Cost: $2.83 (plus many hours of my time).
reader comments
91