Next up in our series on macOS Sierra’s Server app is the Wiki service. You’re likely familiar with Wikis, especially if you’ve spent any time at Wikipedia, but it’s possible you’ve never thought about using one as a collaborative tool for your company or school.
Server’s Wiki service lets you provide multiple levels of access, giving one user the ability to create a Wiki and allowing that user to determine who will have access to view and/or edit what appears on the Wiki they create.
Server’s Wiki service offers superb editing tools. Wiki creators can add calendars and blogs to their Wikis and editors can add images, video, and other files to the Wiki. Additionally you can view editing history by user and restore changes made be editors. The beauty of a Wiki is that it’s device and OS independent, so you can edit the Wiki with a Mac, PC, iOS, or Android device.
Turning on the Wiki service
You may have noticed that most of the services we’ve looked require very little in the way of configuration. For the most part, all you need to do is turn the service on and you’re good to go. This is also true of the Wiki service, but for it to work in the best way possible you’re going to need to set up Groups and Users in Open Directory. We covered this in the Open Directory section of our Primer in Profile Manager. We’ll be adding groups to Open Directory later.
To turn the Wiki service on:
- Open the Server app.
- Select Wiki in the sidebar of the Server app.
- Put a check in the box that says “Enable WebDAV access to Wiki files.”
- Turn the Wiki service on.
- Click the button in the Wiki service window that says Open in Safari.
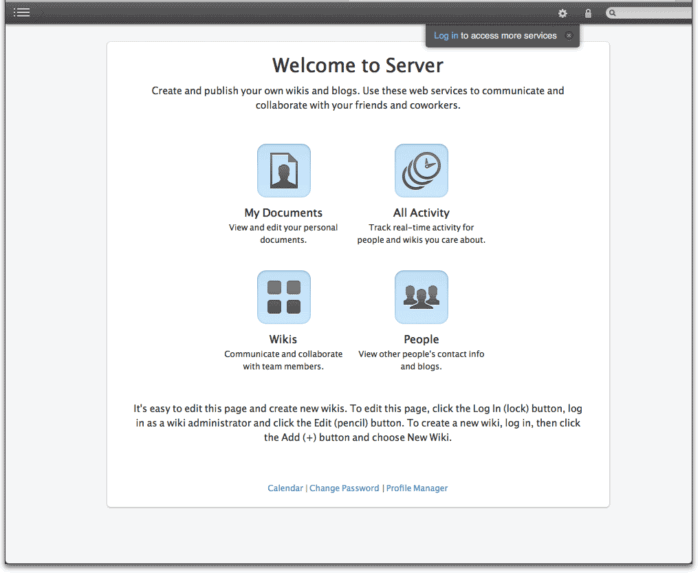
Safari should open to the default Wiki page. You’ll need to log in before you can see the Wiki. Before we do that let’s set up a Group that can create a Wiki.
Define access to the Wiki service
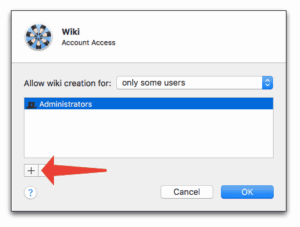
- With the Wiki service selected in the sidebar of the Server app click the Edit Permissions button.
- The default settings for the Wiki service are to allow access to create Wikis for all users. Click the menu that says “Allow Wiki creation for” and select “Only some users.”
- Click the + button and type Teachers. Note that you cannot add Teachers because you haven’t yet set up a Teachers group in Open Directory.
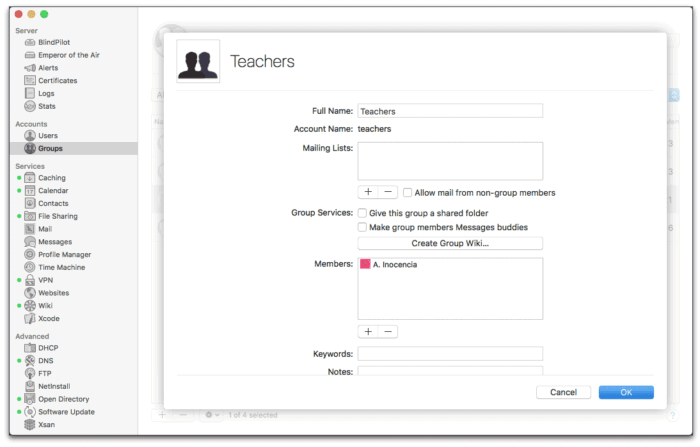
To set up a new group:
- Select Groups in the sidebar of the Server app.
- Click the + button.
- Create a new group called Teachers in the Local Network Directory. Note: If you don’t see the Local Network Directory option it means you have not yet set Open Directory up.
- Authenticate as the Directory Administrator if asked to do so.
- Once the group is created, double click it in the list of groups.
- Click the + button under Members.
- Add one user to the group from the users you created in the Open Directory exercise. (It’s possible you may need to create more users if you only created one or two in the exercise.)
- Create a new group called Students.
- Add at least one user to this group that is different than the user you added to Teachers in step 7.

Give Teachers access to creating Wikis
Now that we have groups set up, let’s give the teachers the ability to create a Wiki.
- Select Wiki in the sidebar of the Server app.
- Click the Edit Permissions button.
- Select “only some users” from the “Allow Wiki creation for” menu.
- Click the + button below the list of users.
- Begin typing Teachers.
- Select the Teachers group from the list of users that appears.
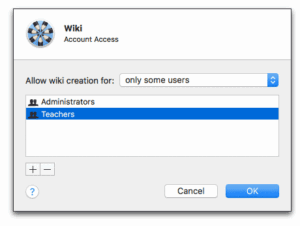
- Click OK.


Now anyone in the Teachers group can log in and create a Wiki. Students won’t be able to create a Wiki, but they will be able edit a Wiki once someone in the Teachers group grants the Students group access to a Wiki a teacher has created.
Next, we’ll create a Wiki, manage access to the Wiki we create, and add a blog and calendar to the Wiki.