Previously, we started the the Wiki service and created two groups that will have access to your Wiki. This week we’ll create and edit a Wiki and add calendar and blog services to it.
Create a new Wiki
Before we create a Wiki, let’s see what the Wiki looks like for someone in the Students group:
- Select the Wiki service in the sidebar of the Server app.
- Click the Open in Safari button.
- Click the Wikis link that appears on the page.
- Click the “Log in” link that appears at the top of the page.
- Log in as one of the users in your Students group.
- Click the + button that appears at the top of the page after you log in.
Note that there are no options for creating Wikis and that there are no Wikis for your student to view. That’s because we need a Teacher to create a Wiki first.
Now let’s create a Wiki:
- Log the student out by clicking the lock at the upper right of the Wiki page.
- Log in as the user you put into the Teachers group.
- Click the + link at the top of the page.
- Click the New Wiki link. (createnewwiki.png)
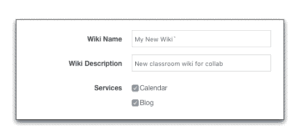
- Enter a name and description for your Wiki.
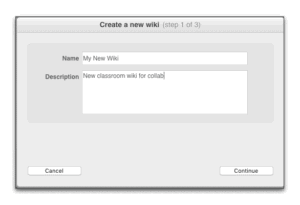
- Click Continue.
- Begin typing Students in the “Set permissions” window.
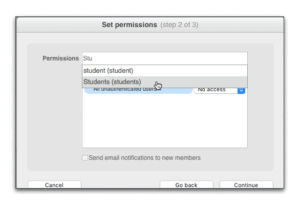
- Select the Students group you just created.
- Set the Students permissions to Read & Write.
- Make sure all other users are set to “No access.”
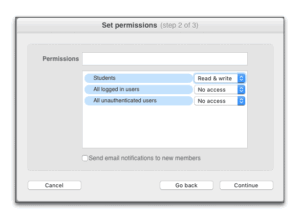
- Click Continue.
- Choose a color for your Wiki and upload an icon if you want to.
- Click Create.
- Click Go to Wiki.


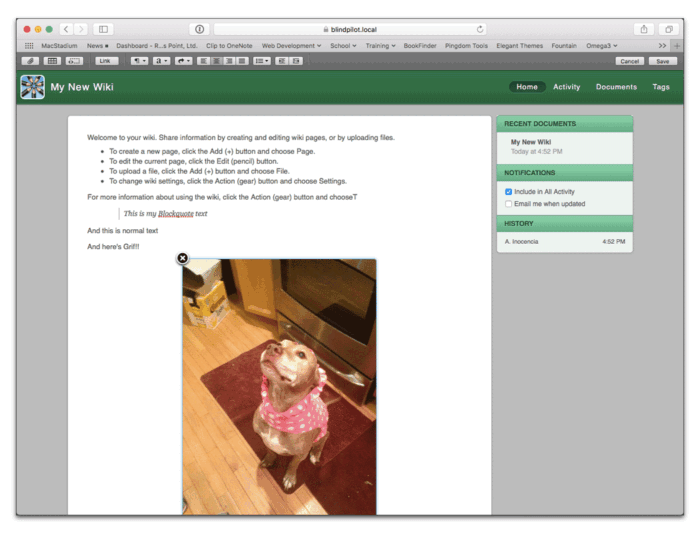
Your new Wiki should open with some default text and basic information about how to work in your Wiki.
Edit your Wiki, add a new user, then log in as another user
Let’s make some changes to the Wiki.
- Click the editing pencil at the top right of your Wiki.
- Place your cursor at the end of the text and press Return two times on your keyboard.
- Make changes to the text adding some formatting and images if you want.
- Click the Save button.


Your changes should now appear in your Wiki.
Now let’s add a user that can only read your Wiki.
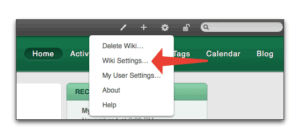
- Click the Action Menu (gear) at the upper right of your Wiki.
- Click the Permissions tab at the left of the Wiki Settings window.
- Type the name of a user in the access field that isn’t in the Students or Teachers group.
- Give this user “Read only” access to the Wiki.

- Click the Save button.
- Click the Lock at the upper right of the Wiki window.
- Click logout.

You should now see a web login for your server.
- Login as a user in the Students group.
- Click the Edit pencil at the top right of the page.
- Makes some edits.
- Click the Save button.
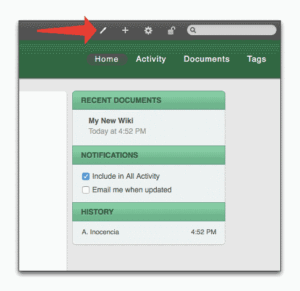
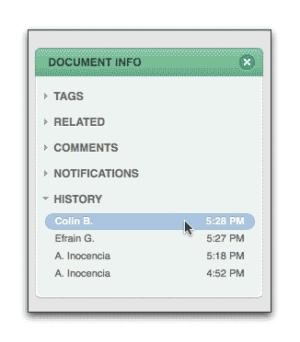
Note that the History section at the right of your Wiki provides historical information on edits that were made to the Wiki. (edithistory.png)
Let’s look at who made the changes.
- Click the Activity button at the top-right of the Wiki.
- Click your new Wiki in the list of Wikis that appear.
- Click each user in the edit history to see the changes they’ve made.
- If you want, restore a previous edit by clicking the Restore button at the top of the Wiki.

- Log out of the Wiki.


Finally, let’s log in as a user that can only view the Wiki
- Log in as the read only user you added to the Wiki
Note that this user has no Edit pencil at the top of the Wiki, but you should also note that this user can see all of the changes made by anyone who has worked on the Wiki but they cannot revert to any previous versions of the Wiki.
Add a blog and calendar to your Wiki
The last step in our Wiki journey is to turn on the Wiki’s blog and calendar services. Note that to user the Wiki’s calendar feature you will need to have the Server’s calendar service turned on.
- Make sure you’re logged into your Wiki as your the user in your Teacher group.
- Click the Action (gear) menu at the top of your Wiki.
- Select Wiki Settings.
- Select the General setting for your Wiki.
- Locate the Services section and put checks in the boxes next to Calendar and Blog.
- Click Save.


Once you click Save two new links appear at the top of your Wiki, one for the Calendar, which, when you click it you can view and add events to your calendar that are related to your Wiki. The other is for your blog. Note that anyone with edit access to your Wiki can also create calendar events and make changes to your blog.