The built-in Photos, Mail, Notes, Messages, Books, and Files app let you annotate and doodle on pictures using Markup tools.
You can use a pen, highlighter, and pencil tools to draw or write on them. You can also add shapes, arrows, text, lines, signature, speech bubbles, magnify a part, and more.
This comprehensive tutorial shows you how to use the built-in drawing tools to Markup photos on your iPhone and iPad.
How to Markup pictures in iOS and iPadOS Photos app
1) Open an image in full-screen inside the Photos app.
2) Tap Edit.
3) Tap the Markup button (pencil icon).
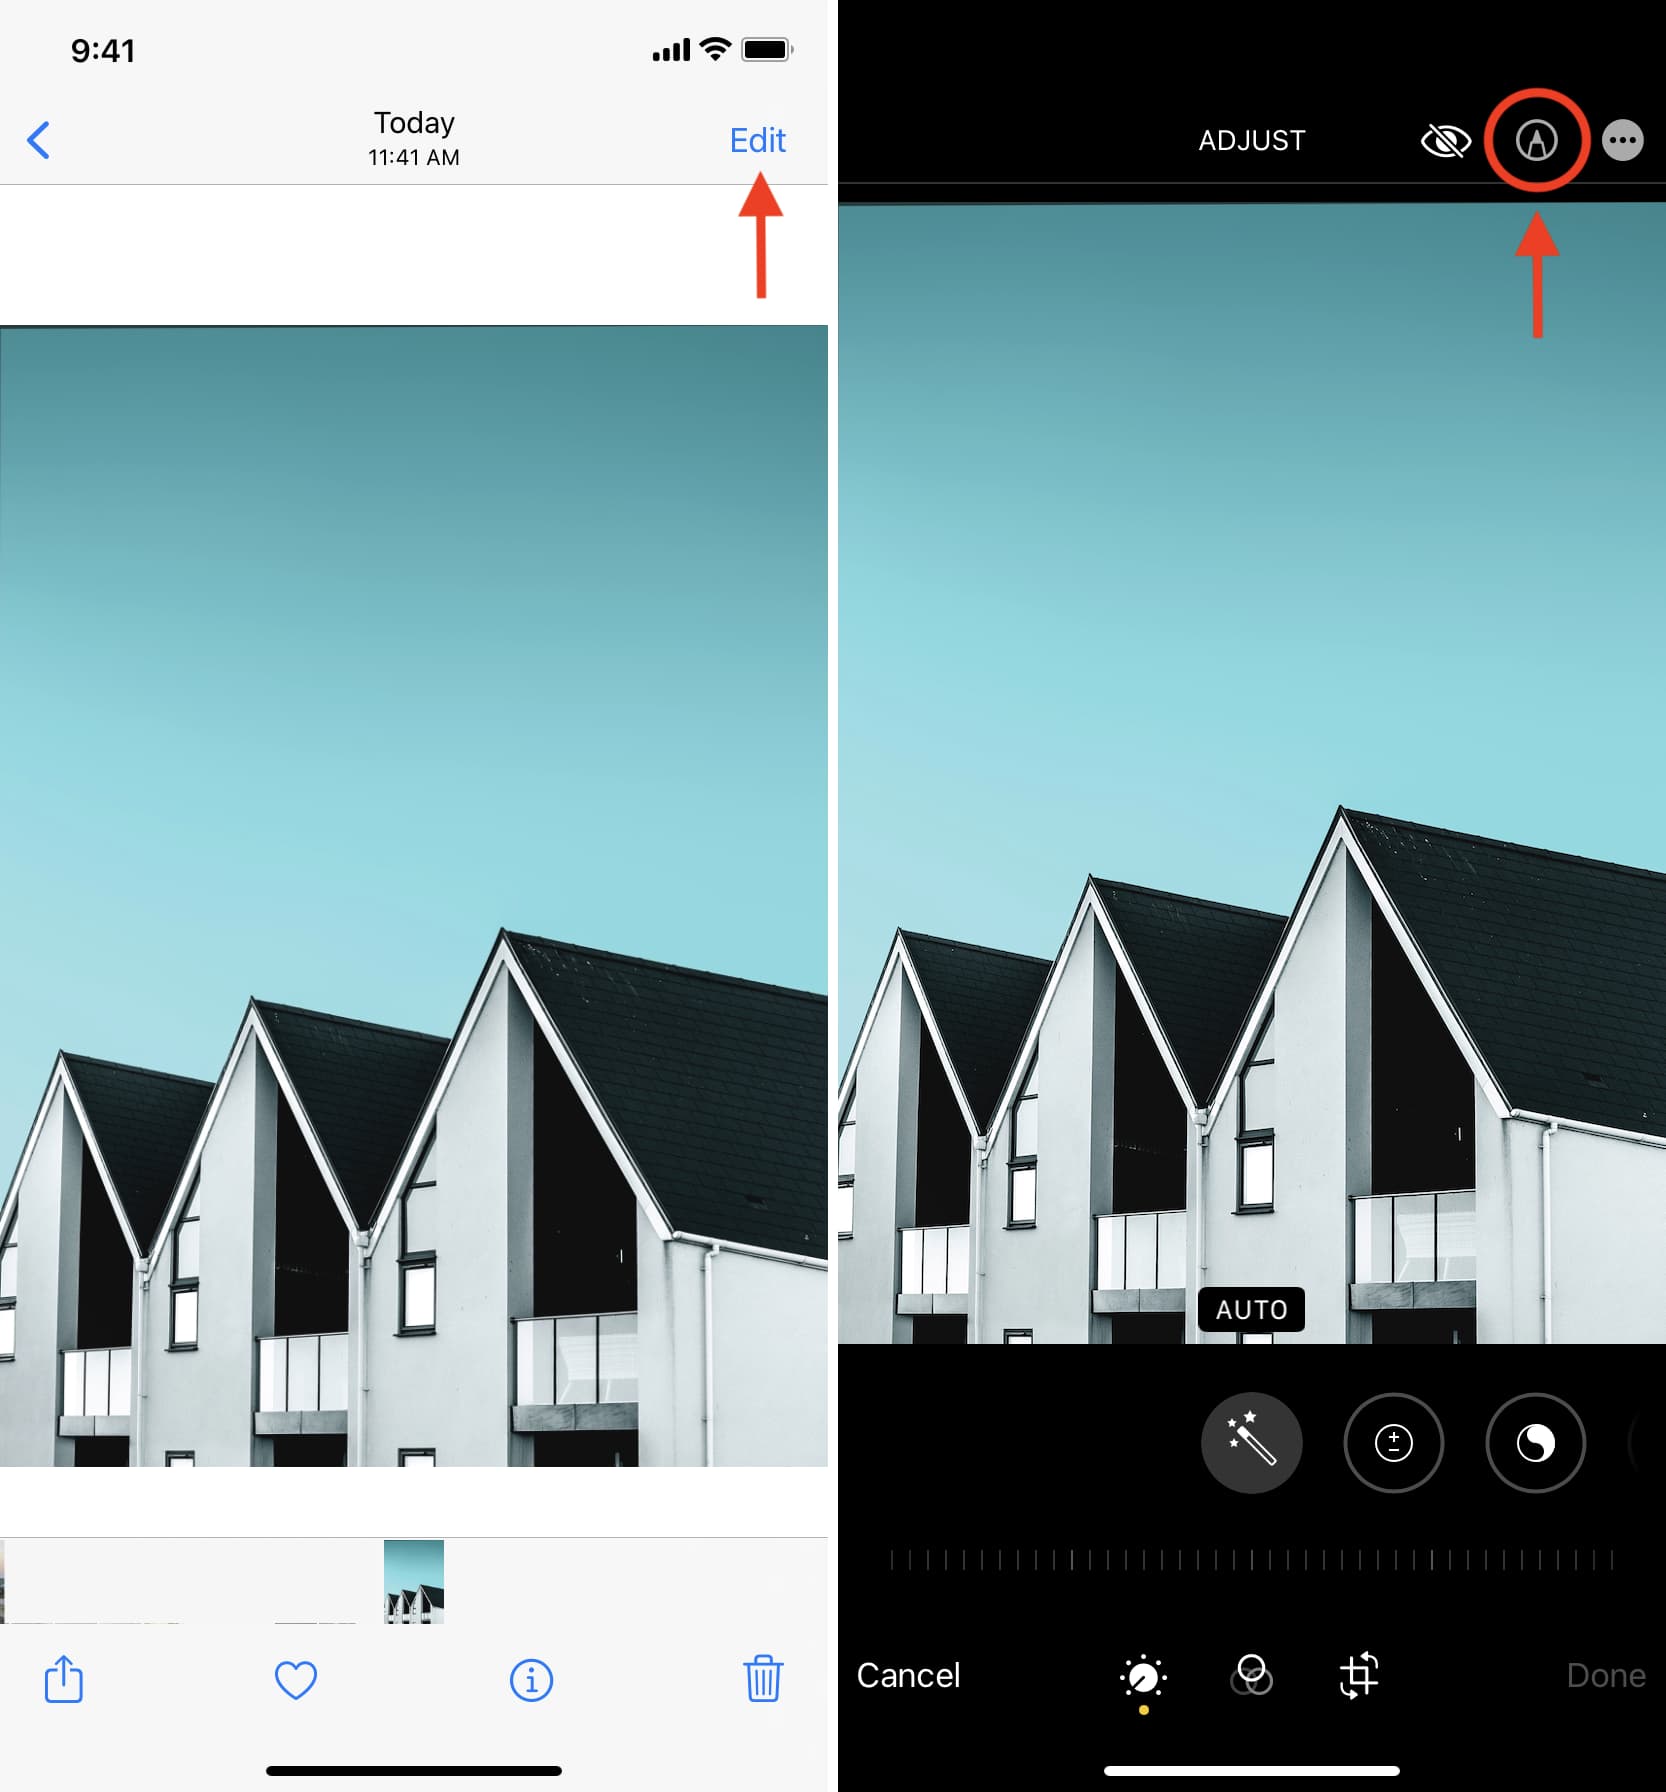
4) You’ll see the necessary Markup tools. Here’s more about them.
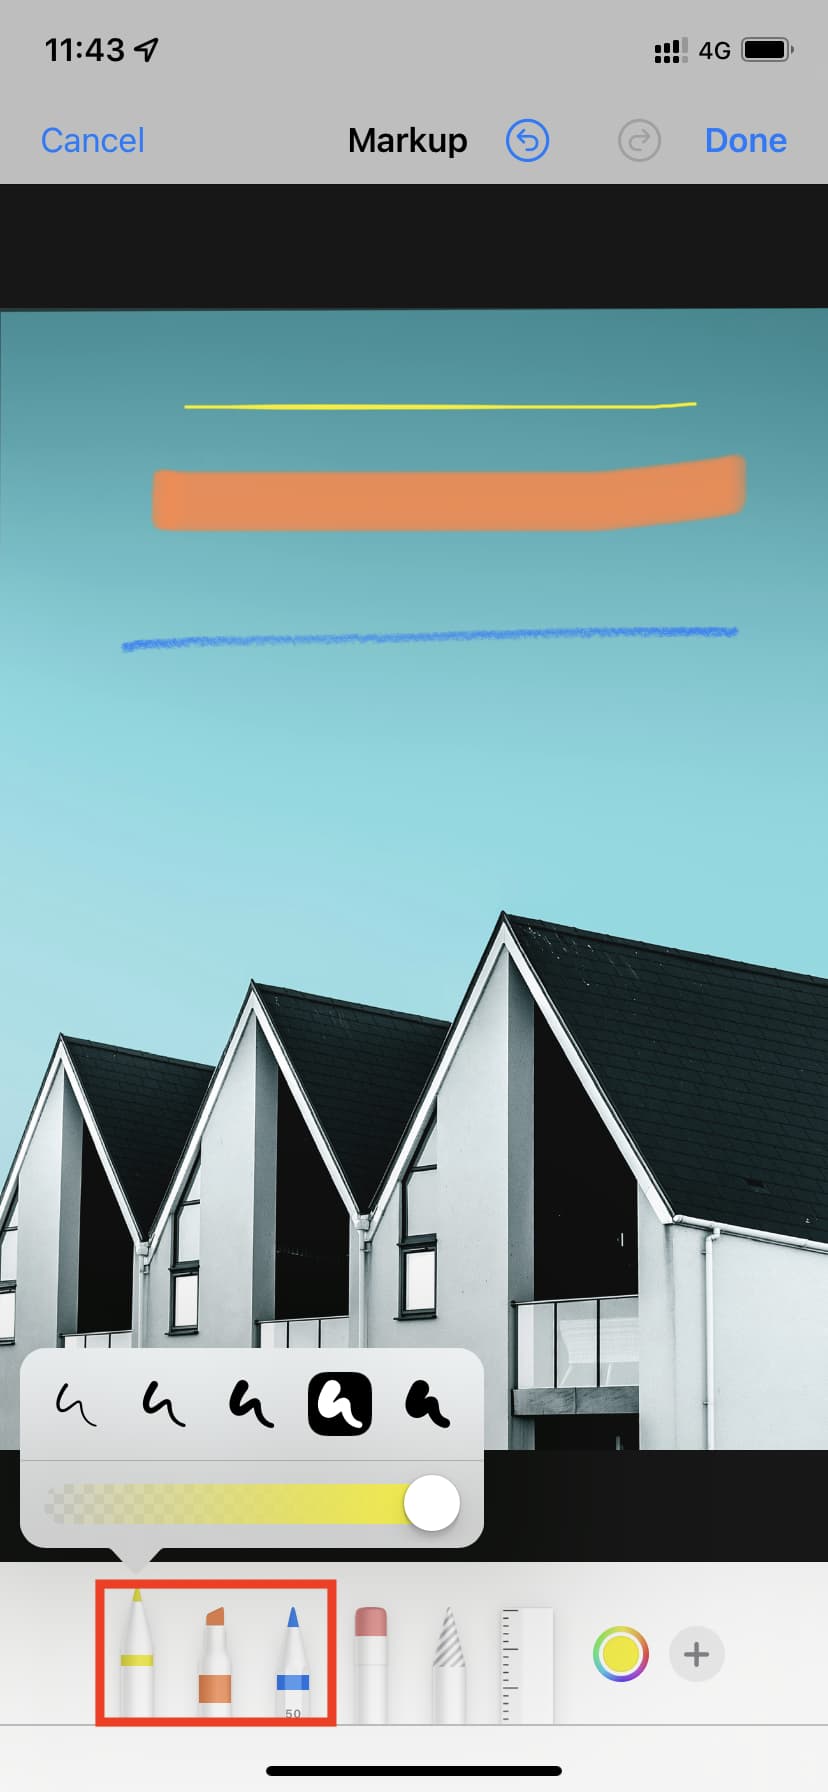
Pen, Highlighter (marker), and Pencil
Tap one of them to write or draw. Tap the same tool again to change their thickness and opacity. Use the color palette to spice things up.
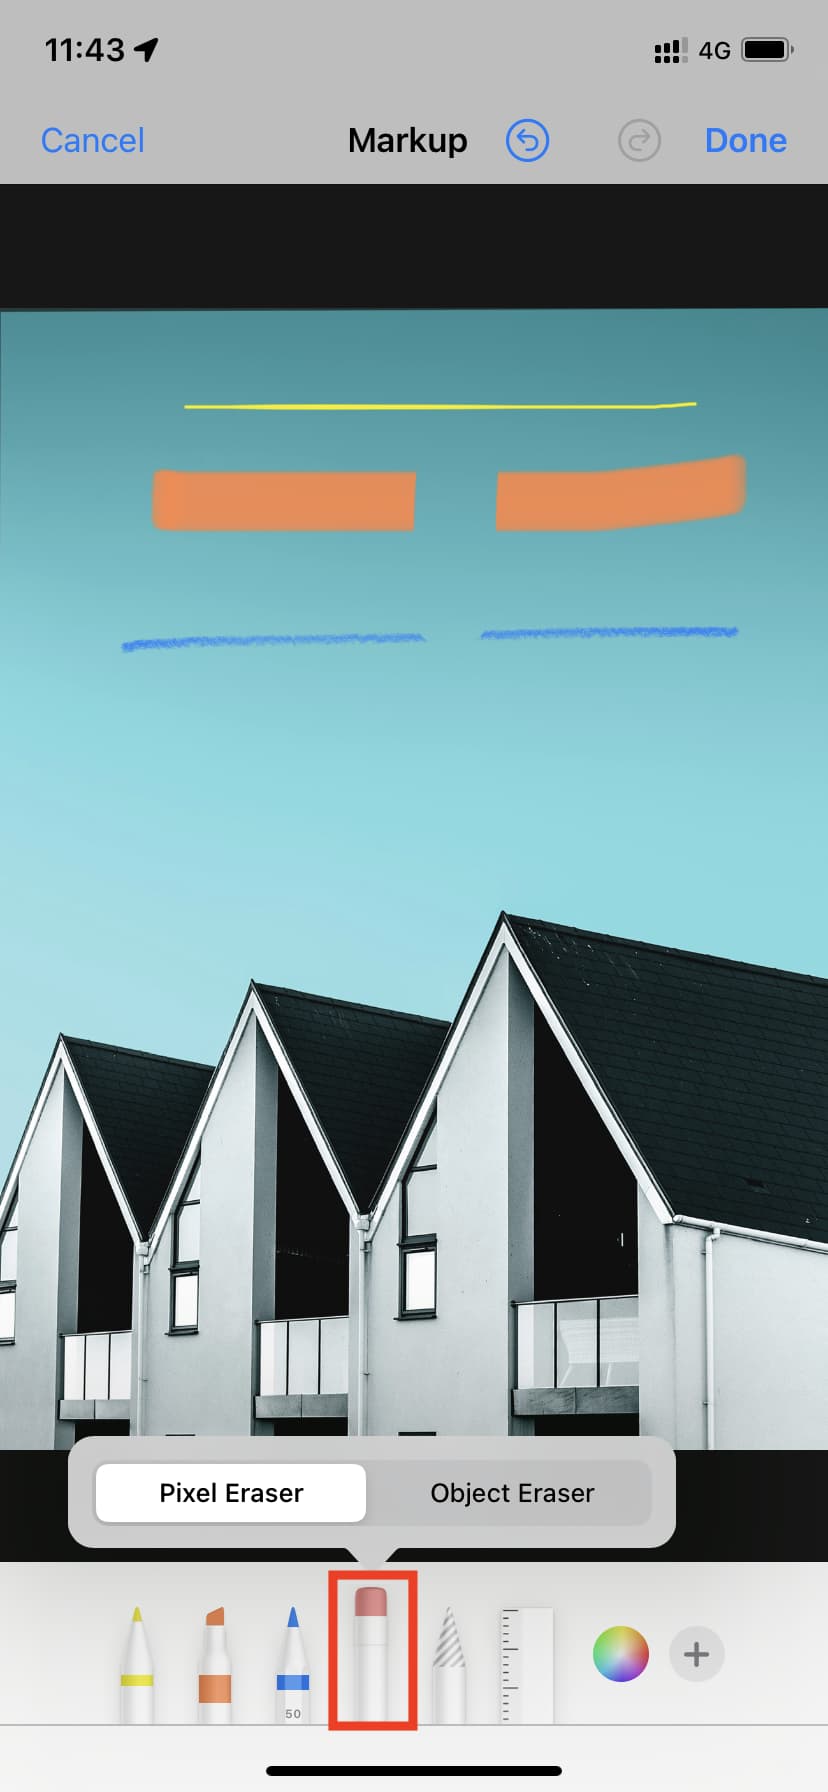
Eraser
Tap the eraser tool and scrub over the portion you wish to erase. If you want to remove the entire Markup object, tap the same eraser icon to choose Object Eraser.
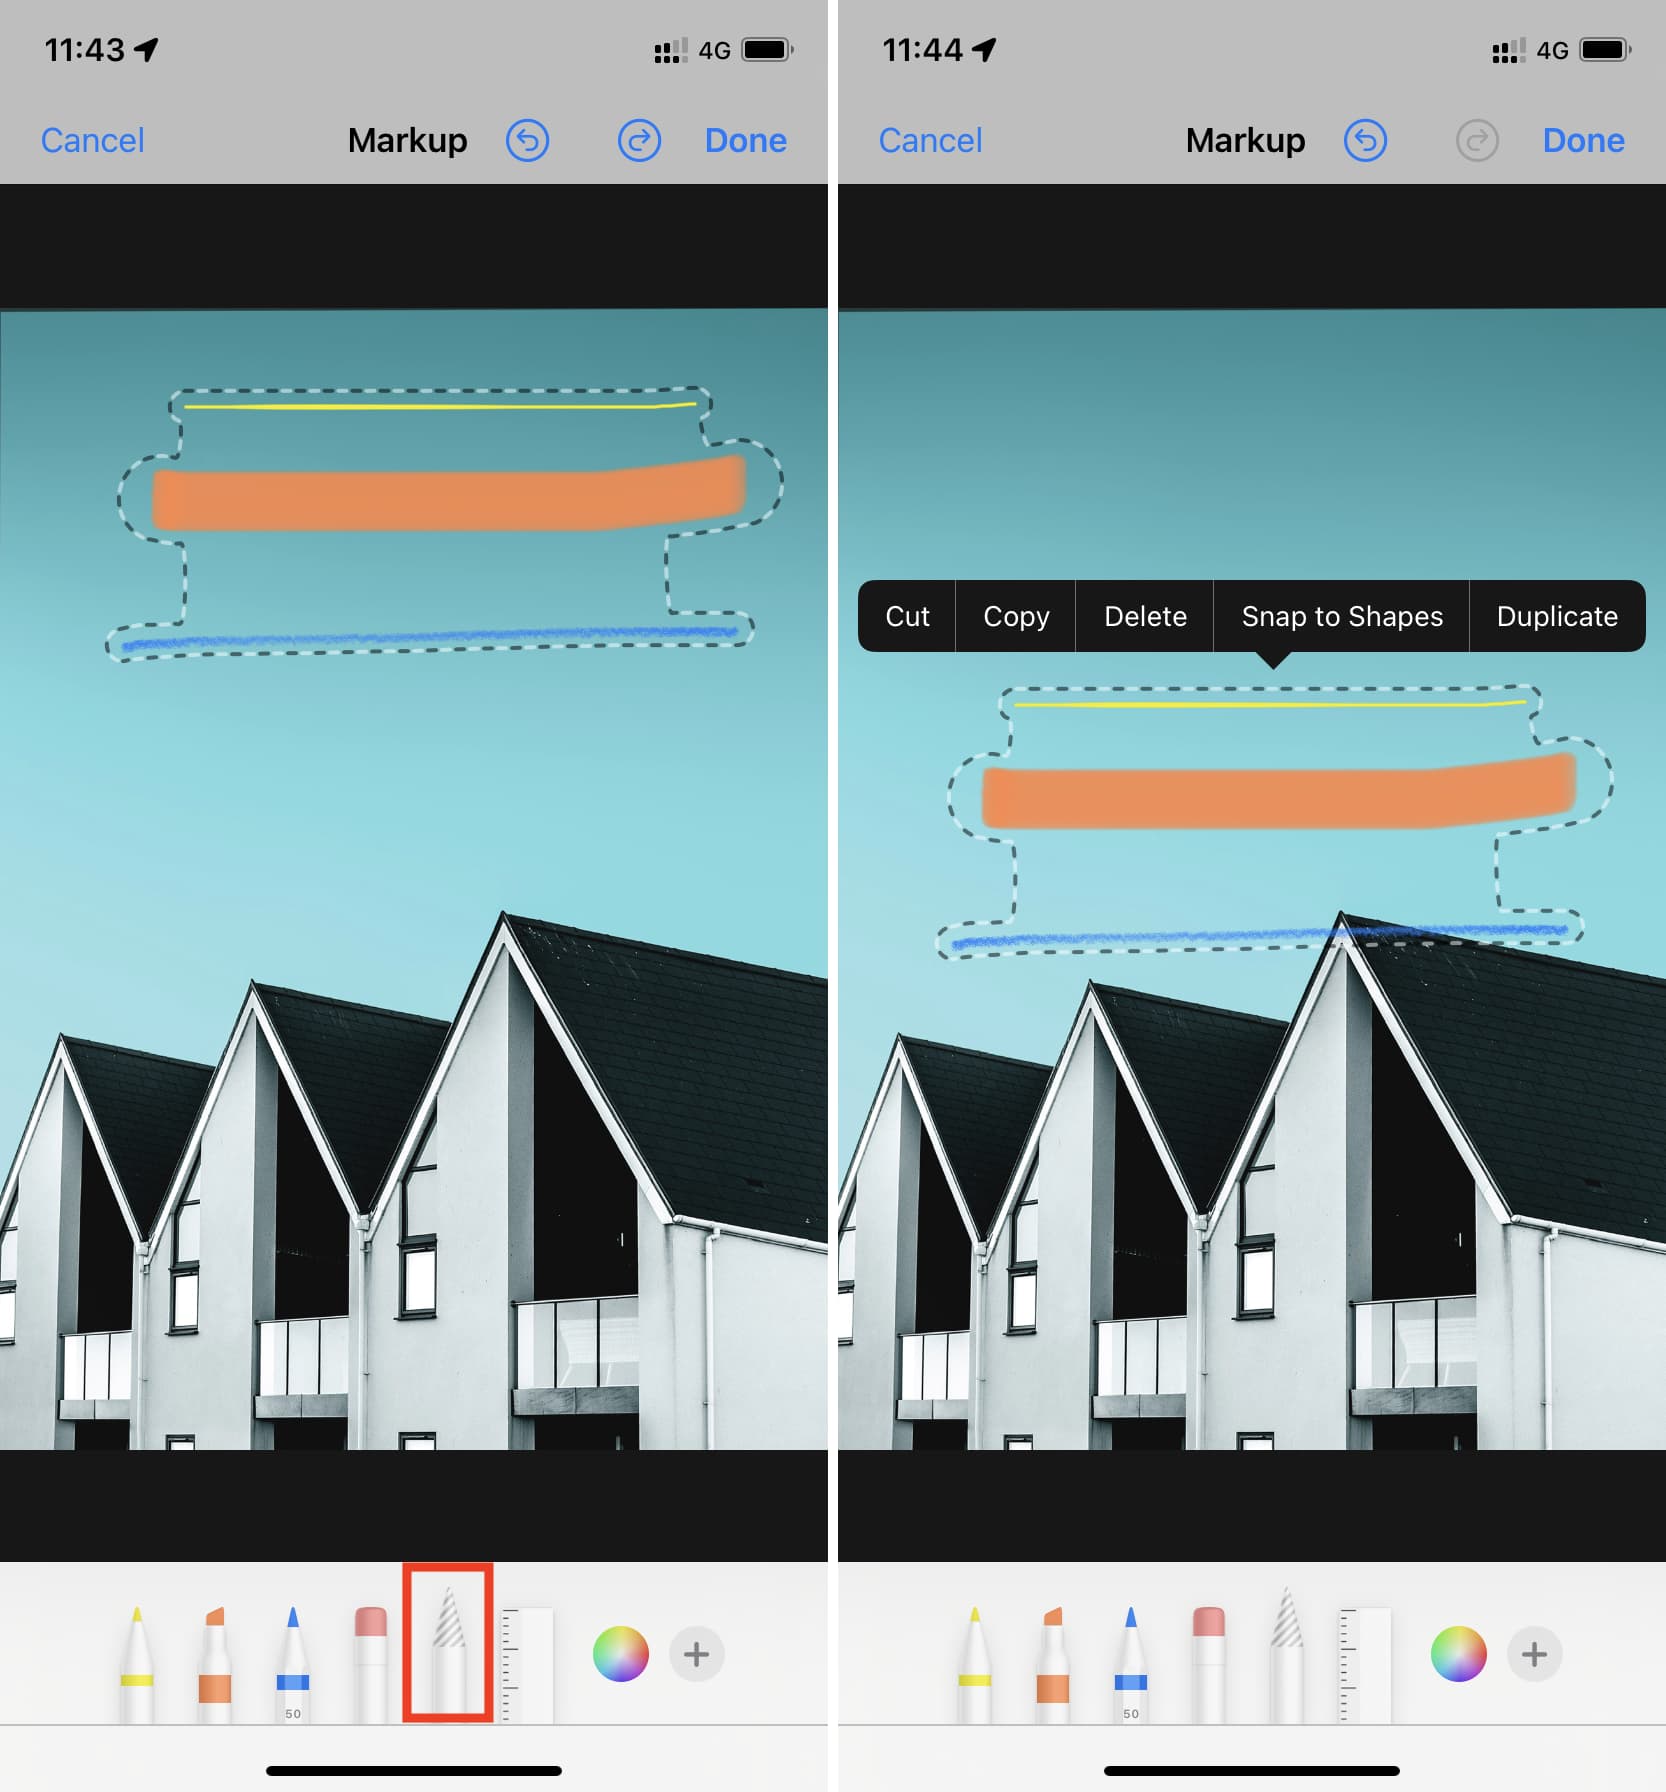
Lasso
With lasso, you can draw a perimeter around the Markup elements to select everything that’s inside the lasso boundary. Next, you can drag to move everything inside the dotted lines to somewhere else. After you tap once inside the dotted border, you can cut, copy, delete or duplicate the selected elements. If you tap Snap to Shapes, it will ensure that the drawn shapes (like irregular lines) become perfect.
Ruler
Use this to draw straight lines using pen, highlighter, or pencil. You can also erase something in an orderly straight line using the ruler tool. To change the ruler’s orientation, put two fingers on it and rotate it. To move it, use one finger and drag it around. Tap the same ruler icon to remove it from the editing screen.

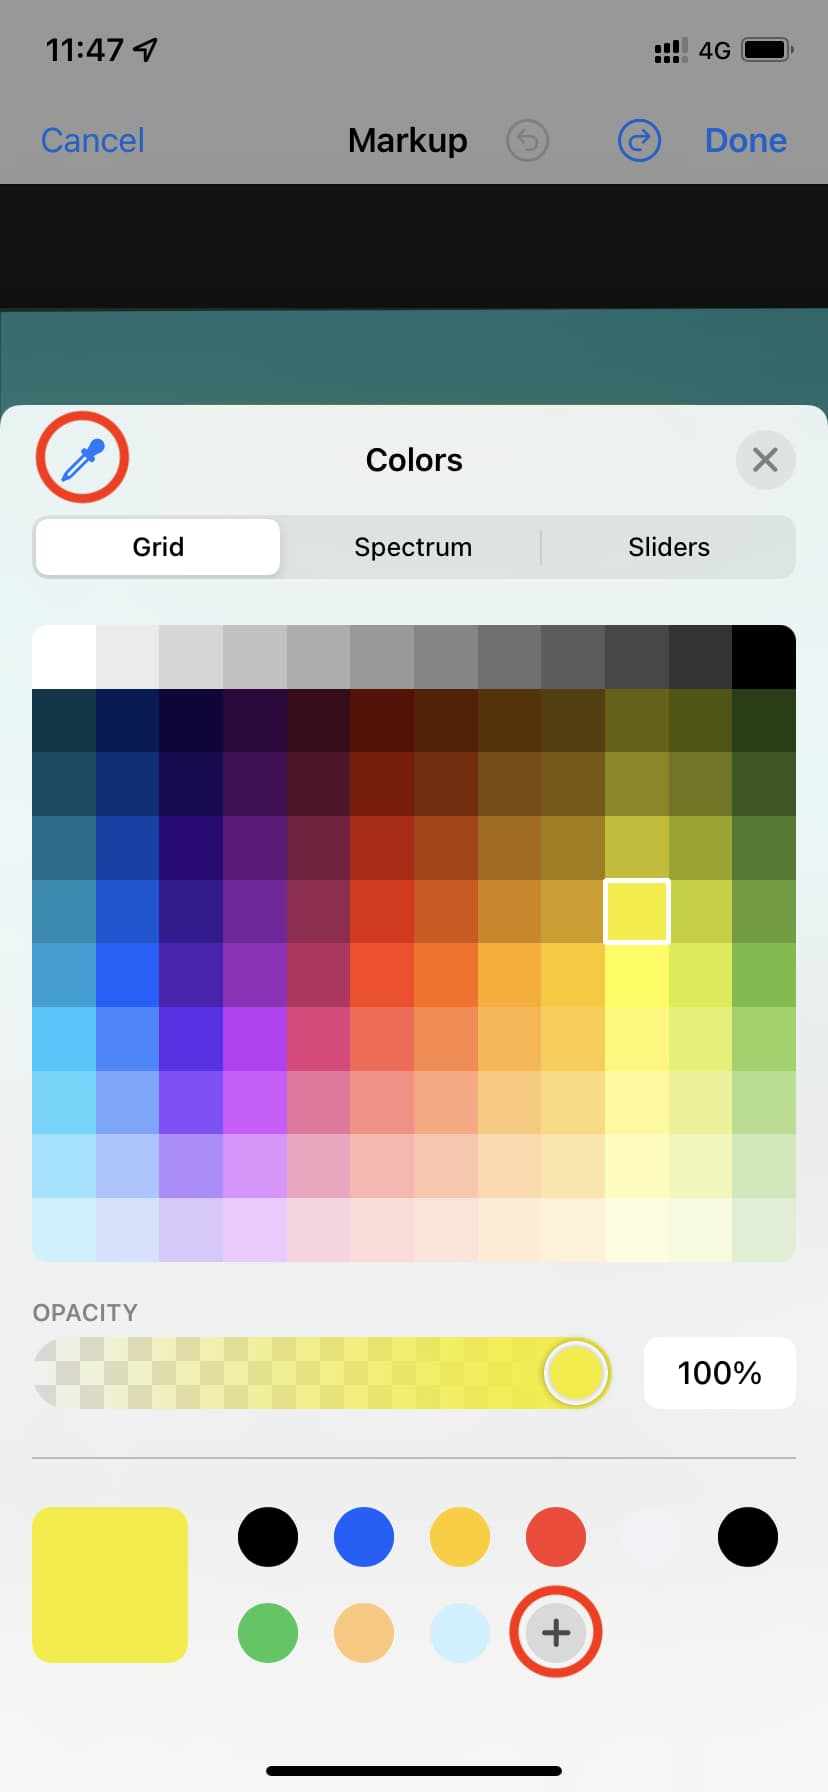
Color palette
Tap the circular rainbow icon to change the color of the pen, highlighter, pencil, or shapes. You can also change the opacity of the color.
With the help of the tiny plus icon, you can create your color palette. Press the small color circle and tap Delete to remove a color from here.
The color picker icon at the top lets you pick any color from the image. It’s an excellent tool to pick the exact colors from a tiny portion of the picture.
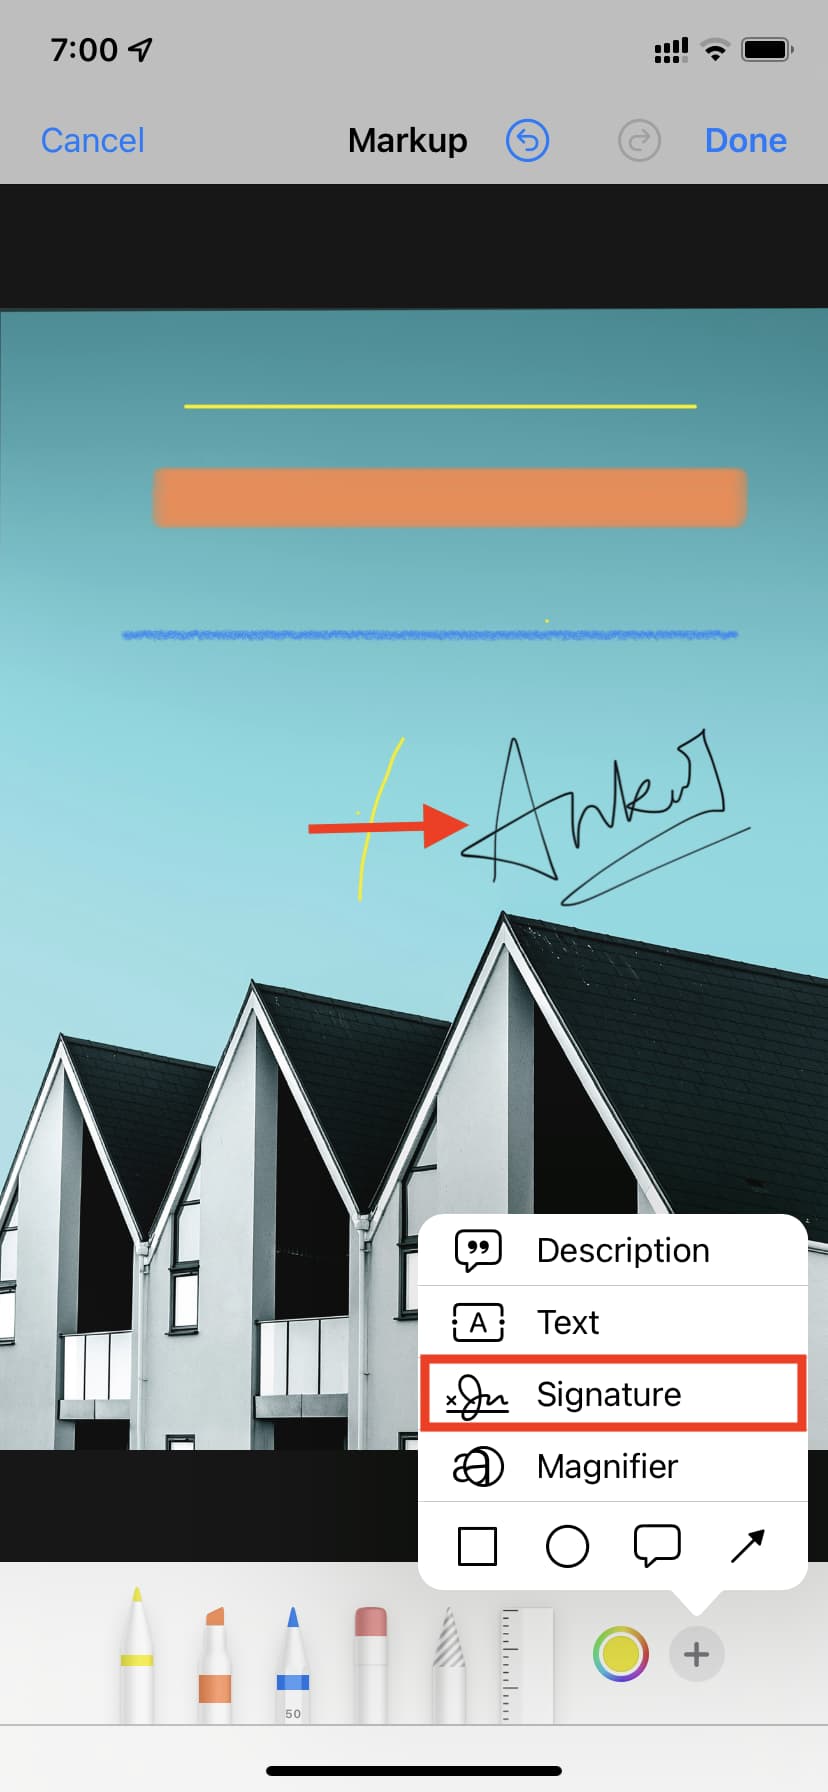
Plus icon
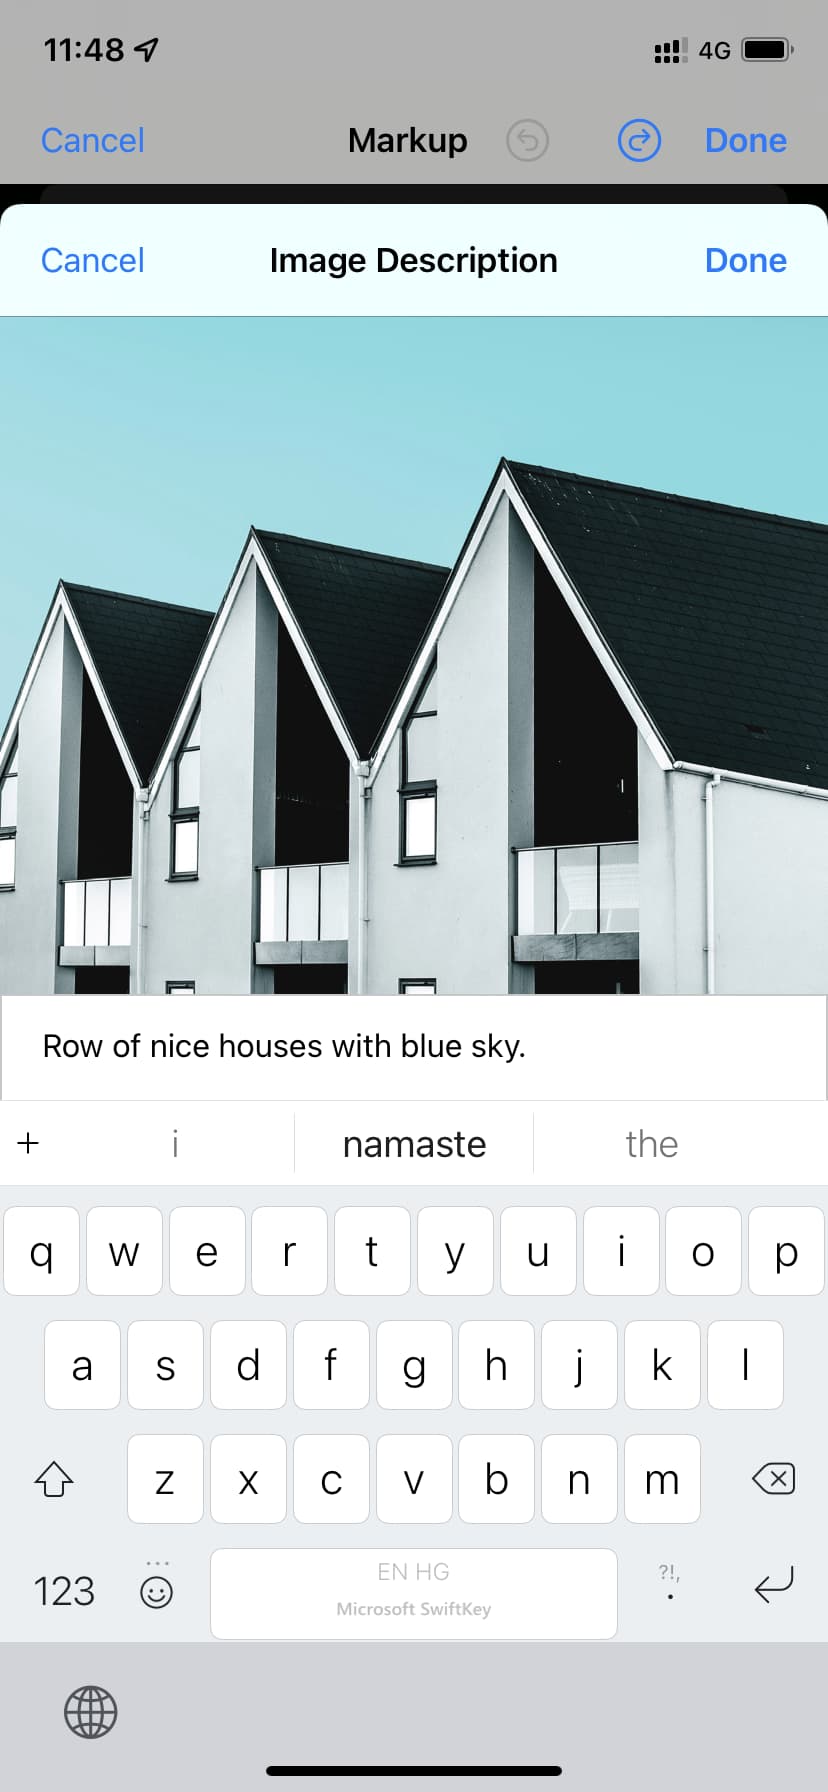
Tap the plus icon to add accessibility descriptions, text, signature, magnifier, and shapes.
Description: If you use VoiceOver on your iPhone, the description you add to the photo in the Markup tools will be spoken by your iPhone when you select this image in the Photos app. In short, you can use it to explain what the picture is for people who can’t see the image and depend on VoiceOver. This is similar to Alt text used on websites to describe images for people who can’t see them.
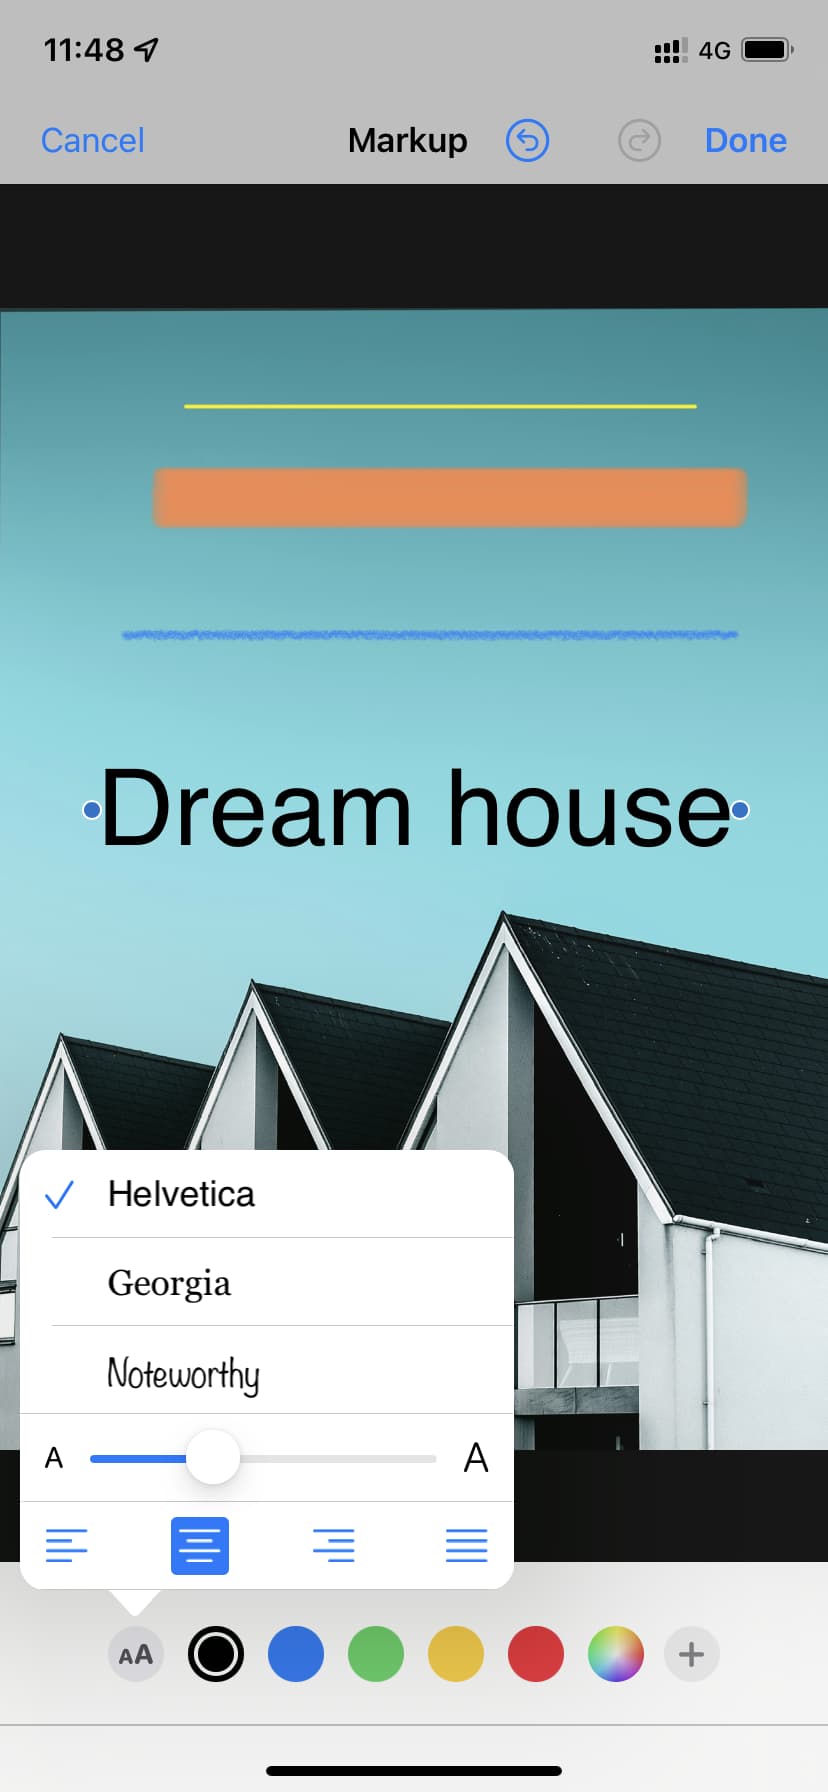
Text: Lets you add words and sentences to the photo. Double-tap the word “Text” to change it. Tap it once and use AA to change the font, font size, and alignment. Use the color pallet to change the font color. You can also move the text anywhere by dragging it with one finger.
Signature: Use it for signing on a photo or PDF. You can add or remove a signature, move it around, and change the size by pinching in and out using one of the four corners.
Opacity: When you tap the thumbnail after taking a screenshot, you will see this tool that lets you change the opacity of the entire image. Pro Tip: If you use the Magnifier first and then the opacity tool, you can create a cool image like the one below. It will change the opacity of the entire image except what’s inside the magnifier.
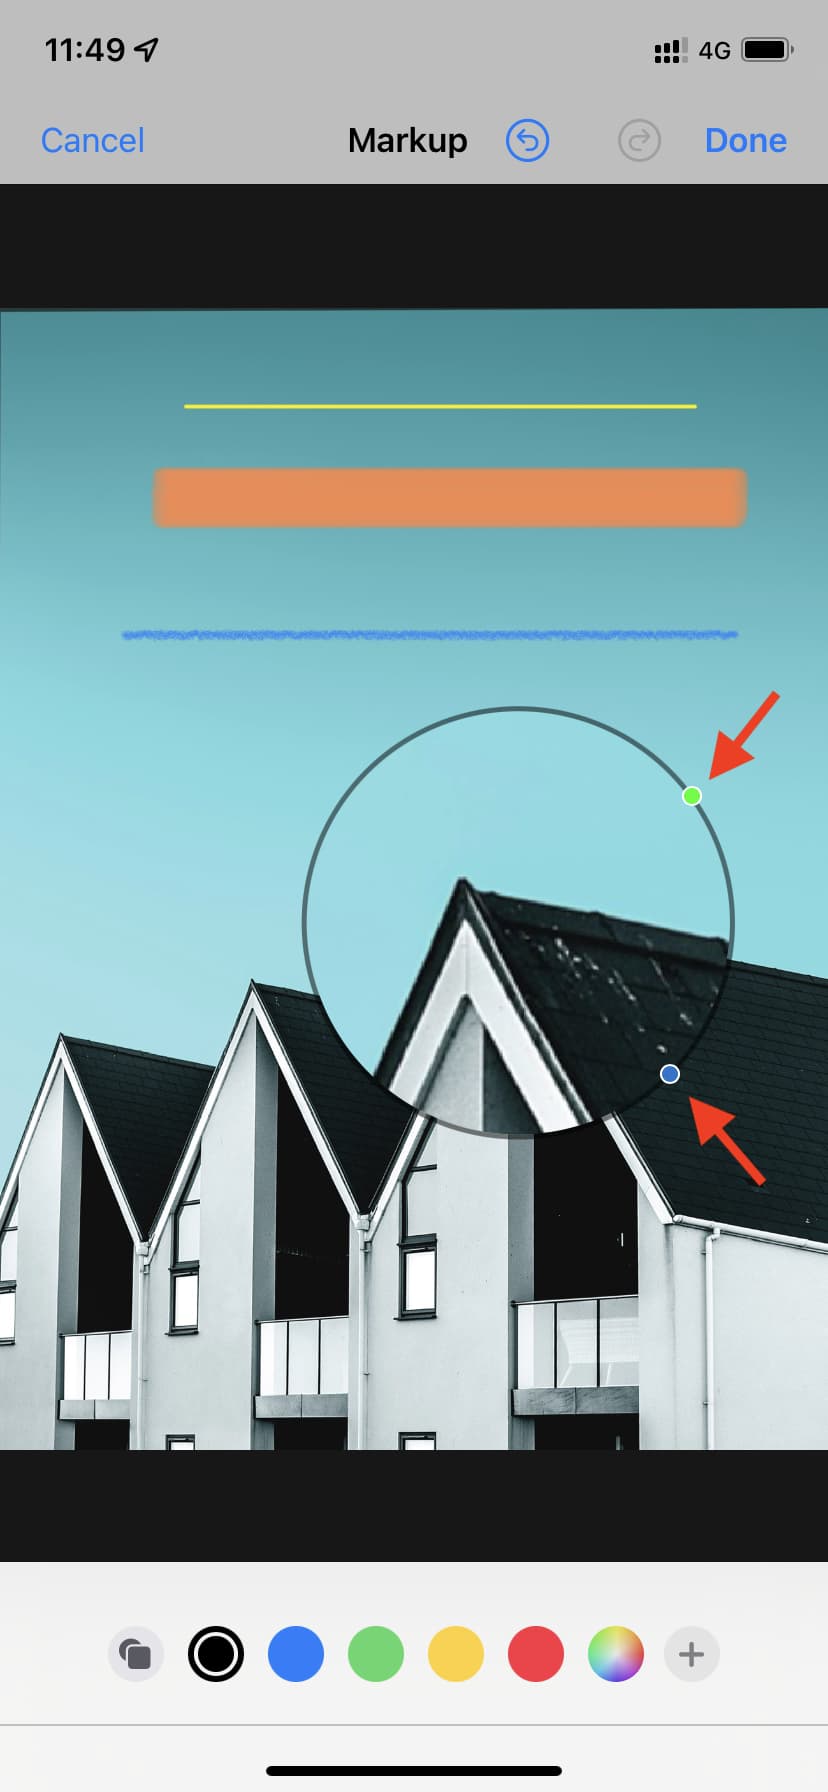
Magnifier: This Markup tool allows you to zoom into a part of the image. Touch the tiny blue dot and move it to increase or decrease the shape of the magnifier window. Touch the green dot and drag it around the circle to change the magnification level. Finally, touch on the magnifier loupe to move it somewhere else on the image. To cut, copy, delete or duplicate, tap the magnifier.
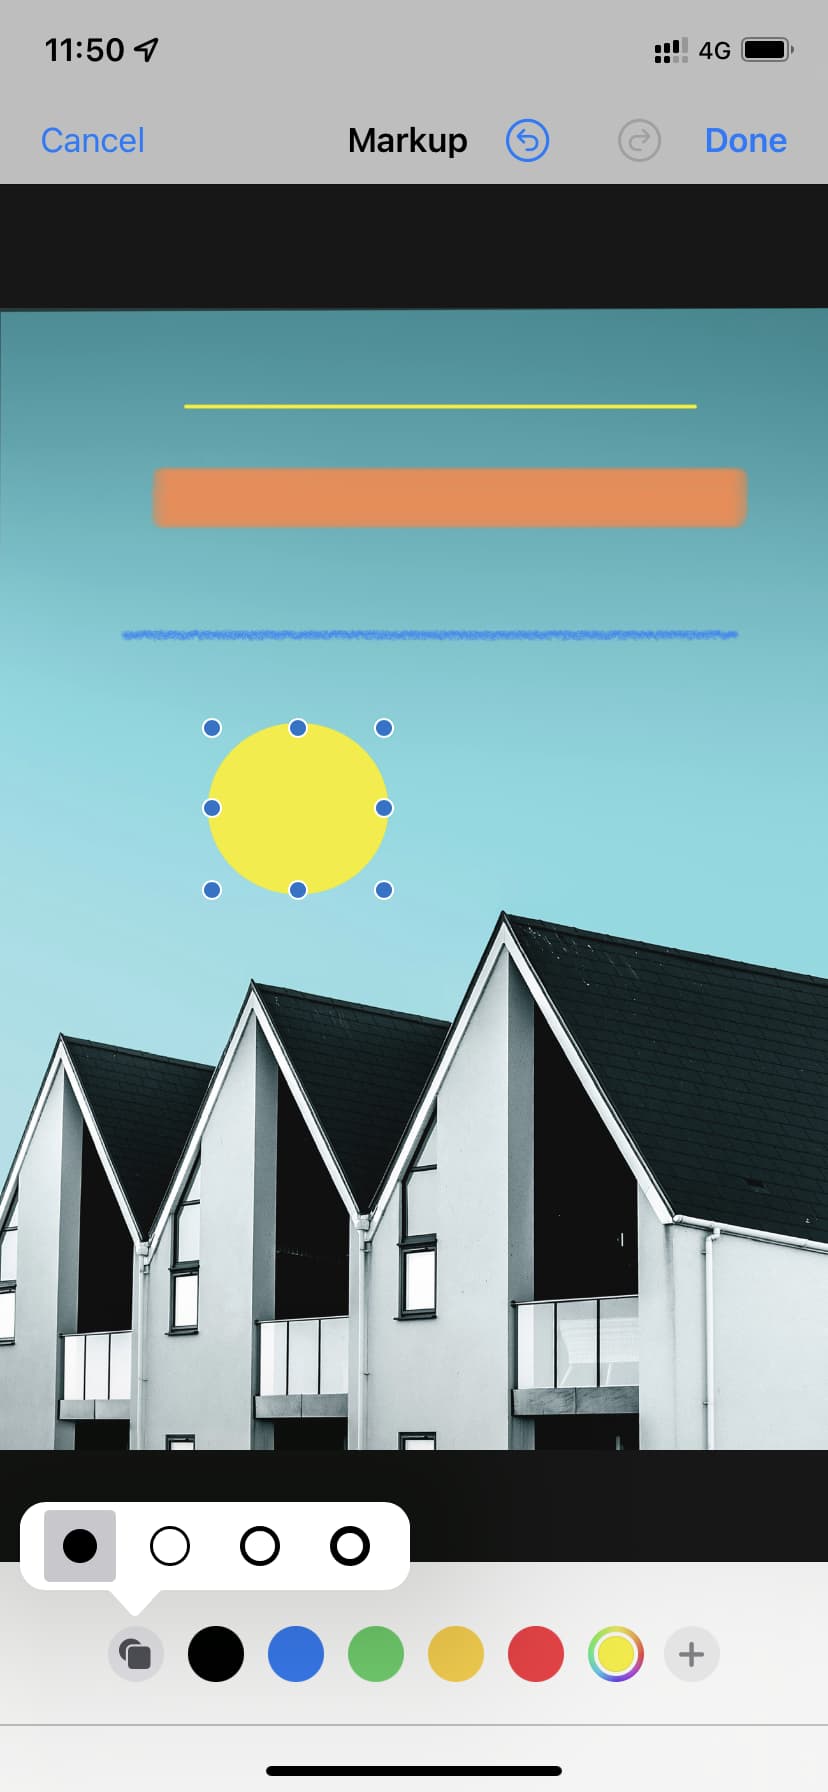
Shapes: At the bottom, you have a square, circle, speech bubble, and arrow. Use them to highlight your image. Tap the circle-square icon to change the thickness of the shape or make them solid with color inside.
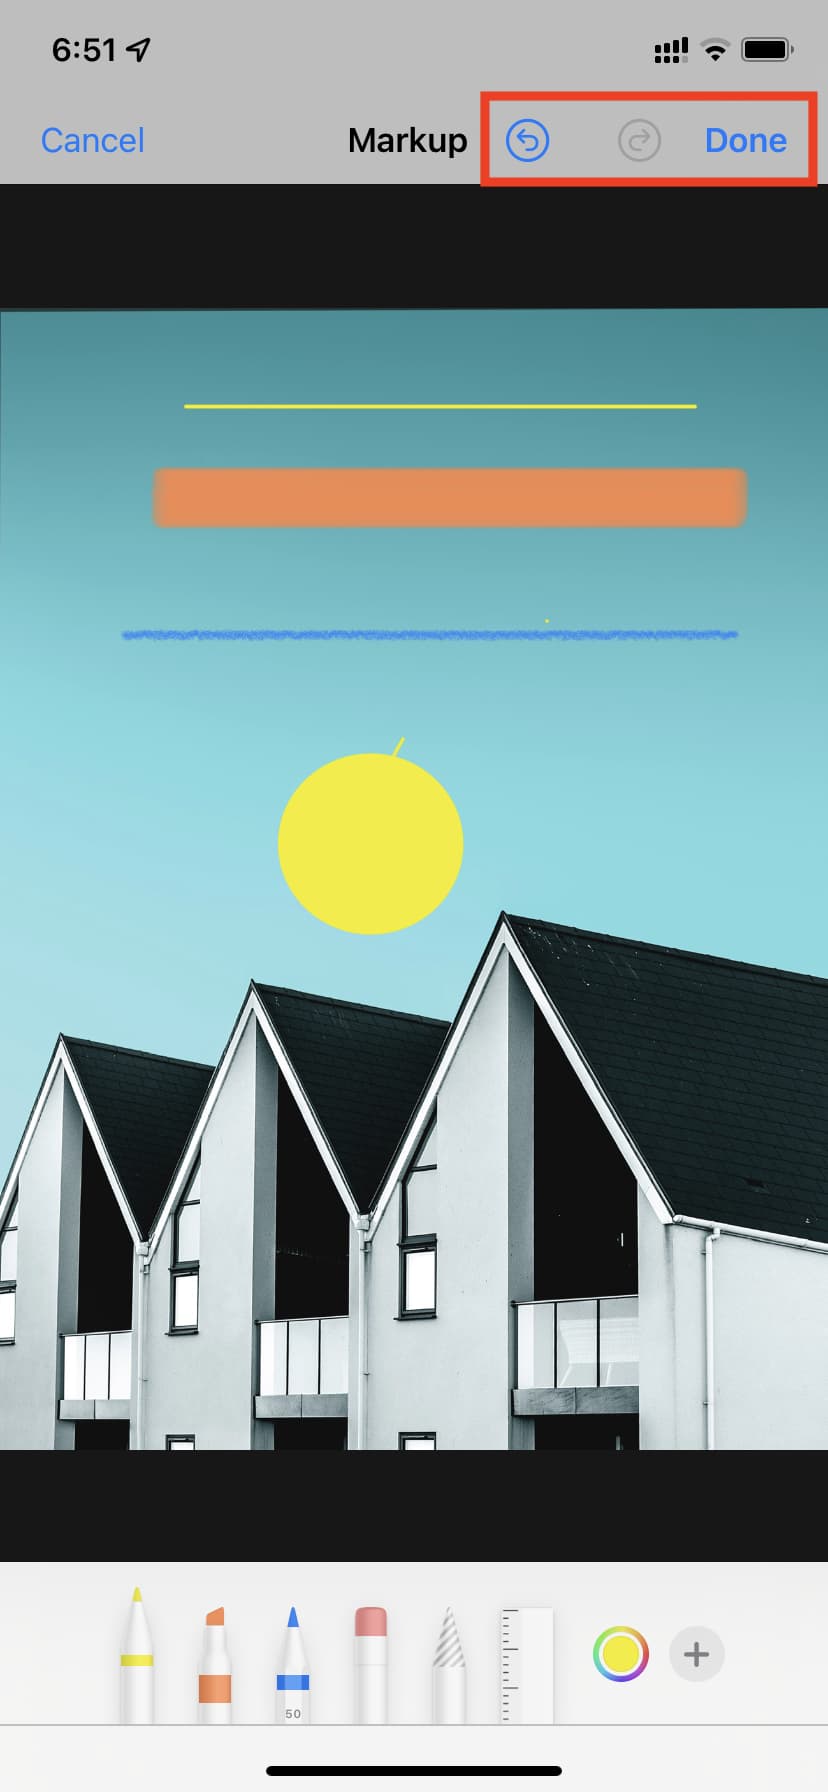
Undo and Redo
On the top, you have curved arrows to undo or redo a change.
Save your edits
Tap Done to exit Markup tools and return to the photo editing screen. To save the image with your Markups, tap Done once again.
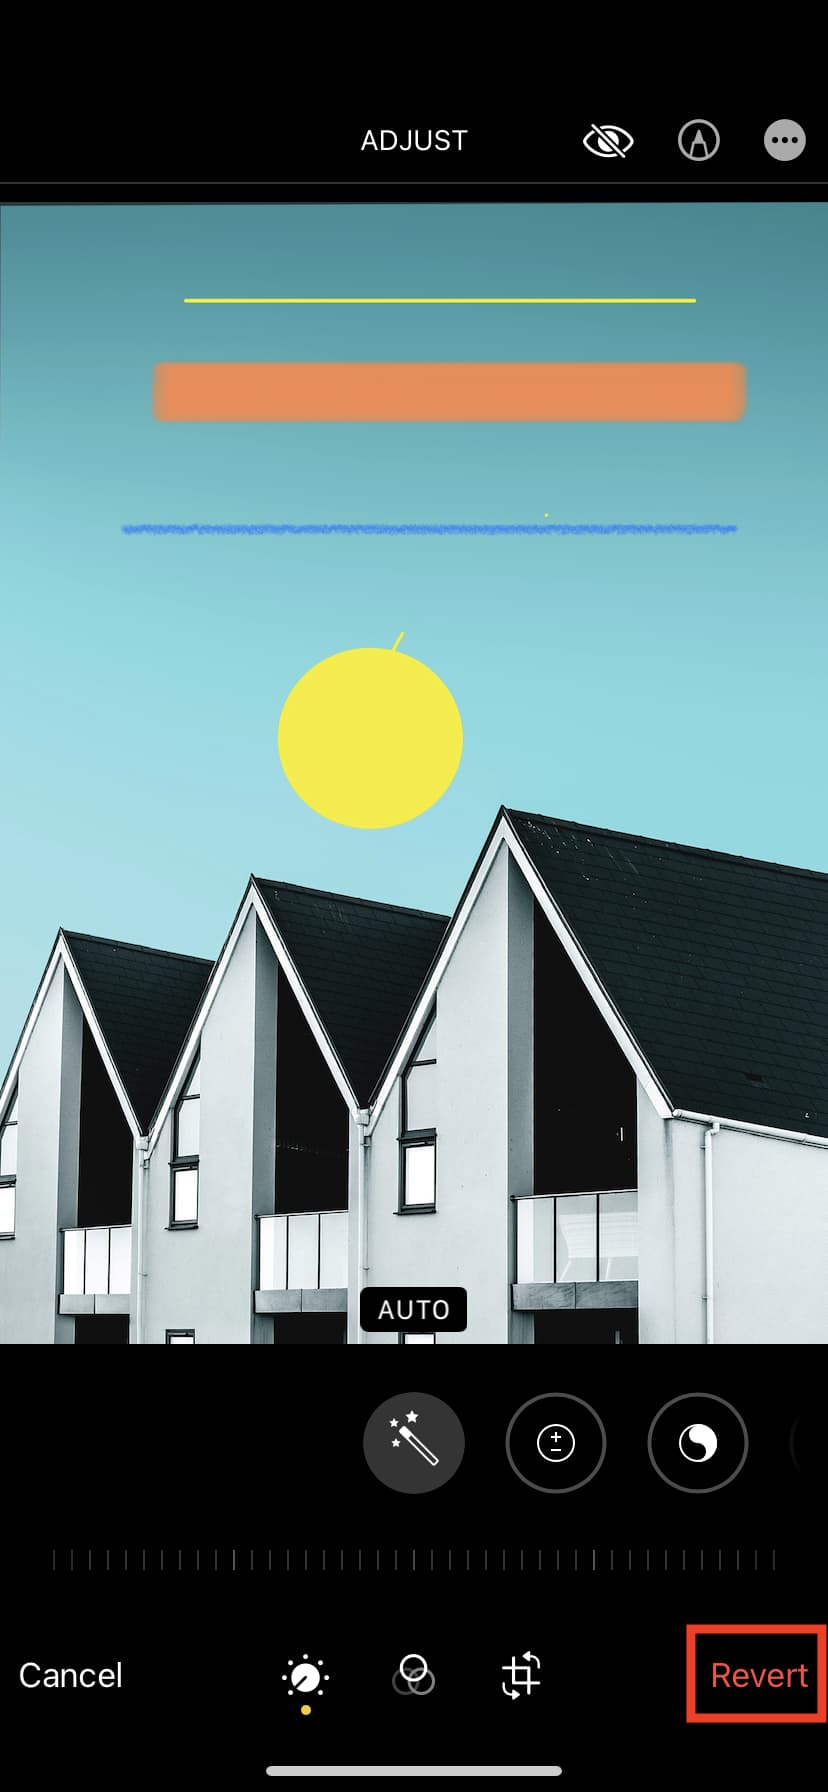
Revert the changes
Tap Edit > Revert > Revert to Original to remove all Markups and other edits from the image and restore it to its original form.
How to use Markup in other apps
The Markup tools are also available outside the Photos app. The basics remain the same, as explained above. But here’s how you can access Markup tools inside various other apps.
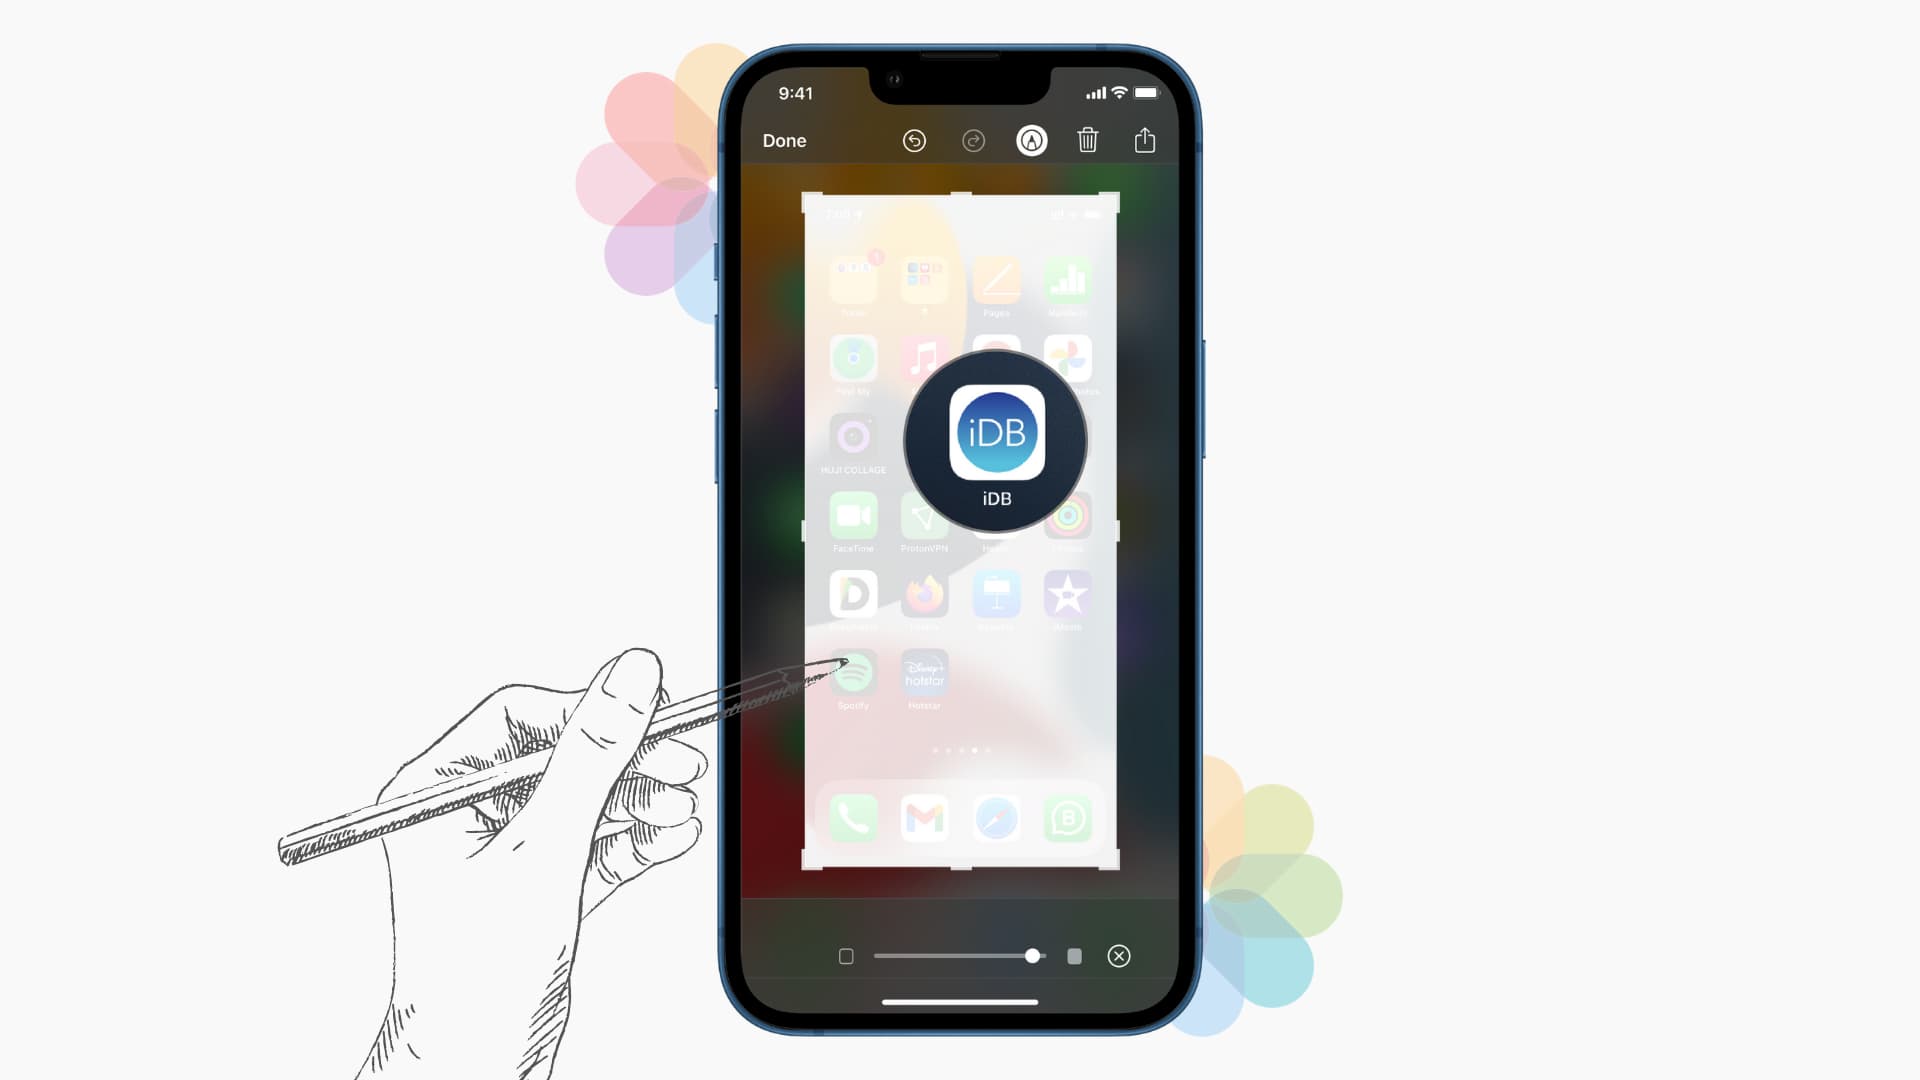
Messages: Tap the oval Photos app icon > select an image > tap the image > Markup.
Mail: Insert an image in a new email or while replying to one. Once you return to the keyboard, tap once on the image and then tap the Markup button. If you don’t tap the image, tapping the Markup button will open the drawing board.
Notes: Insert an image to Notes and tap the image > Markup button.
Files app: Open an image or PDF and tap the Markup button.
Screenshot floating thumbnail: When you take a screenshot, it stays as a small thumbnail at the bottom of the screen for a few seconds. Tap it to access the Markup tools.
Markup tools on iPhone and iPad
By now, you know almost everything about using the handy Markup features. I use it daily to highlight a portion of the image or hide my email and personal details in screenshots I use for iDB posts.
Overall it’s an excellent tool that’s built into iOS and iPadOS. Plus, Mac isn’t left behind, as the Markup tools are also available inside Preview.
You’ll also like: