
How to Take Screenshots on iPhone X

Toggle Dark Mode
By now, you must have seen the new iPhone X which comes with major changes including an edge-to-edge screen design. To achieve this design, Apple has ditched the Home button which was used for many purposes, such as capturing screenshots.
Taking a screenshot on previous models of iPhone required you to press the Home button and Power button together, but things work a little differently in iPhone X now that the Home button is no longer present. The good news however is that you can still take screenshots on iPhone X. In this tutorial, we will show you how it’s done.
How to Take a Screenshot on iPhone X
First, open the screen on your iPhone of which you want to take a screenshot.
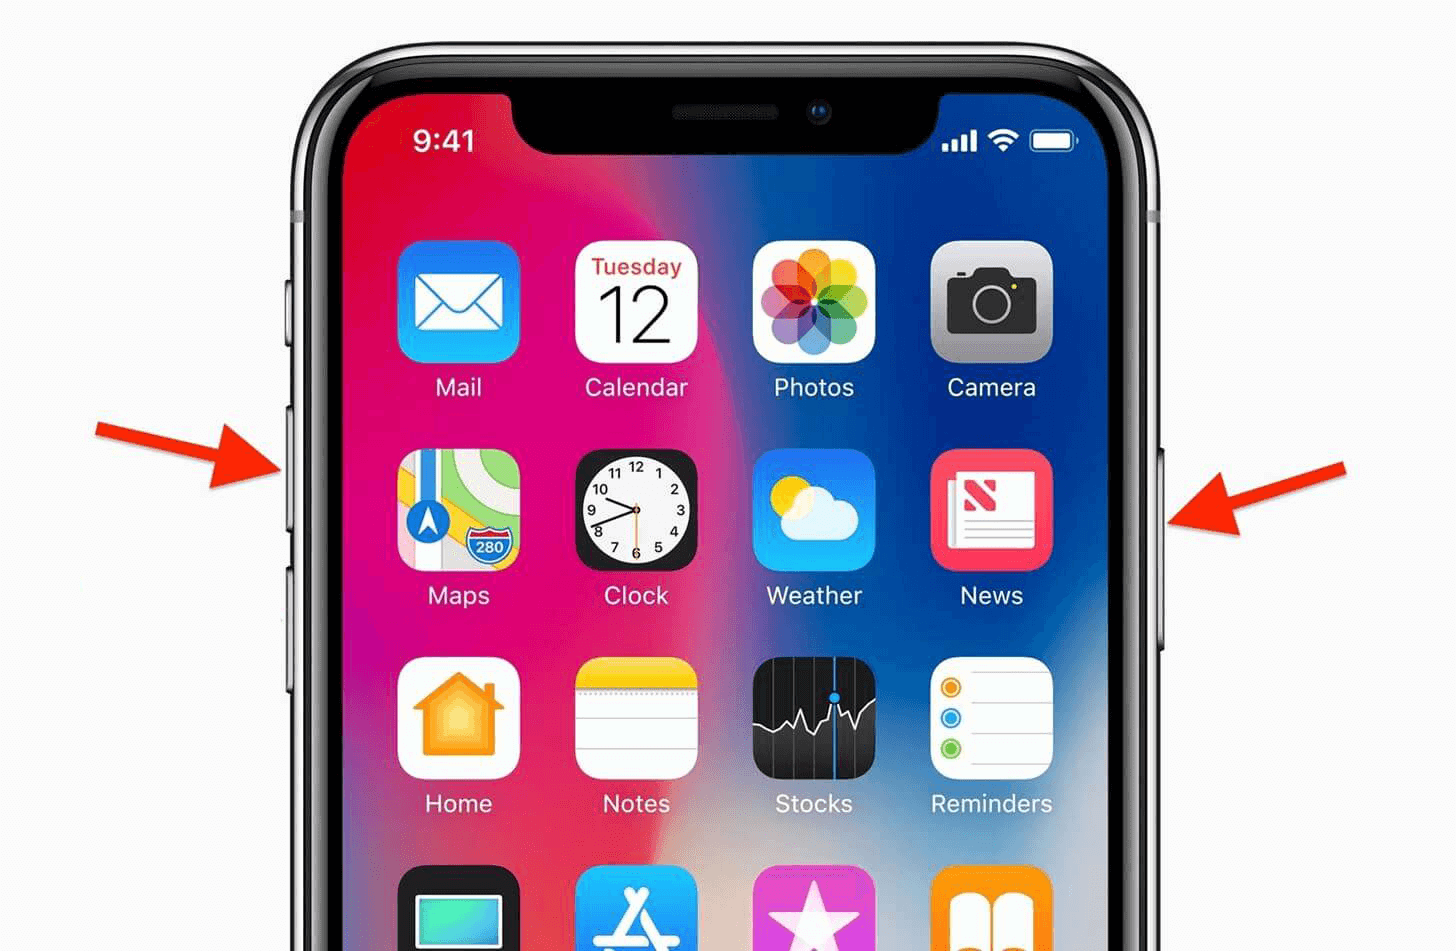
Press and hold the Side button and the Volume Up button together at the same time.
Your iPhone’s screen flashes and the camera shutter sound is played to indicate that the screenshot has been taken.
A preview of the screenshot will be displayed in the bottom left corner of the screen. Tapping on it will allow you to edit the screenshot before saving it while a tap and hold gesture on the screenshot allows you to share it right away. To dismiss the preview and save the screenshot, swipe it to the left and it will hide.
How to View Your Screenshots on iPhone X
Once you’ve taken a screenshot on iPhone X, it will be saved to the Photos app. Open the app and switch to the Albums tab. Go to the Camera Roll album or Screenshots album to view the screenshot that you just took.
You can also edit screenshots from there. Tap on the screenshot which you want to edit, then press the Edit button in the top right corner. You can now add filters and text, crop the image, adjust the contrast and color brightness, draw on the image, and much more.


