Typically, much time and energy are invested installing, licensing, and configuring a Windows virtual machine (VM) on a Mac. VMware Fusion is a leading option for powering such Windows installations, which can be easily moved from one Mac to another, such as a new Mac when an old system is being replaced. When it’s done properly, you shouldn’t even have to re-activate Windows on the new Mac.
When you’re preparing to move an existing Windows VM from one Mac to another, it’s a good time to perform any potentially needed maintenance.
SEE: Virtualization policy (Tech Pro Research)
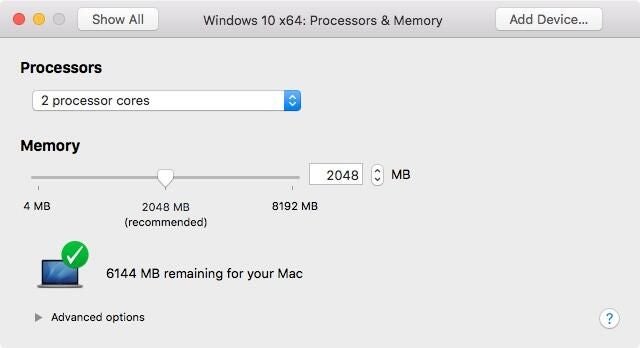
Begin by reviewing and confirming the VM’s settings are configured as you intend. Over time machine settings, such as the amount of RAM the Mac should dedicate to the Windows VM, may change. Perhaps you were loading Windows updates overnight one evening and increased the RAM dedicated to the Windows VM, but forgot to re-adjust the settings once the updates loaded.
To review and confirm a VM’s settings, open VMware Fusion. Next, from the menu bar, click Virtual Machine, and then click Settings. Navigate the VM’s settings, paying particular attention to the Processors and Memory and Hard Disk (SCSI) configurations (Figure A).
Figure A
Also confirm any unneeded Snapshots are removed, and a VM is cleaned before moving the VM to a new Mac.
To manage Fusion Snapshots, open VMware Fusion. Next, from the menu bar, click Virtual Machine, and then click Snapshots. To delete any unneeded Snapshots, right-click the Snapshot and select Delete. VMware Fusion will warn you are about to delete a Snapshot–click Delete to confirm you wish to delete the Snapshot, upon which a progress bar will appear that tracks the Snapshot’s deletion.
In the same way that preparing to move residences is a natural occasion to question whether you should donate or toss possessions you haven’t used since your last move, when preparing to move a Windows VM it’s a good time to review the installation and ensure unnecessary and unneeded files and apps don’t make the move; the resulting VM will be more tidy and potentially consume less disk space as a result of housecleaning efforts.
SEE: Boost your Mac productivity with these 10 techniques (free PDF) (TechRepublic)
Follow these steps to move a VMware Fusion-powered Windows VM to a new or a different Mac.
How to move a Fusion-powered Windows VM
Begin by ensuring the Windows VM is powered off. Moving an open or active Windows VM can result in a moved VM that won’t open or malfunctions.
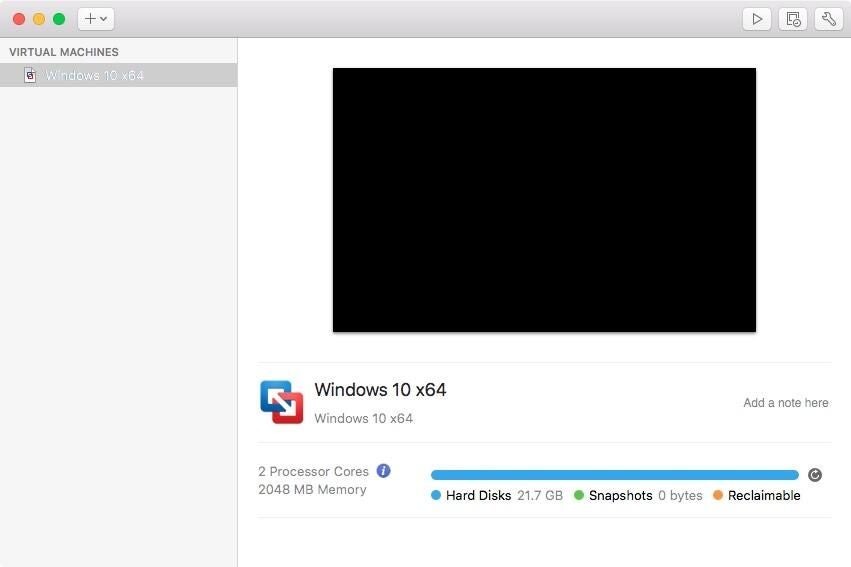
The next step is to locate the Windows VM. To find the Windows VM on your Mac’s hard drive, open VMware and, from the menu bar, select Window and click Virtual Machine Library. VMware will display installed Virtual Machines (Figure B). From the left pane, right-click (or control click) the Windows VM you wish to move and select Show In Finder.
Figure B
Next, right-click (or control click) the VMware Fusion Windows VM and select Copy. (Note: The Copy command will be followed by the name of the VM, such as Windows 10 x64.) Then, locate the media (such as a USB drive or a network directory) to which you seek to copy the VM, select Edit from the menu bar, then click Paste. A window with a progress bar will appear tracking the VM’s copy operation. The amount of time required will depend upon several factors, including the VM’s size and the media’s data transfer rate. In my test, only a few minutes were required to transfer the Windows VM from a MacBook Air to a Thunderbolt 2-powered external hard drive.
Before proceeding, ensure VMware Fusion is installed and activated on the new Mac. Fusion installation on my new Mac proved easy–all I had to do was navigate to the VMware Fusion site, log in and download and activate Fusion. The steps required took but a few minutes to complete.
SEE: Comparison chart: Virtualization platforms (Tech Pro Research)
To finish, transfer the Windows VM to the new Mac by connecting the new Mac to the media to which you transferred the VM. Simply drag-and-drop or cut-and-paste the Windows VM to the new Mac. By default, VMware Fusion creates a Virtual Machines directory within a user’s Documents folder and places the individual vmwarevm files within that location, so I placed the file there on the new Mac.
Double-clicking the transferred file prompts VMware Fusion to open the file. VMware recognizes the Windows VM as having been transferred. Subsequently, VMware presents a window stating This Virtual Machine Might Have Been Moved Or Copied. Click the I Moved It button vs. the I Copied It option. The moving option retains settings and doesn’t generate a new UUID or MAC address, meaning you don’t have to re-activate Windows or adjust network settings. When I moved my existing Windows VM following these settings, the Fusion VM booted right into Windows, my new Bluetooth peripherals worked properly, and I experienced no network issues.