Whether you are working, browsing the web, or playing a game on your Mac, time can easily get away from you. One neat feature of macOS is that you can have the time announced to you. This is a helpful reminder of the time that you can configure for how often you hear it and what voice speaks to you.

Enable time announcement on Mac
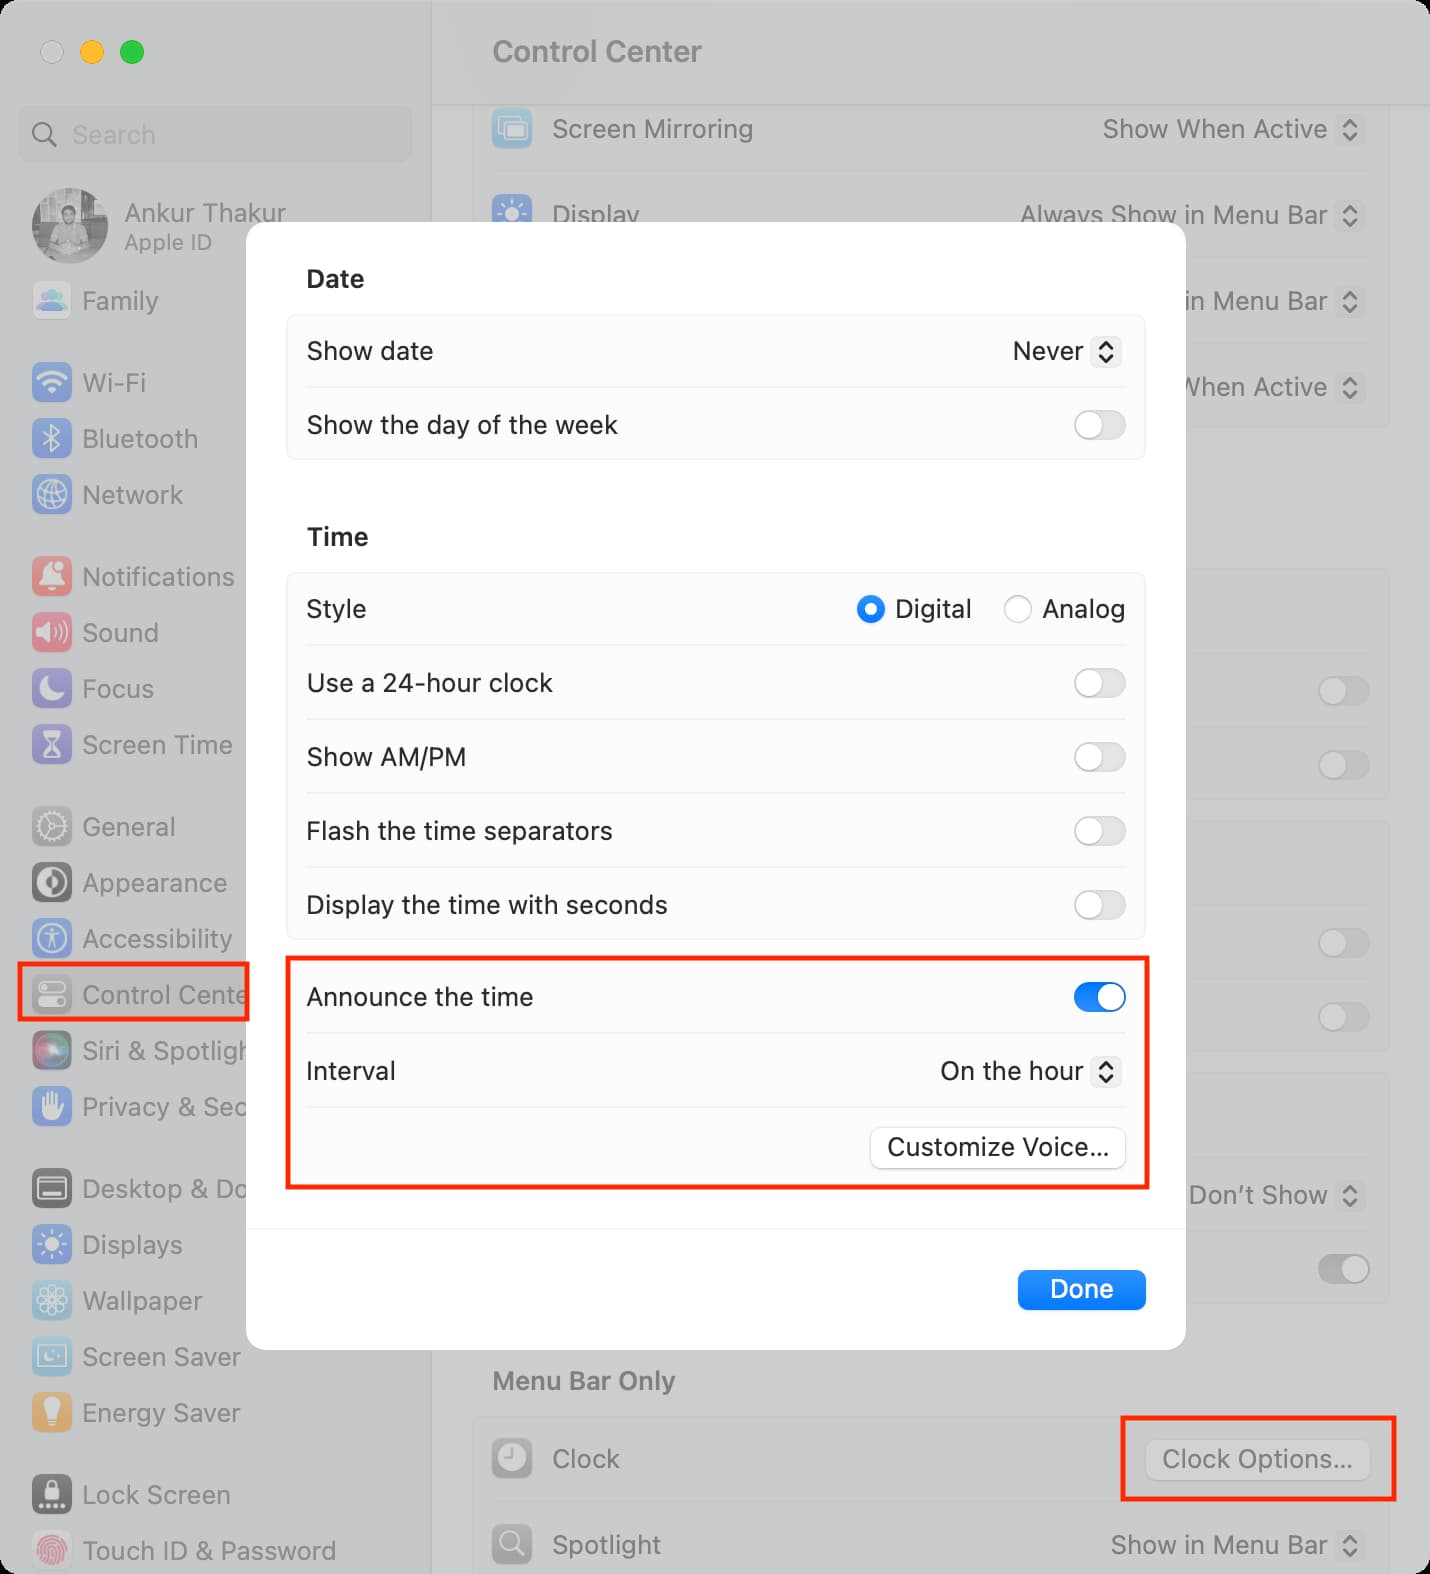
- Click the Apple icon and choose System Settings on macOS Ventura or later.
- Select Control Center.
- Scroll down and click Clock Options next to Clock.
- Enable the switch next to Announce the time.
- Next, click the drop-down menu next to Interval and select On the hour, On the half hour, On the quarter hour.
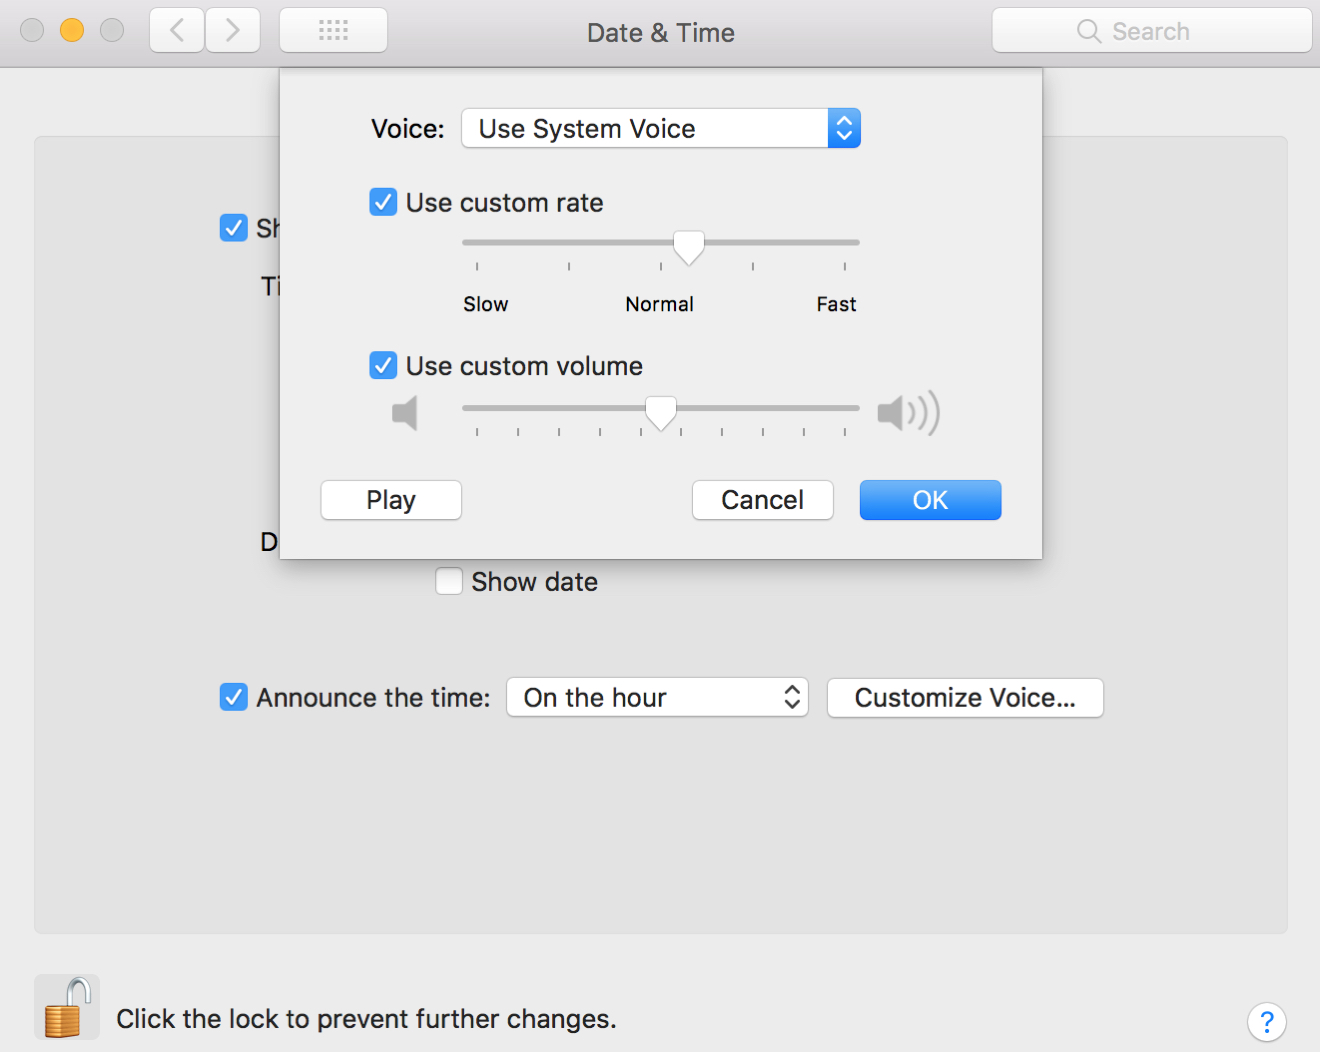
- You can also click Customize Voice and choose a different voice.
- Finally, click Done.
On macOS Monterey and earlier
- Open System Preferences.
- Click Date & Time.
- When you land on the Date & Time settings, click Clock and then mark the checkbox for Announce the time.
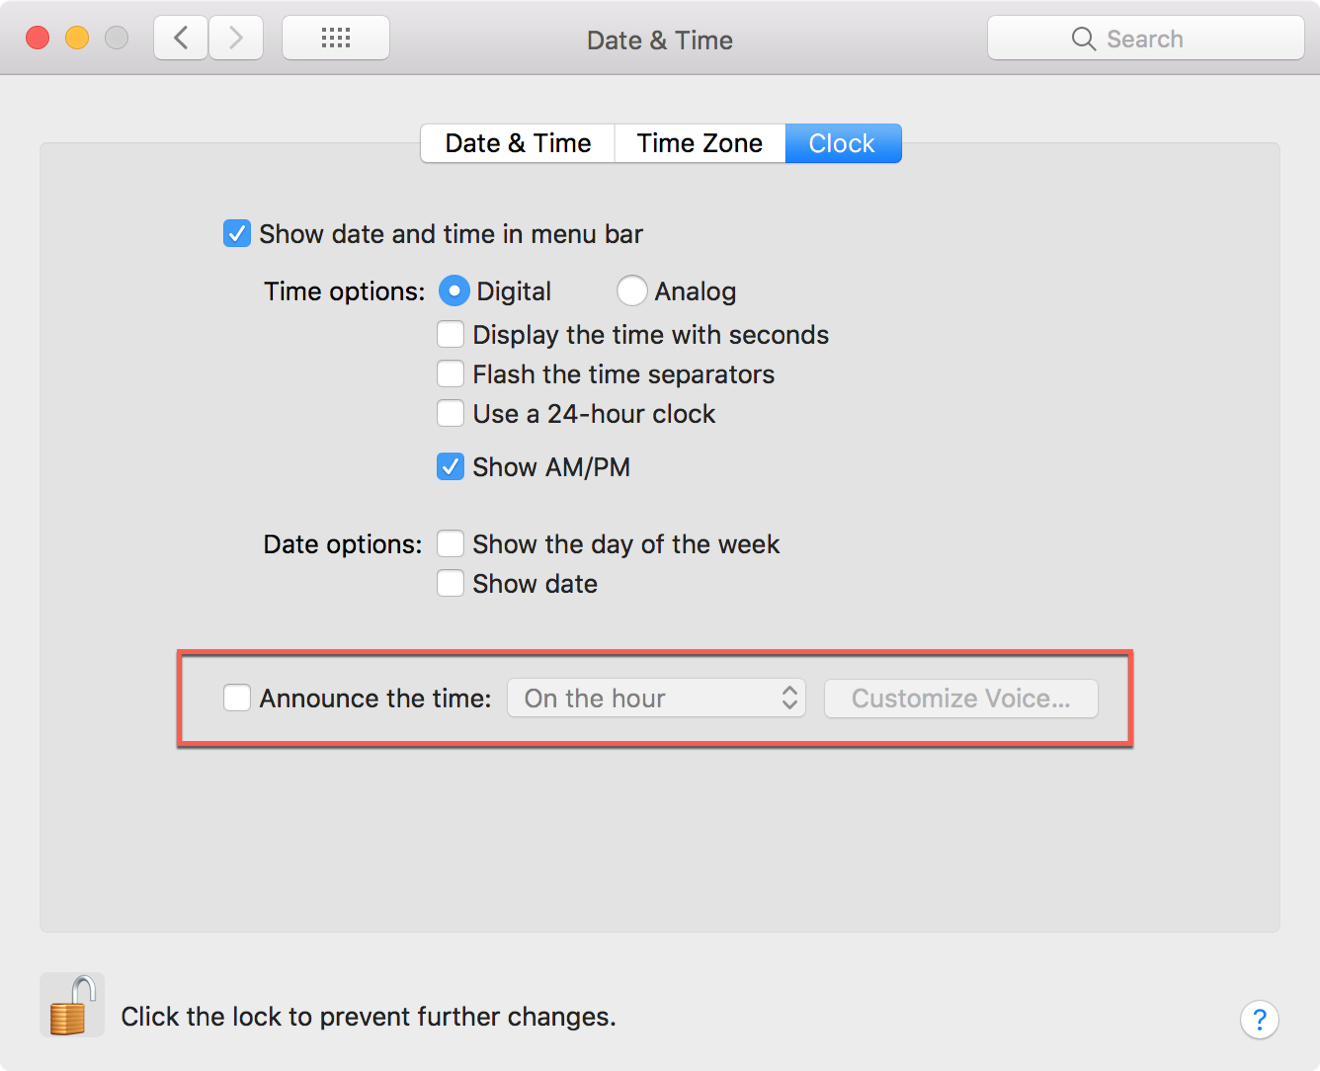
Note that you may have to click the lock on the bottom left in order to make changes. If so, you’ll be prompted to enter your username and password.
Configure the time announcement
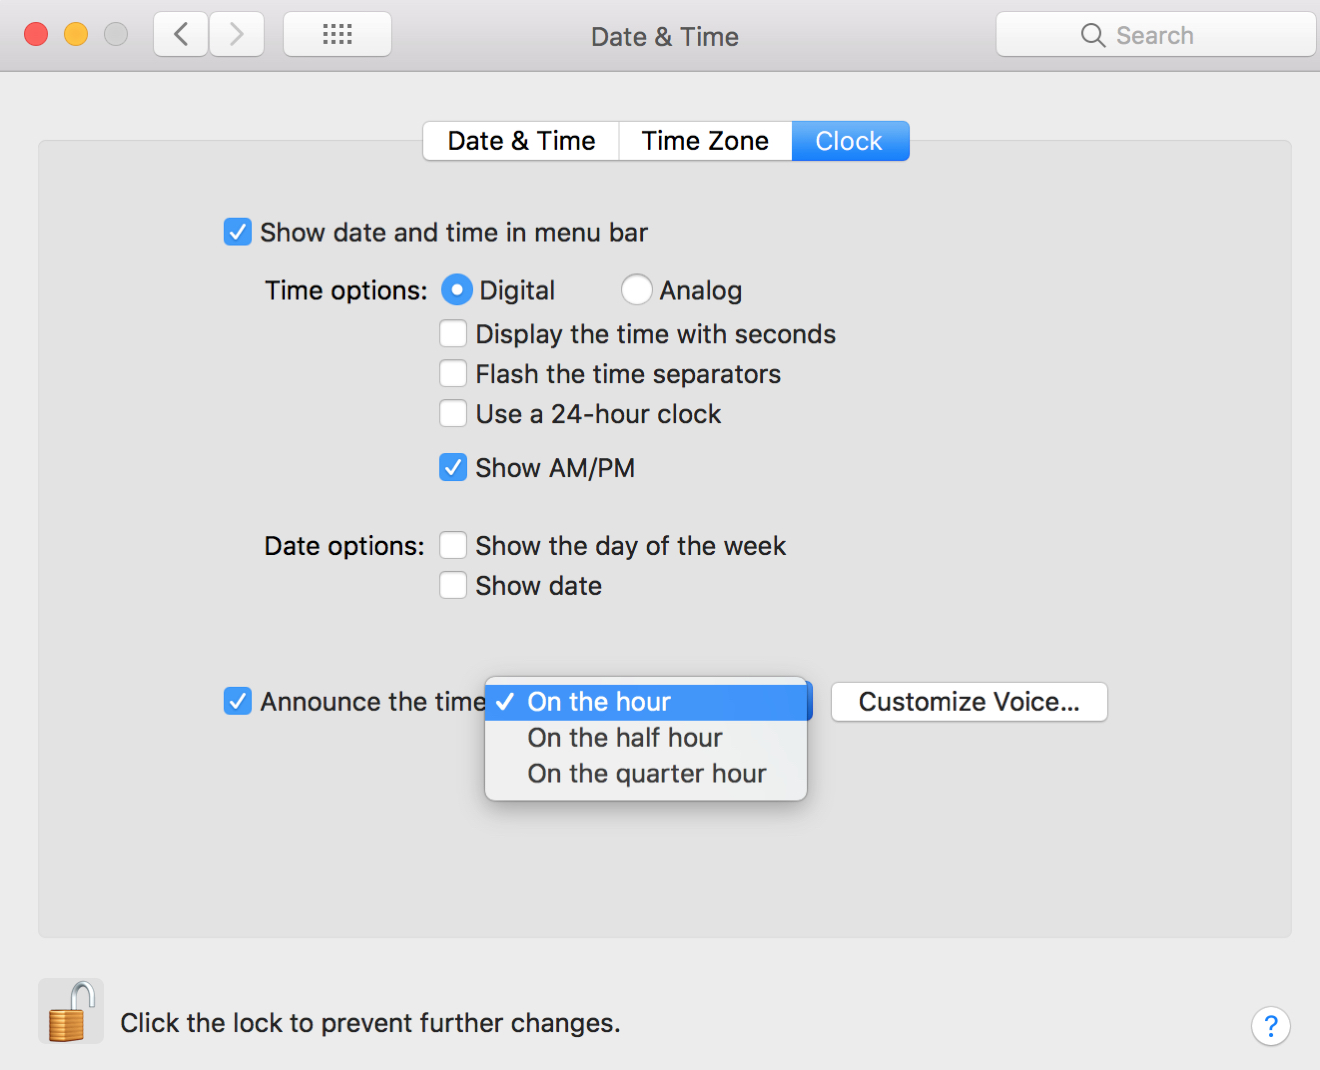
Now that you have the time announcement enabled, you can choose how often to hear it, select a voice, and more.
- Click the drop-down box and select On the hour, On the half hour, or On the quarter hour for how often you want to hear the announcement.
- Click Customize Voice to adjust the speech rate and volume.
- On the voice screen, click the drop-down box for Use System Voice to change the voice you hear.
- Select one of the voices you see in the list or choose Customize to add more voice options.
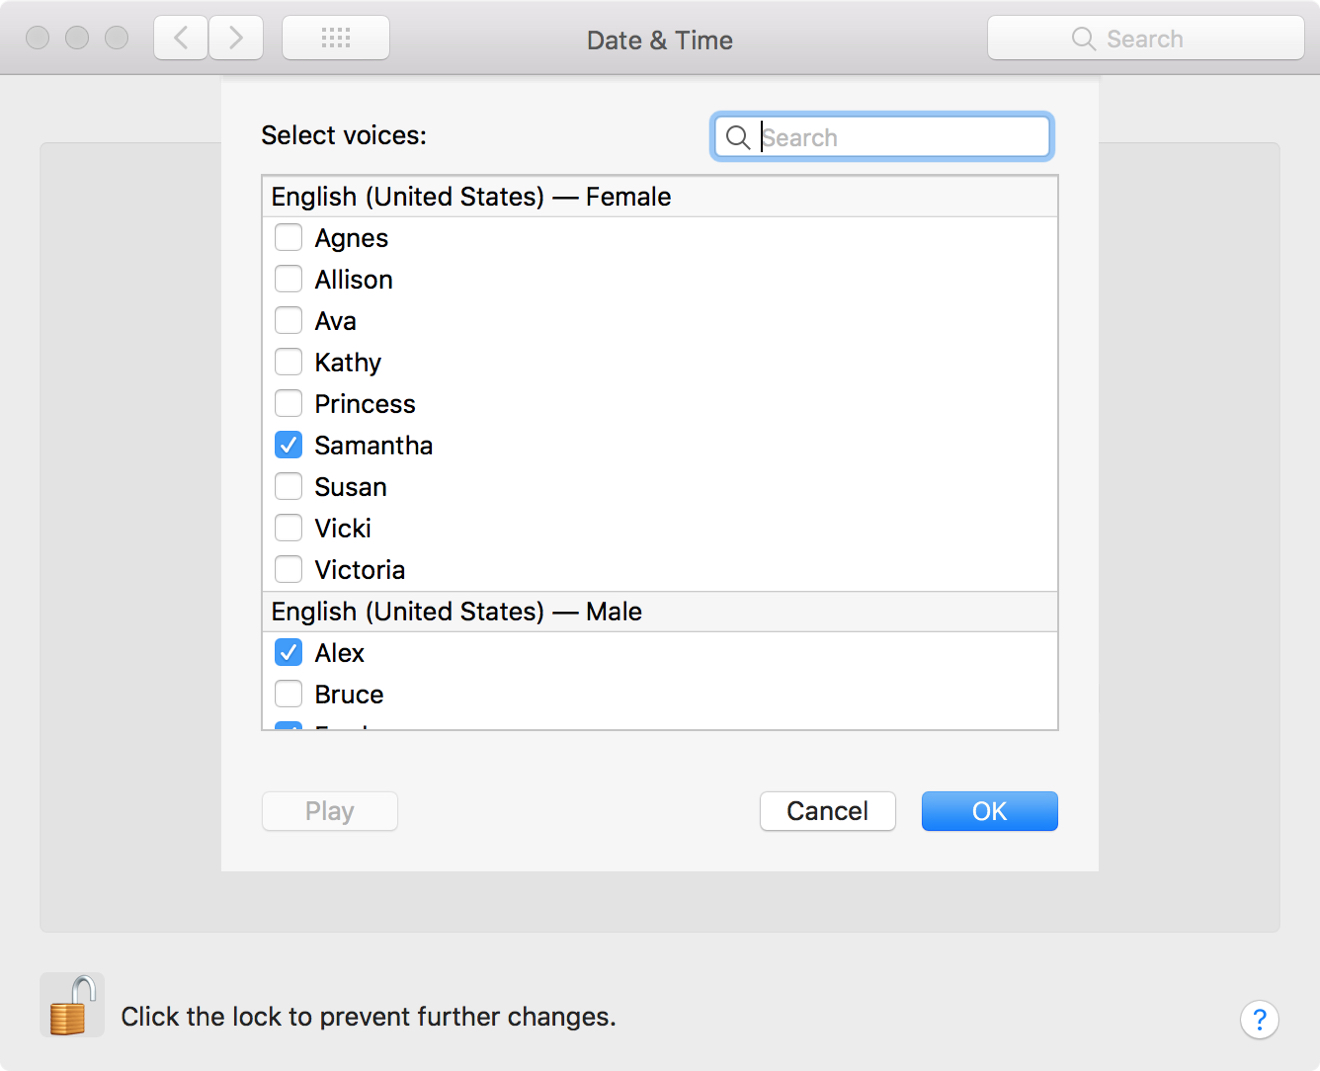
- Click the Play button to hear the voice, speed, and volume.
- Click OK when you are happy with your picks.
If you had to unlock the Date & Time settings with your username and password to make these changes, just click the lock to lock them in when you finish.
Check out next: