Original Image William Malott
macOS Hidden Treasures: Secrets of the System Preferences Window
System Preferences is easy to use: open it, click here, click there—whoops, not there, over here instead… wait, where is that setting? My point is: System Preferences could be easier to use. And it is, once you know the details.
You don’t, for instance, need 30-plus items displayed when you use only a dozen of them regularly. You don’t always have to start with the full window, click a preference pane, and then click a tab to get where you want to be. And that Search field is more useful than you might expect.
Open System Preferences and Preference Panes
To open System Preferences, you can choose Apple > System Preferences or click its icon on the Dock. (System Preferences isn’t on your Dock? See the tip at the end of this article.) Or, use a keyboard shortcut to open it, as described below.
You can jump directly to a specific pane without first opening System Preferences itself, although the first two options here are limited to only a handful of panes:
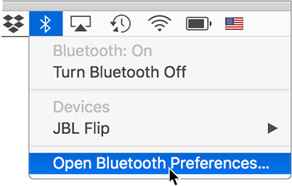
- If the item has a status menu on the menu bar, choose Open Preferences from its menu.
- If an item has a dedicated function key—as do volume control and screen brightness, for instance—press Option and the function key to go to its preference pane. This trick also works with the Touch Bar.
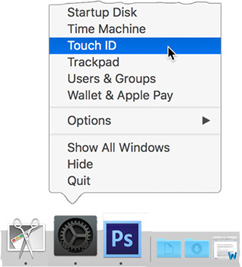
- If the System Preferences icon is in your Dock, press (click-and-hold, rather than just click) it, and choose the pane you want from the menu.
- Put an icon for a specific pane in your Dock; clicking it opens System Preferences to that pane. (A tip at the end of this article explains how.)
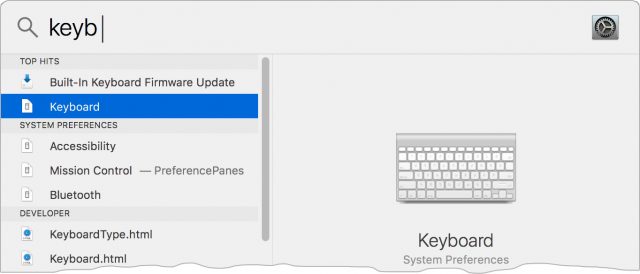
- Use Spotlight to jump directly to specific panes using only the keyboard. Command-Space bar is the system default for opening Spotlight, and typing the name of a pane—usually just the first few letters—gives you a list of options, including the preference pane. The first hit in the list is always highlighted, indicating that pressing Return will open it. I used this method for years, and often still do (I blame muscle memory), but it’s much quicker to use the next method.
- Okay, this isn’t exactly “directly” to a pane, but it’s so quick, it might as well be. Set up a keyboard shortcut to open System Preferences, and create shortcuts in System Preferences for the panes you use the most. The two keyboard shortcuts can get you to a pane in about two seconds. (I describe how to set these up later in this article.)

Open Panes from Within System Preferences
Once the System Preferences window is open, displaying its collection of icons, there are many ways to open a specific preference pane:
- Click its icon.
- Choose it from the View menu.
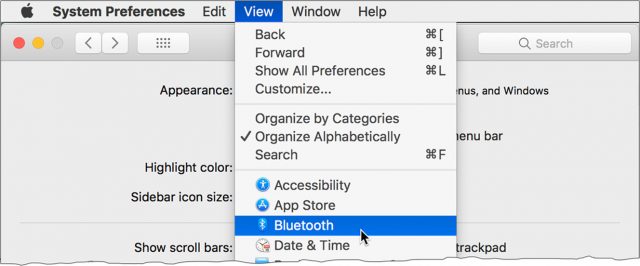
- Choose it from the Show All
 button’s menu: press—that is, click and hold—the button for a list of panes.
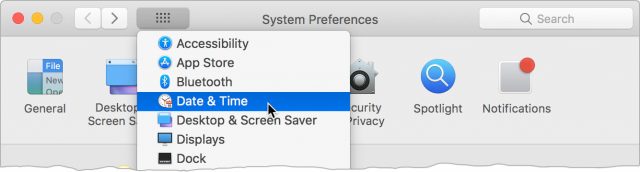
- When the Search field is inactive (the magnifying glass and Search label are grayed-out and centered in the field), type one or more letters to specify a target pane; a quick animation outlines it in blue (as with the Dock icon shown below), and pressing the Space bar opens it.


- Assign keyboard shortcuts to items in the View menu that you open frequently—and to System Preferences itself—as described next. (The shortcuts show up in the Show All button’s menu, too.)
To return from a preference pane to the icon array, you can:
- Click the Show All button.
- Choose View > Show All Preferences (Command-L).
- Use the Back button on the menu bar, or choose View > Back (Command-[ ). Use the Forward button or View > Forward (Command-]) to head in the other direction when you’ve been tweaking more than one setting. These buttons and commands can take you through a history of where you’ve been in System Preferences.
No matter how you move around, if you return to a multi-tab pane, the tab you worked in previously will remain selected as long as System Preferences remains open.
Set Up Keyboard Shortcuts
You can skip menu selections and/or multiple clicks to get where you need to go in System Preferences: set up a keyboard shortcut to open System Preferences, and then others within System Preferences to take you to the pane you want. Two quick key combos get you there in about two seconds, and you can move quickly from one pane to another if you have more than one thing to adjust.
For System Preferences itself:
- Go to System Preferences > Keyboard and click Shortcuts.
- Select App Shortcuts in the category list on the left, and click All Applications in the list on the right—you want this available no matter where you’re working.
Click the + button under the app list and typeSystem Preferences…in the Menu Title field. You can type three periods instead of the ellipsis character that you get with Option-colon. - Click in the Keyboard Shortcut field and press your key combination. I use Command-Option-Control-comma because the three modifier keys are easy to press together and unlikely to conflict with any app shortcut, and Command-comma is used in almost all apps to trigger the Preferences command.

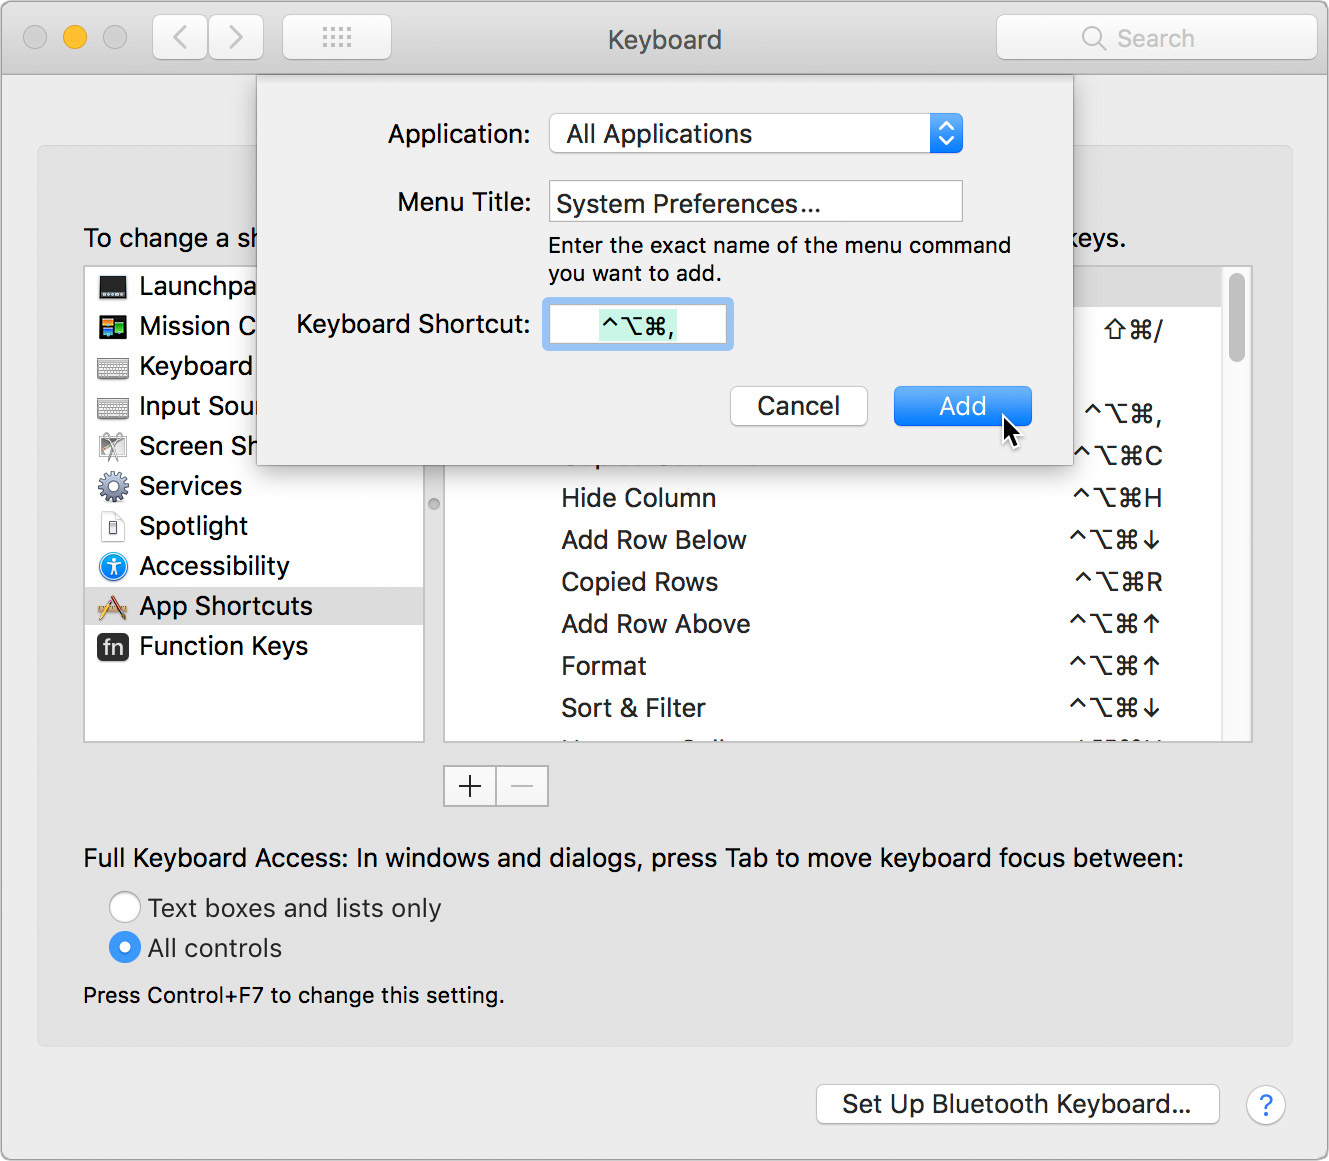
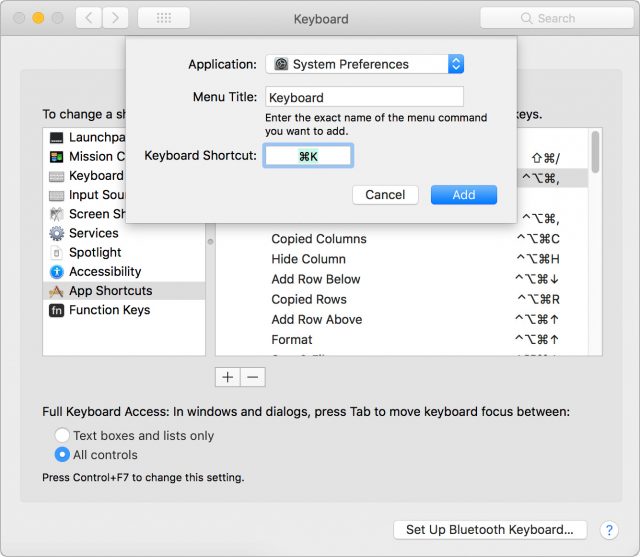
To set up a keyboard shortcut for a specific pane—one that works within System Preferences:
- In System Preferences, go to Keyboard > Shortcuts and click App Shortcuts in the category list on the left.
- Click the + button beneath the list of apps, and choose System Preferences from the pop-up menu. (Embedded little tip: Jump to the System Preferences item in this incredibly long menu by clicking it to open it and then typing
syto select it, or pressing its keyboard shortcut if you’ve created one.) - In the Menu Title field, type the name of the pane for which you want to make a shortcut. The name must be exact, so
Date and Timewill not work for the Date & Time preference pane. You can double-check the name by looking in the View menu (since you’re in System Preferences while you’re doing this). - Enter the shortcut you want for the pane. Since System Preferences has no keyboard shortcuts of its own, you’ll be able to use single-letter shortcuts for your most-used panes: Command-K for Keyboard, Command-T for Trackpad, and Command-S for Sound, for instance.

To use these shortcuts in tandem, you would press Command-Control-Option-comma to open System Preferences and then Command-K to open the Keyboard preference pane.
These keyboard shortcuts even open hidden preference panes, described ahead.
Use the Search Field
Using the View menu or the menu from the Show All button is great when you know where to find the feature you need, but what about items that are less obvious? Where do you change your default browser, for instance? You haven’t used Spaces in a while… wait, there’s no preference pane for that? Nor for dictation, which you’ve been meaning to try….
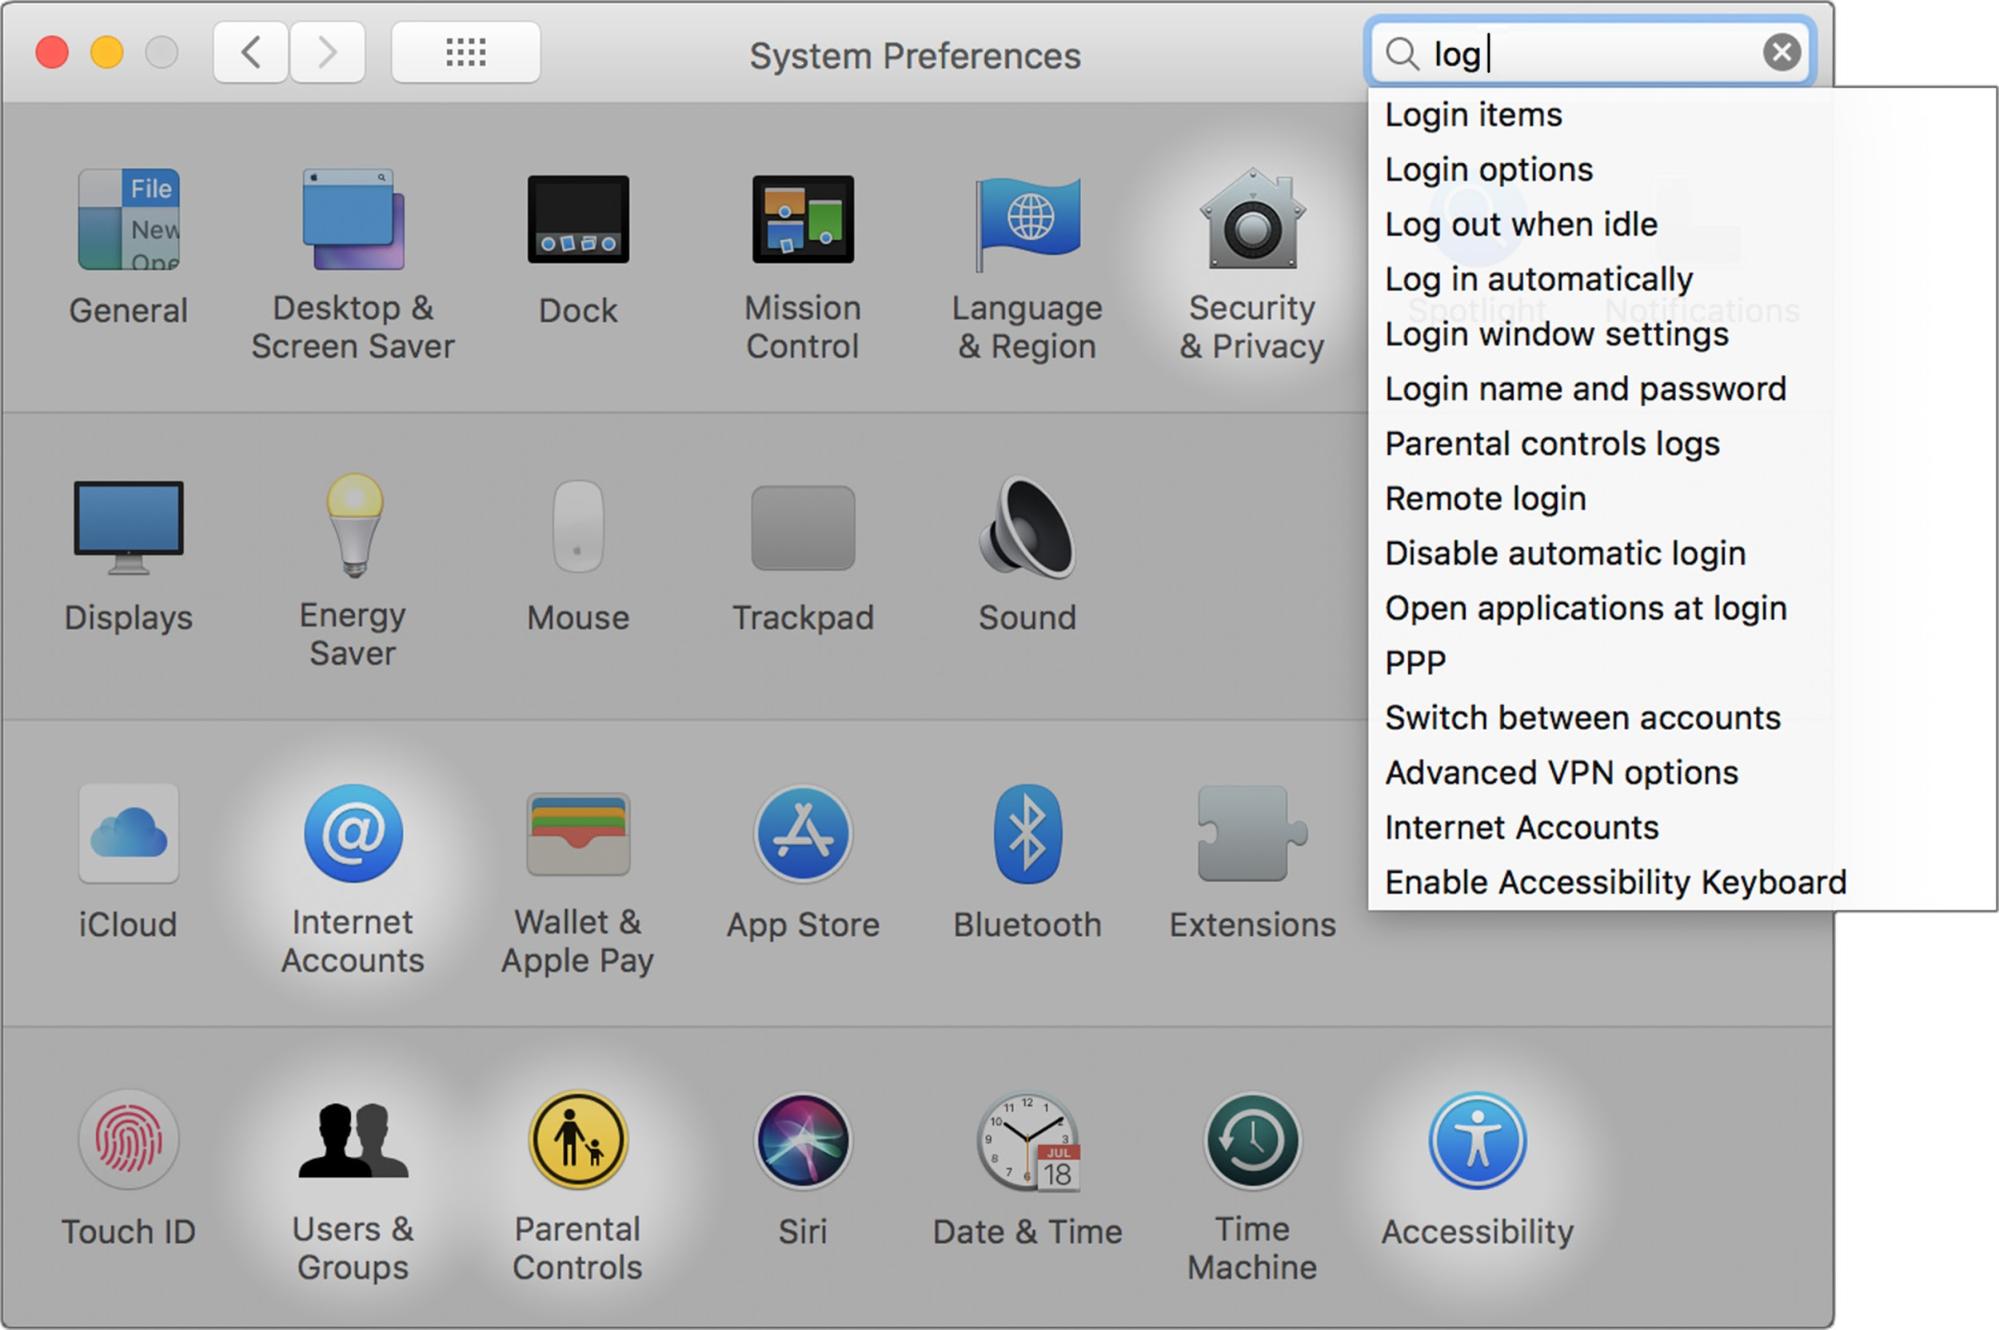
While the Search field may seem redundant, or just relatively useless for going to a pane, it’s great for going directly to a tab, or finding where a setting lives when you’re not sure where to look, and even if you’re not sure of the correct term.
So, using login or even log in as a search term can get you directly to the Login Items tab of the Users & Groups pane. The icon used to identify you and other account owners at startup… what’s that called? It doesn’t matter: type picture and you can select from User Picture, Desktop picture, and Screen saver. Search for wallpaper, and you get Desktop picture.
As you type, a drop-down menu lists candidates, all of whose panes are spotlighted in the window. (If you’ve hidden seldom-used panes to cut down on clutter—that’s covered next—they still appear in the Search field’s menu of suggestions.) You can jump to the related pane by clicking its icon or by clicking an item in the menu; you’ll be sent directly to the appropriate tab in the pane.
 Note that once the Search field is active, it stubbornly insists on staying that way as long as System Preferences is open, no matter what you do from then on, and even if you delete the search term. (Which means you can’t simply type to select a displayed icon, as described earlier.) You can deactivate it by clicking its Cancel button or pressing Esc, but neither of those works unless there’s something typed in the field because an empty, active field doesn’t provide a Cancel button or respond to Esc.
Streamline the Preferences Window
The System Preferences View menu provides two organizational choices: Organize Alphabetically and Organize by Category. Experts agree that the alphabetical approach is by far the better of the two (the experts polled being Adam Engst and me.)
But how many System Preferences panes do you use on a regular basis, rather than in set-it-and-forget-it mode? How many do you never use (perhaps Mouse on your laptop, or maybe Parental Controls), or need only once in a blue moon, such as Startup Disk? If you want more convenient access to the panes you actually use, you can reduce the clutter by hiding seldom-used panes:
- Choose View > Customize. Every icon starts with a checked checkbox, indicating it shows in the window.
- Click icons to uncheck those you want to hide; if you change your mind, click the icon again. (You don’t have to click the icon’s checkbox—clicking the icon itself is enough.)
- Click the Done button in the toolbar. The unchecked items disappear.
You can still easily access a hidden pane if you need it: choose it from the View menu, use the Search field, or trigger it with a keyboard shortcut that you’ve set up. The only catch is that a hidden pane isn’t listed in the Show All button’s menu except for the duration of the current System Preferences session.
Note that neither the View > Show All Preferences command nor a click of the Show All button unhides out-of-sight icons. The purpose of Show All is to get you back from a specific preference pane to the window view that displays all the available icons.
Here’s what my System Preferences window looks like—it would have even fewer icons, but the window has a fixed width, so I filled an entire row.
Quick Tips
Here are a few more useful tips:
- Dock or un-dock System Preferences: System Preferences is displayed in the Dock by default. To remove it, press (click-and-hold) the icon for a pop-up menu, and uncheck Keep in Dock from the Options submenu. It’s still there? That’s because you have System Preferences open, and all open apps show in the Dock.
Your System Preferences icon isn’t available in the Dock unless it’s open? Drag its icon from your Applications folder to the left side (or top, if you have it showing vertically) of the Dock.
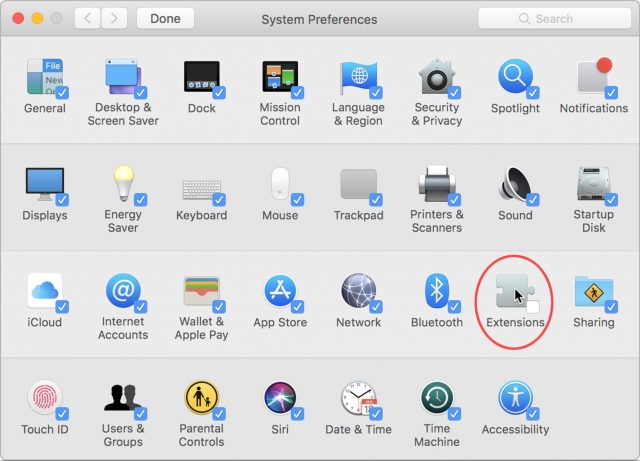
- Add panes to the Dock: If you need to use certain preference panes frequently, add them to your Dock for quick access. You’ll find them in
/System/Library/PreferencePanes. Since they’re essentially documents, drag them to the right side (or the bottom) of the Dock. The screenshot here shows the System Preferences icon on the “app” side of the Dock and icons for the Keyboard, Notifications, Mouse, and Sound panes on the “document” side.

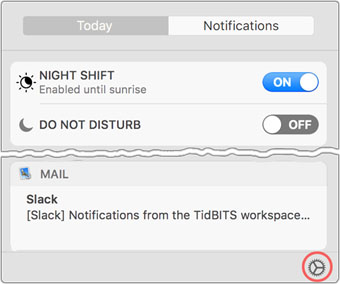
- Notifications shortcut: There’s a special shortcut from the Notifications sidebar to the Notifications preference pane: click the little gear icon at the bottom of the panel.

- Third-party pane placement: Non-Apple preference panes are interspersed with the others in an alphabetized System Preferences window but appear in their own row at the bottom of the window when it’s viewed by categories.
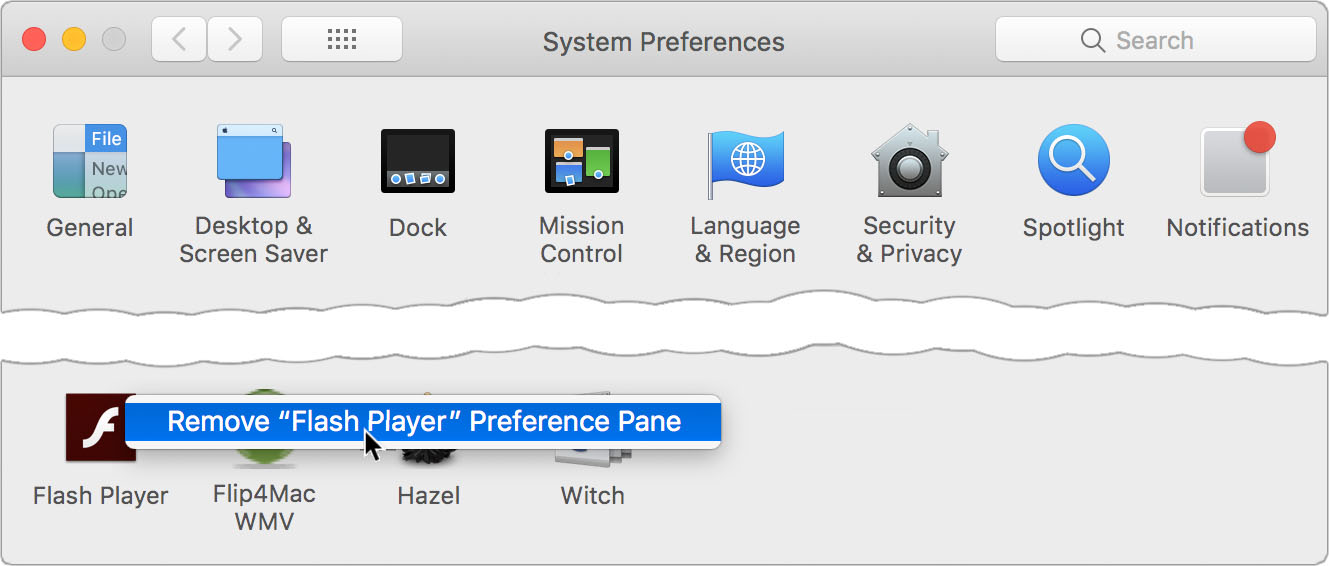
- Delete a third-party pane: Third-party preference panes live in
~/Library/PreferencePanes. That’s your user Library folder—Apple’s preference panes are stored in the System Library folder. The user Library folder is hidden by default, but you can easily access it in the Finder by pressing Option while opening the Go menu and then choosing Library. To delete a pane that has outlived its usefulness, however, you don’t have to access the folder. Instead, Control-click its icon in System Preferences and choose Remove.

When I try to go to Spotlight with the “command-spacebar” I get Siri not Spotlight.
What am I doing wrong?
MacOS Sierra v10.12.6
David
At first I thought it was iOS or some weird hybrid. I’m also still on El Capitan (11.x) and I think he’s on a later version!
You’re holding the keys down to long:
The default for spotlight is Command-Space while the one for Siri is Hold Command-Space. If you have timing problems, change one or the other to use something other than the Command Key.
One important thing is that not all User Interface items show up directly in the System Preference Panel for that interface item; there are often more items in the Accessibility Preference panel.
Here’ an example involving the Trackpad:
The default method for dragging an item using the trackpad is to select the item and then, without losing contact with the trackpad, move your finger along the trackpad until the item is in its final position. However, some folks (me, for example) have problems keeping the pressure light enough to keep contact without pressing too deeply and activating Force Touch on a newer trackpad. One way out of this problem is to enable three-finger drag—you select the item and then drag it with three fingers. However, that option is not in the Trackpad Preference Panel; it’s a dropdown item in Accessibility->Mouse&Trackpad->Trackpad Options. To make things worse the Mouse&Trackpad item doesn’t;t show up immediately when you display the Accessibility panel—it’s the next to last item in the scrollable list.
Excellent article, useful.
Alan - Thank you!
Worked as advertised.
David
Would be helpful to talk about the scope of keyboard shortcuts. For example Cmd F is used by System Prefs as “Find”. So too Cmd L and of course Cmd Q