A First Look at the New Finder in macOS Mojave
macOS Mojave brings with it several enhancements to the core of the Mac experience: the Finder.
More than just a file system viewer, Finder is the heart of the Mac, giving users access to all of their data, programs, and more. With Mojave, Apple has added some genuinely useful features to what some people may consider a product not worth the time.
Those people, of course, are wrong, and Apple is once again showing its commitment to the Mac.
With that out of the way, let’s dive into Mojave’s four new Finder features:
Desktop Stacks
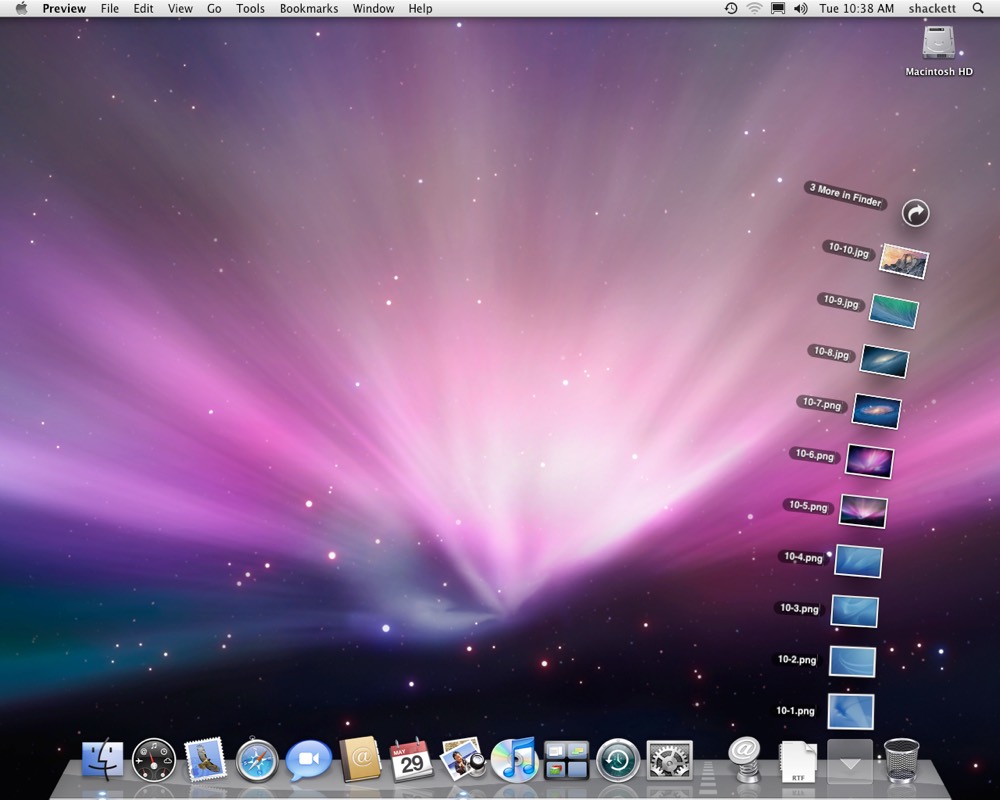
Stacks have been a part of macOS for many years. They started as a way to quickly access a folder, such as Downloads or Applications right from the Dock, as seen here in Leopard:
Mojave takes the same basic elements and brings them directly to the Desktop.
We’ve all had files and folders stack up on our Desktop, making a mess of our computers.
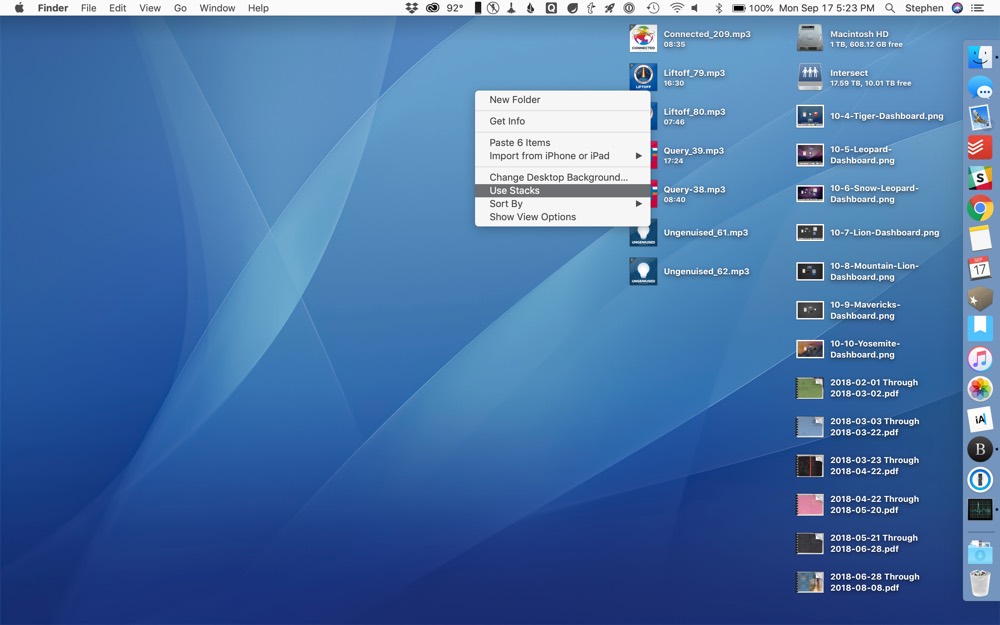
Stacks can be enabled from Finder’s View menu, or via a right-click on the Desktop itself:
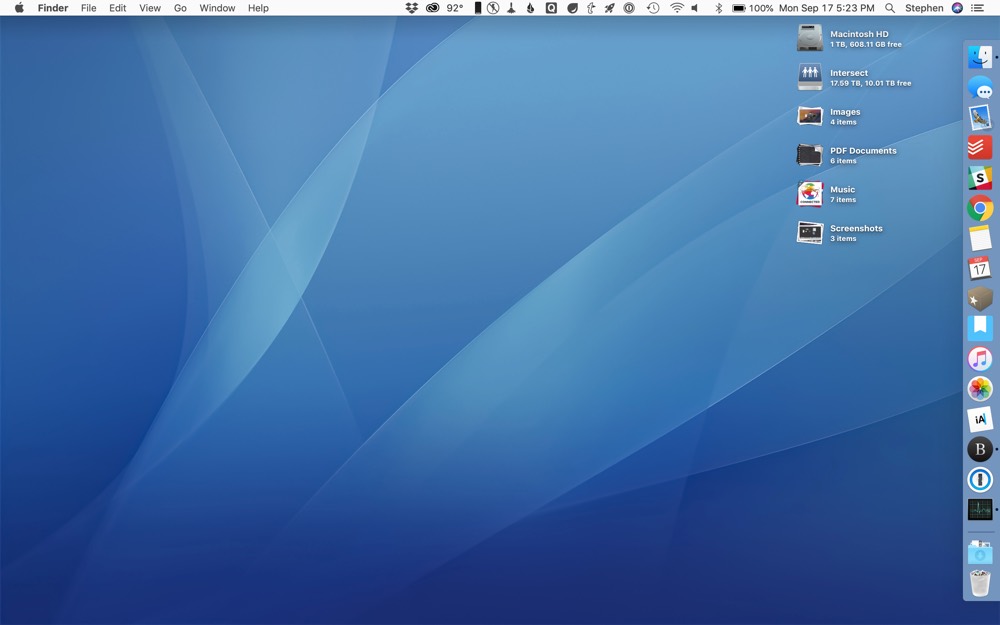
Once enabled, Finder will sort all of the files on the Desktop into Stacks based on file type. If that doesn’t work for you, Stacks can be created using several criteria, included creation and modification dates, tags and more. Each Stack type will leave folders alone; Stacks can only reorganize individual files.
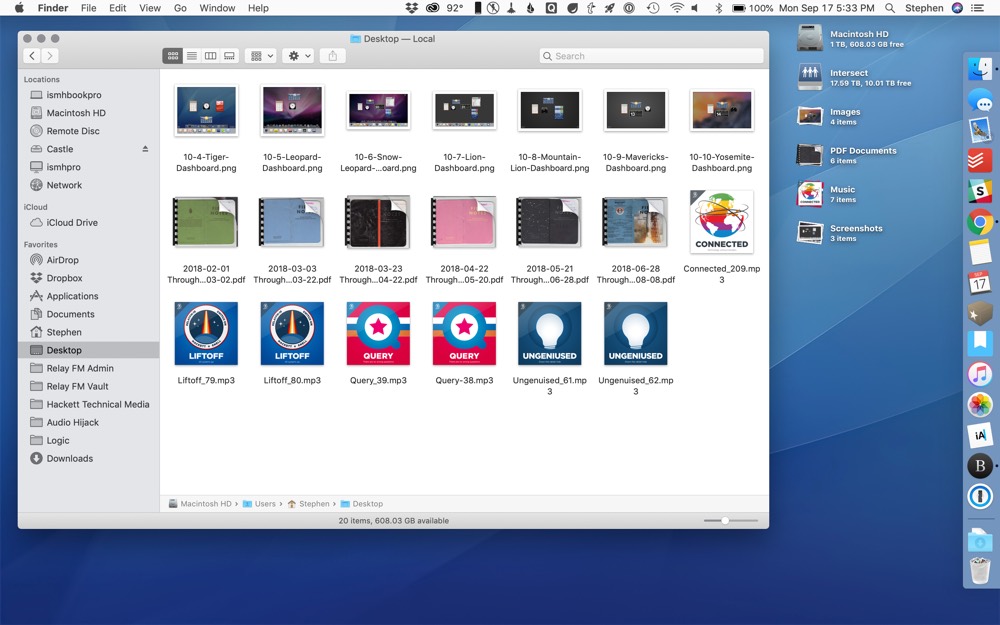
This organization is unique to the Desktop; Stacks do not appear in other Finder views:
Stacks can be opened individually, or scrubbed over via Trackpad to reveal files hidden by the top-most file. From there, they can be viewed via QuickLook or opened.
Gallery View
Mojave marks the end of Cover Flow, a view in Finder lifted straight out of mid-2000s iTunes. In its place, we now have “Gallery View,” which takes the best part of Cover Flow — large file previews — and combines it with some useful, context-aware tools.
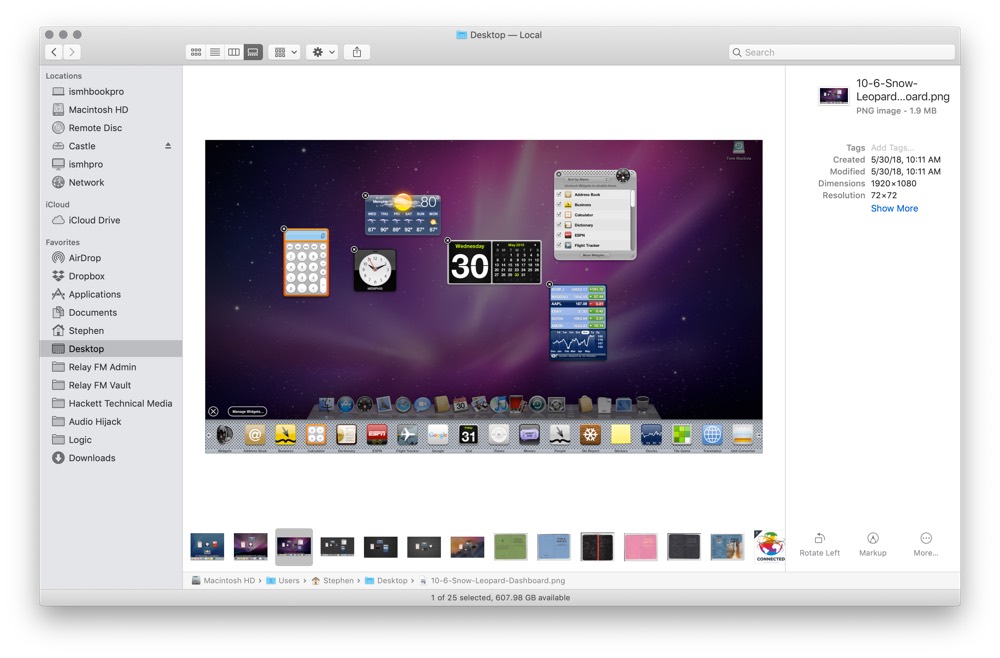
As you can see, the preview for the highlighted file dominates this view, with thumbnails for the other files in the directory lining up in a horizontally-scrolling list across the bottom of the window.
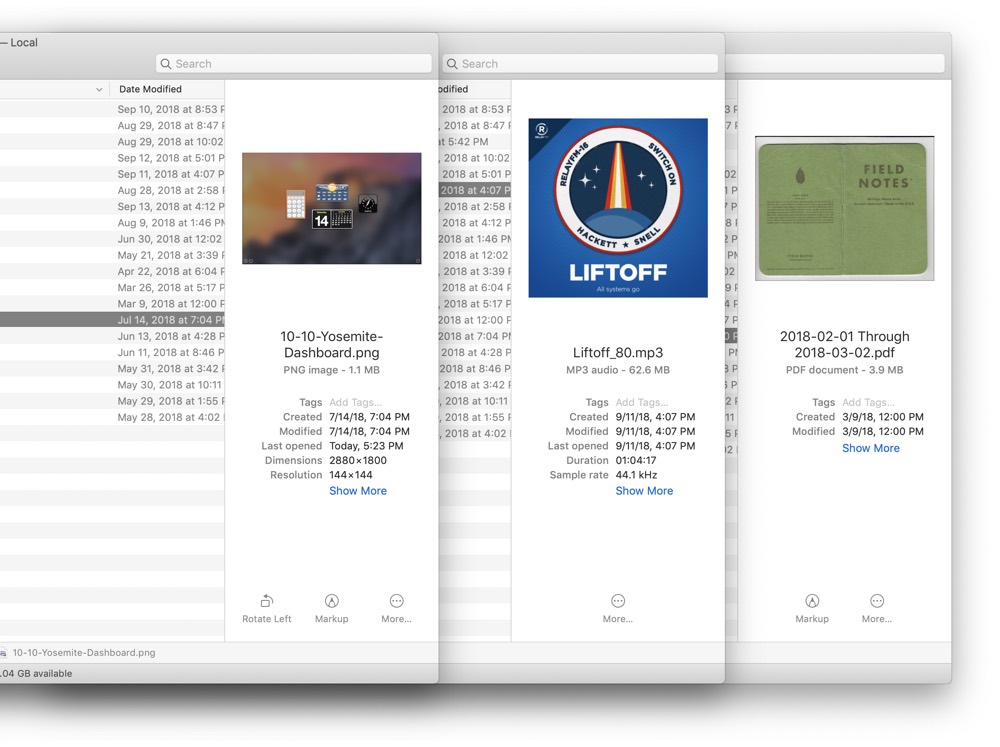
The right panel is new, available in all Finder views, not just Gallery view, and shows any metadata associated with the selected file that appears on the left. For images, that includes file size, dimensions and resolution. For MP3s, Finder will surface the file’s duration and sample rate. PDFs, on the other hand, don’t get much:
You may have noticed the gray action buttons beneath the metadata entry in the right panel. These are called Quick Actions, and they are best thought of as shortcuts to common actions you may want to perform, based on the type of file selected in Finder.
macOS Mojave comes with several Quick Actions pre-installed, but Automator can be used to create new ones.
Say you need to resize images to 1,000 pixels across on a regular basis. You can create a workflow to accept a file, and resize. Save it as a Quick Action, and it will now appear in Finder, along with the built-in options:
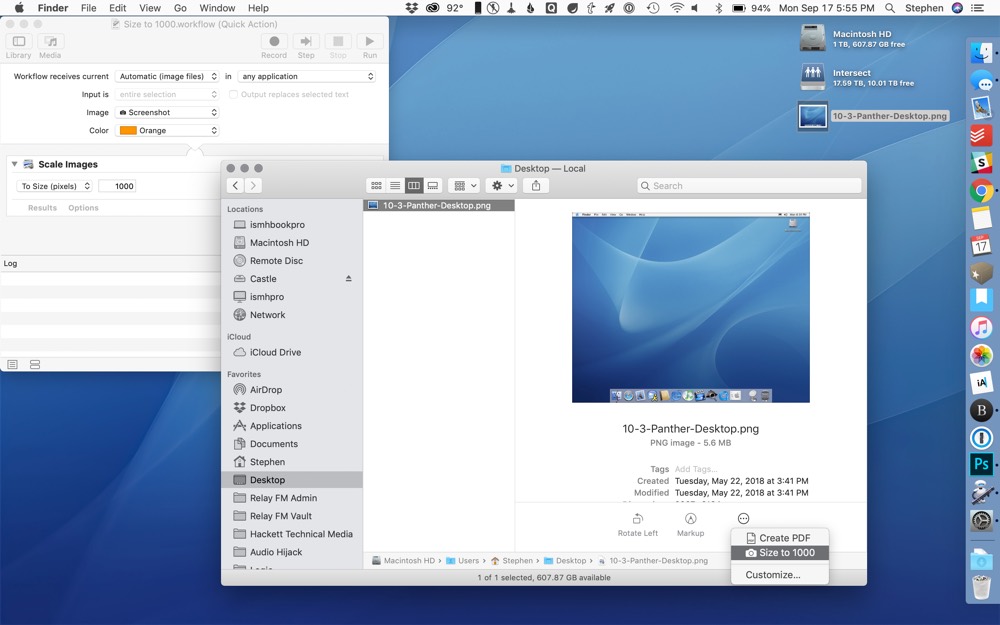
While Automator actions have always been accessible via Finder, Quick Actions make them all the easier to run. You can manage the order in which they appear in System Preferences:
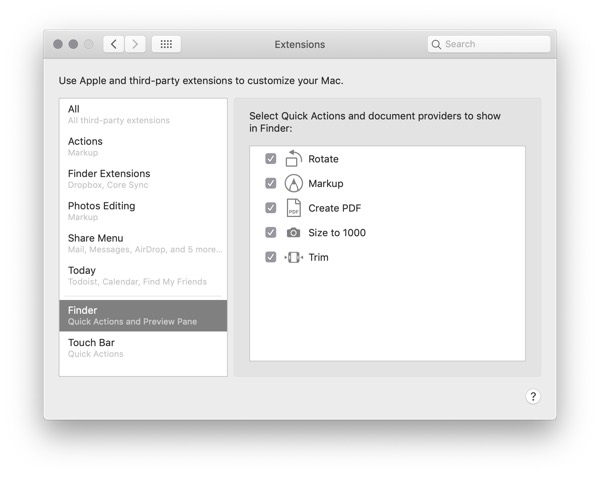
If you find Automator intimidating, don’t worry. Apple is encouraging third-party developers to add support for Quick Actions, and I expect to see quite a few surface as Mojave adoption improves over the coming weeks and months.
Quick Look
Keeping with our theme, Quick Look is another function of macOS that has been around for years, but has been infused with new power. This time, the new tools are something that should be familiar to some Mac and iOS users: Markup.
Quick Look functions as it always has. Tapping the space bar opens a preview of the selected file, right in Finder. Now, images, PDFs, movie files, and more can be lightly edited directly from this window, without needing to open the likes of Preview and QuickTime:
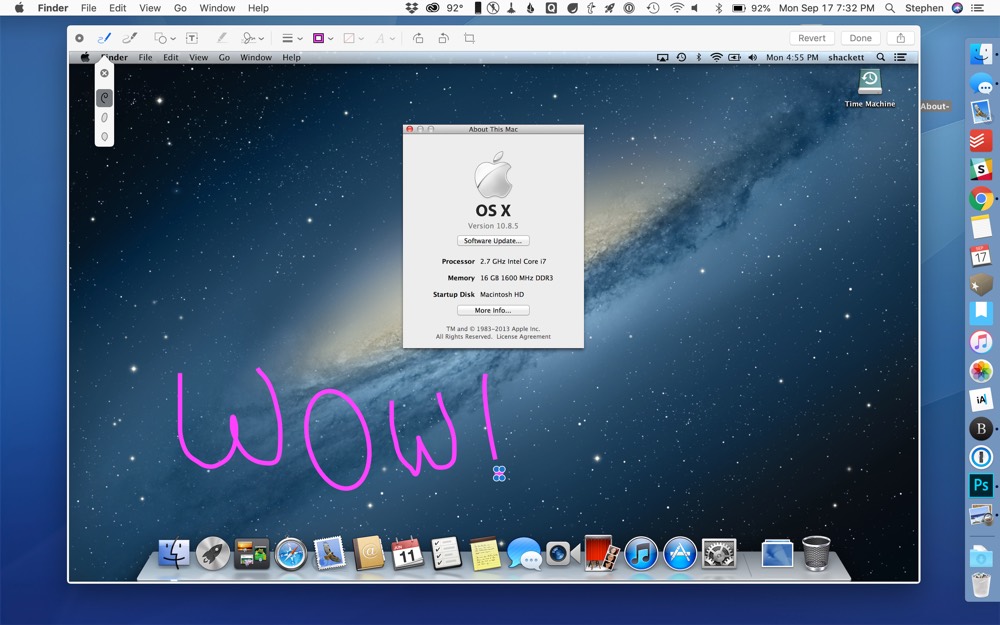
I’m not sure how much faster any of this is over just opening an image in Preview to draw on it, but your mileage may vary.
Screenshots
Rounding out the additions to Mojave is a whole new set of screenshot tools. Since the beginning, macOS has come with a utility named Grab, which is designed for taking screenshots.. Grab had its own UI, but can be completely controlled via keyboard shortcuts, even when the app isn’t running in the Dock:
- Capture screen:
Command-Shift-3 - Capture selection:
Command-Shift-4 - Capture window:
Command-Shift-4, Space bar
In Mojave, these keyboard shortcuts work as they always have, but now Command-Shift-5 opens a new screenshot UI:
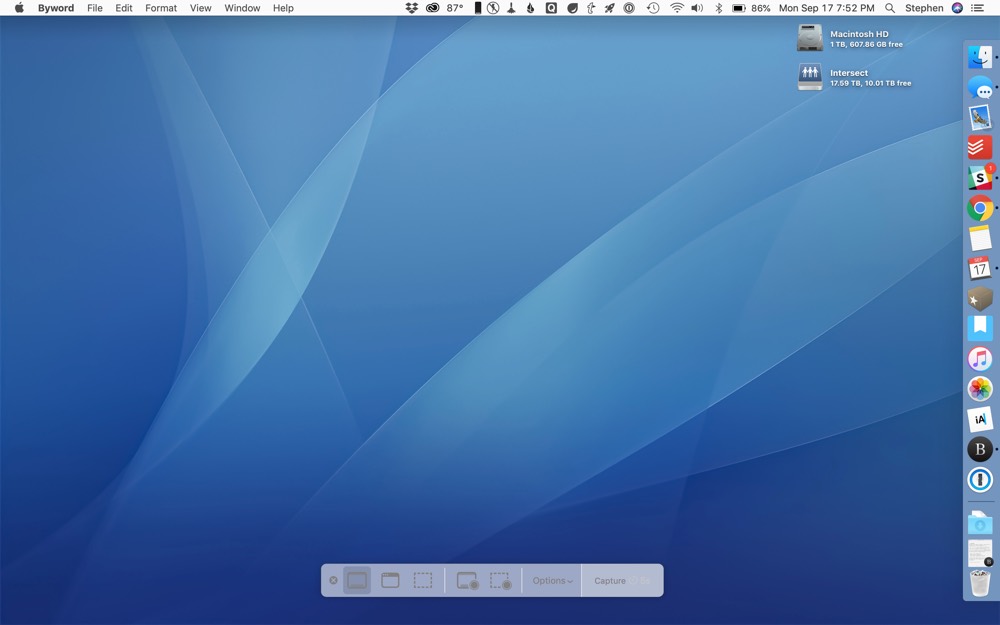
That UI is actually part of the new Screenshots.app, which lives in the Utilities folder. Here’s a closer look at some of its options:
As you can see, Screenshots offers several various tools. You can capture an image of the entire screen, a single window, or a selection, just as before. Additionally, the app can now record video of your computer’s screen as well, a trick that used to be reserved for QuickTime.
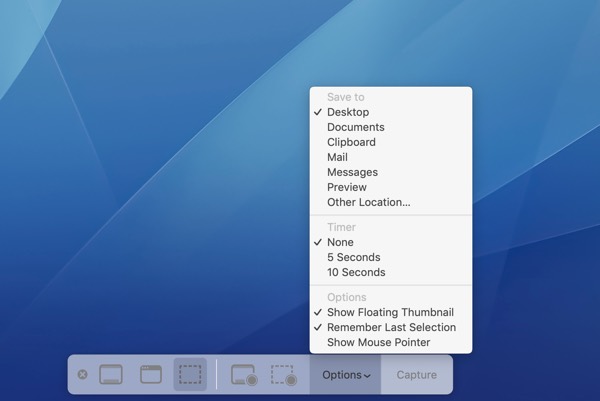
Lastly, Screenshots comes full of options. You can decided where to save your files, if you want to include a countdown timer before the image or video is taken, and control if the application shows a thumbnail of the screenshot or image before it is saved out to Finder:
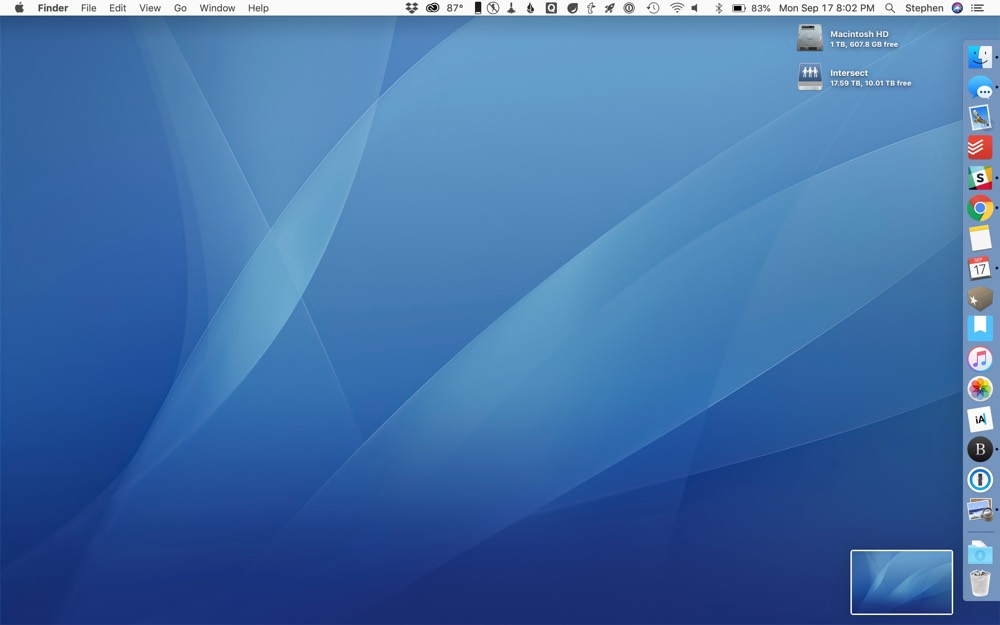
The purpose of this thumbnail is to preview what you shot, and allows for near-instant access to Quick Look and Markup. However, it adds a delay before the image or video is saved, and in my testing, I found that to be frustrating, so I have disabled it on my Mac.
Wrapping Up
All in all, Apple has spent a lot of time making common file and system-related tasks on the Mac easier and more flexible. These features are all decidedly Mac-only, as Finder isn’t present on the iPad and iPhone. I think that shows that Apple knows that there are plenty of people who still need a Mac to get their work done, and will always welcome improvements to their platform of choice.
Get Our Best Photography Tips & Workflows
Transform your photos and edits from average to awesome with our in-depth, mobile photography course. It’s jam-packed with training, ideas, and lessons that can literally transform your photography overnight.