If you own an Apple computer, especially a modern one, then you’ve probably come to notice how particularly thin these machines have become. Despite that, most Macs still sport internal cooling fans to keep the CPU and GPU temperatures in check.
By default, Apple’s internal cooling fans run as silently as possible for a quiet user experience, but this isn’t without its caveats. Thinner machines like the MacBook Pro are more susceptible to heat soak because the cooling capabilities of such a compact chassis are limited; this is something you’ve undoubtedly felt while the machine sits on your lap during intensive tasks.
While most people overlook it, heat soak can be bad for several reasons, including:
- Blisteringly-hot heat transfer to your lap when sitting
- Faster CPU or GPU degradation
- Throttled CPU and GPU performance
- And much more…
Fortunately, you can mitigate these concerns by managing your Mac’s fan speeds manually with a free third-party app dubbed Macs Fan Control. With it, you can achieve preferable CPU and GPU temperatures and benefit from the long-lasting results.
How to manually set your Mac’s cooling fan speeds
Upon launching Macs Fan Control for the first time, you’ll notice that the interface encompasses both fan speed controls and a place to monitor real-time hardware temperatures:
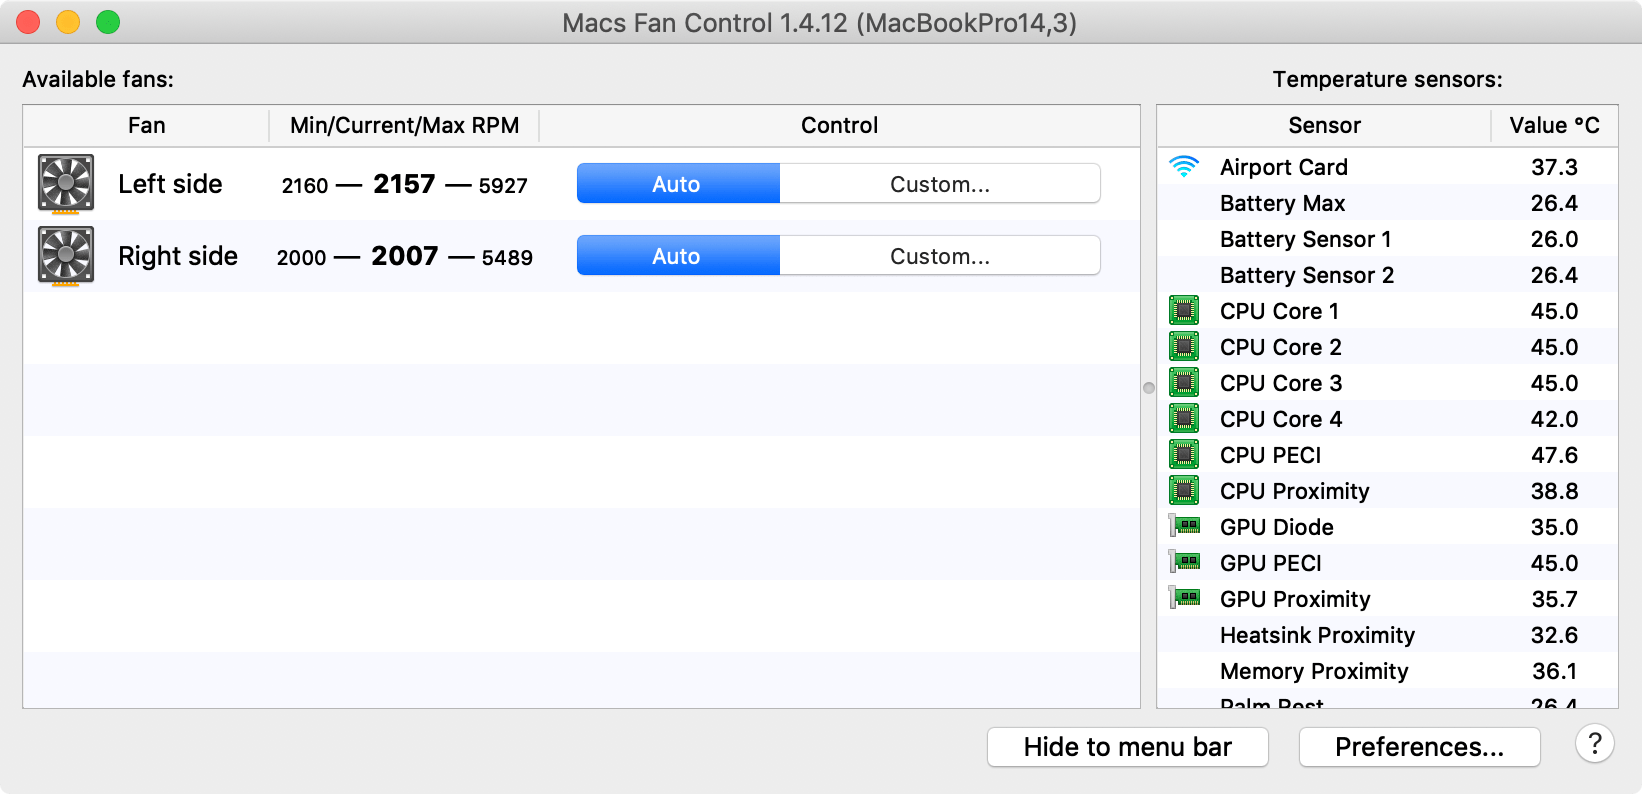
By default, my Mac’s cooling fans run between 2,000-2,100 RPM at idle, and that’s great. But Apple’s fan curve tends to be somewhat lax as CPU and GPU temperatures climb, resulting in higher temperatures than you might want.
By clicking on the Custom… button, you can enter your own fan RPM value, like so:
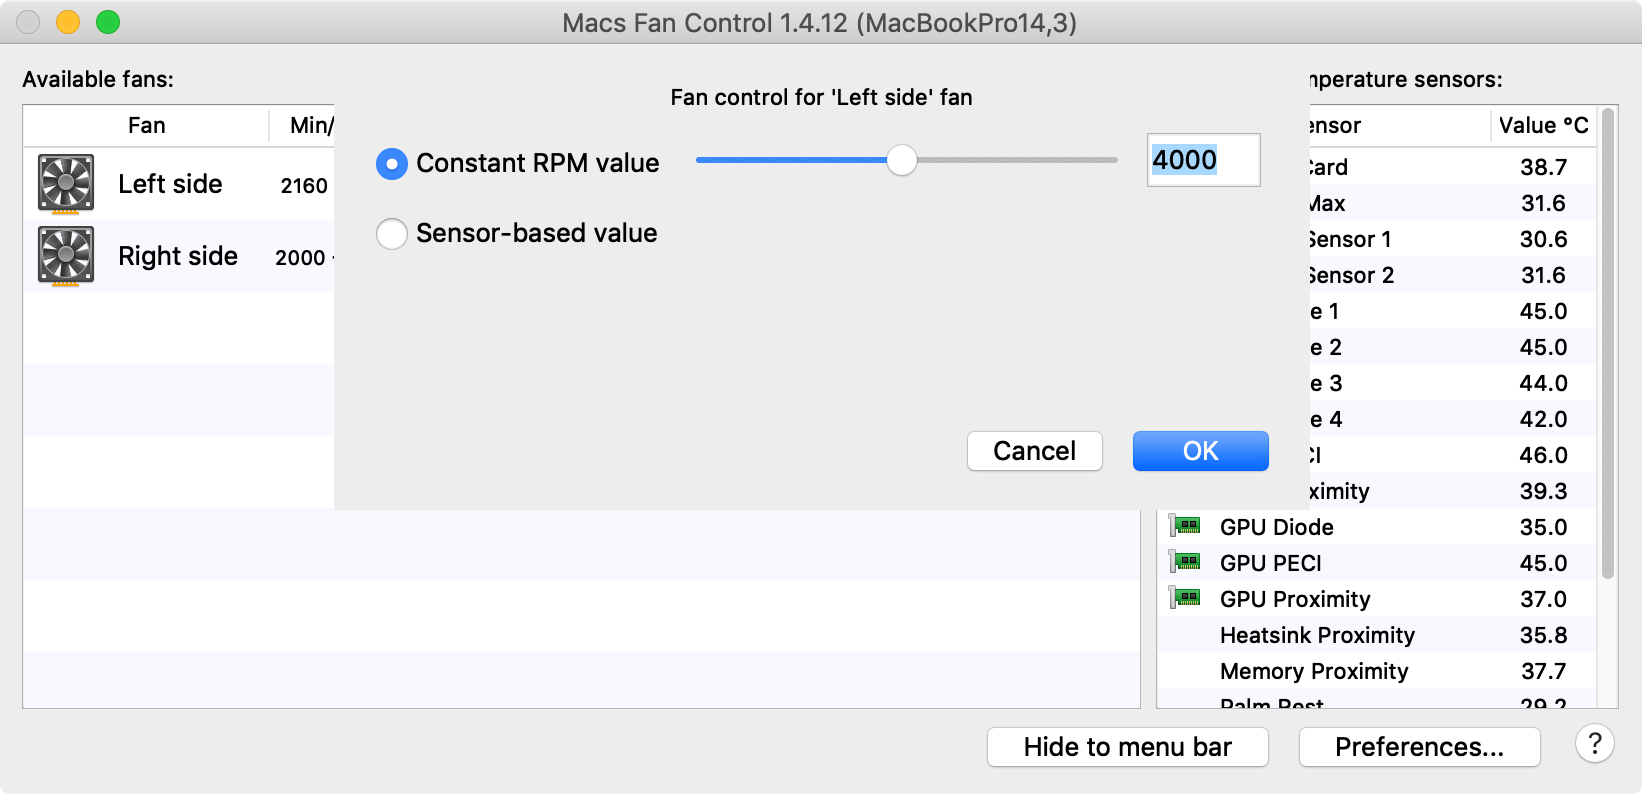
You can apply custom fan speeds to both fans if necessary, one for the CPU and one for the GPU:
Note: not all Macs have dual fans, so your mileage may vary.
Upon closing the Macs Fan Speed interface, the app hides in your Menu Bar, where it’s always readily accessible:
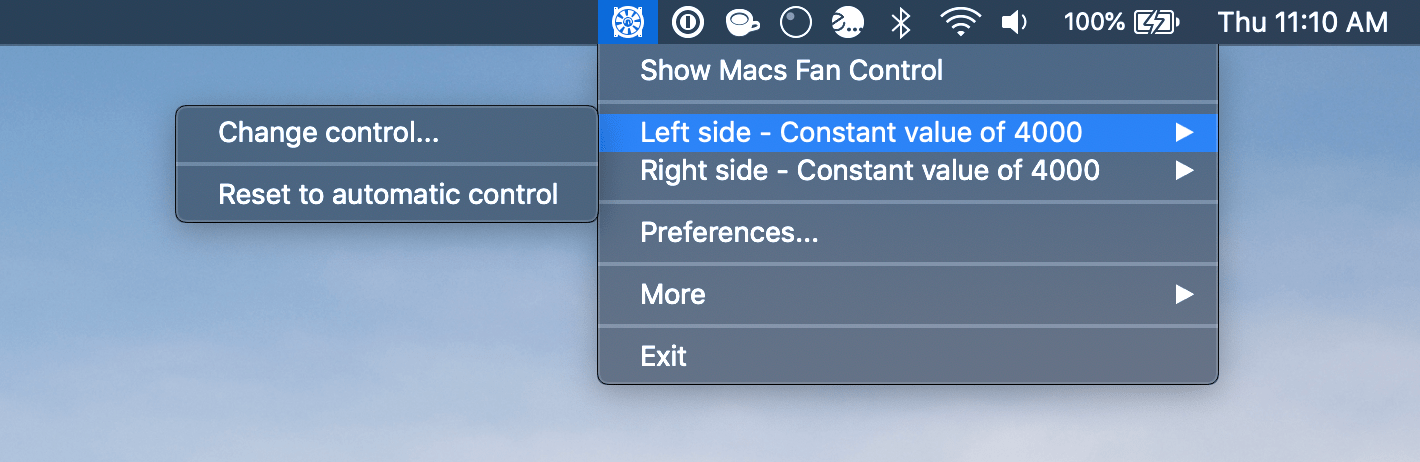
From here, you can still manage your Mac’s fan speeds and access the app’s preferences, but you won’t be able to see your Mac’s hardware temperatures unless you click on Show Macs Fan Control from the drop-down menu.
Speaking of preferences, Macs Fan Control doesn’t come with too many of them. You can:
- Force Macs Fan Control to launch at system startup
- Check for app updates automatically
- Switch between (C) Celsius and (F) Fahrenheit temperature scales
- Enable decimal points in the hardware temperature read-outs
- Choose the app’s language
- Change between a colored or black/white Menu Bar icon
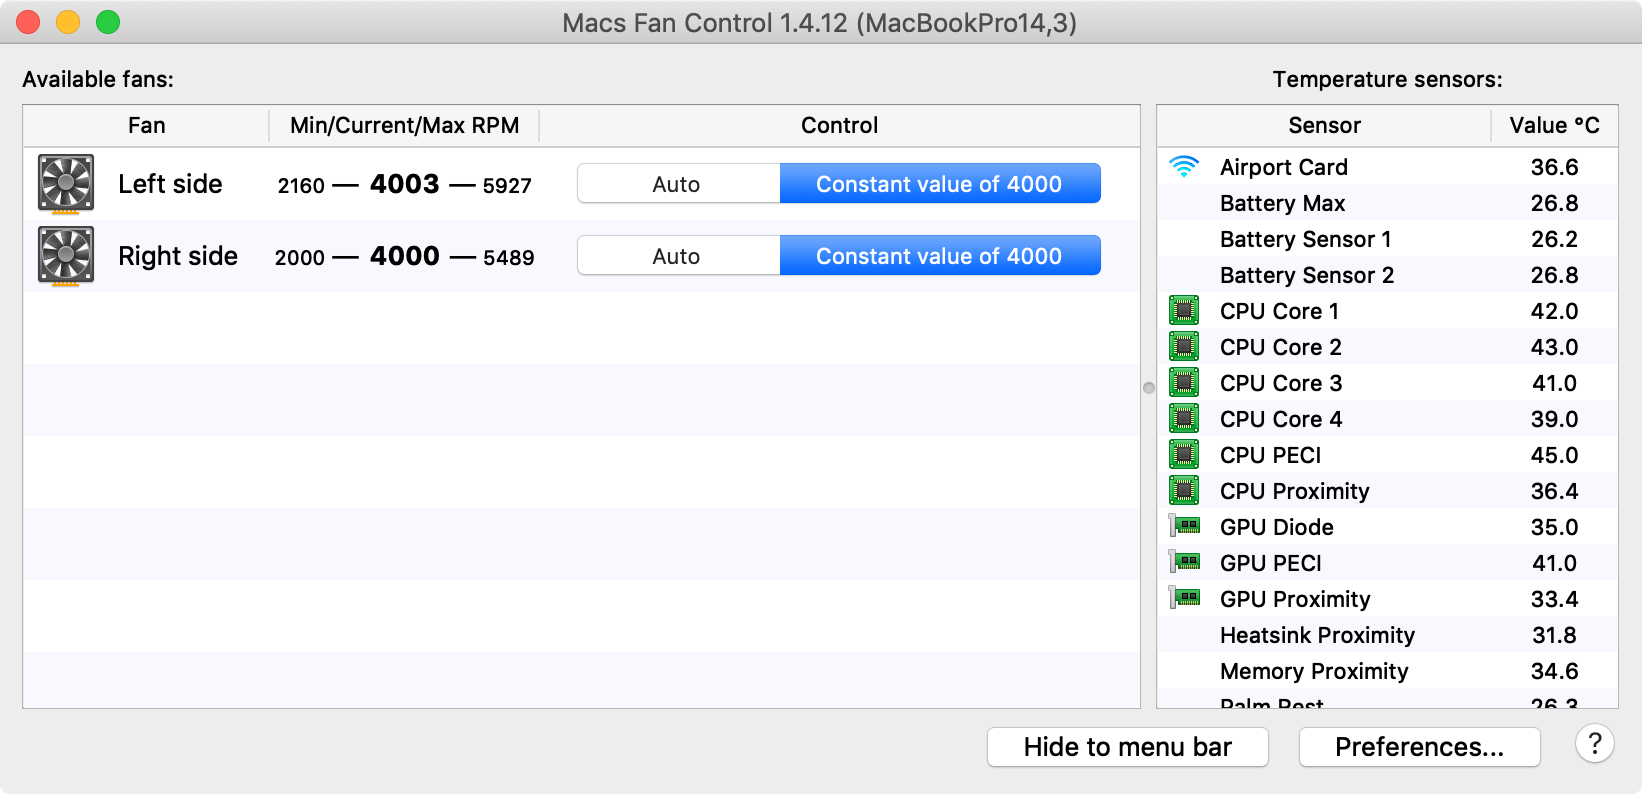
After configuring a higher fan speed on your Mac, fan noise becomes more audible, but the core temperatures of your machine drop significantly. For me, this is a fair trade-off. As a computer-building enthusiast, I prefer to see lower temperatures, but your use case may vary.
One thing to keep in mind is that higher fan speeds equate to additional power consumption. That said, you can expect battery life to take a hit if you aren’t using an AC adapter while manually-managing your fan speeds. If you have a Mac desktop such as the iMac or iMac Pro, then battery life isn’t really an issue; you’ll only need to deal with a little more fan noise.
Regardless, if you want to see cooler temperatures, experience more comfortable computing on the couch, and enjoy longer-lasting Mac hardware, then Macs Fan Control should be the next thing on your list of apps to try.
Macs Fan Control can be downloaded for free for both your macOS and Windows BootCamp partitions. You can grab it from the download links below:
Will you be managing your Mac’s fan speeds manually from now on, or are you satisfied with Apple’s stock fan curves? Let us know in the comments section below.