How to upgrade the RAM on the new 2018 Mac mini
 Andrew O'Hara
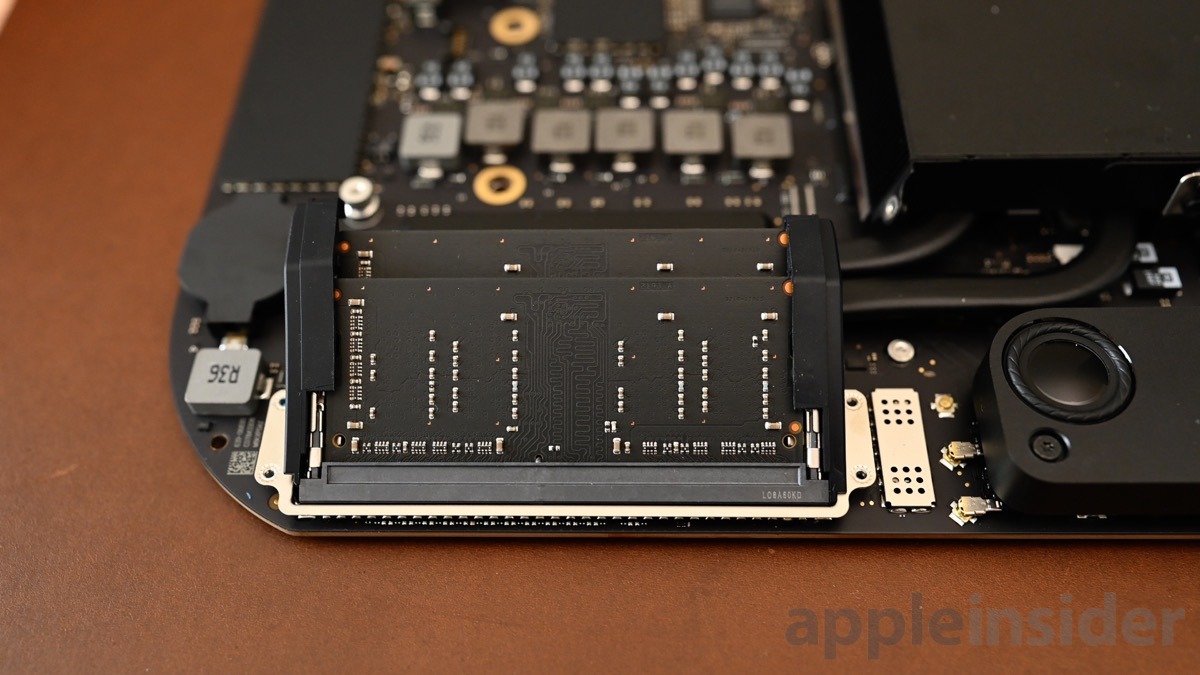
Apple reversed course this year, opting to allow for user-swappable memory on the new Mac mini. The procedure isn't as straight-forward as it could be, so AppleInsider walks you through it.
There are many configuration options when choosing your Mac mini between the processor, RAM, storage capacity, and an upgraded Ethernet port. Most of these cannot be changed and are soldered to the main board, but the RAM is upgradable post-purchase.
How to replace the RAM was one of the most frequent questions we received after our in-depth 2018 Mac mini review, so we are here with answers.
But look, here's the basic deal — you can break things and you will be sorry. You can destroy your new computer if you aren't careful, and it is not our fault. Read the procedure in full before you decide if this is something you want to do.
Importantly: this procedure does not void your warranty, however anything you break in the process does.
Also, keep the old RAM chips. If you need to bring your Mac mini back to Apple for any reason, they won't do a thing with it if your RAM is installed. So, if that's the case, put the RAM back in, before you head off to the Genius Bar.
What you need
To start, you need a few things including a TR6 Torx security screwdriver, T9 Torx screwdriver, P5 screwdriver, a plastic spudger, a pair of DDR4-2666, 1.2V, PC4-21300, unbuffered, non-ECC RAM sticks, and an anti-static wrist strap that you know how to use properly.
There are many options out there for RAM upgrades, some on Amazon (Hynix, MemoryMasters) and more from OWC. You can have up 64GB total, or two 32Gb sticks.
Replacing the RAM
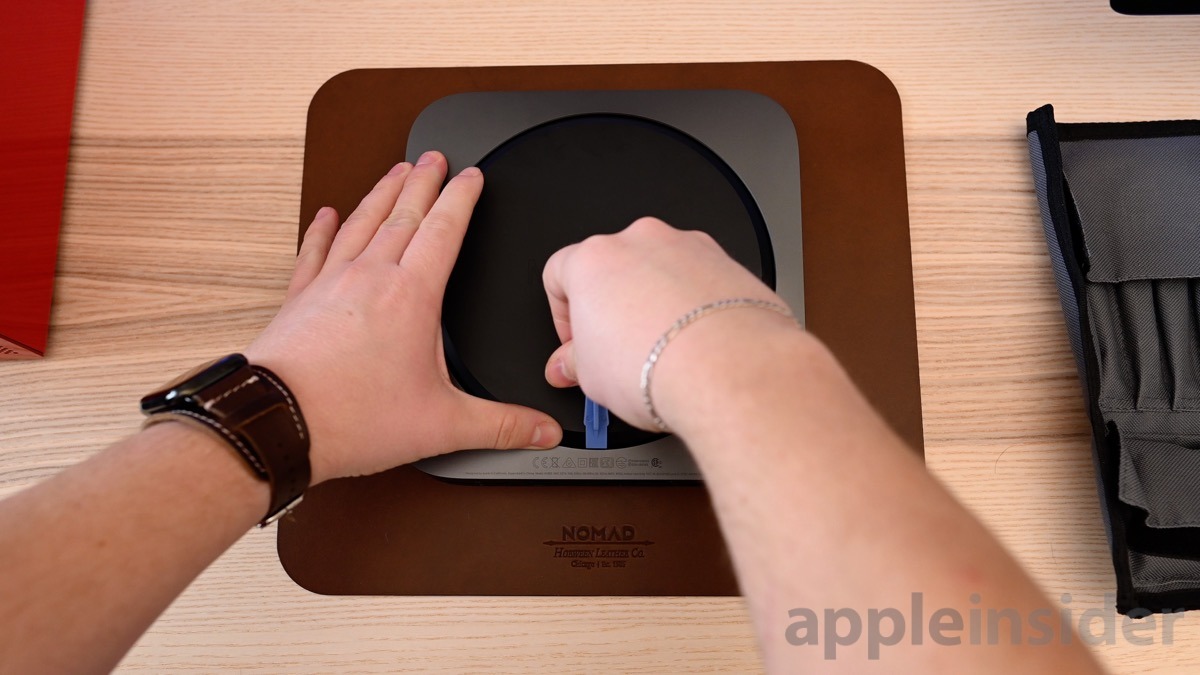
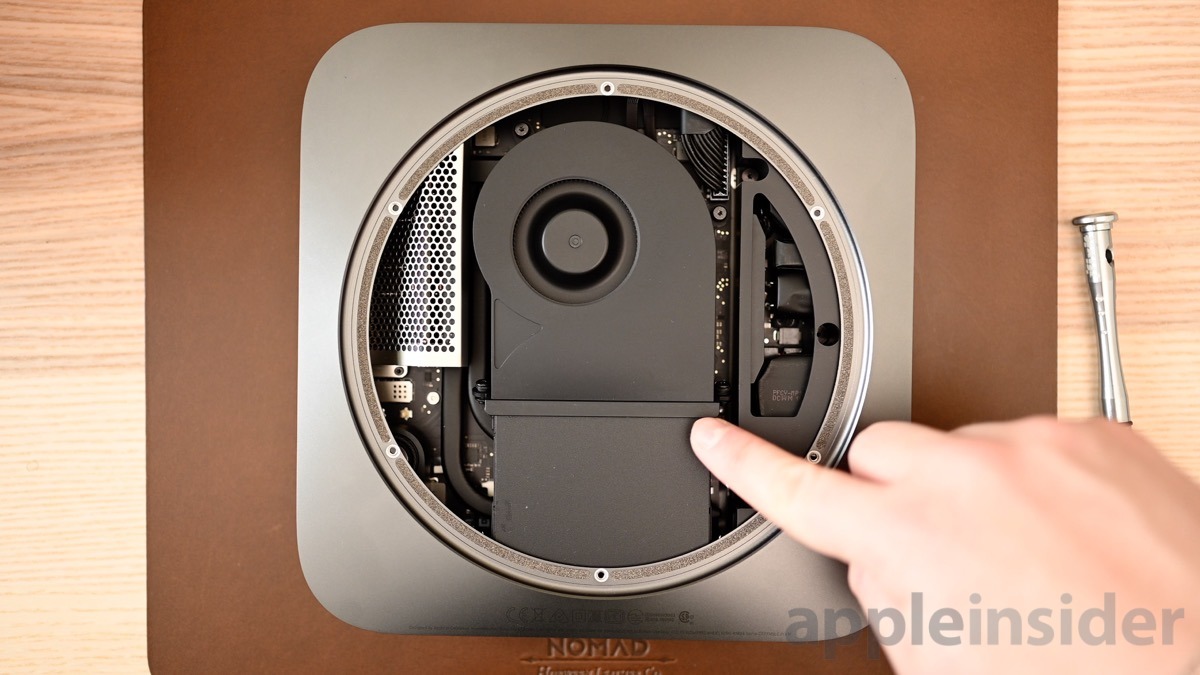
- Using the plastic spudger, carefully remove the plastic bottom of the Mac mini by starting at the end closest to the ports.
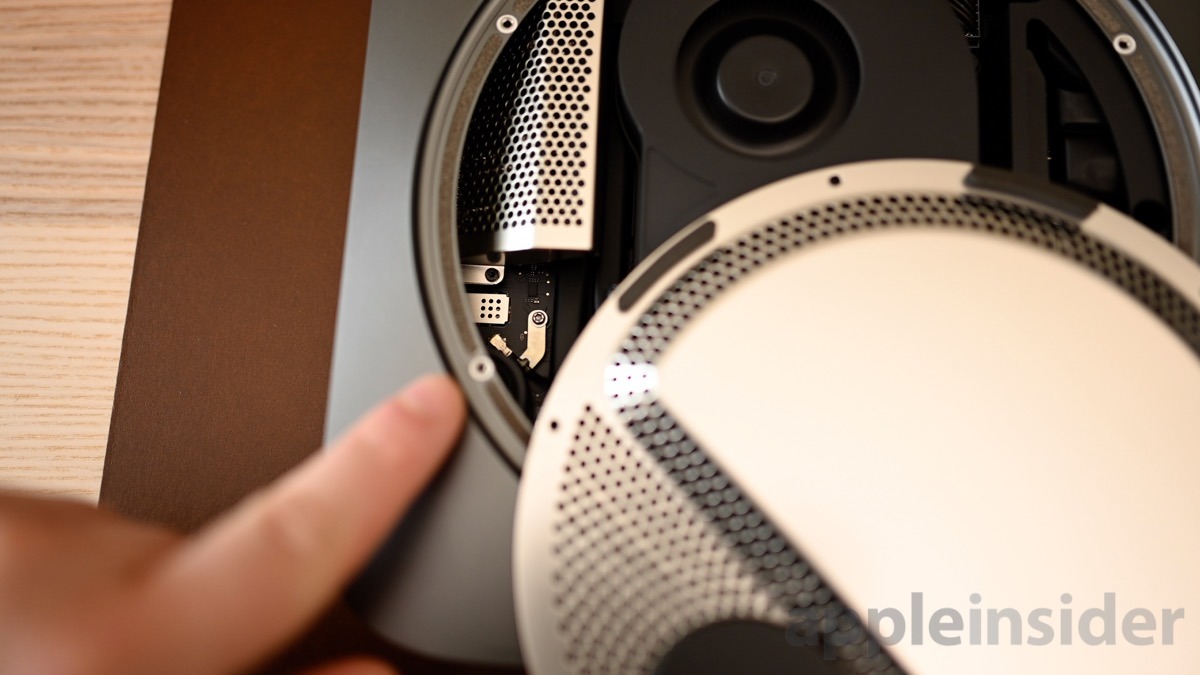
- Use the TR6 Torx security screwdriver to reove the six screws holding the Wi-Fi antenna/shield plate into place.
- Remove this, while at the same time being careful not to damage the antenna wire located on the left side.
- The antenna wire is held to the logic board with a screw. Remove the screw, then use the spudger to dislodge the cable.
- Now remove the updated fan/cooling system to expose the RAM hiding beneath by unscrewing the four screws.
- Once the screws are removed, tilt the fan towards the top (carefully) and use a spudger to dislodge the cable.
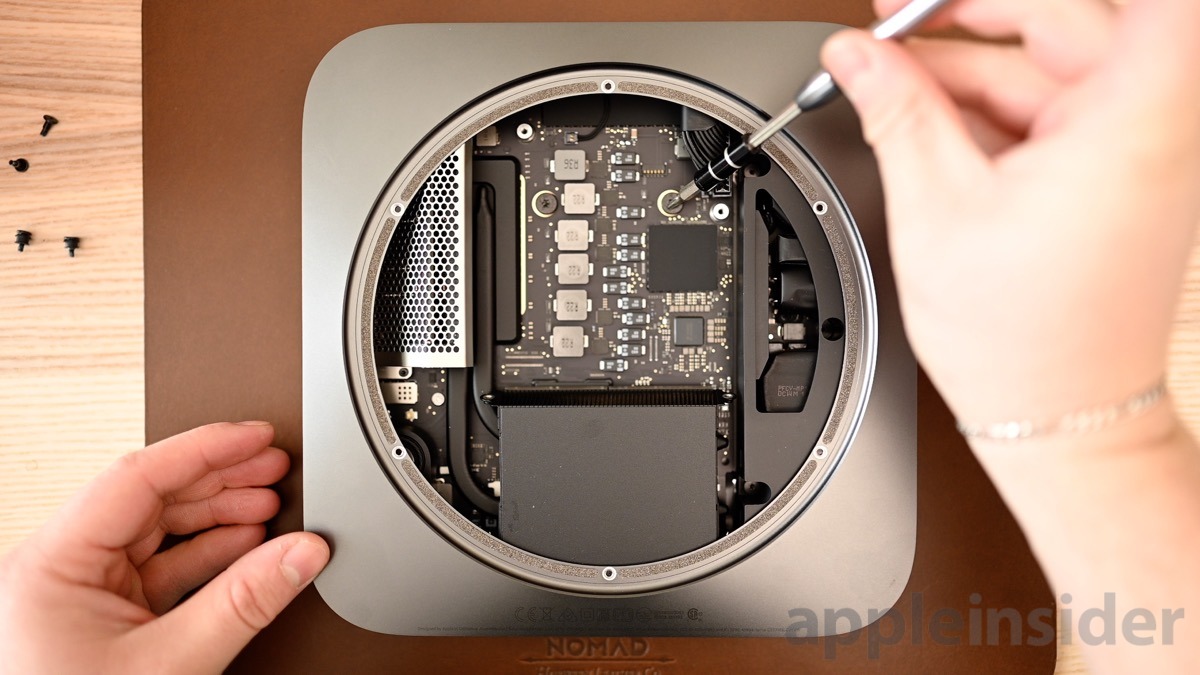
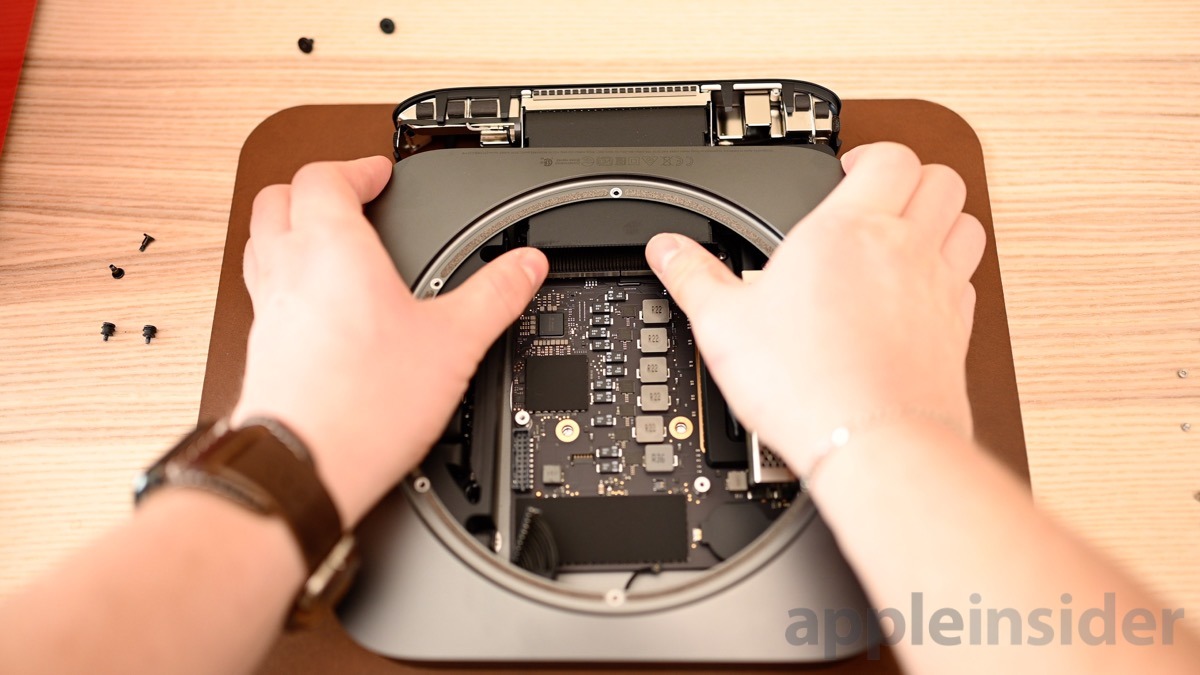
- Use a T9 Torx screwdriver to remove the two centrally located screws holding the logic board to the case.
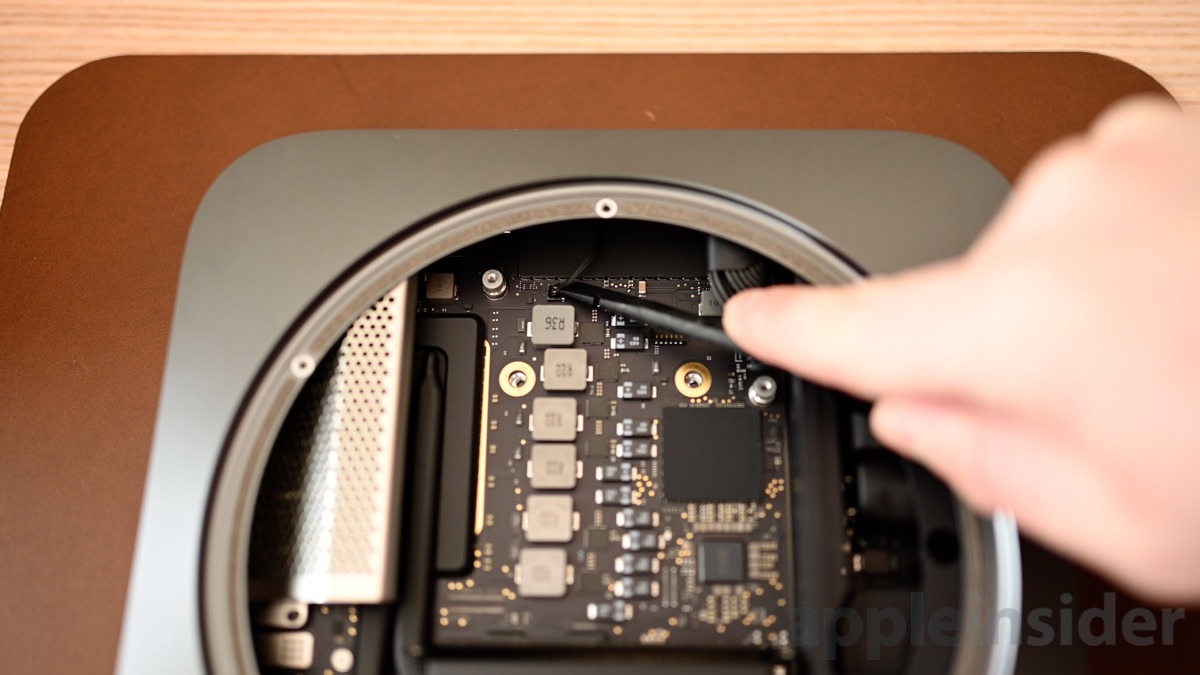
- Using the spudger once more, dislodge the cable towards the top of the logic board.
- Using your fingers, disconnect the power supply from the top right.
- Rotate the Mac mini 180-degrees, then use your thumbs to apply gentle and even pressure to the heat sink to remove the board from the case.
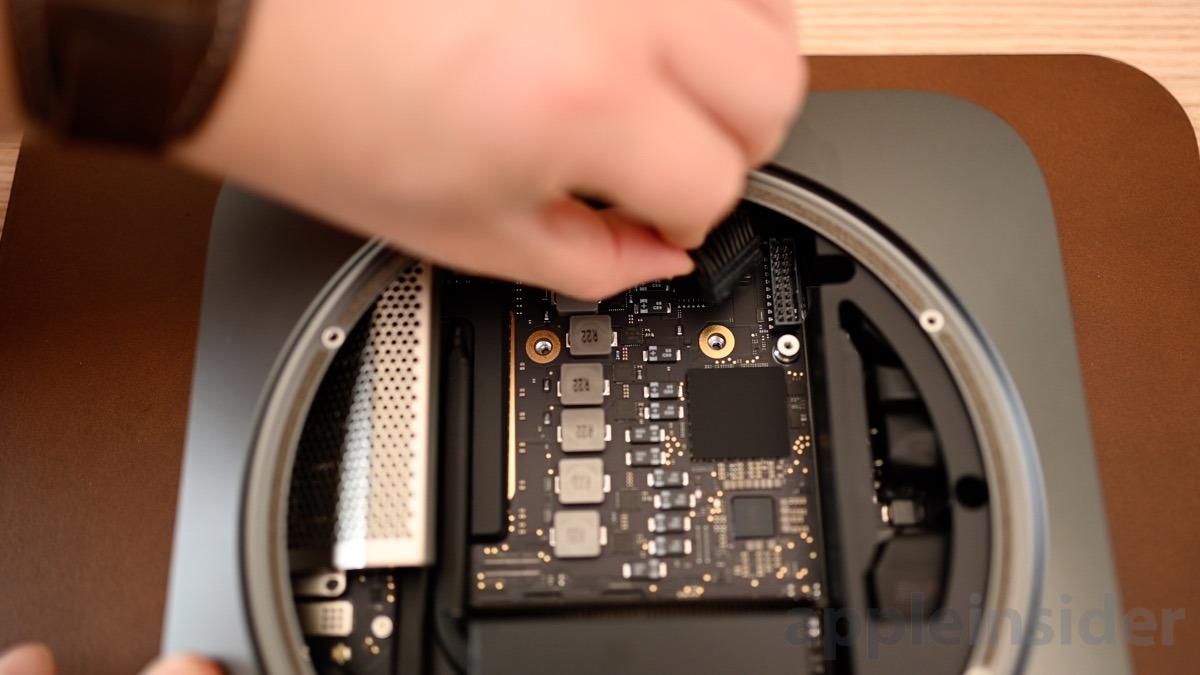
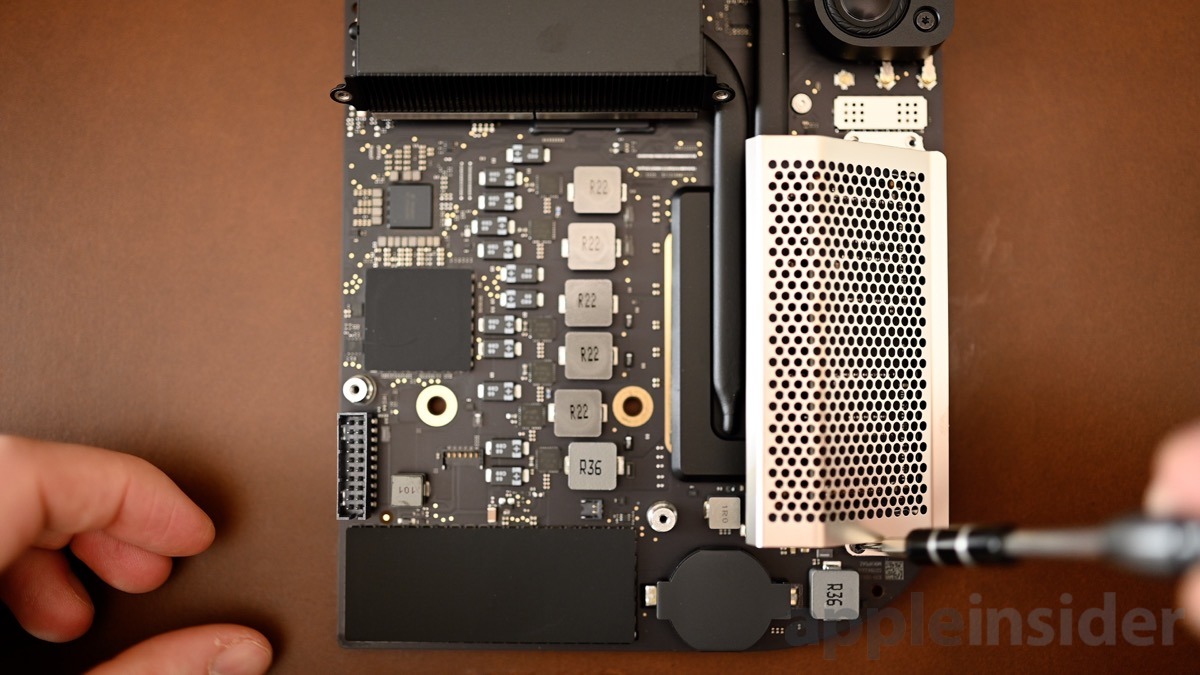
- Remove the four T6 screws keeping the RAM shielding in place.
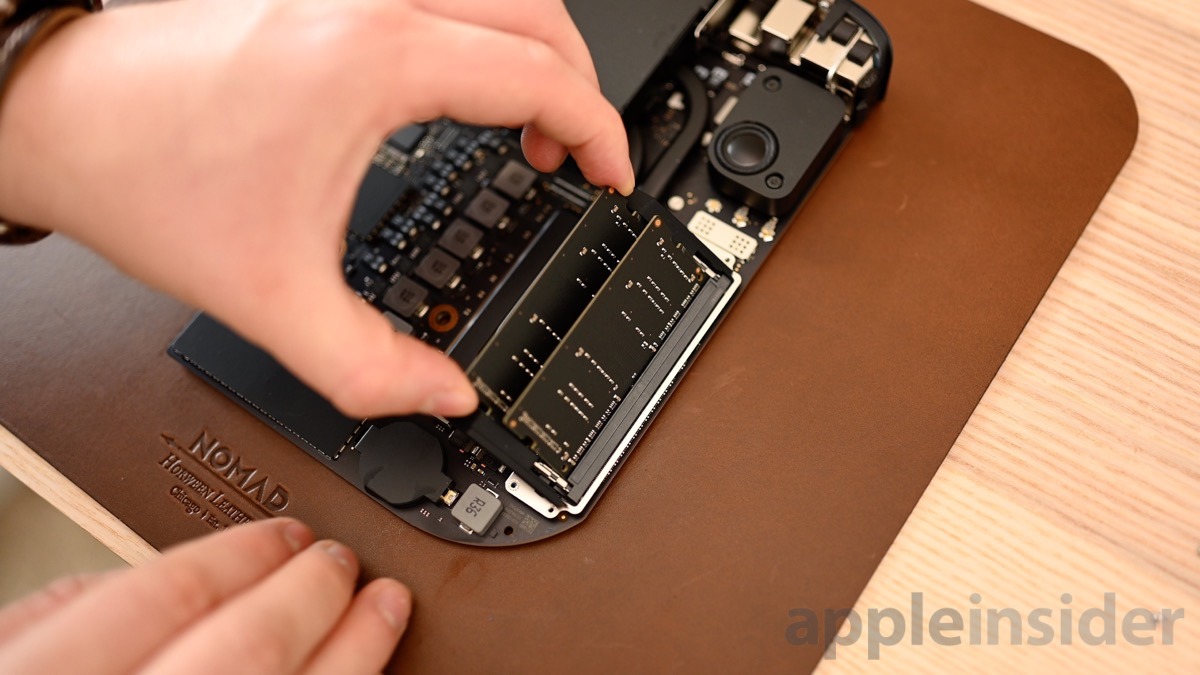
- Free the RAM sticks from their spring-loaded enclosure by releasing the clips on each side of the chip
- Swap in your new, higher capacity sticks.
- After ensuring the replacement RAM is securely in place, reverse the above steps.


 Amber Neely
 William Gallagher

 Malcolm Owen