How to use Airpods with Live Listen in iOS 12 to help your hearing
 William Gallagher
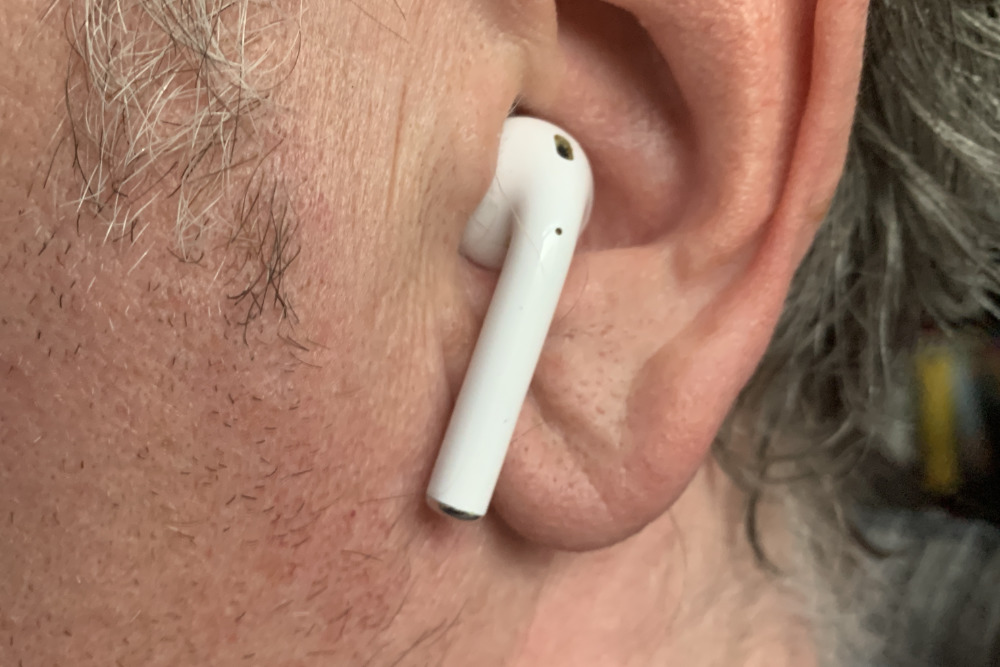
Ironically, Apple keeps rather quiet about this feature but whether you're hard of hearing or just in a loud place, Live Listen is remarkable. AppleInsider explains how to get it set up and use it.
You may have been told for years that loud headphones will damage your ears but now Apple's using that same technology to help any of us hear better. If you have AirPods and an iPhone with iOS 12, you can now use Live Listening.
We hesitate to say that this turns the iPhone into a hearing aid but it is most definitely a boon for anyone who is actively hard of hearing. It's not exactly the most unobtrusive of hearing aids, though, as you have to have your AirPods in your ears.
You'd best explain to people that you're using this feature or else they'll assume you're ignoring them in favor of listening to the latest AppleInsider podcast.
Yet if you're in a noisy environment, if you need a little help hearing the TV or if you're just curious to see how well this works, pop your AirPods in and set it up.
New and not new
To use this feature you have to have iOS 12 and Apple has designed it specifically to work with the company's AirPods. However, it's a development of what Apple introduced in 2016 as part of its Made for iPhone program.
Previously you could pair qualifying Bluetooth headphones to your iPhone and through Settings, Accessibility, give them access to the iOS device's microphone.
That hasn't changed. What's new is that Apple has both brought this to the AirPods and also made it much easier to switch on and off.
Easy and not easy
You'll be tapping it on and off all day, once you've got it set up. Yet the way you get it working the first time isn't obvious.
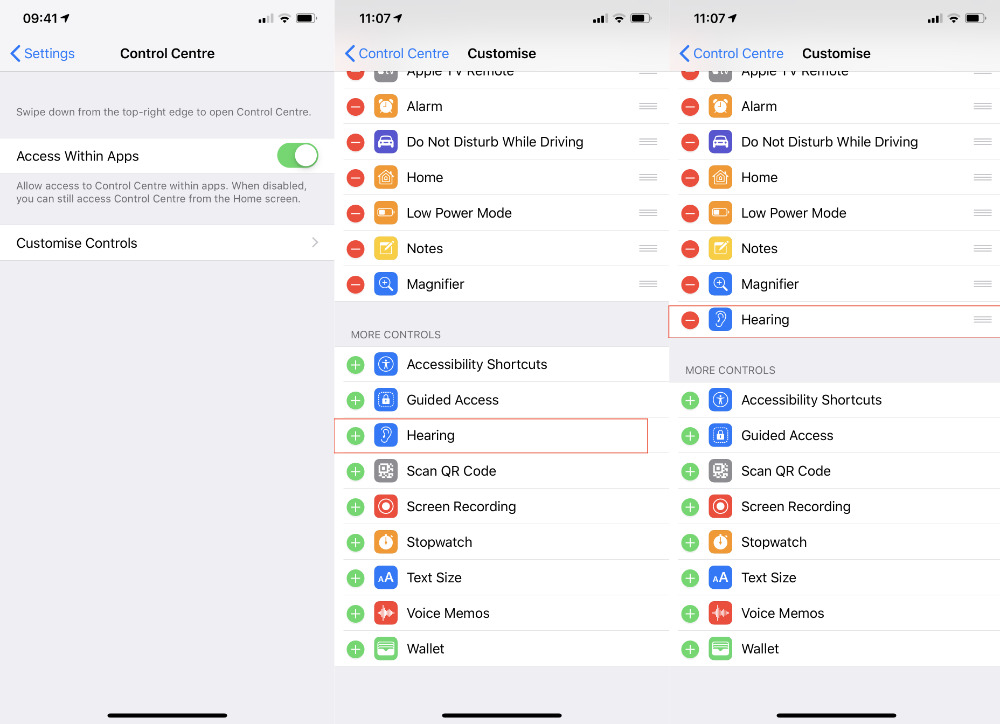
On your iPhone or iPad, go to Settings and tap on Control Center. Now choose Customize Controls. You get a long list called Include that shows you what controls are already active in Control Center and then there's a Customize Controls section. In that, you'll find one called Hearing.
Tap on that and it leaps up into the Include section. This is where you can also drag to rearrange controls but leave that for now: until you see the Control Center in action, there's no obvious way to know what the best arrangement of controls is for you.
Now swipe down from the top right of your iPhone screen to call up the Control Center. Alongside WiFi, Bluetooth and other controls, you'll now have an icon for Hearing which has an icon of an ear. Don't tap on it yet.
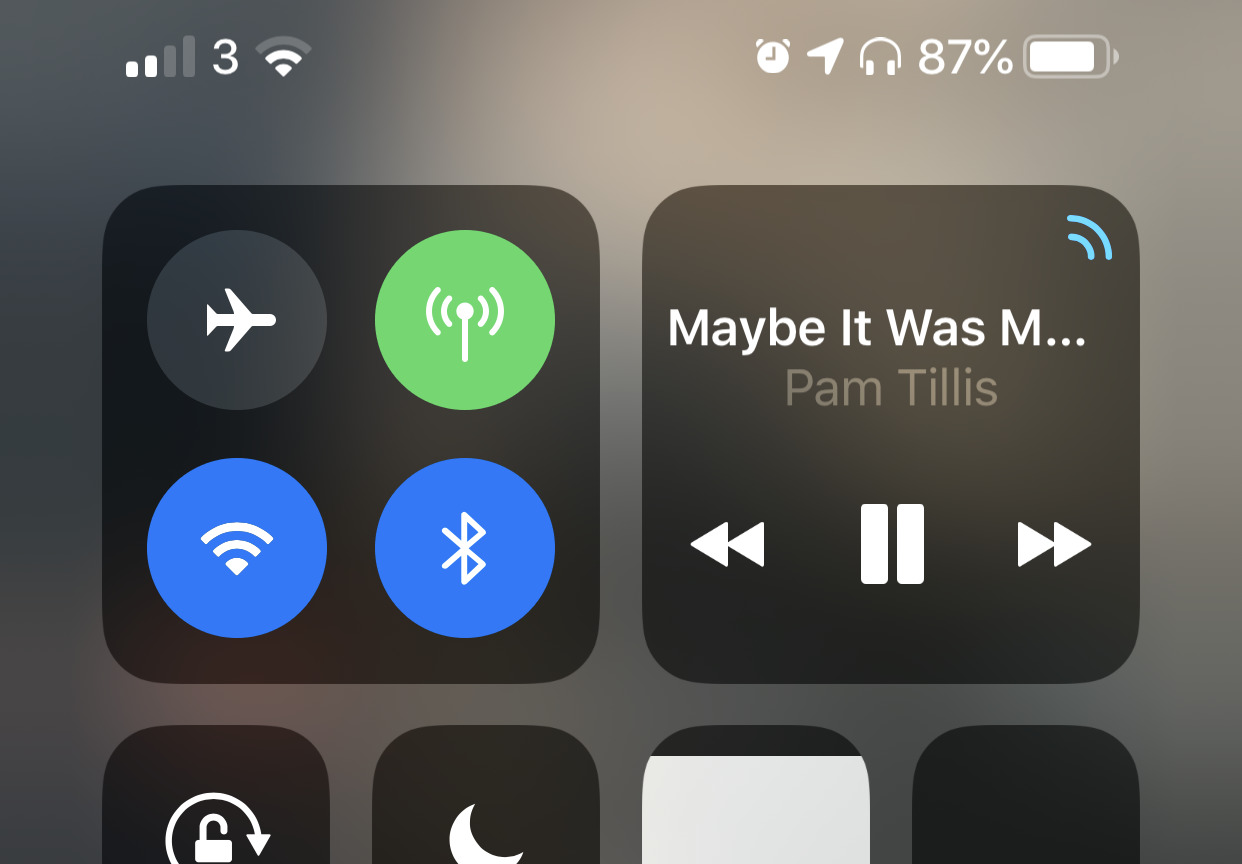
Instead, with your AirPods in your ears, tap on the Music icon which is usually at the top right of Control Center. Tap specifically in the top right corner of that icon where you may see a mini icon that's meant to show sound waves coming from a speaker.
This is surely the poorest part of the entire iOS 12 design. Even though Apple now puts at least a greyed-out sound wave icon there, you have to know that this is where you change between speaker and headphones. Still, you know now, so tap on it and up comes a list of all audio options available to you. There'll be a tick next to the active one.
Top of the list will be your iPhone or iPad. Then there may also be Apple TVs that you've connected to recently but somewhere in the list there will be your AirPods.
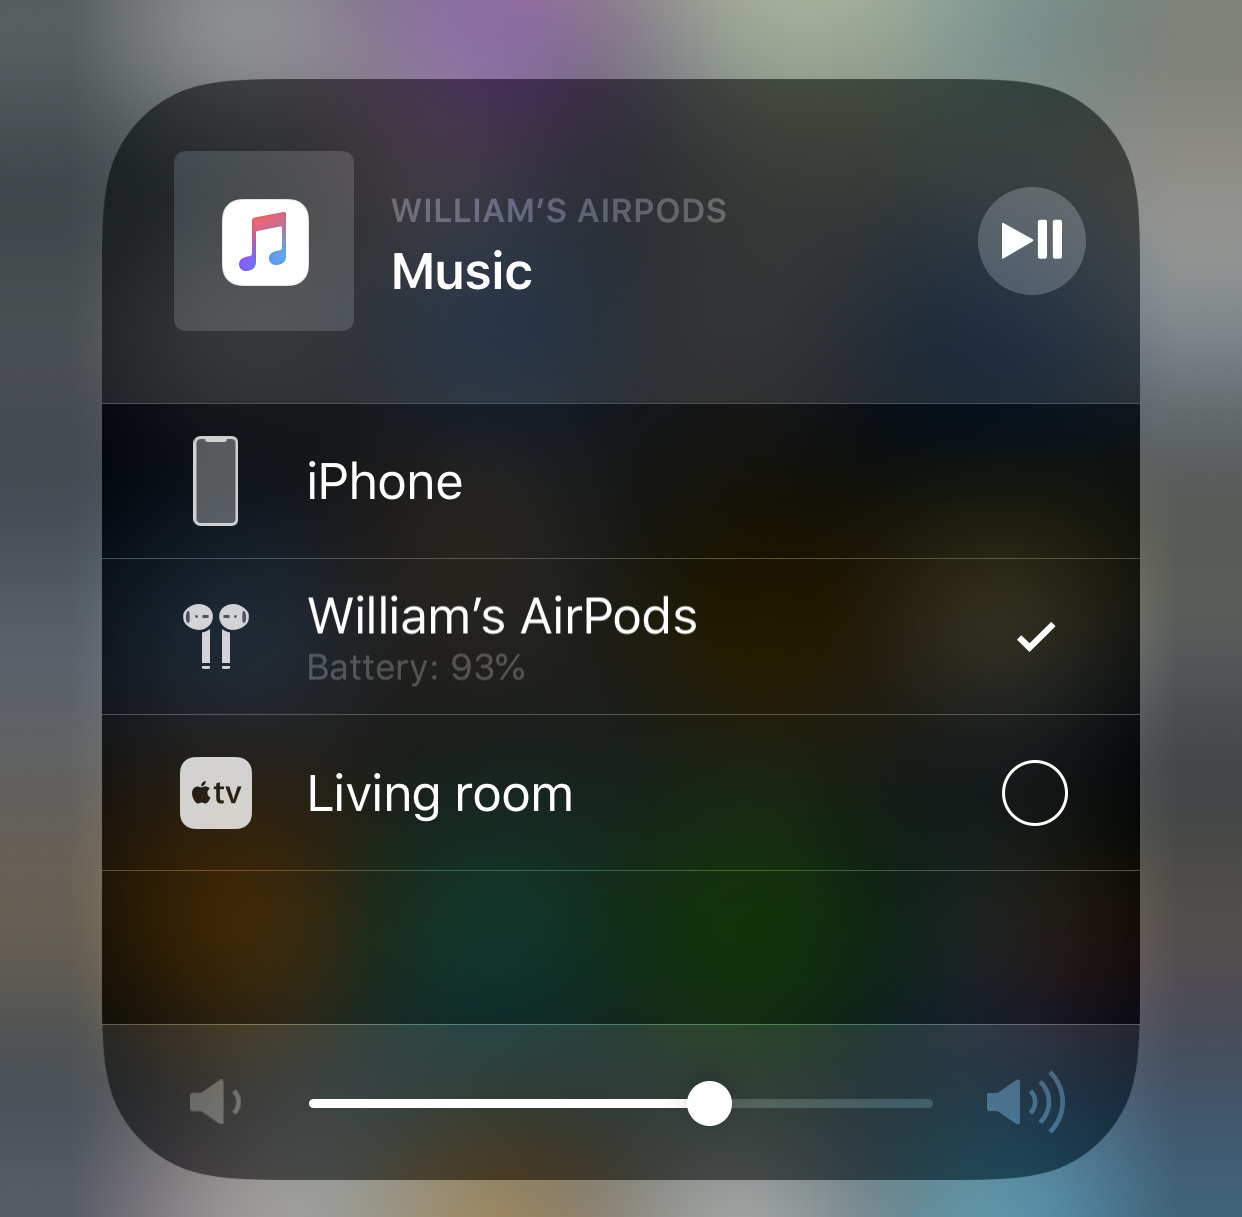
Tap on them to make sure they're ticked and after a beat, you'll hear a tone in your ears saying they're on and active.
Hearing control
Now in another less than optimal design, there isn't a Back or an OK button. To dismiss this audio source control, you have to tap somewhere away from the dialog box.
If you're playing music, by the way, tap on the Pause button in Control Center. You'll thank us later.
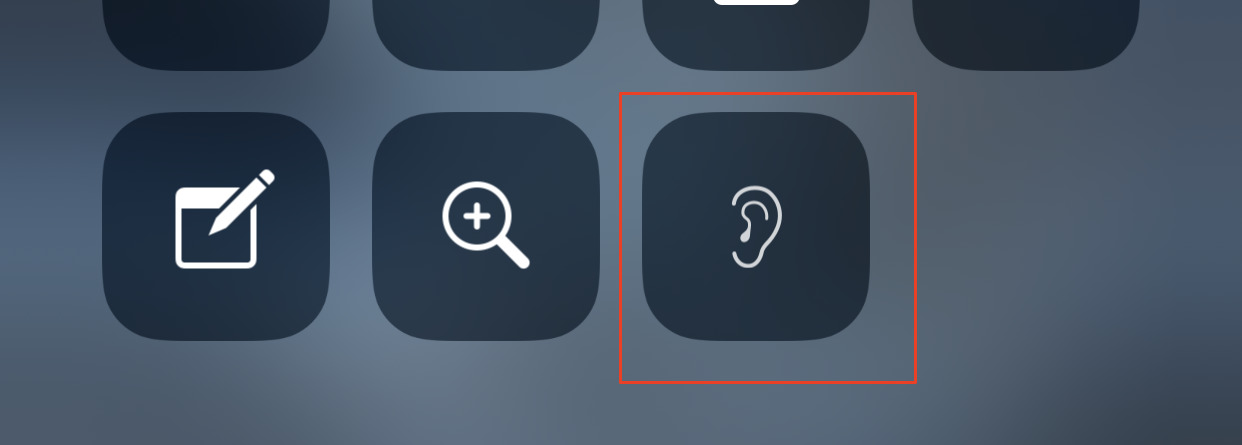
The Hearing control is probably at the bottom of the page: tap on the Ear icon.
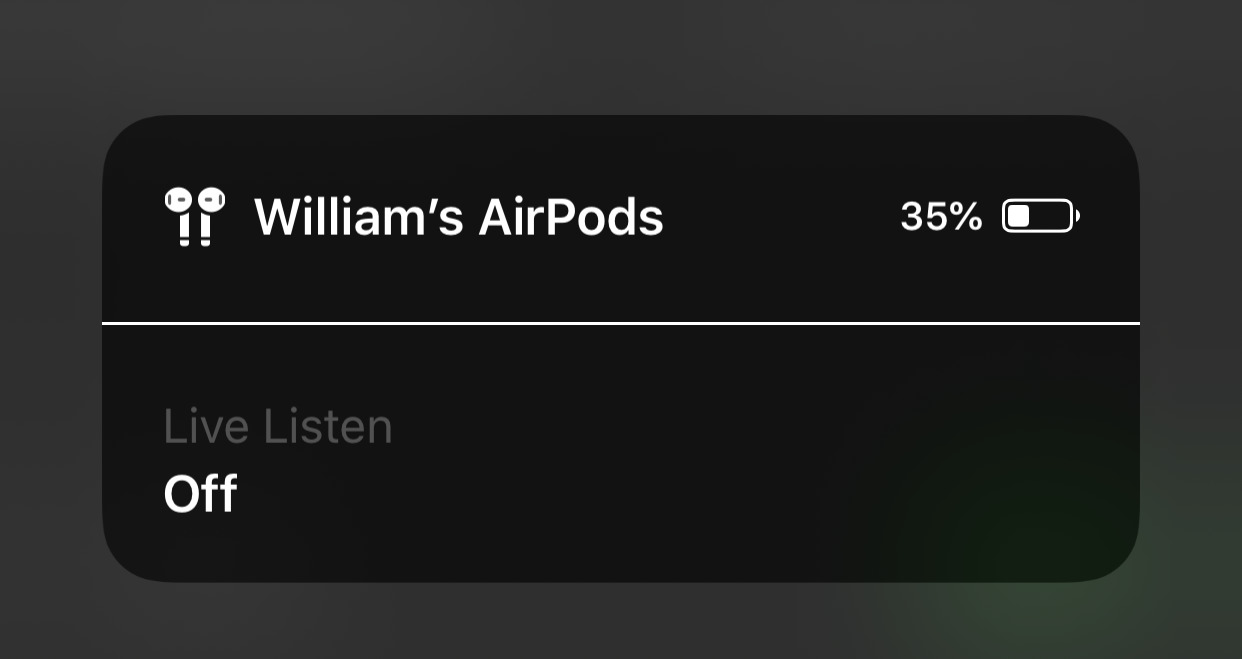
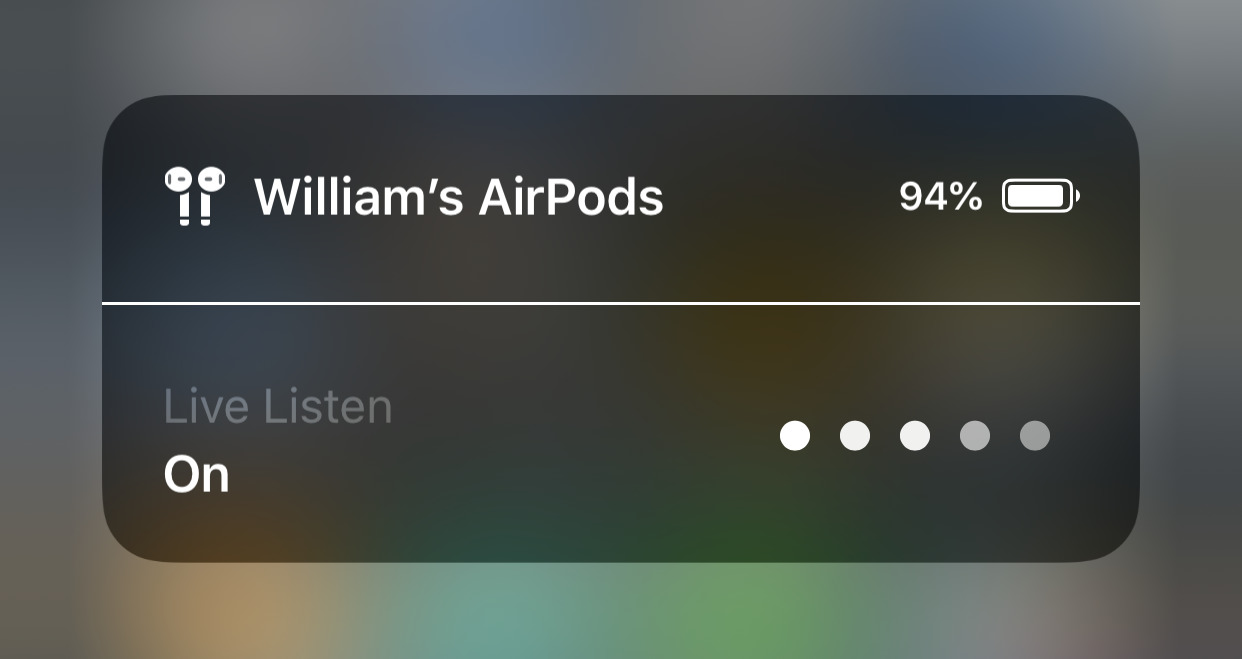
In the small dialog that appears, you initially get two pieces of information and one option. You're told the name of your AirPods, so you know you're connected to them, and you get a battery indicator for them too.
Then there's a button marked Off. It's a clear button under a greyed-out section called Live Listen. So when you're looking for how to switch this on, the section is harder to find and the button says Off.
Tap it to On and be prepared to be rather delighted.
What you hear
The Live Listen heading remains greyed-out but the button turns to On and there is now also a series of five dots opposite it. These are level indicators: they show you how loud the sound around you is.
Now position your iPhone or iPad where you want it. So you could put it in front of the TV set or you could point it toward a person you're speaking with. This is a Bluetooth connection and anyway your iPhone is a thousand bucks so you don't want to leave it halfway across the sports bar.
Yet you can exploit the fact that it's Bluetooth to mean that you've got the option to push it closer to someone if you need to.
When they speak, the iPhone or iPad's microphone picks it up and relays it to you.
Volume
There are no volume controls on the AirPods or in this Live Listen feature: to turn the sound up or down, you alter the volume on your iPhone.
And it is remarkable. Right now we're listening to the tick of a clock that's sufficiently far enough away from us across a room that we hadn't noticed before that it ticks at all.
Problems
As genuinely excellent as this Live Listen with AirPods is, use it sparingly. It gets through the battery life of your AirPods rapidly. We are finding that our original AirPods are not lasting as long as they used to so your mileage may vary but we saw a 24 percent drop in battery life in just ten minutes.
Apple's Control Center tends to switch itself off at every possibility so you can't expect to leave it open during a Live Listen session. However, while you're using the feature, the time in the top left of your iPhone display will be shown in a red lozenge-shaped icon, just as you get when you're recording audio.
Also, another reason for using them sparingly is that when you go to move or place the iPhone somewhere, Live Listen makes every tiny movement sound really loud. Do not drop your iPhone onto the table, okay?
It's a similar thing if you were playing music before you switched this on. Choosing the Hearing control and turning Live Listen on doesn't stop the music. Instead, it switches the music from the AirPods to your iPhone's speaker.
Only, what's right next to your iPhone's speaker? Exactly. You immediately get the music much louder and, oddly, a little distorted or broken up too.
We didn't notice any other issue with breaking up or connection problems during Live Listen, though, and instead merely got a little fed up now knowing just how creaky our chairs are.
Officially, and unsurprisingly, Live Listen only works with Apple's AirPods or at least it does in quite this fashion. You can still use Made for iPhone headphones or hearing aids which you set up via Settings, Accessibility. You can't get one-tap access via Control Center unless you're using AirPods.
Some users have reported being able to connect other Bluetooth headphones but we suspect that's down to this confusing business of Made for iPhone options. In our testing connecting other Bluetooth headphones simply never worked. Every time we would get an error saying that Live Listen was: "Unavailable for current route".
The route in question is the one the audio takes from iOS microphone to AirPods but, still, this isn't the clearest kind of message to give someone. Plus it's a little buried in the Control Center. Plus setting up Control Center requires you to know that you can set it up.
So it's not the smoothest system, but once it's running, you can get to it through just a swipe down on the iPhone screen and then a couple of taps.
Plus, we're not kidding, it sounds great.
Keep up with AppleInsider by downloading the AppleInsider app for iOS, and follow us on YouTube, Twitter @appleinsider and Facebook for live, late-breaking coverage. You can also check out our official Instagram account for exclusive photos.


 Marko Zivkovic
 Amber Neely
 Christine McKee
 Malcolm Owen
 Mike Wuerthele and Malcolm Owen