
How to Make 3D Facebook Photos on Your iPhone
 Credit: Margaret Bost
Toggle Dark Mode
There’s a cool new feature on Facebook that takes advantage of the dual-lens cameras in most newer iPhones.
The feature is called 3D Photos — and you may have seen some of them and not even realized what they are. Essentially, 3D Photos are pictures that look like they have depth and movement to them, allowing for a nifty shifting-perspective effect.

And if you have a newer iPhone, you can easily create your own 3D Photos to share on Facebook. Here’s everything you need to know.
Before you start, you need to make sure that your particular iPhone is compatible with the new feature.
In short, 3D Photos are created by using depth-mapping data on Portrait Mode photos.
As such, the feature is only supported by iPhones that have a dual-lens camera setup. That includes the iPhone 7 Plus, iPhone 8 Plus, iPhone X, iPhone XS and iPhone XS Max.
Additionally, you may need to find and like the Facebook 360Â page on Facebook before the option becomes available to you. Just make sure to like that page, exit out of the Facebook app, and reopen the Facebook app before continuing.
After you’re done with all of that, you can move on to actually creating a 3D Photo. See tips for creating better-looking 3D Photos at the end of this article.
How to Create 3D Photos on Facebook
Launch the Facebook app. (Make sure that you’ve closed out and reopened the app after liking the Facebook 360 page.)
Tap on What’s on your mind? to create a status update.
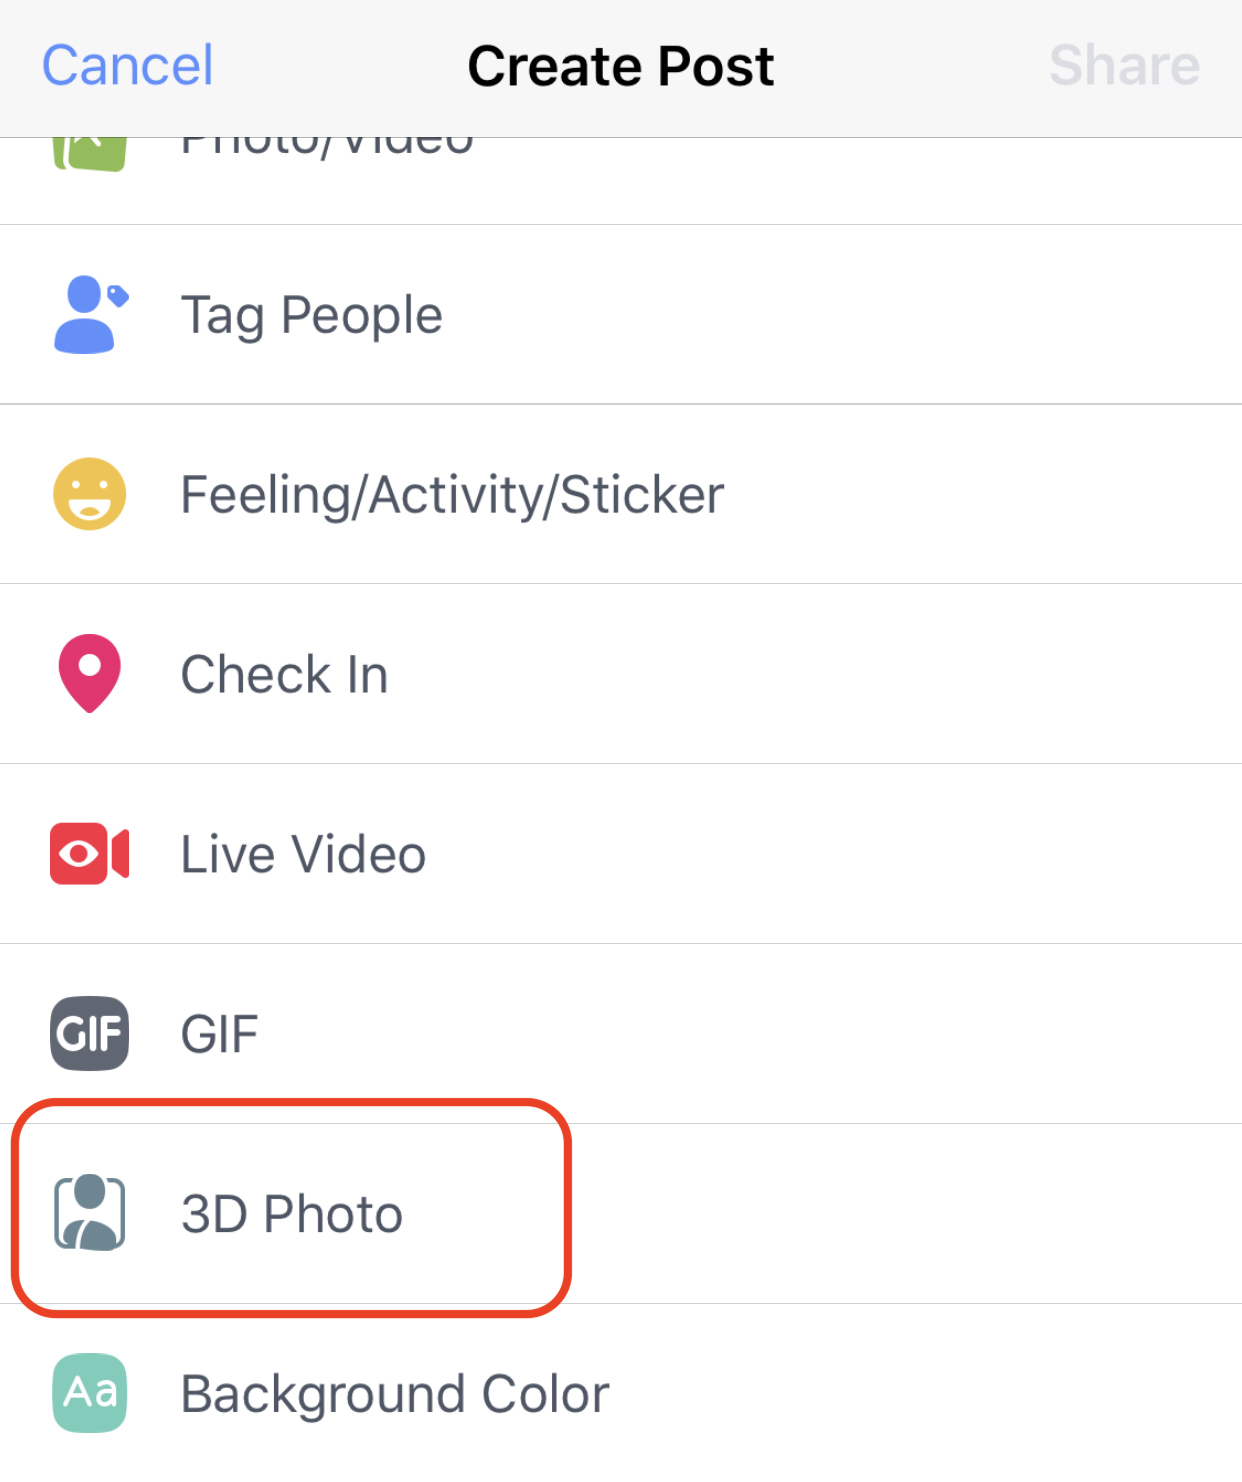
You should see a list of post content options pop up. If not, tap on Add to your post.
Scroll down and tap on 3D Photo.
Grant access to your device’s camera roll if necessary.
Now, you’ll need to find a Portrait Mode Photo in your camera roll that you’d like to turn into a 3D Facebook image.
Once you find one, tap on it to select it.
At this point, it might take a bit for the 3D photo to render.
Once it’s done, tap on Next to finish completing your post.
Try moving your iPhone around to see the “3D†depth and motion effect of the image in question.
It’s worth noting that some results will end up looking better than others — that’s just how 3D depth-mapping works.
But there are a few tips you can keep in mind when taking Portrait Mode photos to end up with the best-looking 3D pictures.
Tips to Create Better-Looking 3D Photos
Try to keep your Portrait Mode subject about three to four feet away from your iPhone.
Make sure that your subject is in a contrasting color than the background.
It helps if there are multiple layers of varying depths in your photo. A city scene or a field of flowers work well.
Avoid Portrait Mode photos of transparent materials or objects. They won’t turn out as nicely.
Subjects that have some type of texture to them and aren’t too smooth or shiny work best.


