Taking Notes on an iPad with LiquidText
This article has taken me a long time to write because every time I go into LiquidText I end up reading for way too long. That’s a sign of a great reading app, if you ask me. But, LiquidText isn’t a reading app, it’s an annotation app, and it’s the best annotation app I’ve ever used.
Let’s get the bad things out of the way first. This will be quick.
LiquidText is iPad only. There’s no direct sync between devices but it does work with iCloud Drive and iCloud file providers like DEVONthink To Go. It’s a clever implementation even if it’s not ideal. Because of this, I don’t think LiquidText is a good place to archive documents even though it has some great features for storing related research.
That’s it. Now let’s start the long road of amazing features in LiquidText.
Let’s Annotate
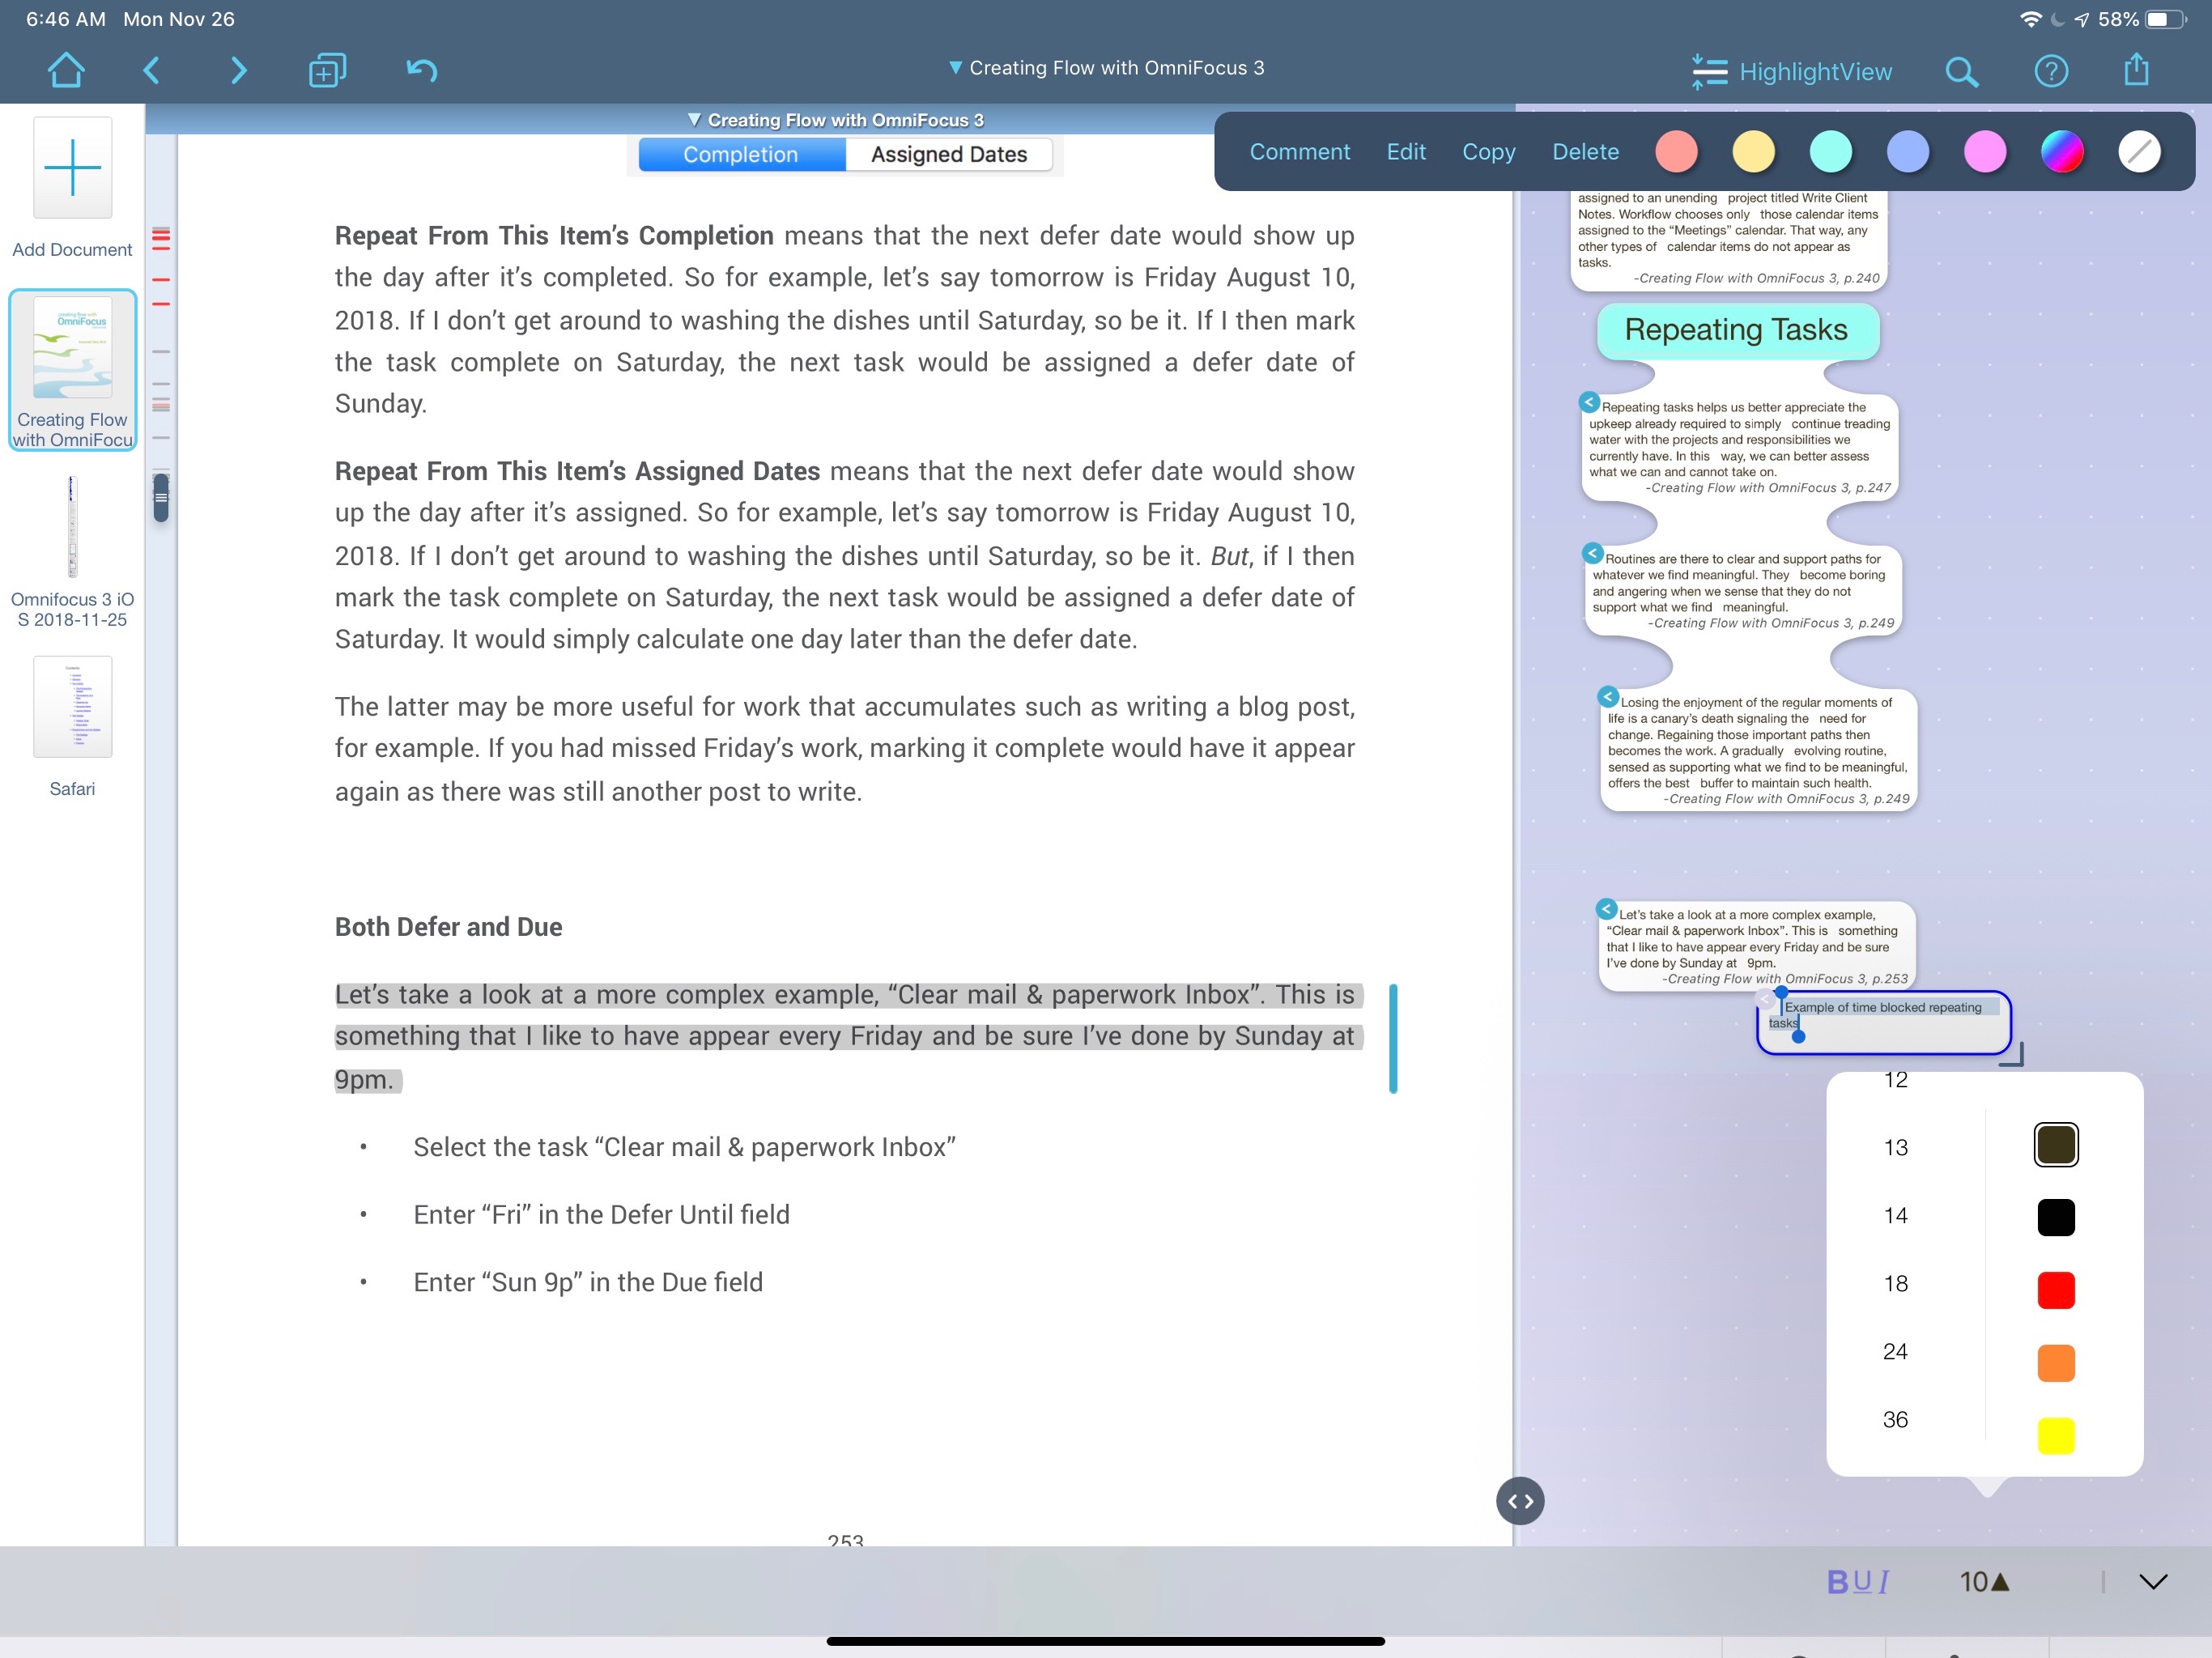
The most basic capability of LiquidText is extracting and highlighting PDFs. Highlights aren’t that novel but the way LiquidText extracts annotations is marvelously unique. With an Apple Pencil, or a finger, I can select text in the PDF and instantly extract a linked note. LiquidText preserves the connection to the original document. Tapping the annotation in the sidebar immediately scrolls the main document and shows where it is linked.
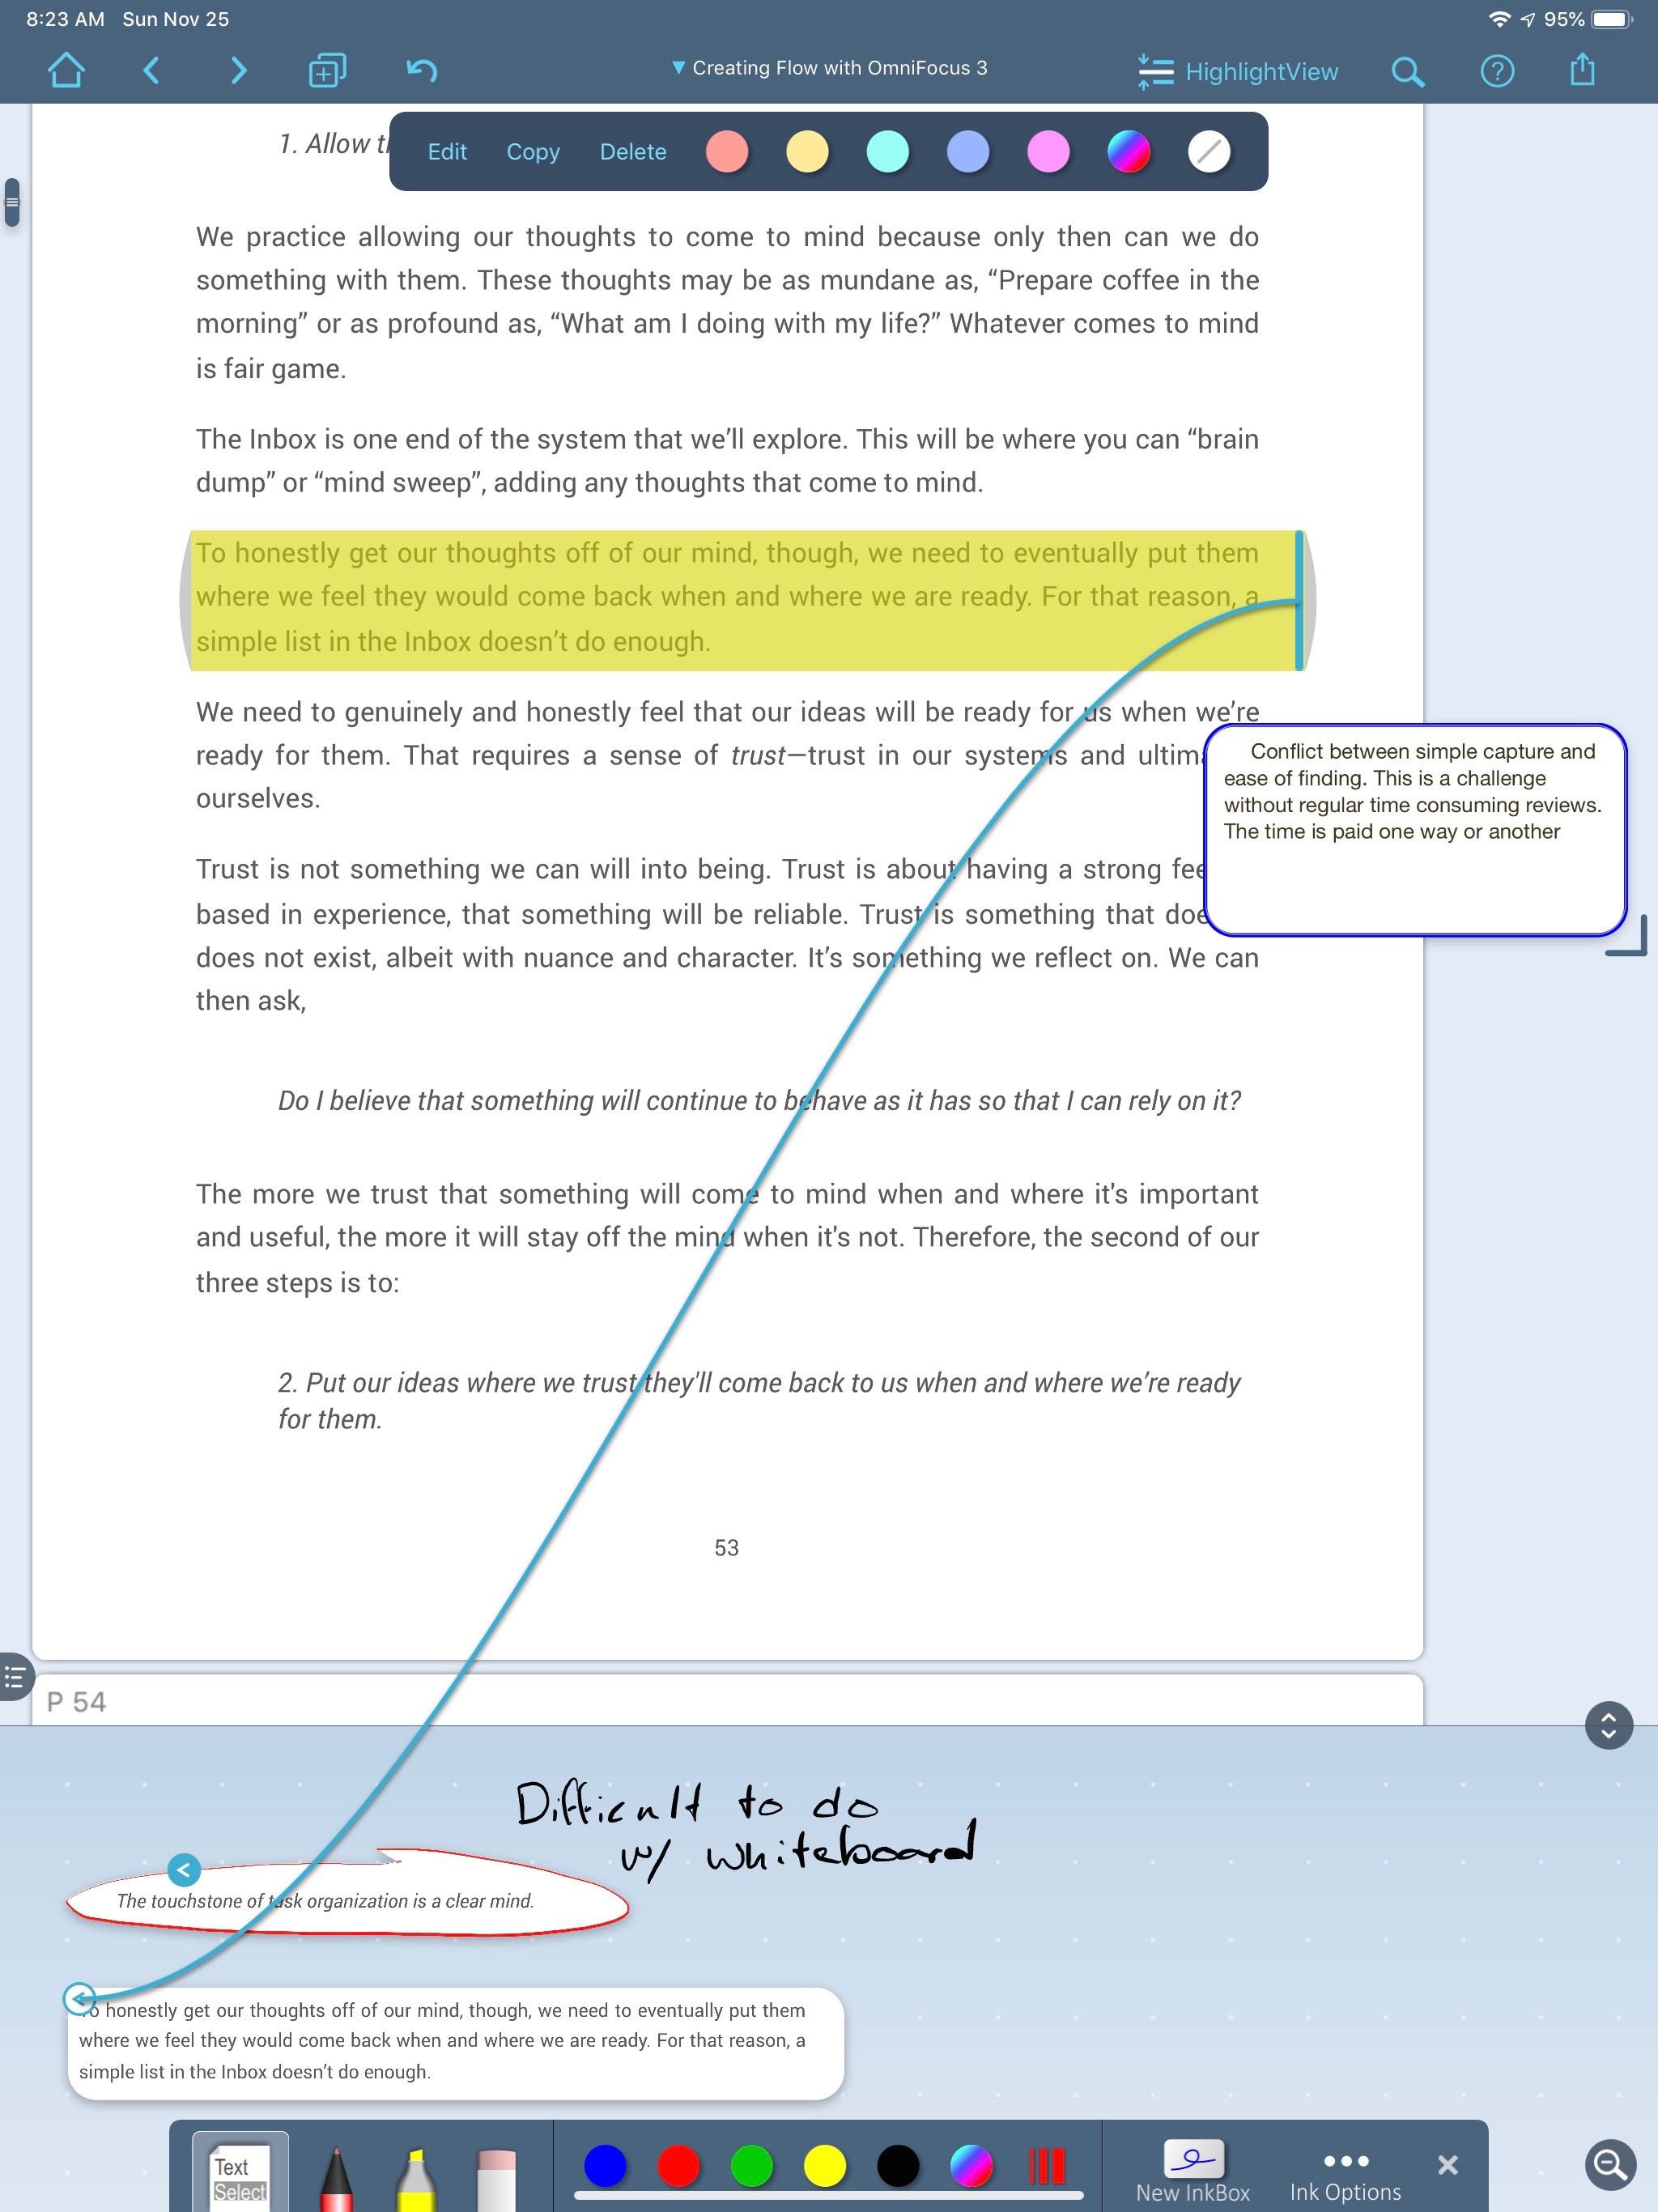
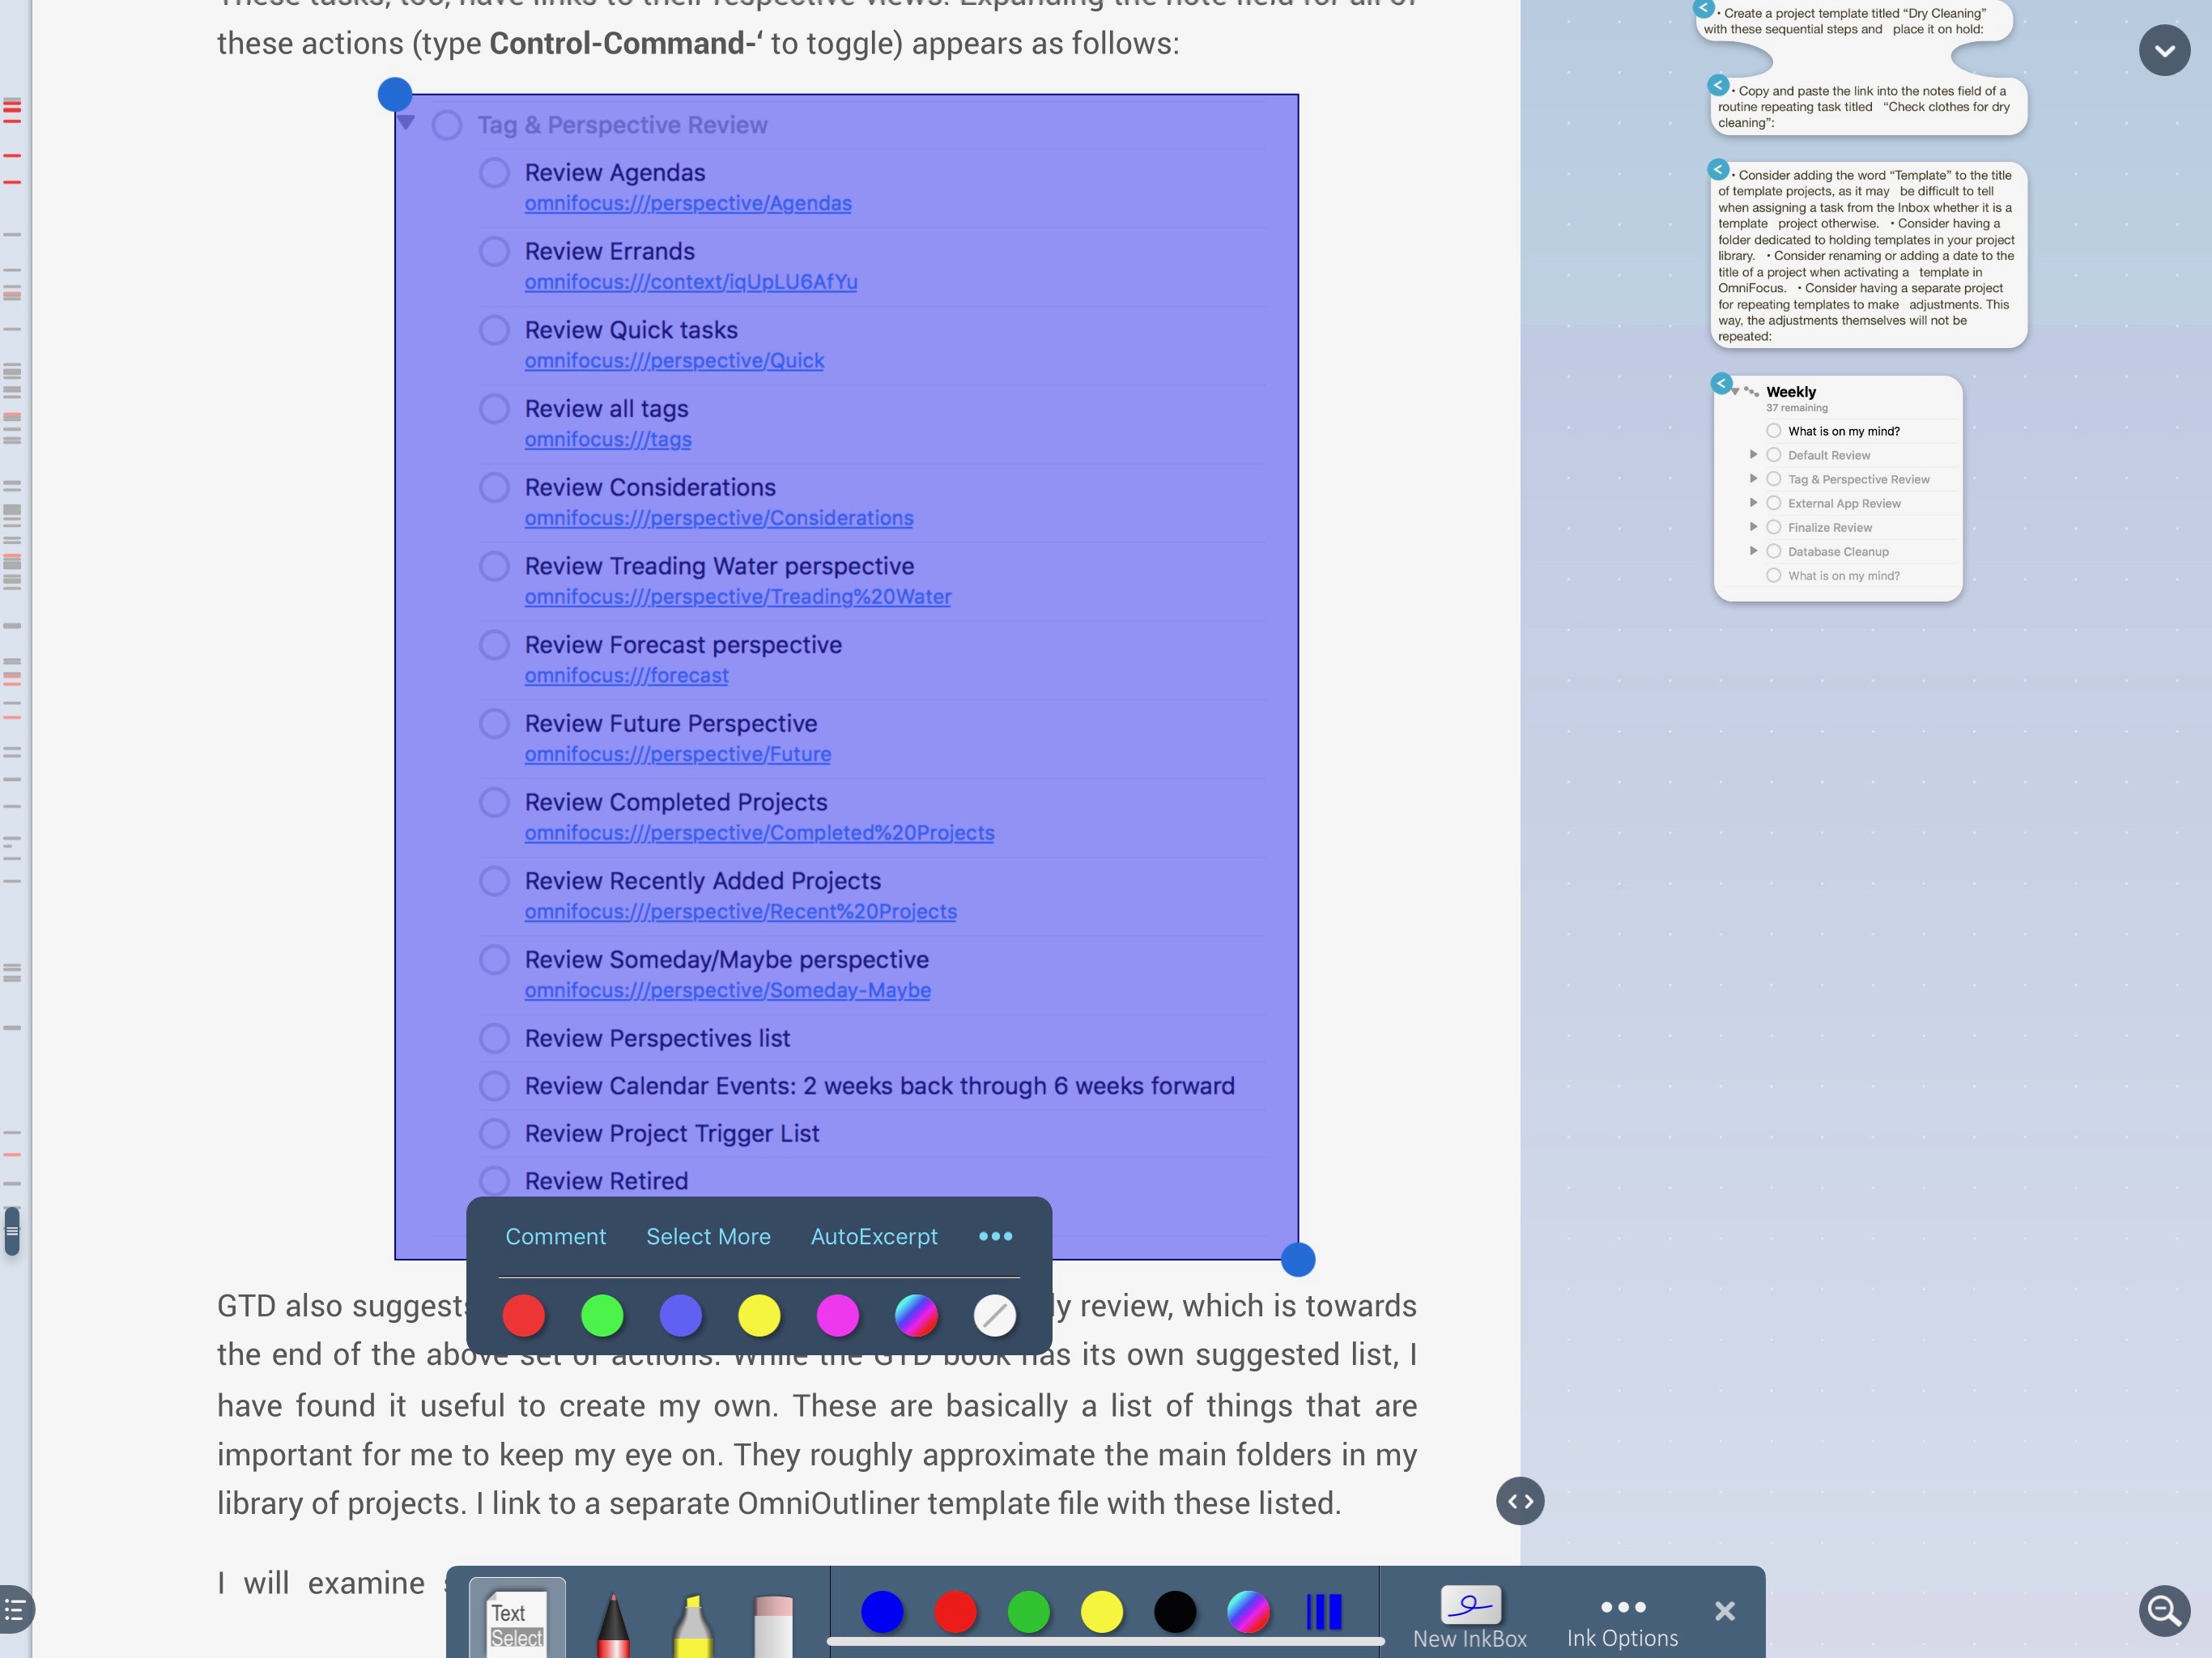
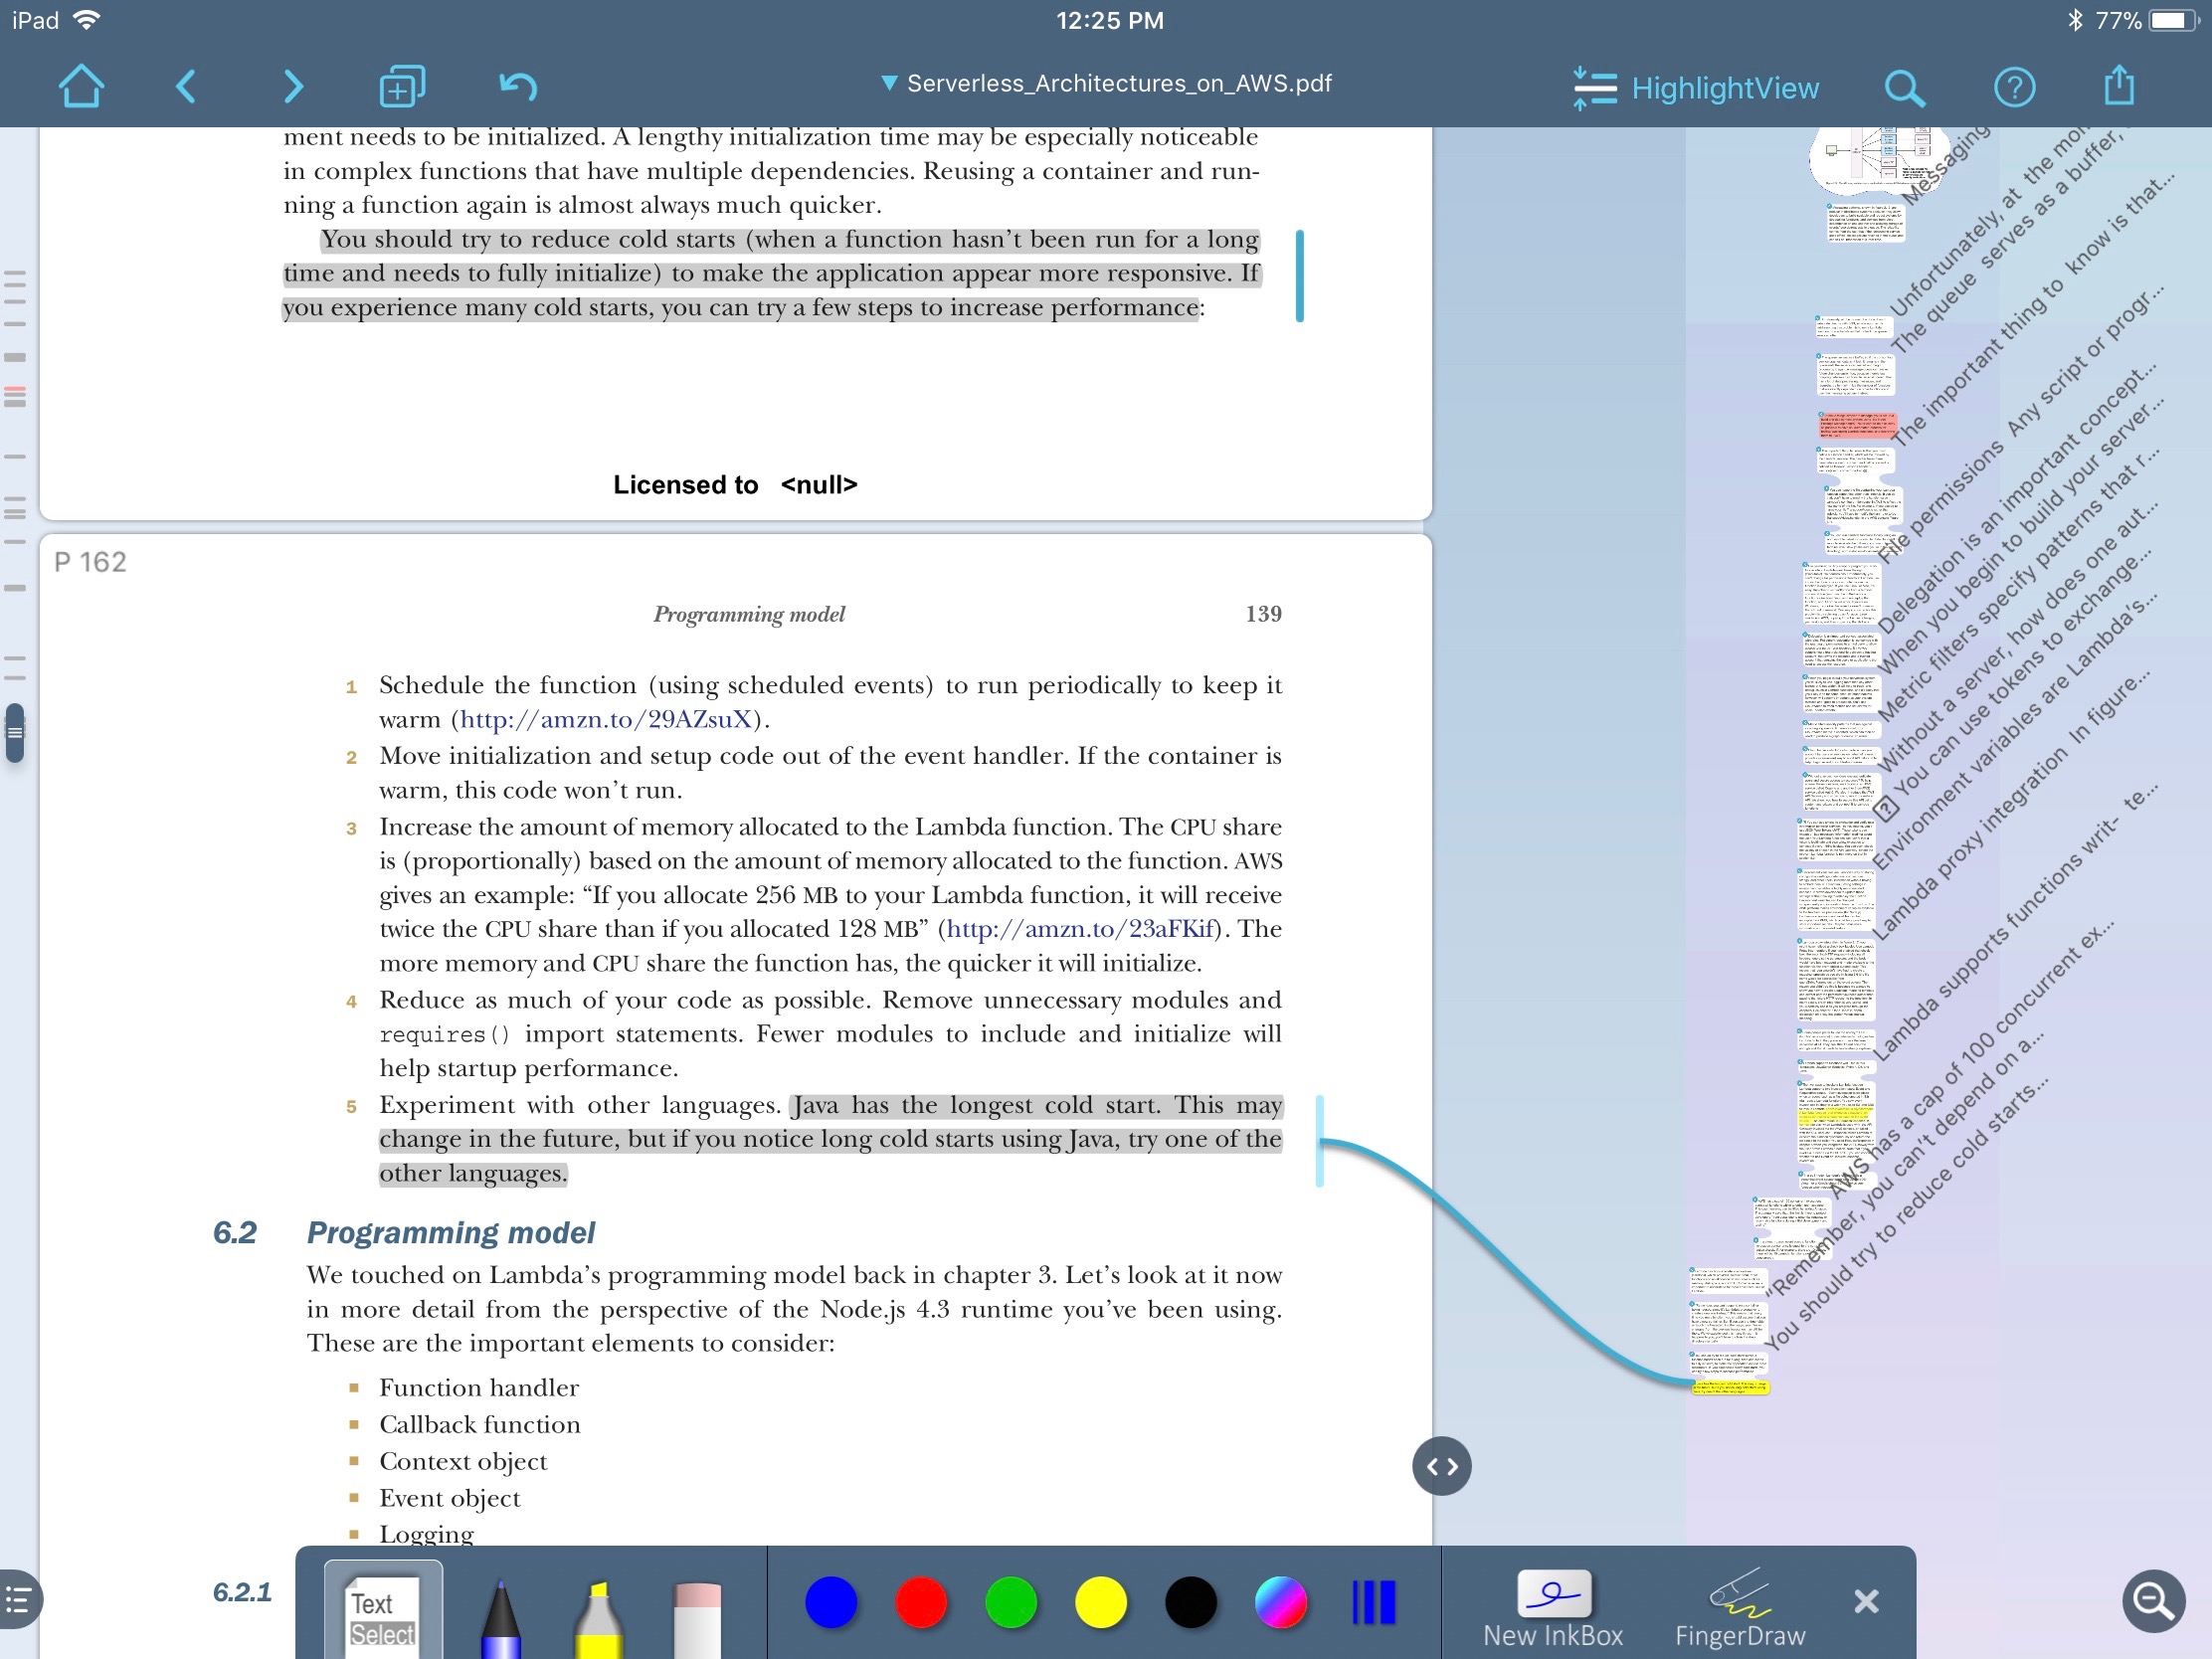
I also really enjoy the interactions with LiquidText. Using an Apple Pencil I can quickly circle text or images and drag them out to my annotation sidebar. These will live on as if they were a separate document, but tapping on the connection arrow scrolls the document back to the source to show the context. Tap and hold on an excerpt and then tap more excerpts to multi-select. These can all then be moved around the annotation canvas together. While organization of the excerpts and notes happens automatically at creation, I can re-organize them anytime to fit the way I think or how I want the ideas to flow. It’s better than a highlighter and a paper book. Try moving the order of your highlight around on a printed page. You’ll need some scissors.
Pinching on a page in LiquidText is a joy for long, wordy, passages. The paragraphs collapse immediately, which allows me to compare two different paragraphs more easily. Every detail has been thought of and the gestures in LiquidText make it feel like the iPad was custom designed for annotating PDFs.
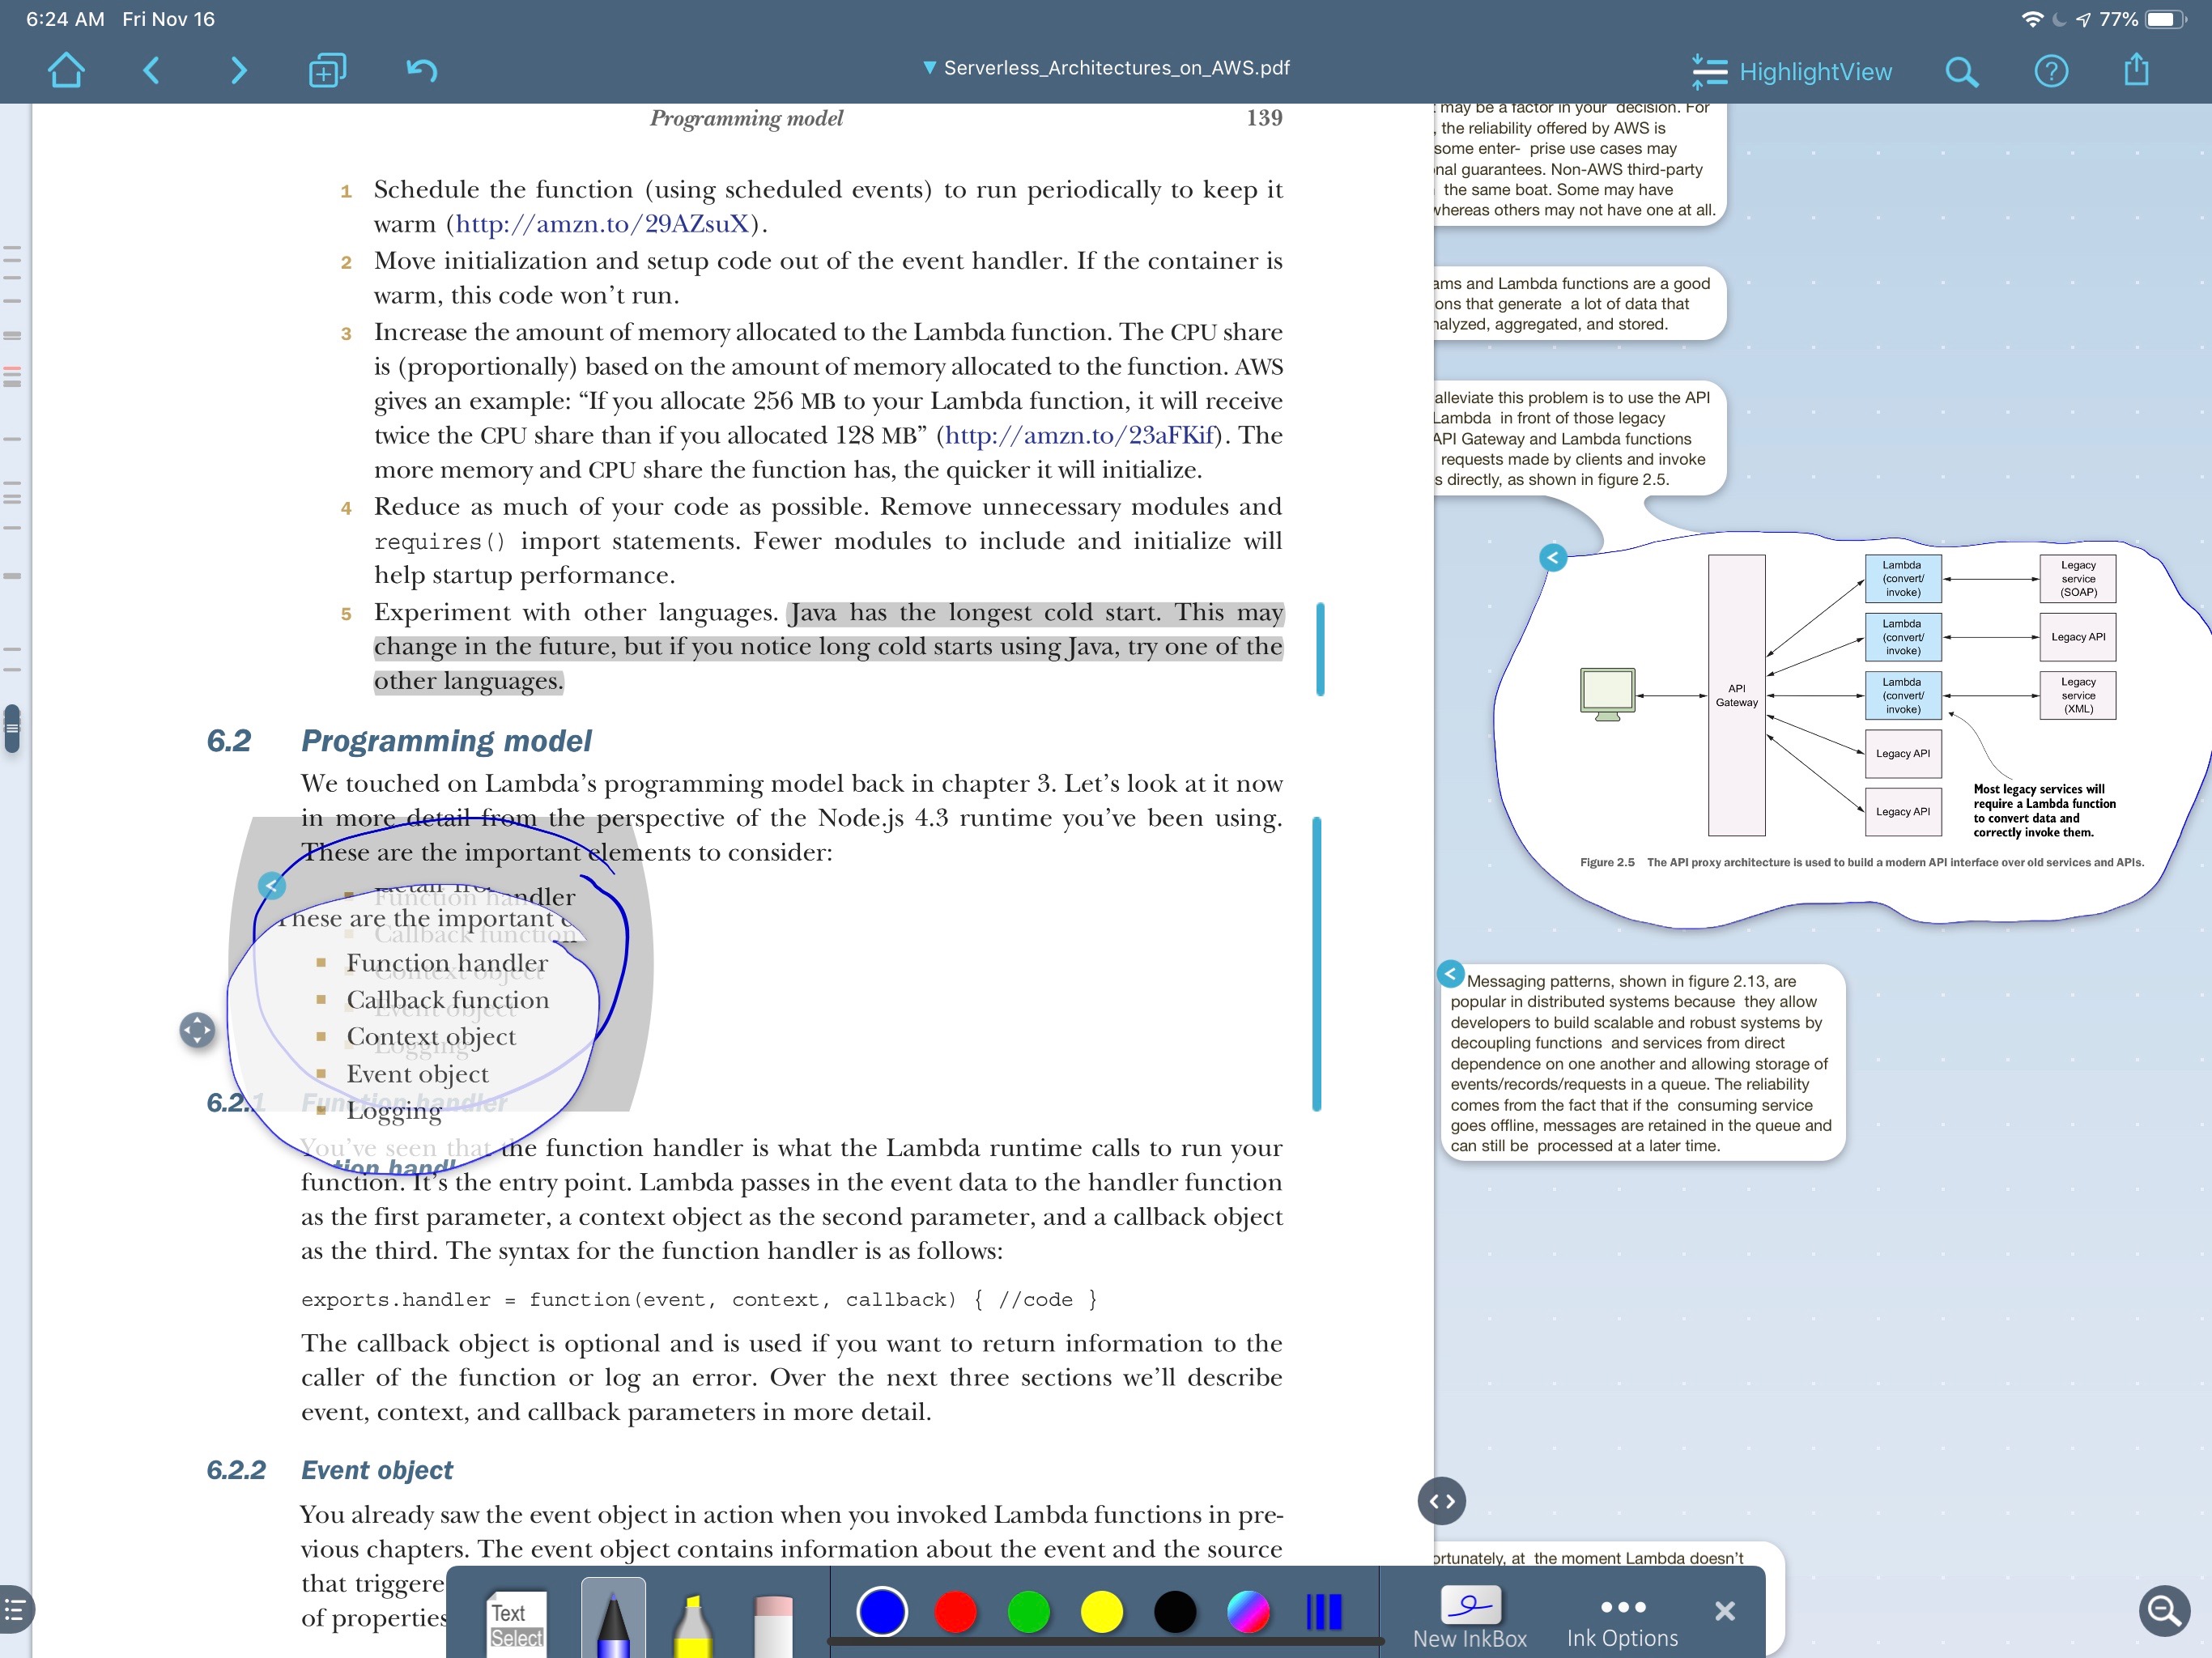
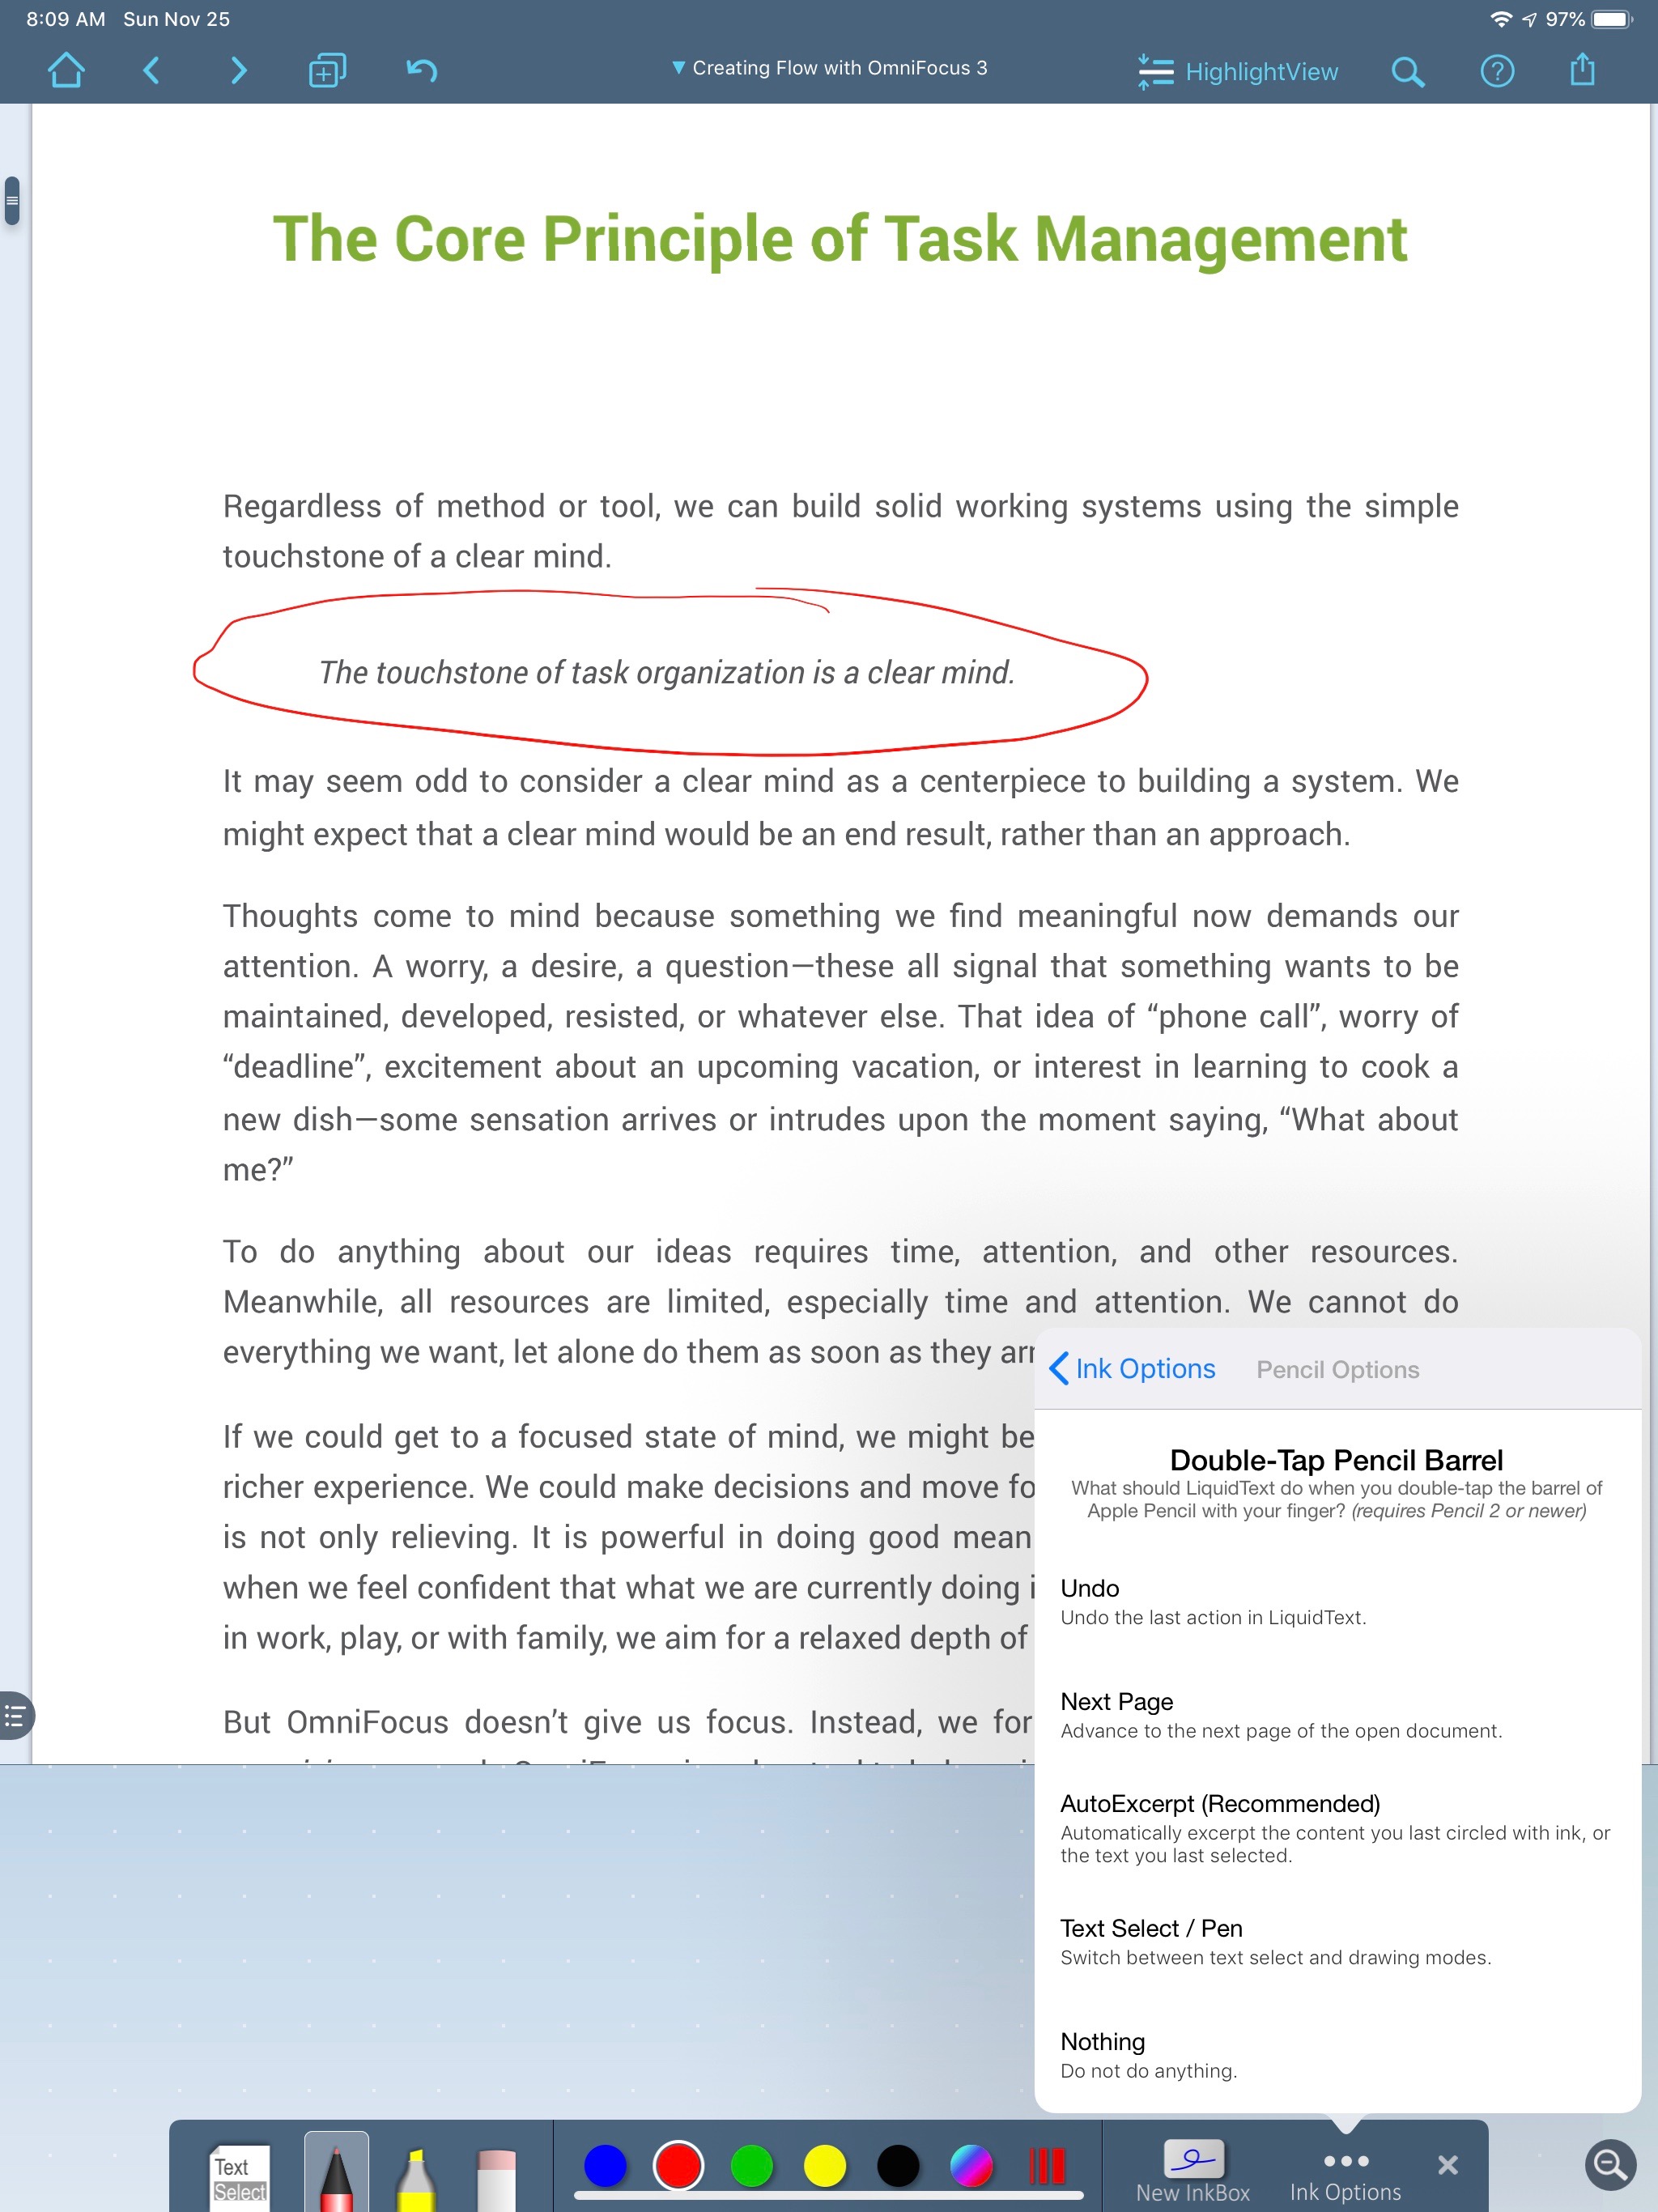
Marking up a PDF with the Apple Pencil feels natural. It feels down-right incredible when you can simply circle some text or an image and start dragging it out to the side bar. While dragging out annotations, they can be immediately linked to existing annotations. In this way I can condense a large amount of information into a series of small annotations linked in a related context.
The Pencil isn’t just a gimmick in LiquidText. It’s an organic part of the tool-kit. LiquidText added meaningful support for double-tap on the Apple Pencil 2 within weeks of its release. With the default setting, it’s a marvel to circle and then double-tap to excerpt text or sections of documents.
I generally like the different modes for creating annotations in LiquidText. With the Pencil I usually want a more free-form selection. When I’m using my finger, I have less granular control. LiquidText does the right thing and uses the finger input as a traditional text selector in iOS. Drag across a block of text to select or highlight with your finger.
Want to extract an entire image in a PDF? Just drag your finger across the area and hit “AutoExcerpt” to add it to the side-bar.
One of the strengths of LiquidText is that it doesn’t treat text and images as objectively different. Each can be selected and highlighted or excerpted. Images can be dragged out and attached to a text excerpt or note.
Markup formatting is quickly adjusted by using the slide up tool-bar. Or each individual annotation can be manually selected and formatted later. Every aspect of the annotation markup is customizable in LiquidText. The line thickness and color can all be tweaked. I don’t tweak very much and usually default to one of the built-in formats.
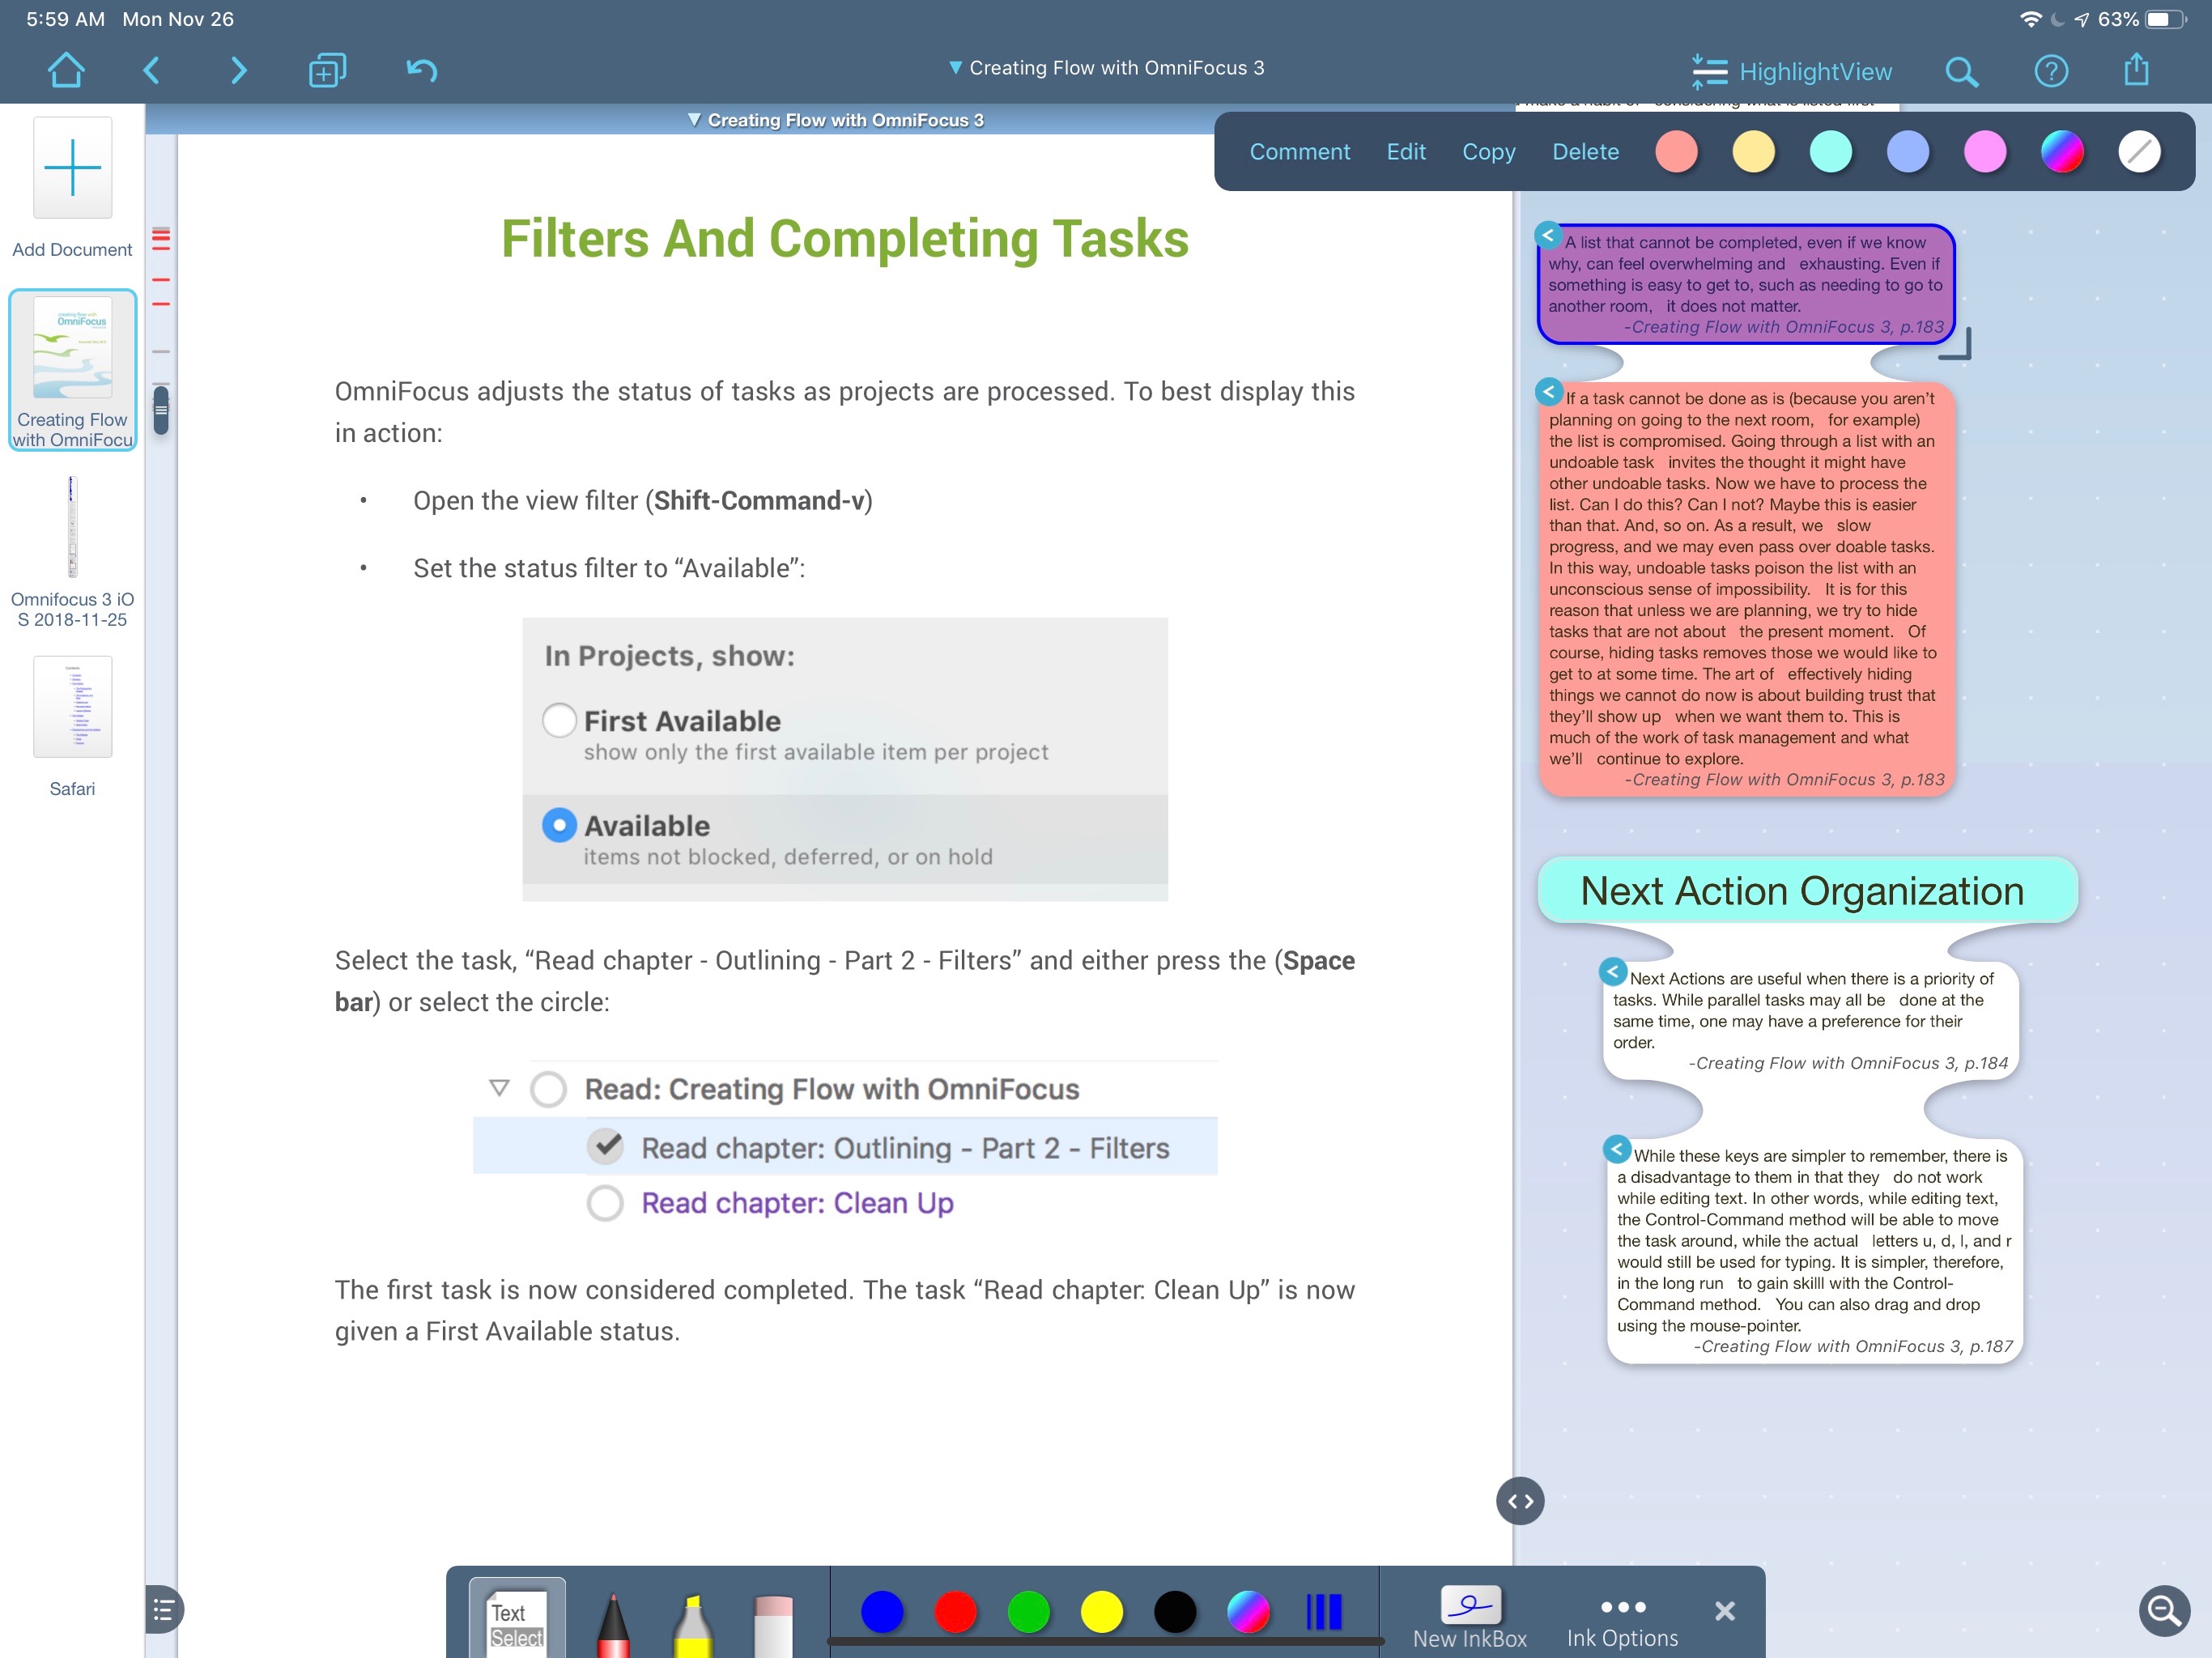
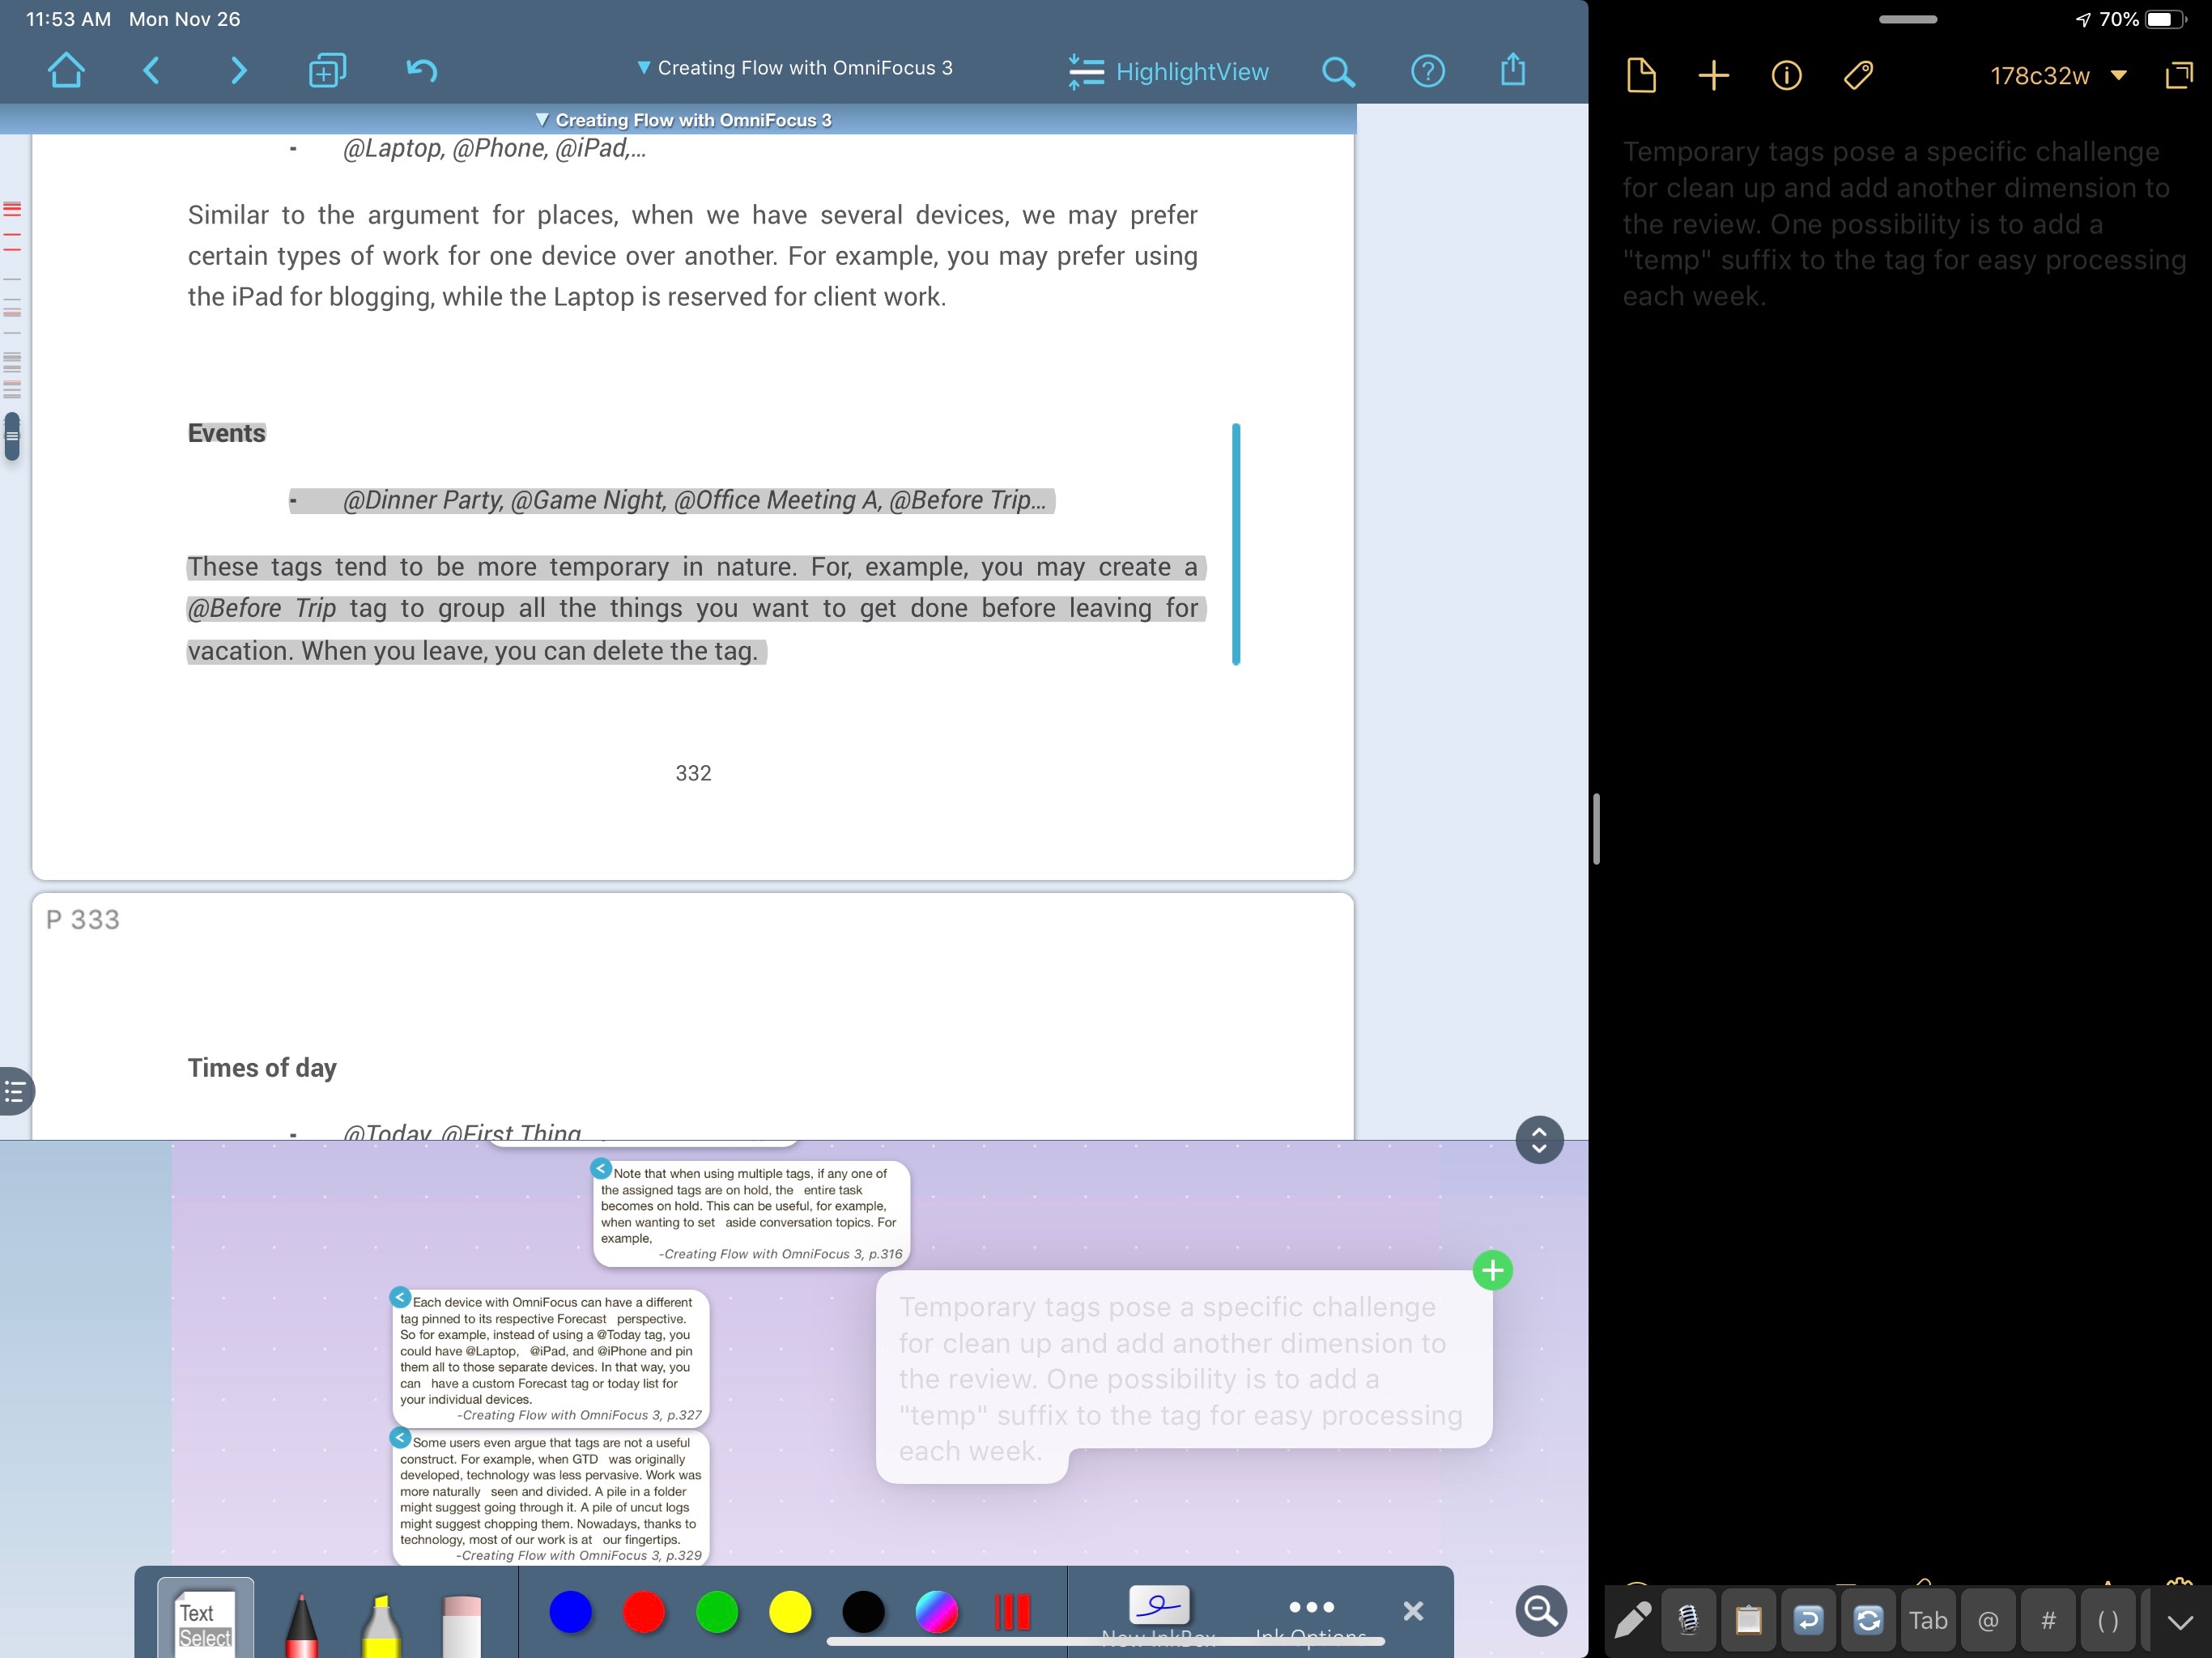
I like to organize my notes in the side-bar with a combination of annotation formatting and free-text boxes. For example, I add section headers or just title a collection of excerpts. This is really helpful when scanning a large collection of notes.
Even the text of annotations can be adjusted. I find the default text to be very small and hard to read when I’m scanning down a long list. By adjusting the text of a key section, I can call it out and make it much more obvious against a sea of ants.
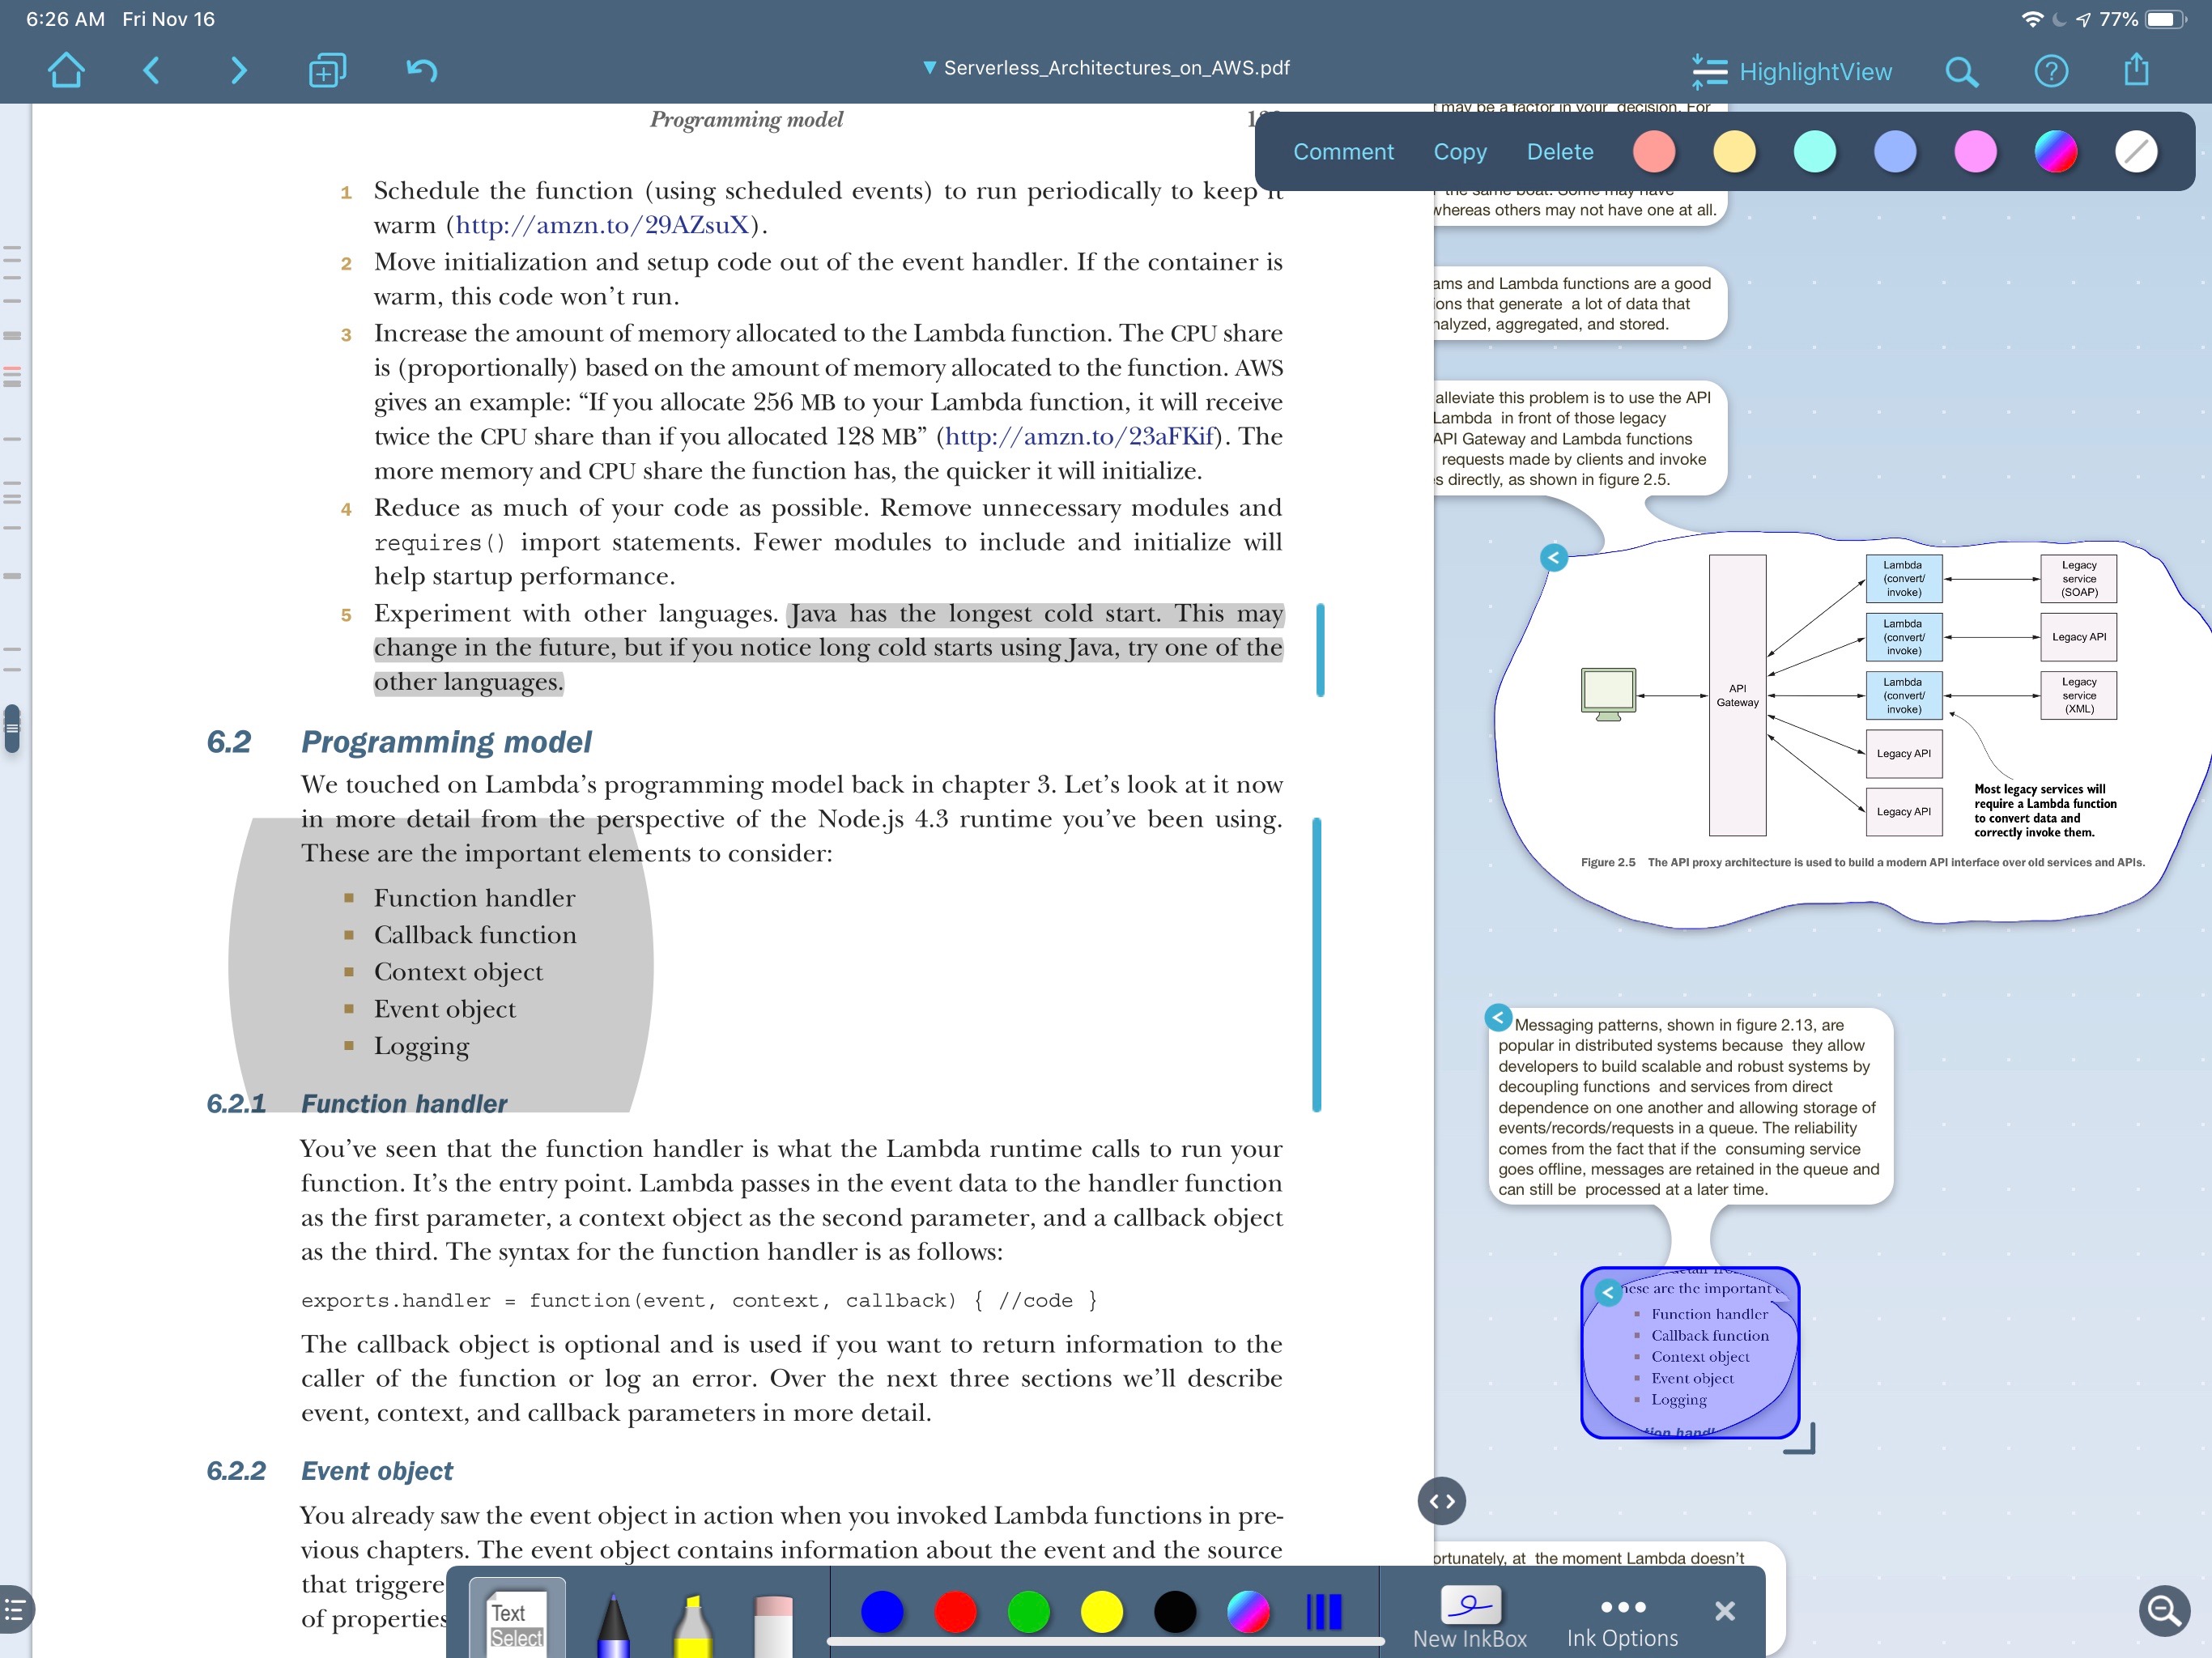
Once I have a pile of annotations and excerpts, LiquidText makes it easy to navigate. On the left there is a vertical strip that denotes sections with markup. On the right there’s a long organized list of annotations. Tapping on any one of the annotations scrolls the PDF view to the exact spot and highlights the link between the source and the excerpt.
If you thought this was the end of LiquidText’s magic formula, you’re in for a surprise. It’s a research powerhouse that works in split-screen with multiple documents as easily as it does with a single PDF.
Multi-Source Support
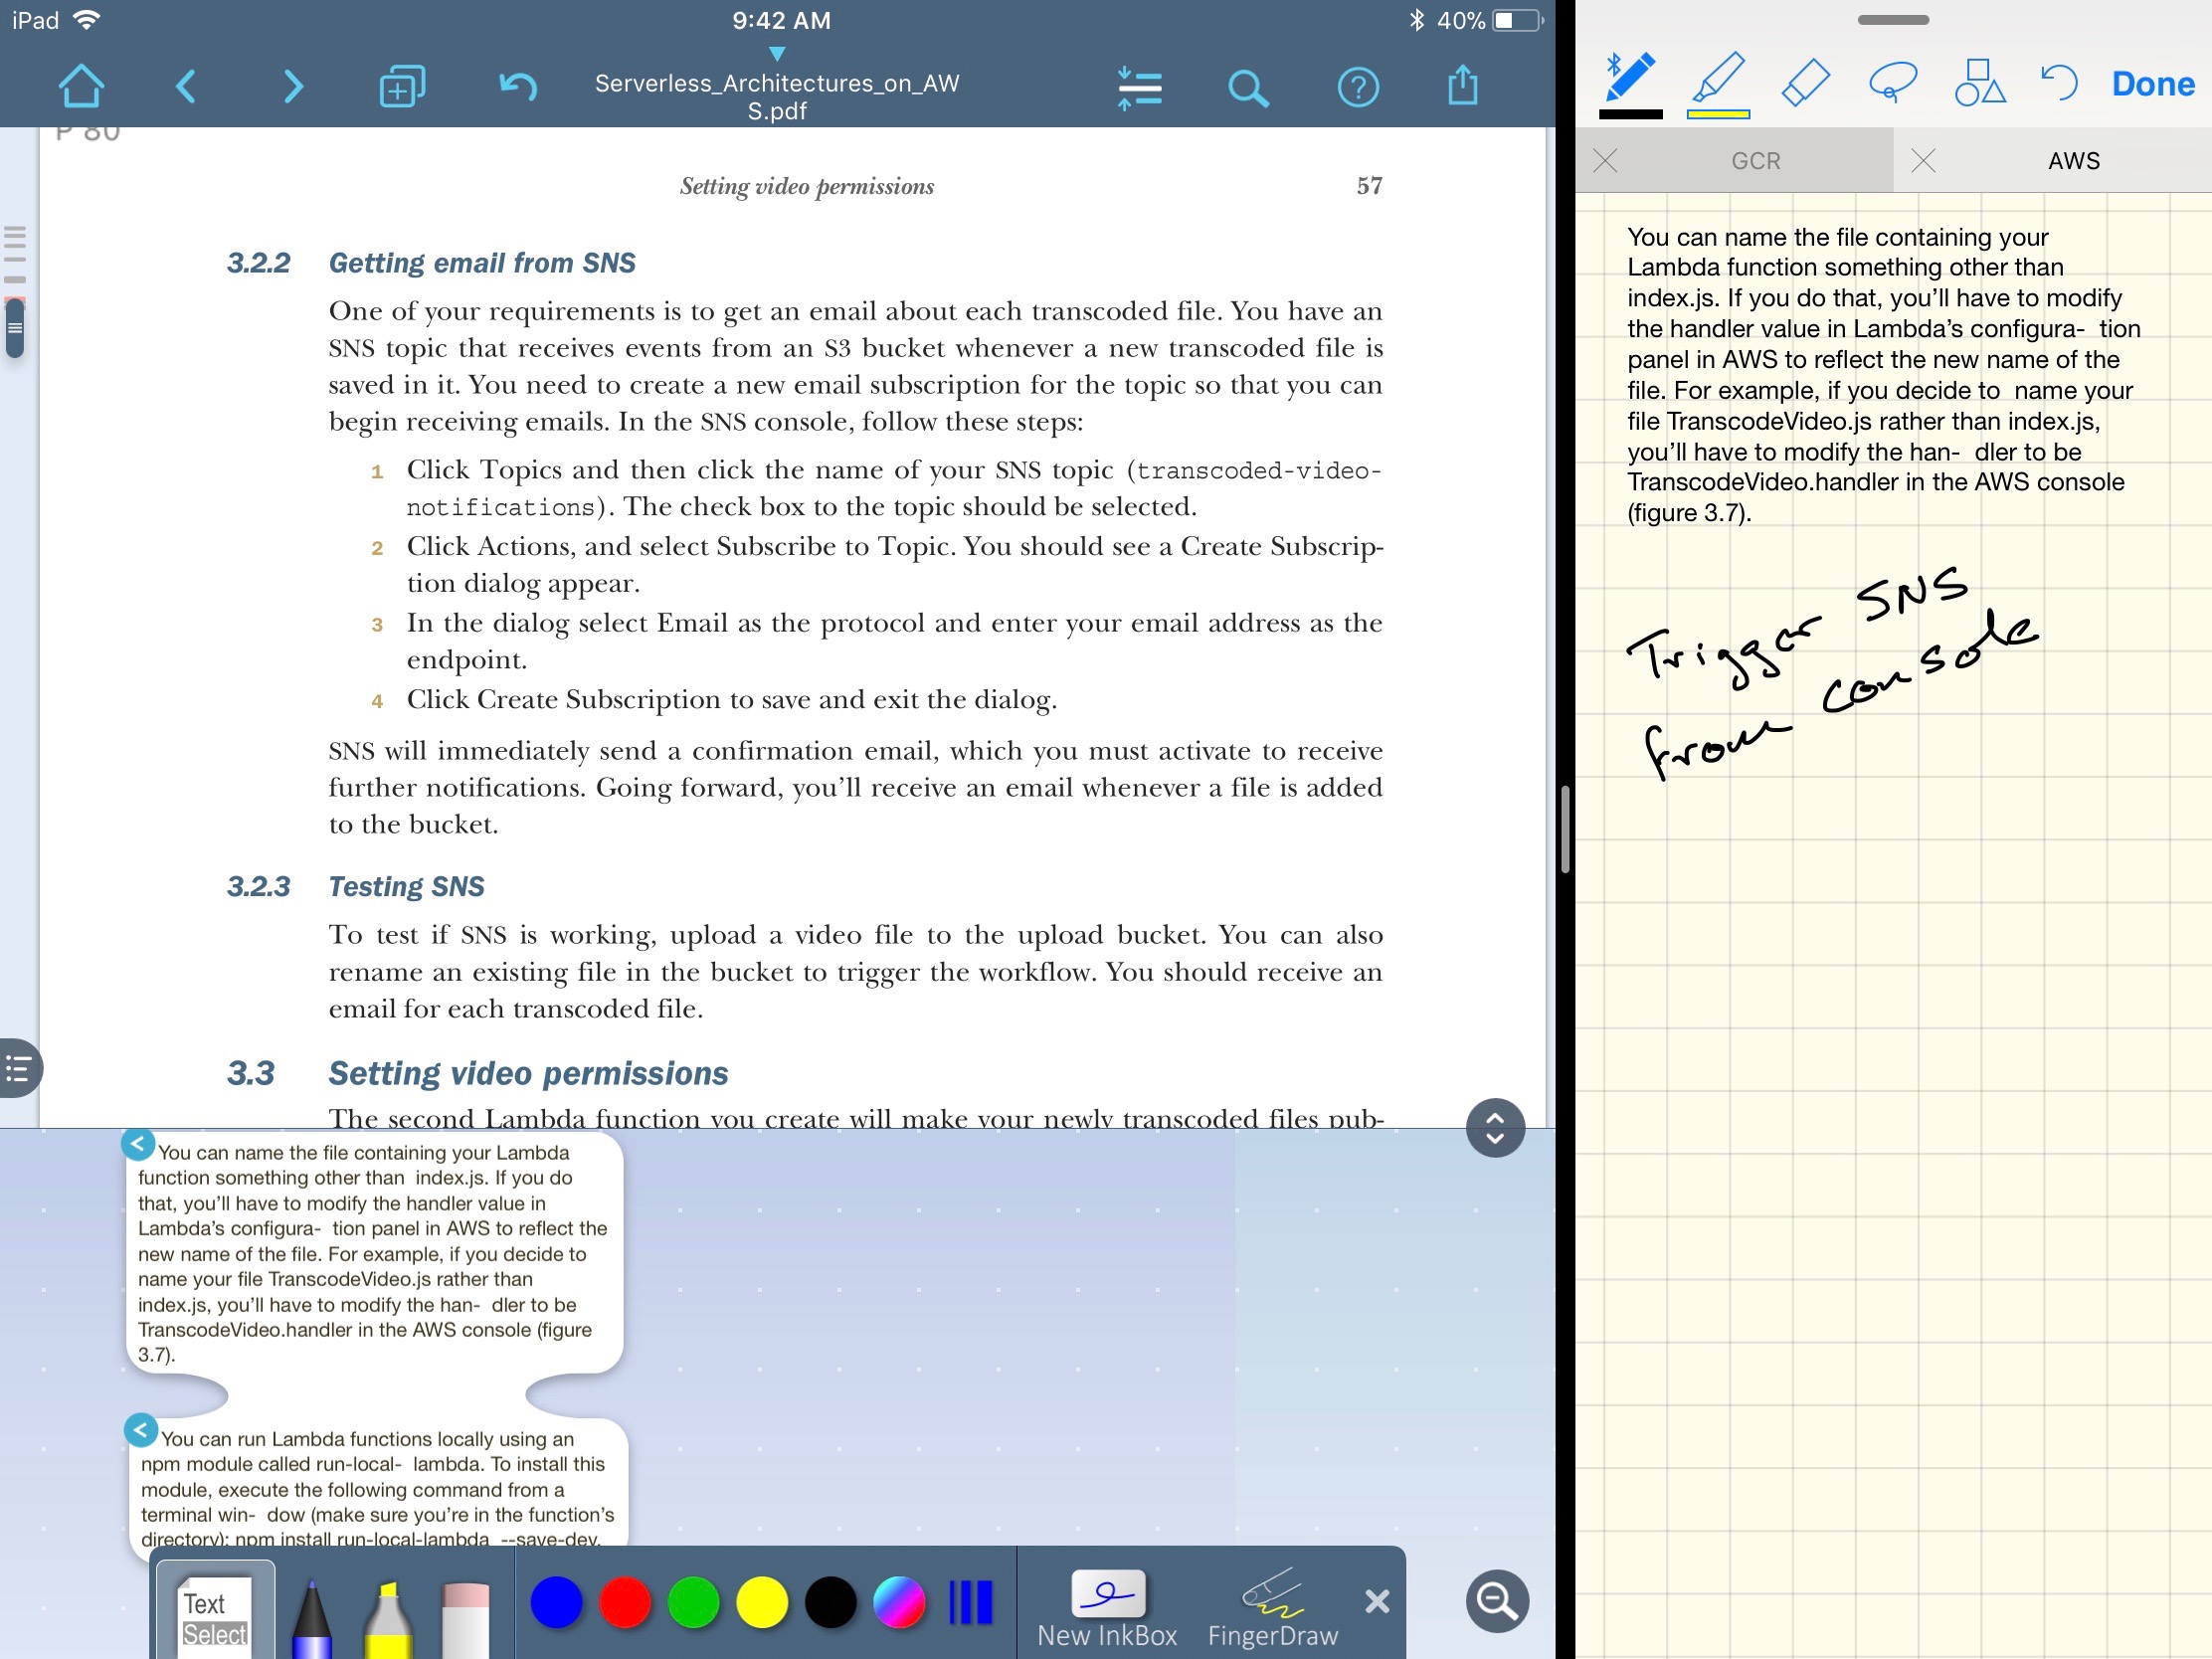
LiquidText works perfectly in split screen mode on iPad. A very powerful setup is to have Drafts open for typing notes while annotating in LiquidText on the left. Text can be dragged between the apps. Dragging text from Drafts into LiquidText creates a text annotation anywhere it is dropped.
If I already have notes in another app like GoodNotes, I can go split screen and drag those right into LiquidText. I love how LiquidText works with other apps as if they are equals. Text and images are exchangeable, which means LiquidText doesn’t hoard my ideas.
LiquidText treats a PDF as just part of a larger research project. LiquidText files are organized into folders, but each file can contain multiple PDFs, images, and Microsoft Word documents.
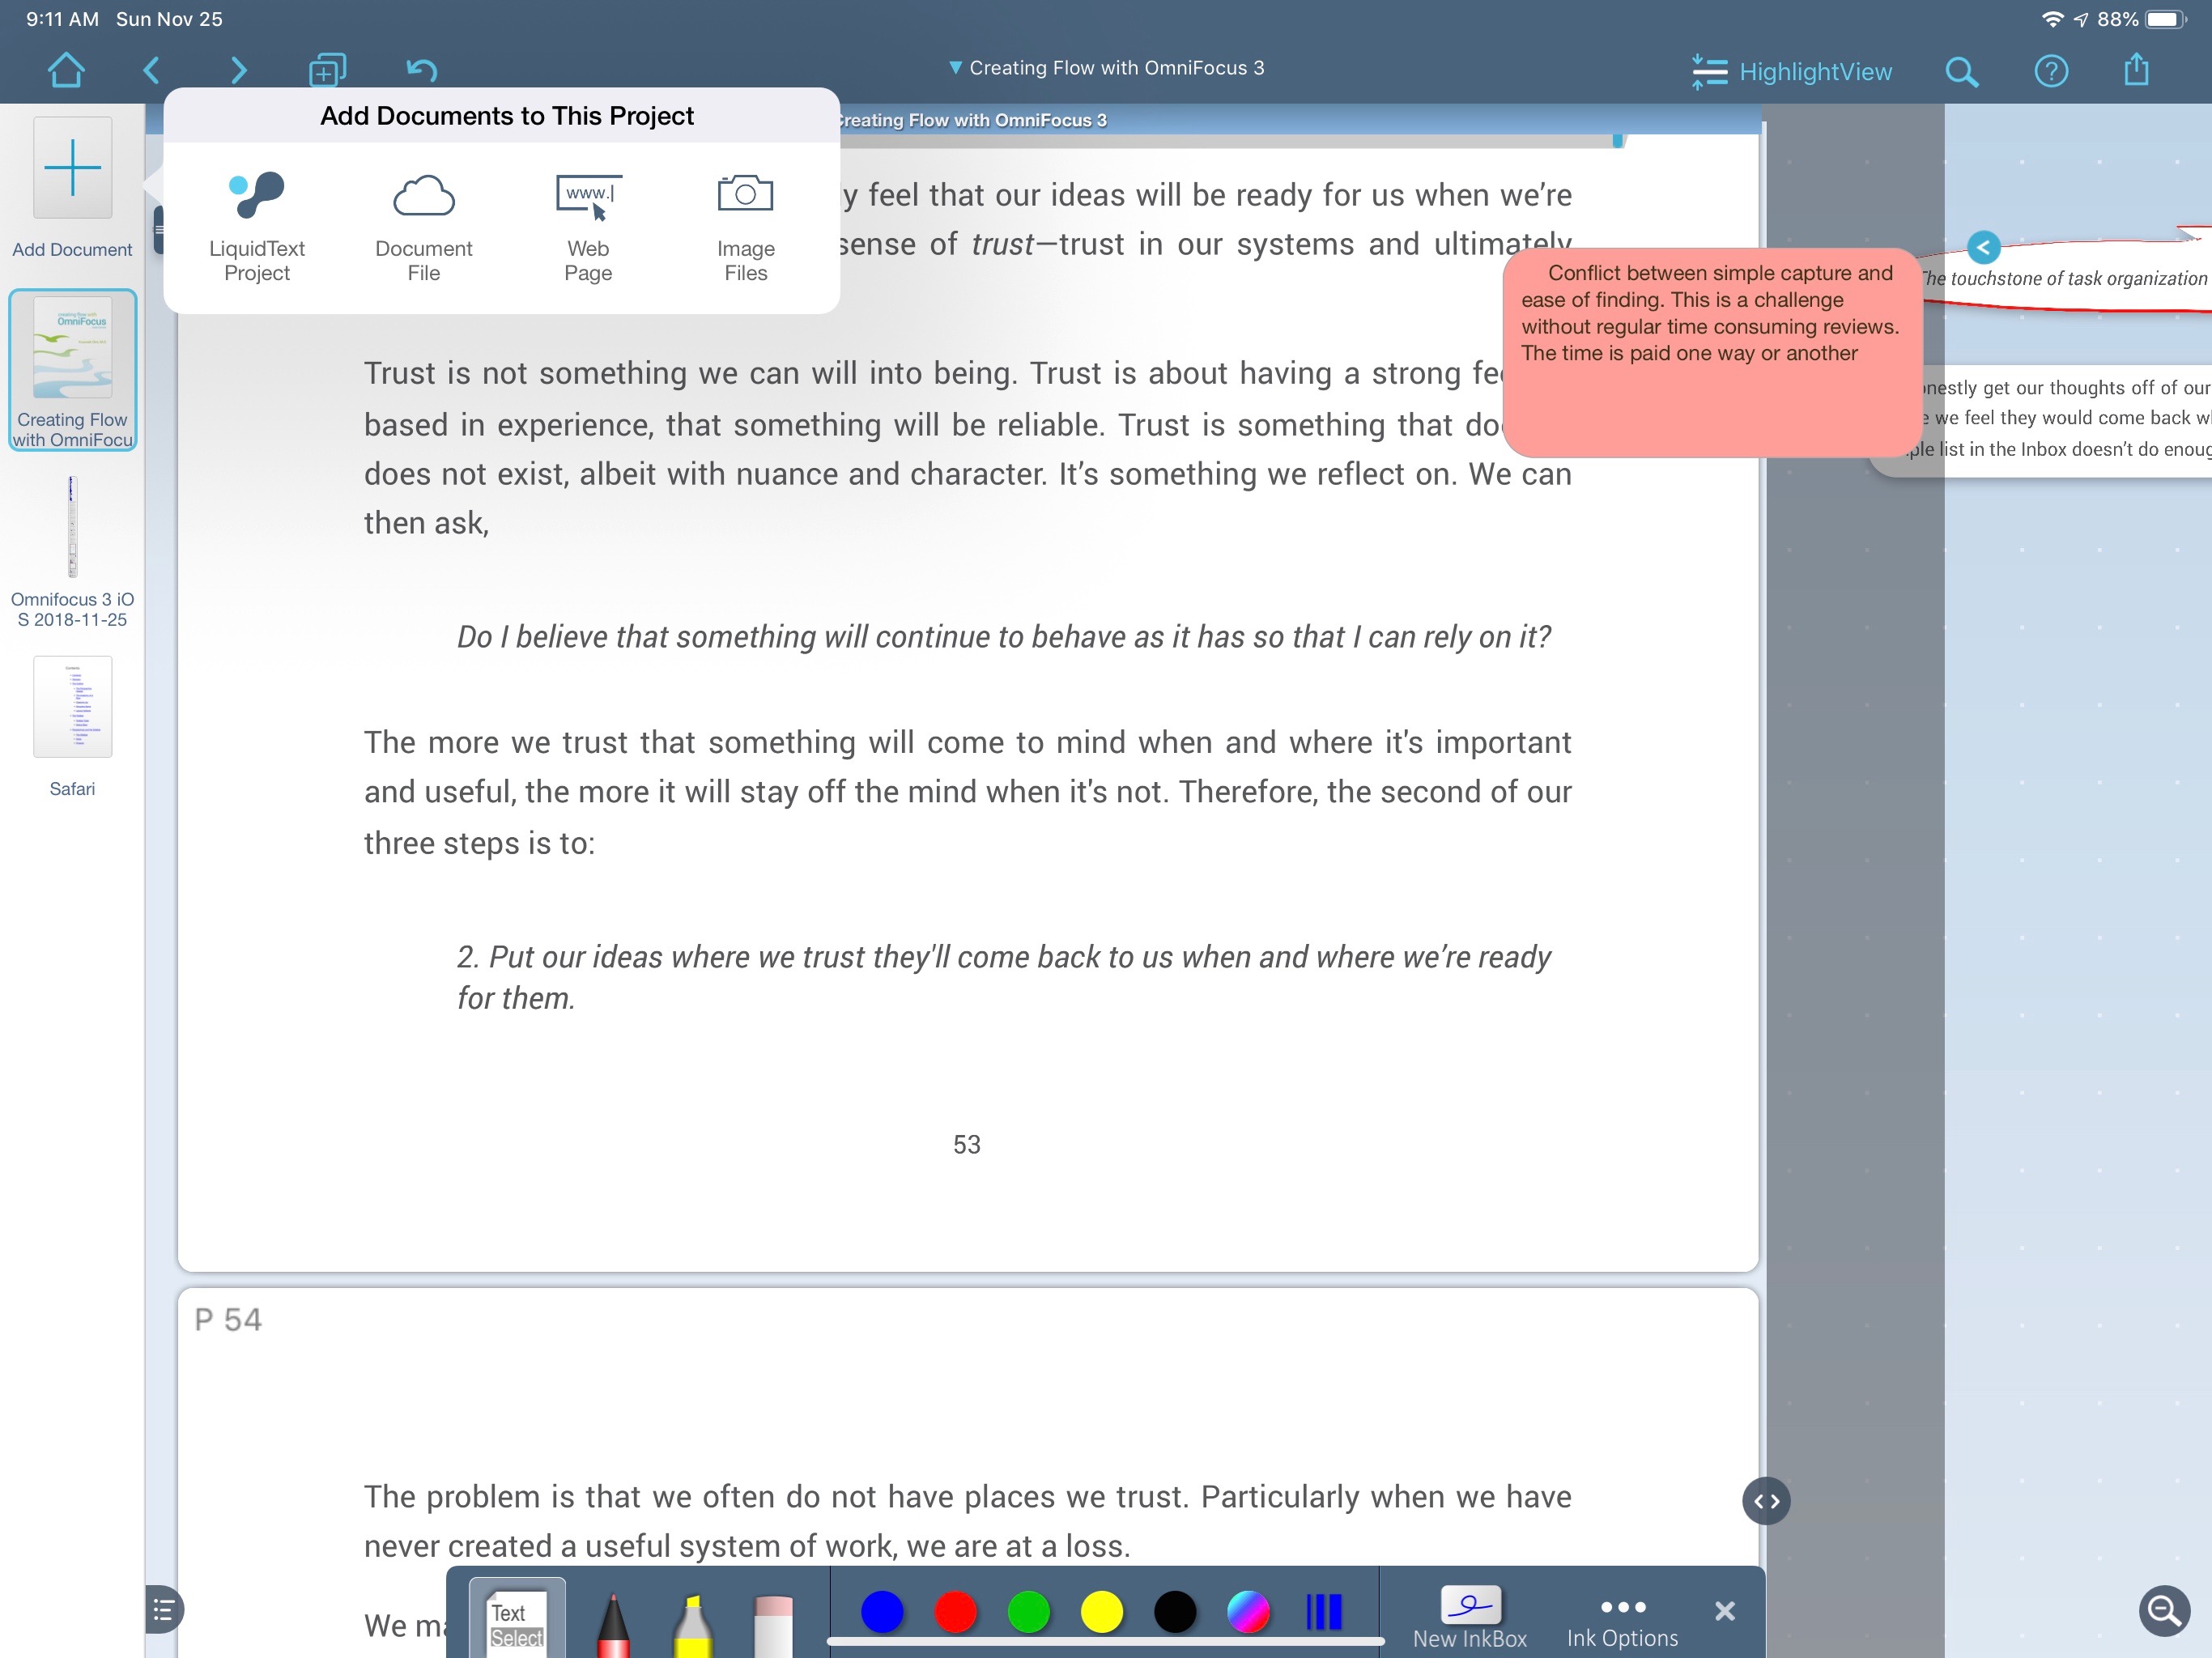
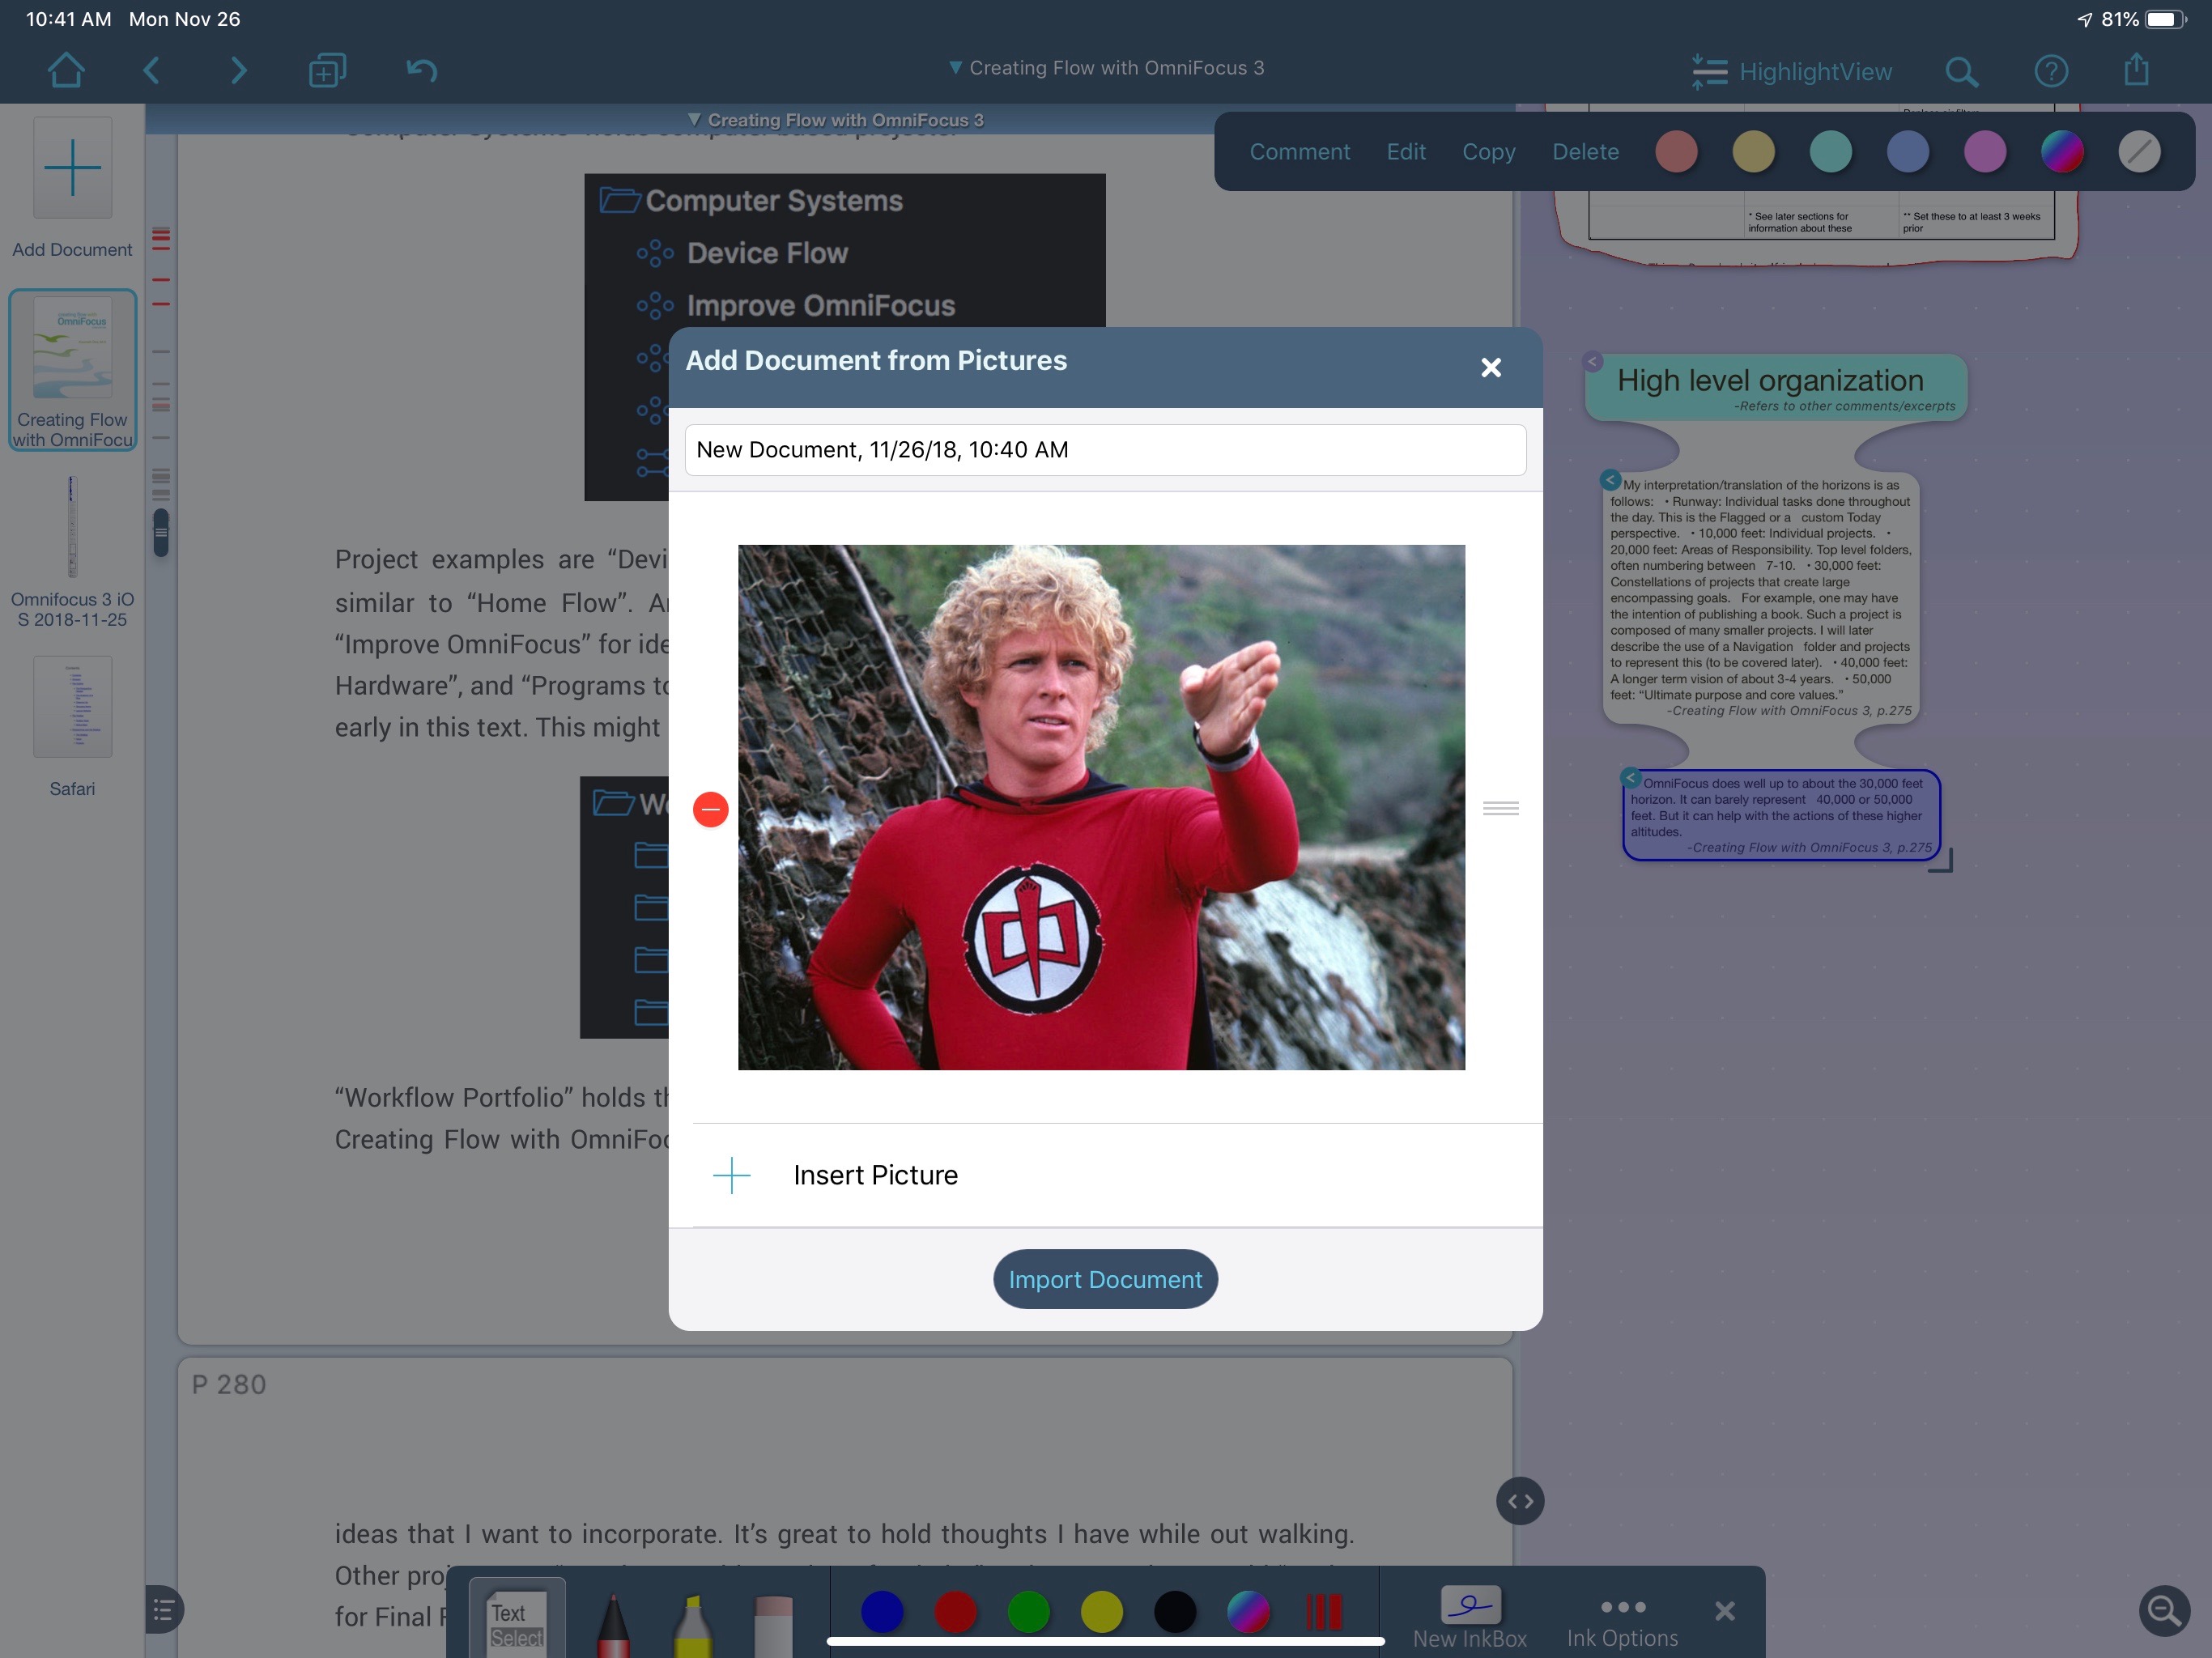
The document importer isn’t some half-baked solution either. Image imports can be re-titled. Multiple images can be added at once and imported into the LiquidText project.
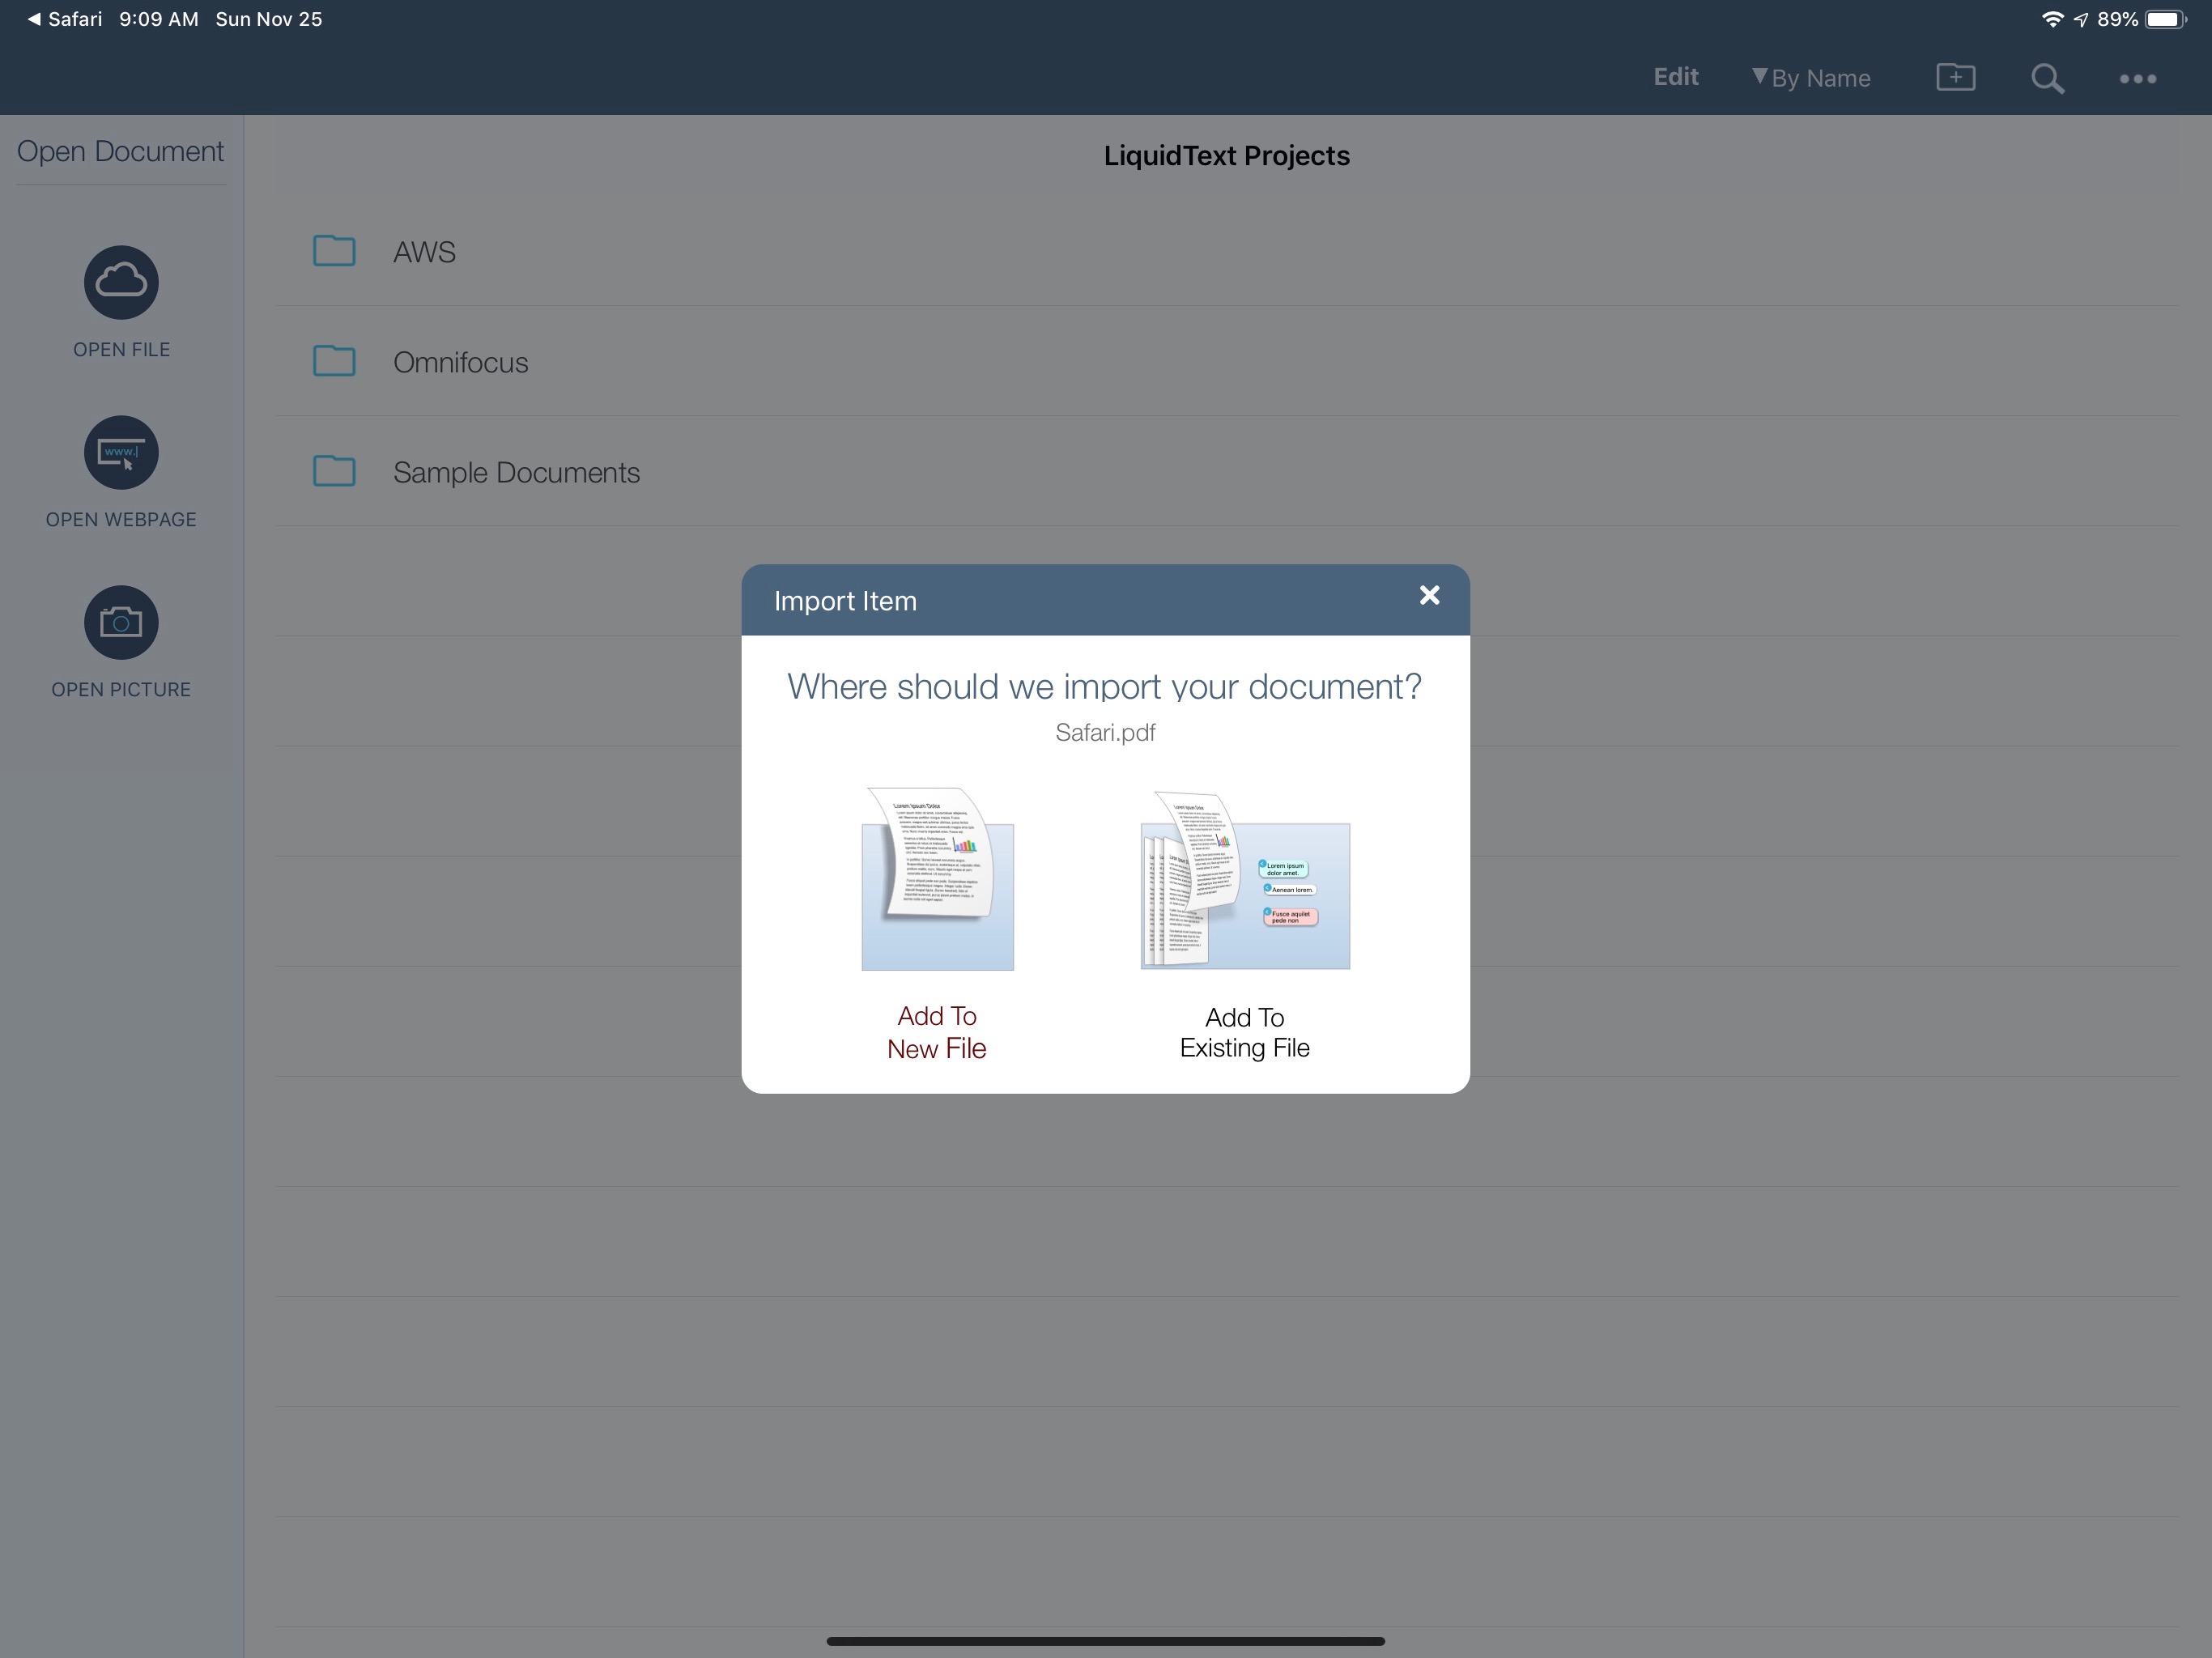
PDFs can be added and then rearranged or inserted right into the middle of another PDF. Files can be added from iCloud Drive or sent to LiquidText through iOS sharing extensions.
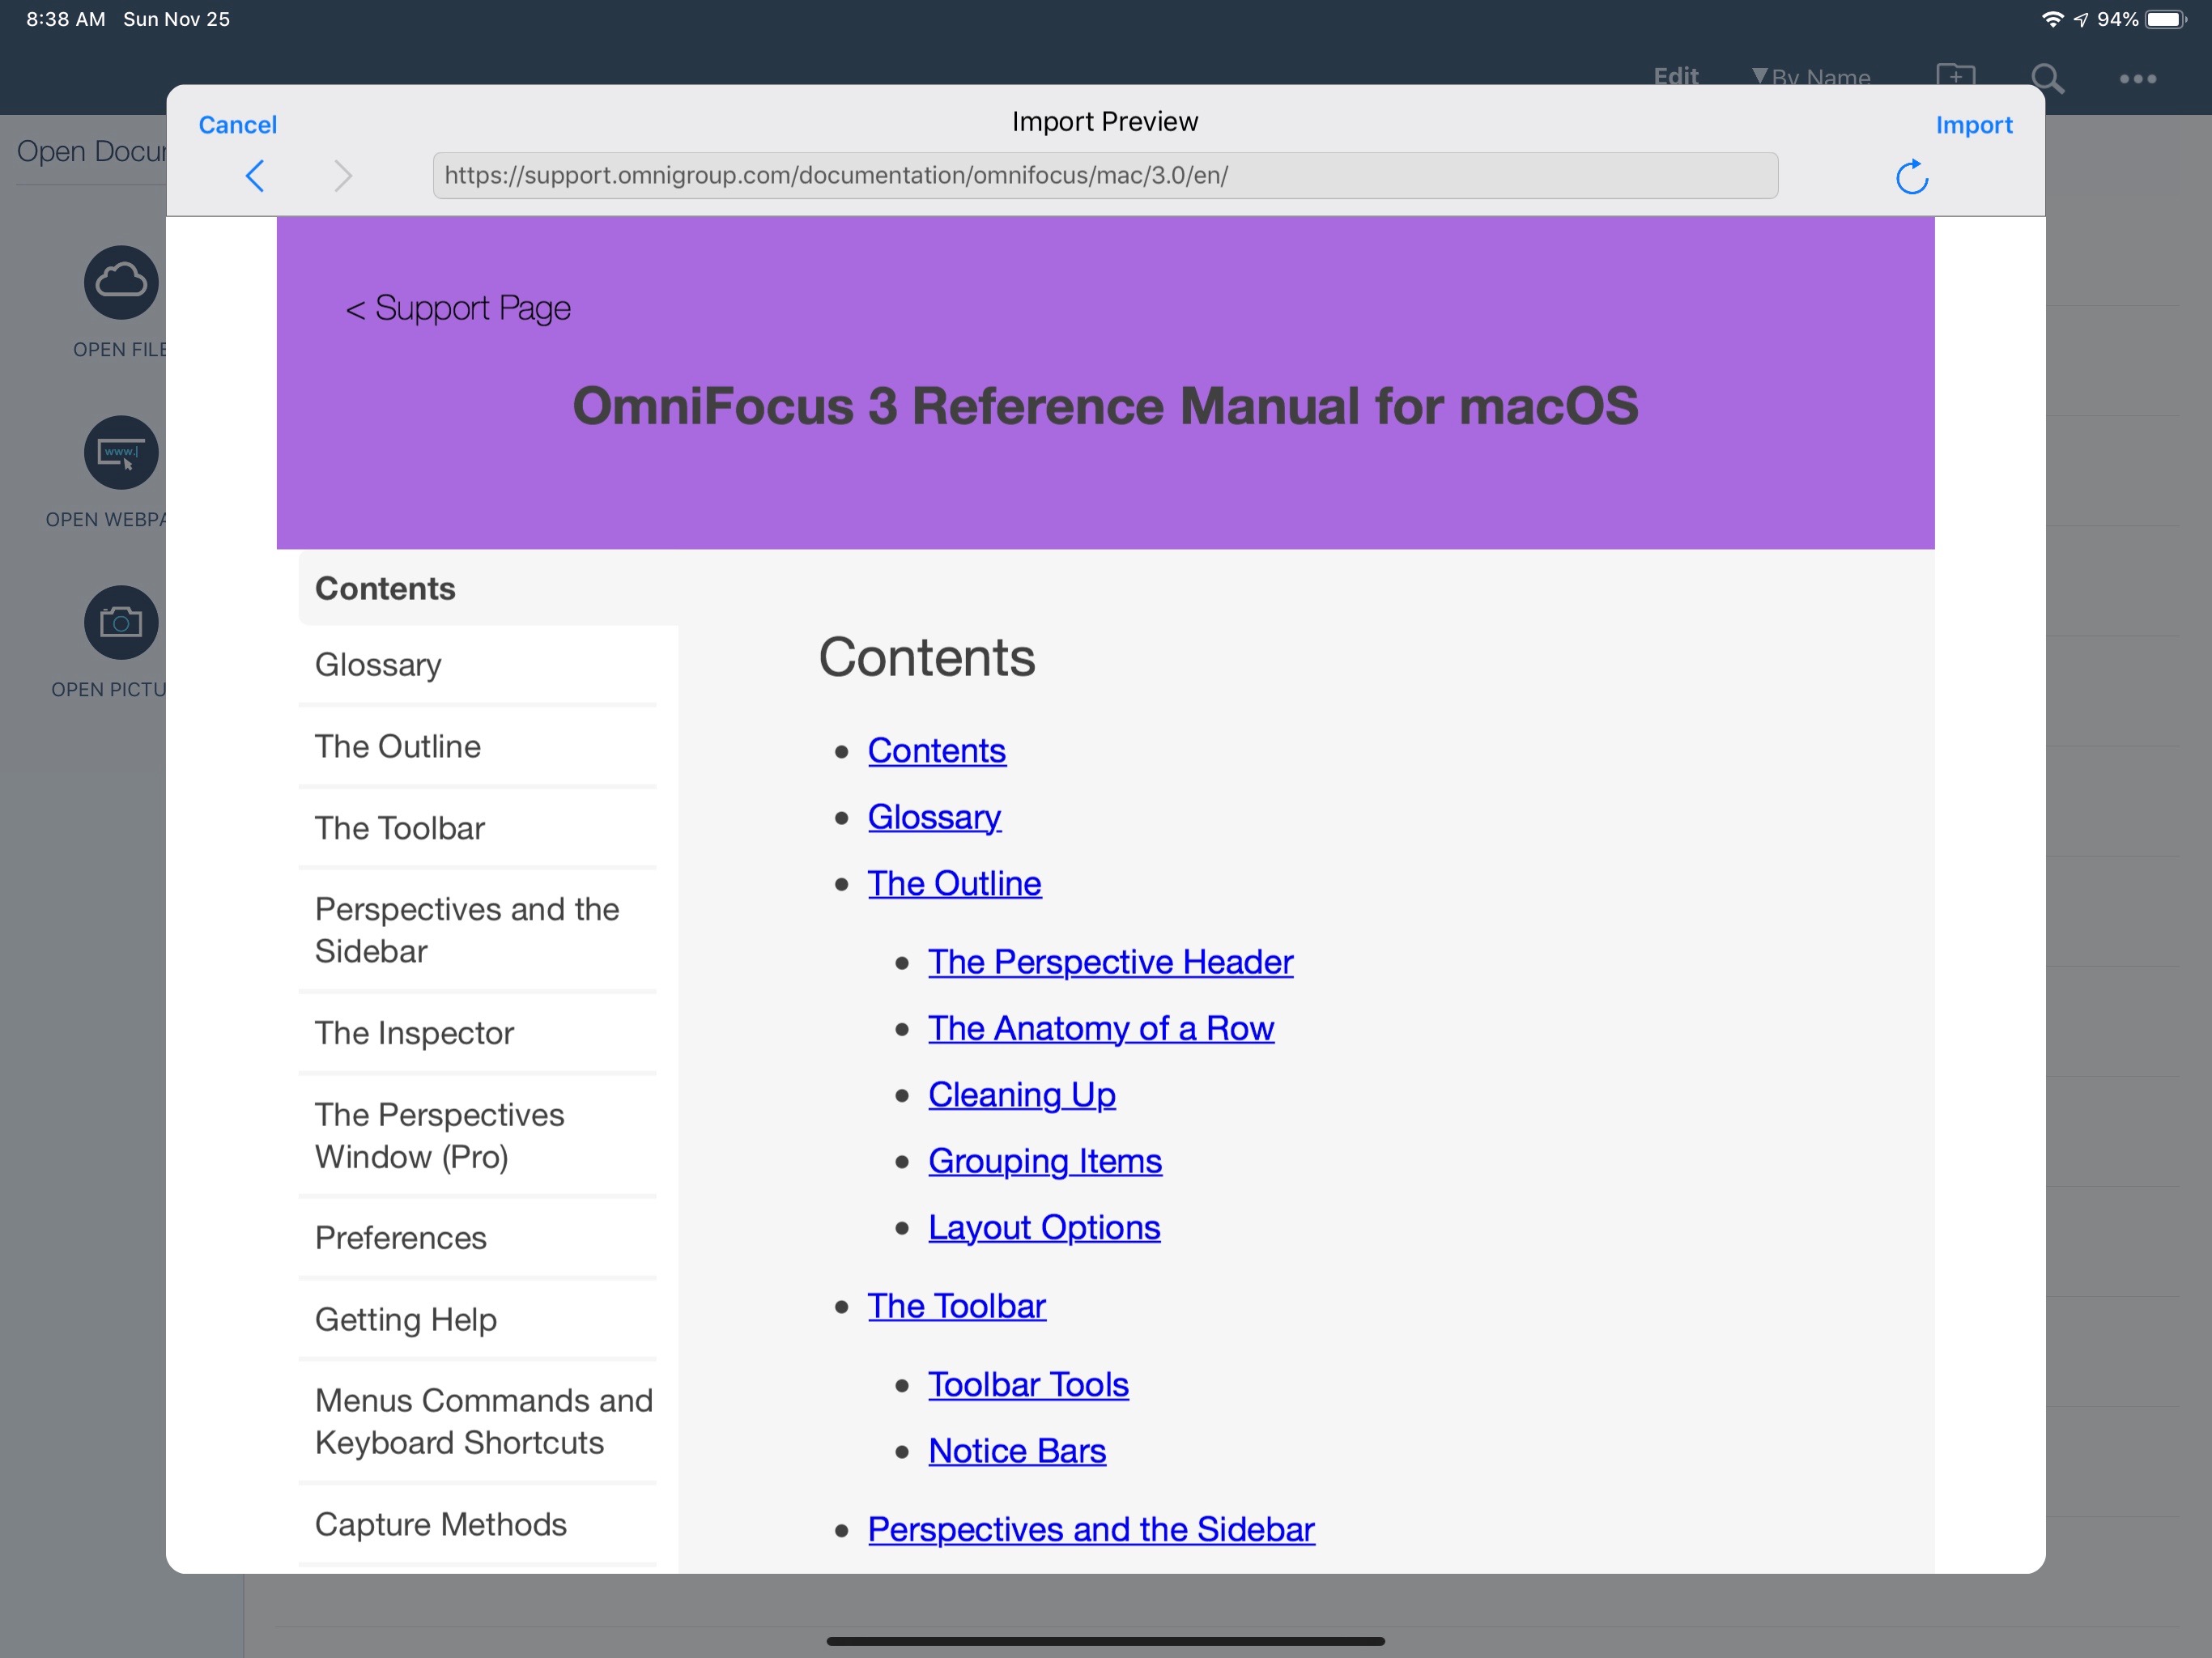
Entire webpages can be imported directly into LiquidText, which converts them into PDFs. As with most iOS apps, LiquidText struggles to convert large webpages into PDFs so it’s easier to use iOS' built-in print to PDF functionality and then send to LiquidText through iOS sharing.
But, for a quick Wikipedia reference, this is really useful for adding static references.
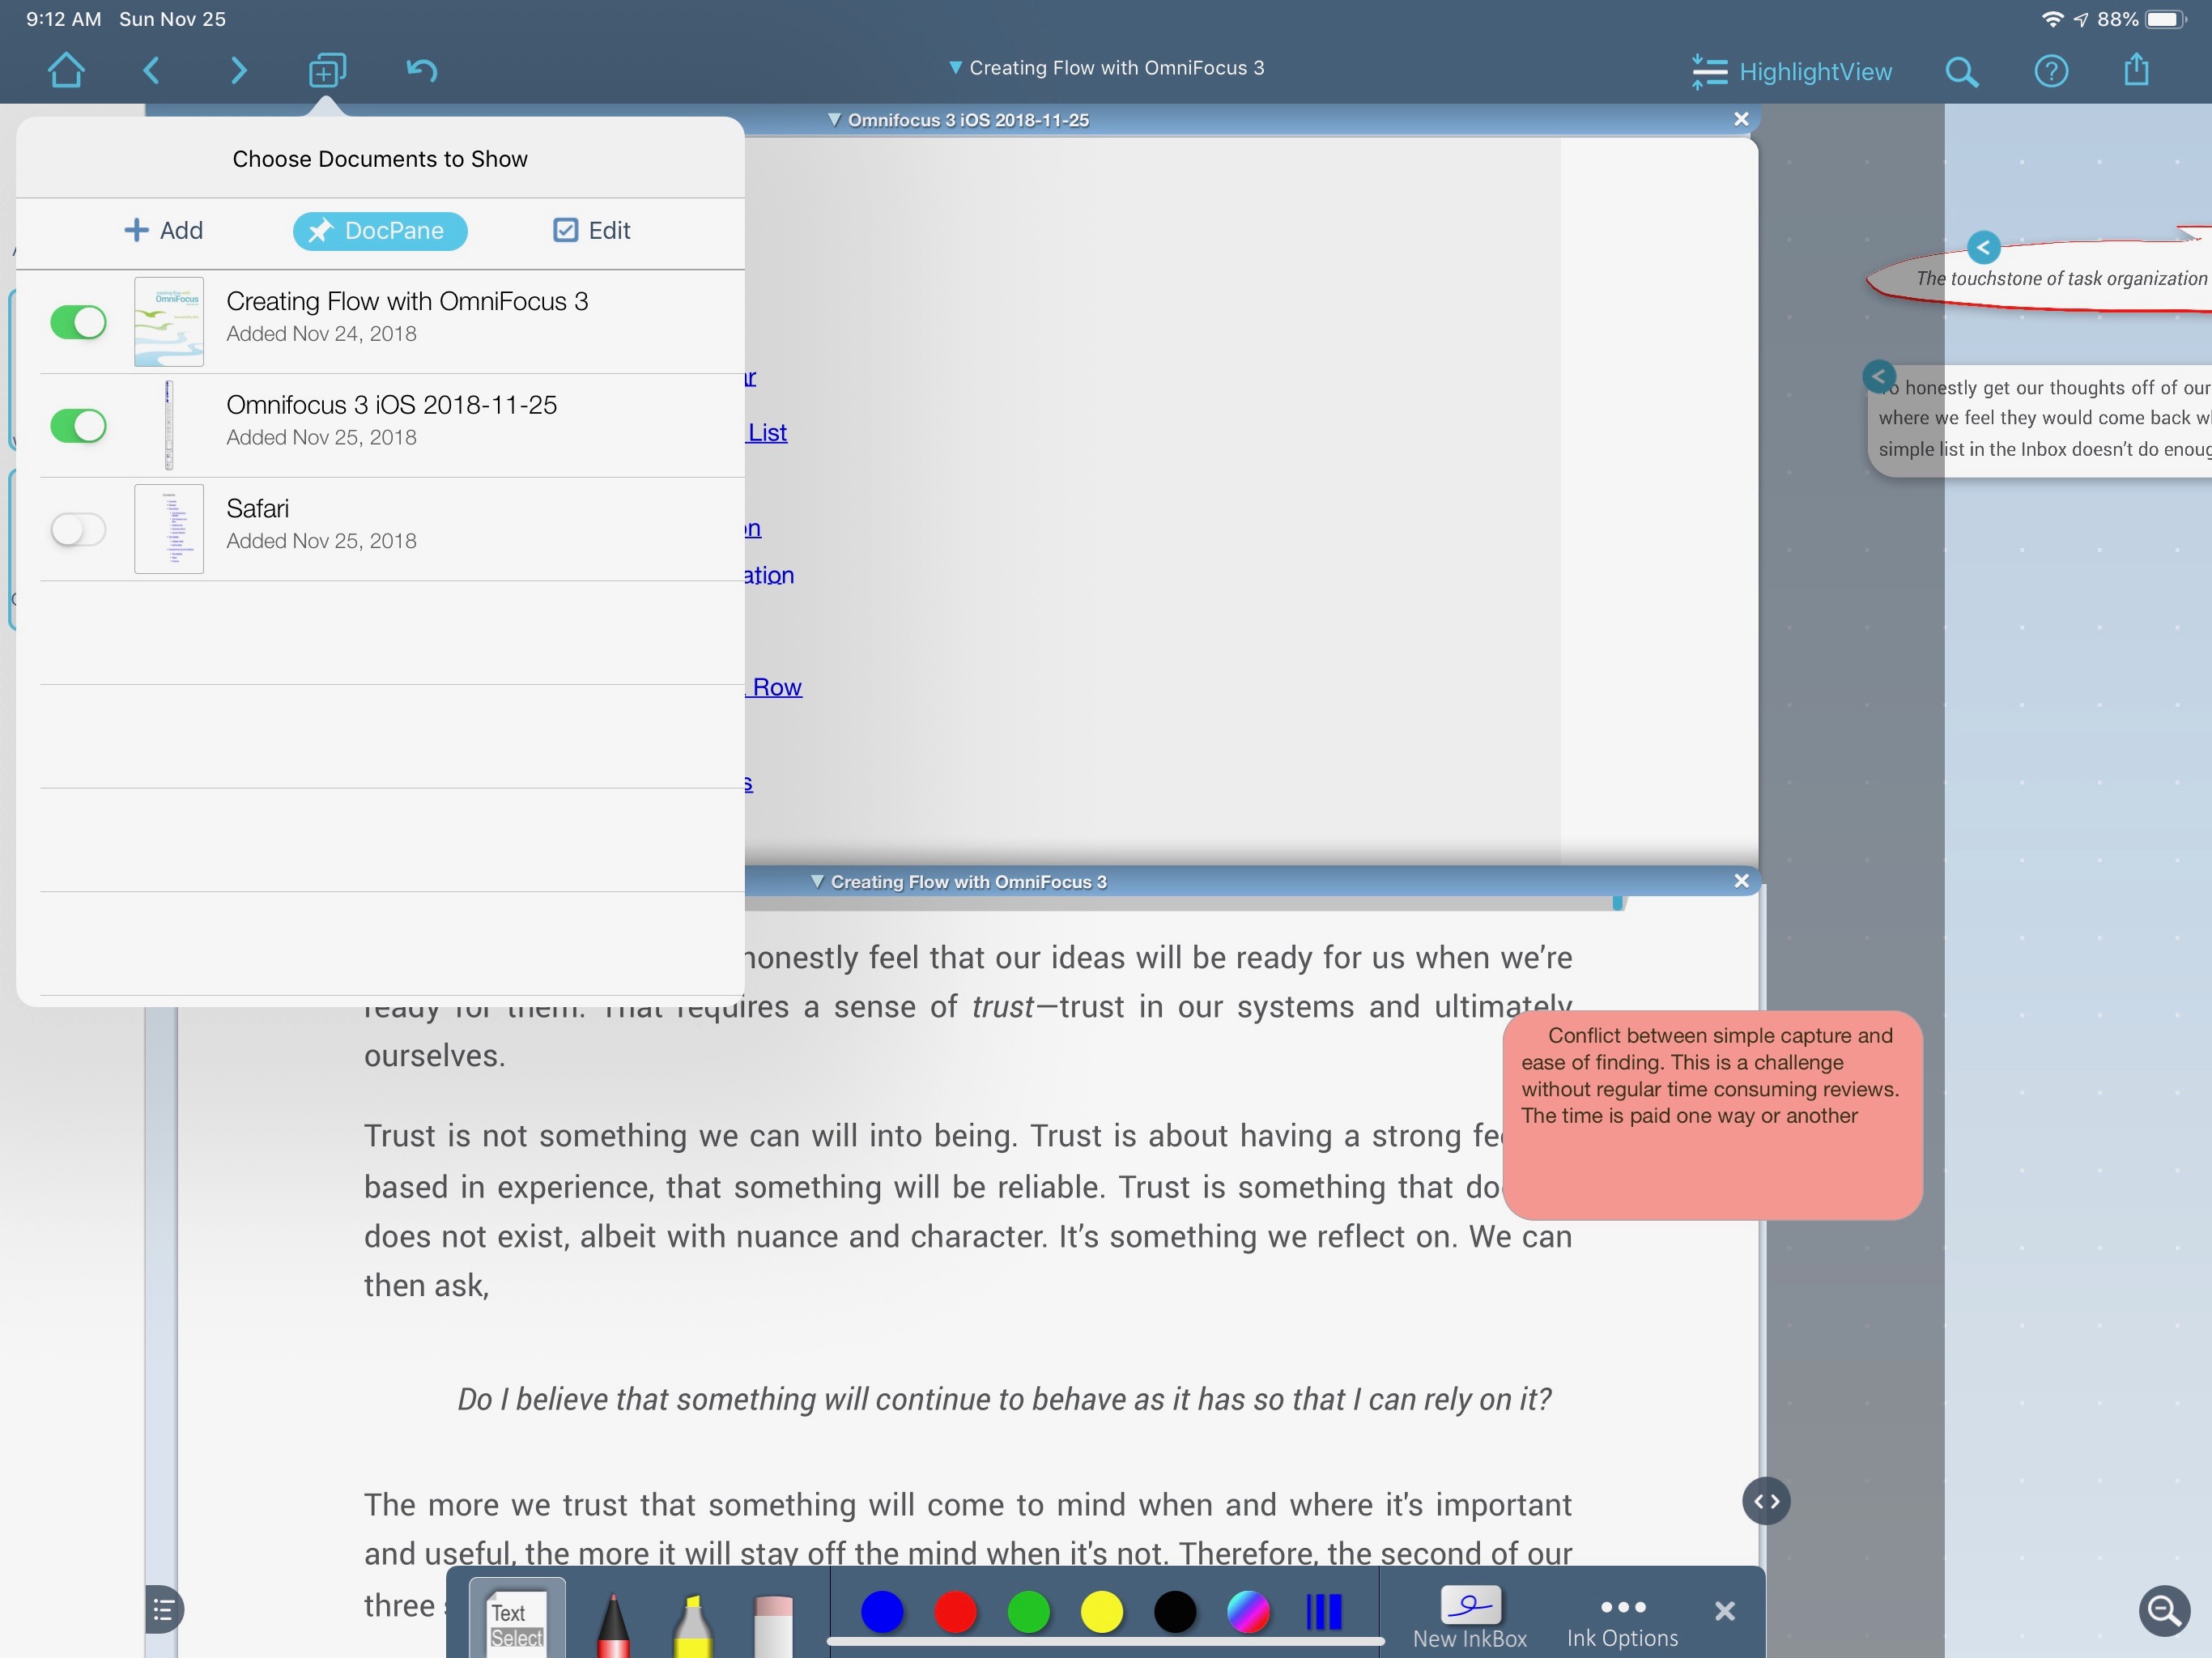
Once documents are added to a LiquidText project, they can be turned on and off in the document viewing pane.
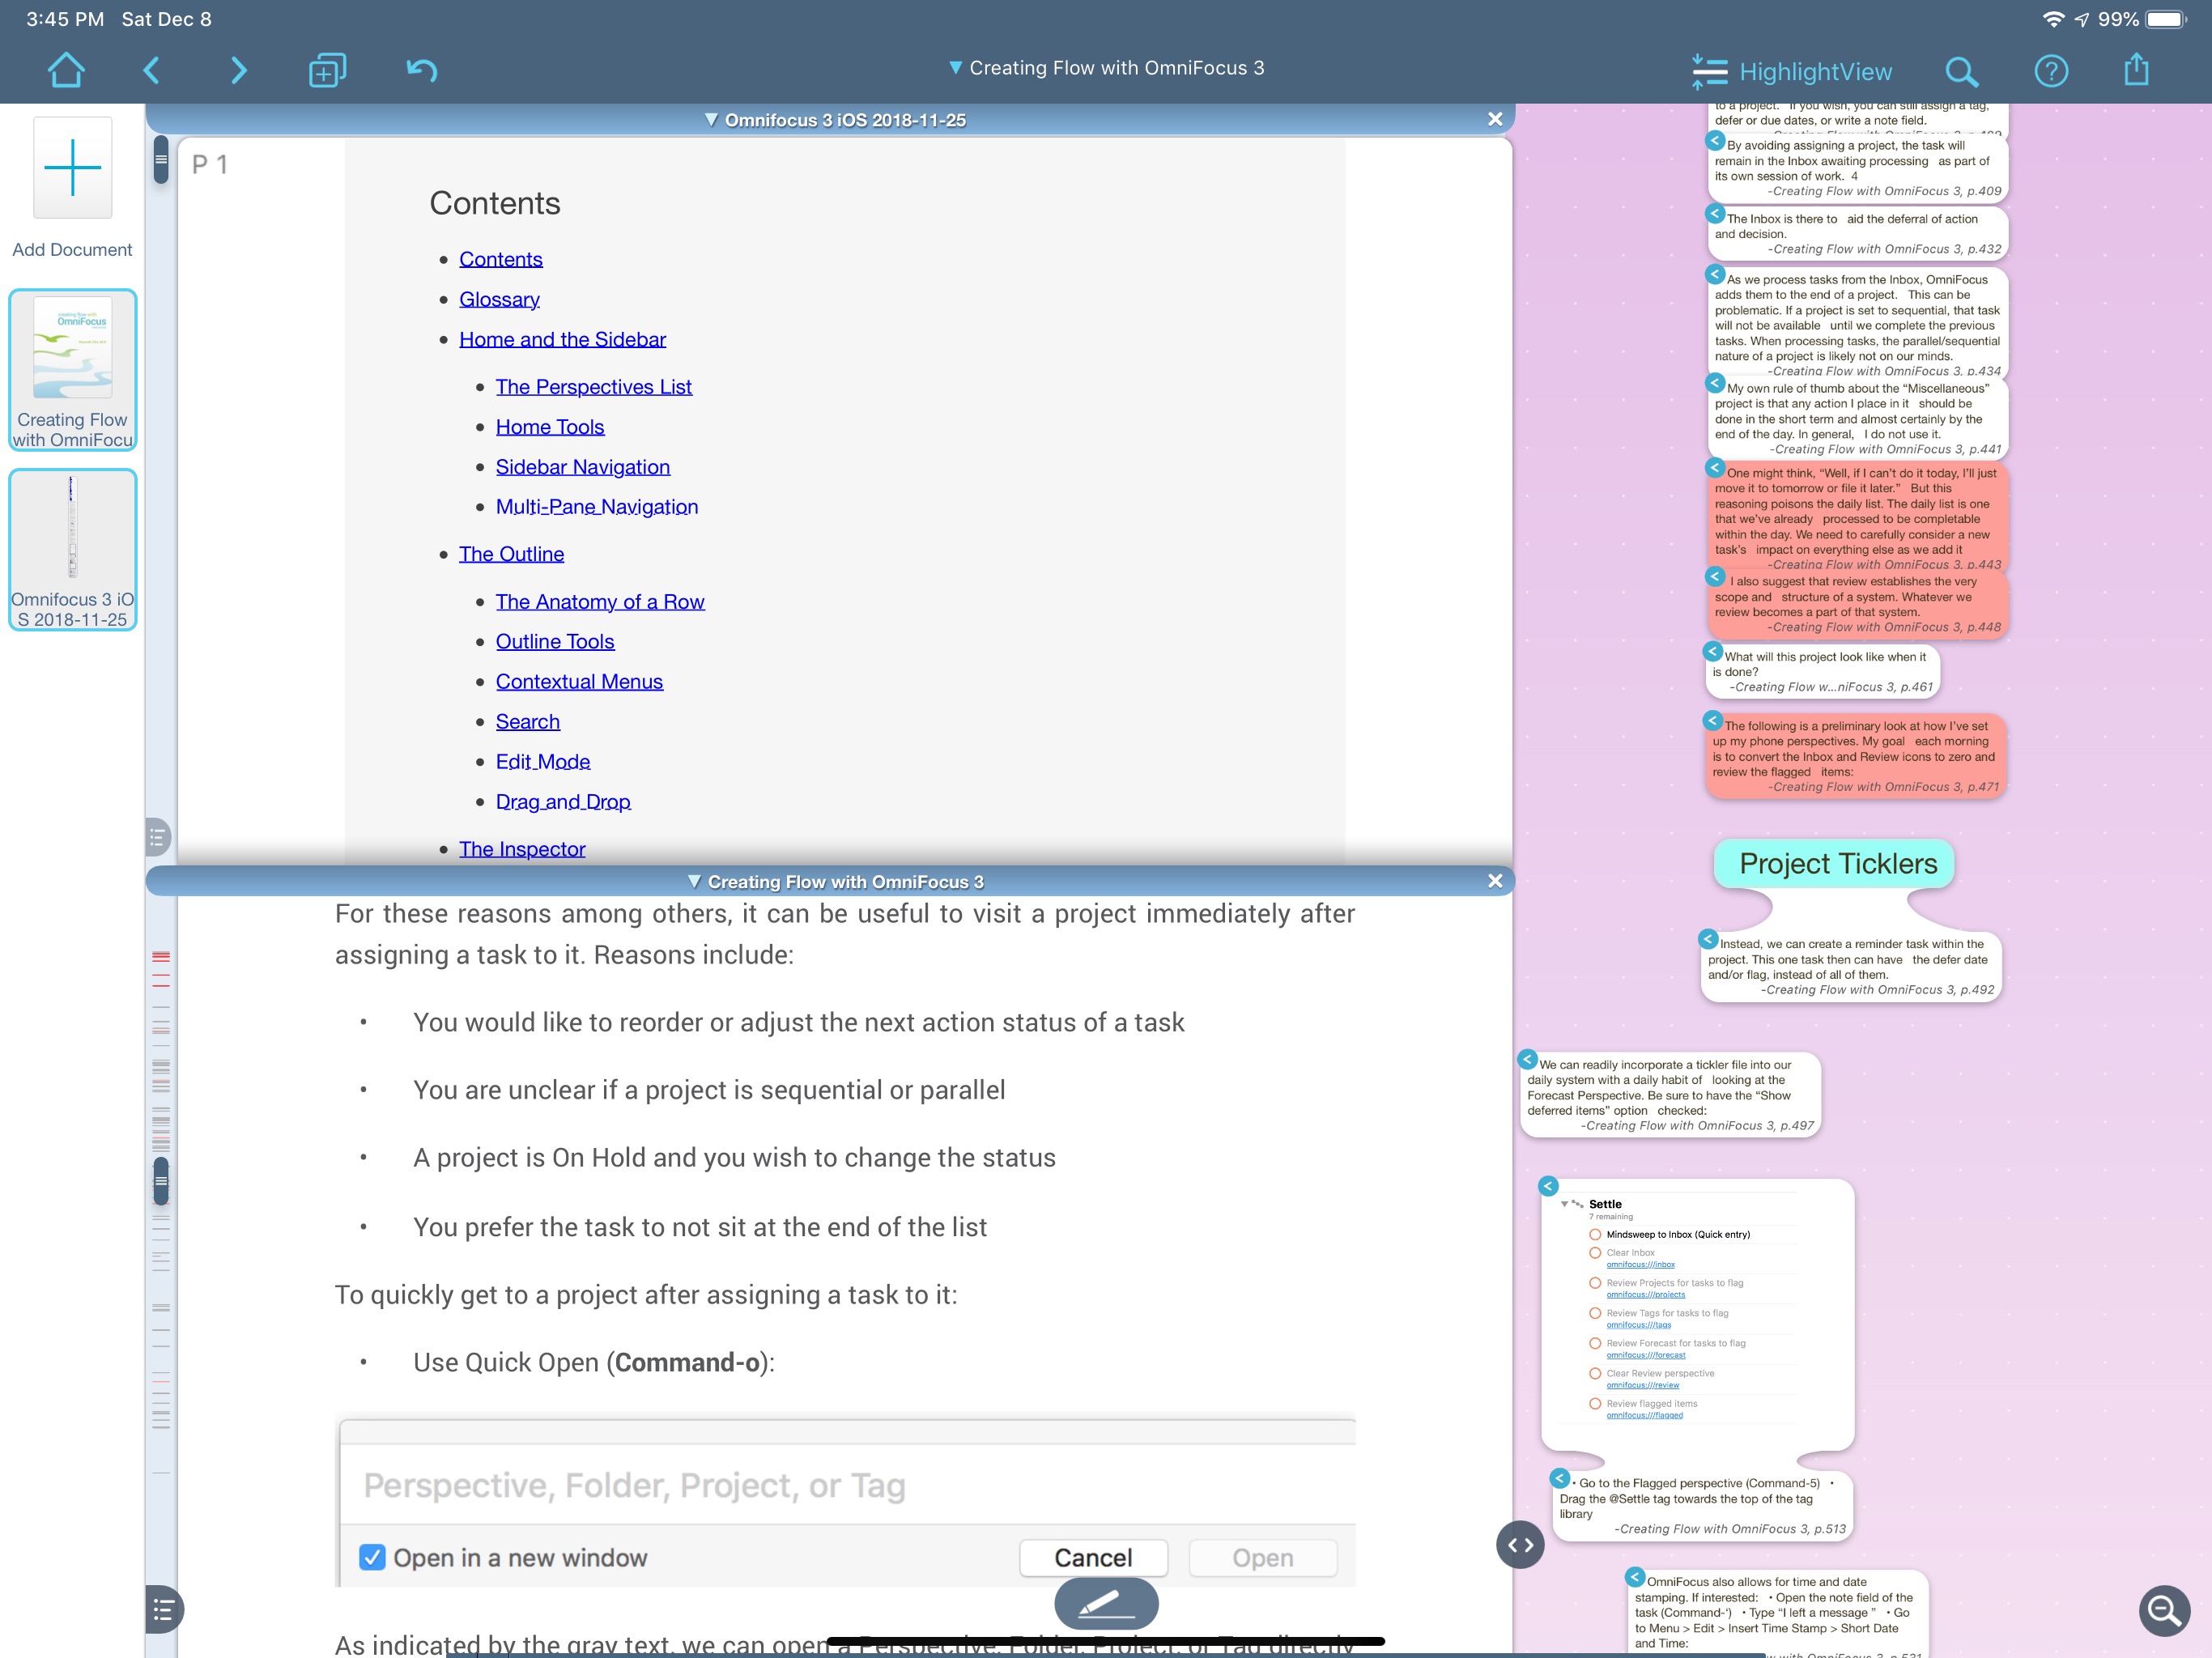
The real multi-document happens when two different PDFs are displayed at once. Annotations from all of the documents are intermingled. The annotations belong to the LiquidText project, not the PDF. Tapping on any of the annotations brings up the referenced PDF section, regardless of which document is currently open.
External Data
If you thought that LiquidText was a typical silo protected by a copyright and a user account, you’d be wrong. Even though LiquidText is iPad-only, a lot of effort was put into exporting the data in a neutral format.
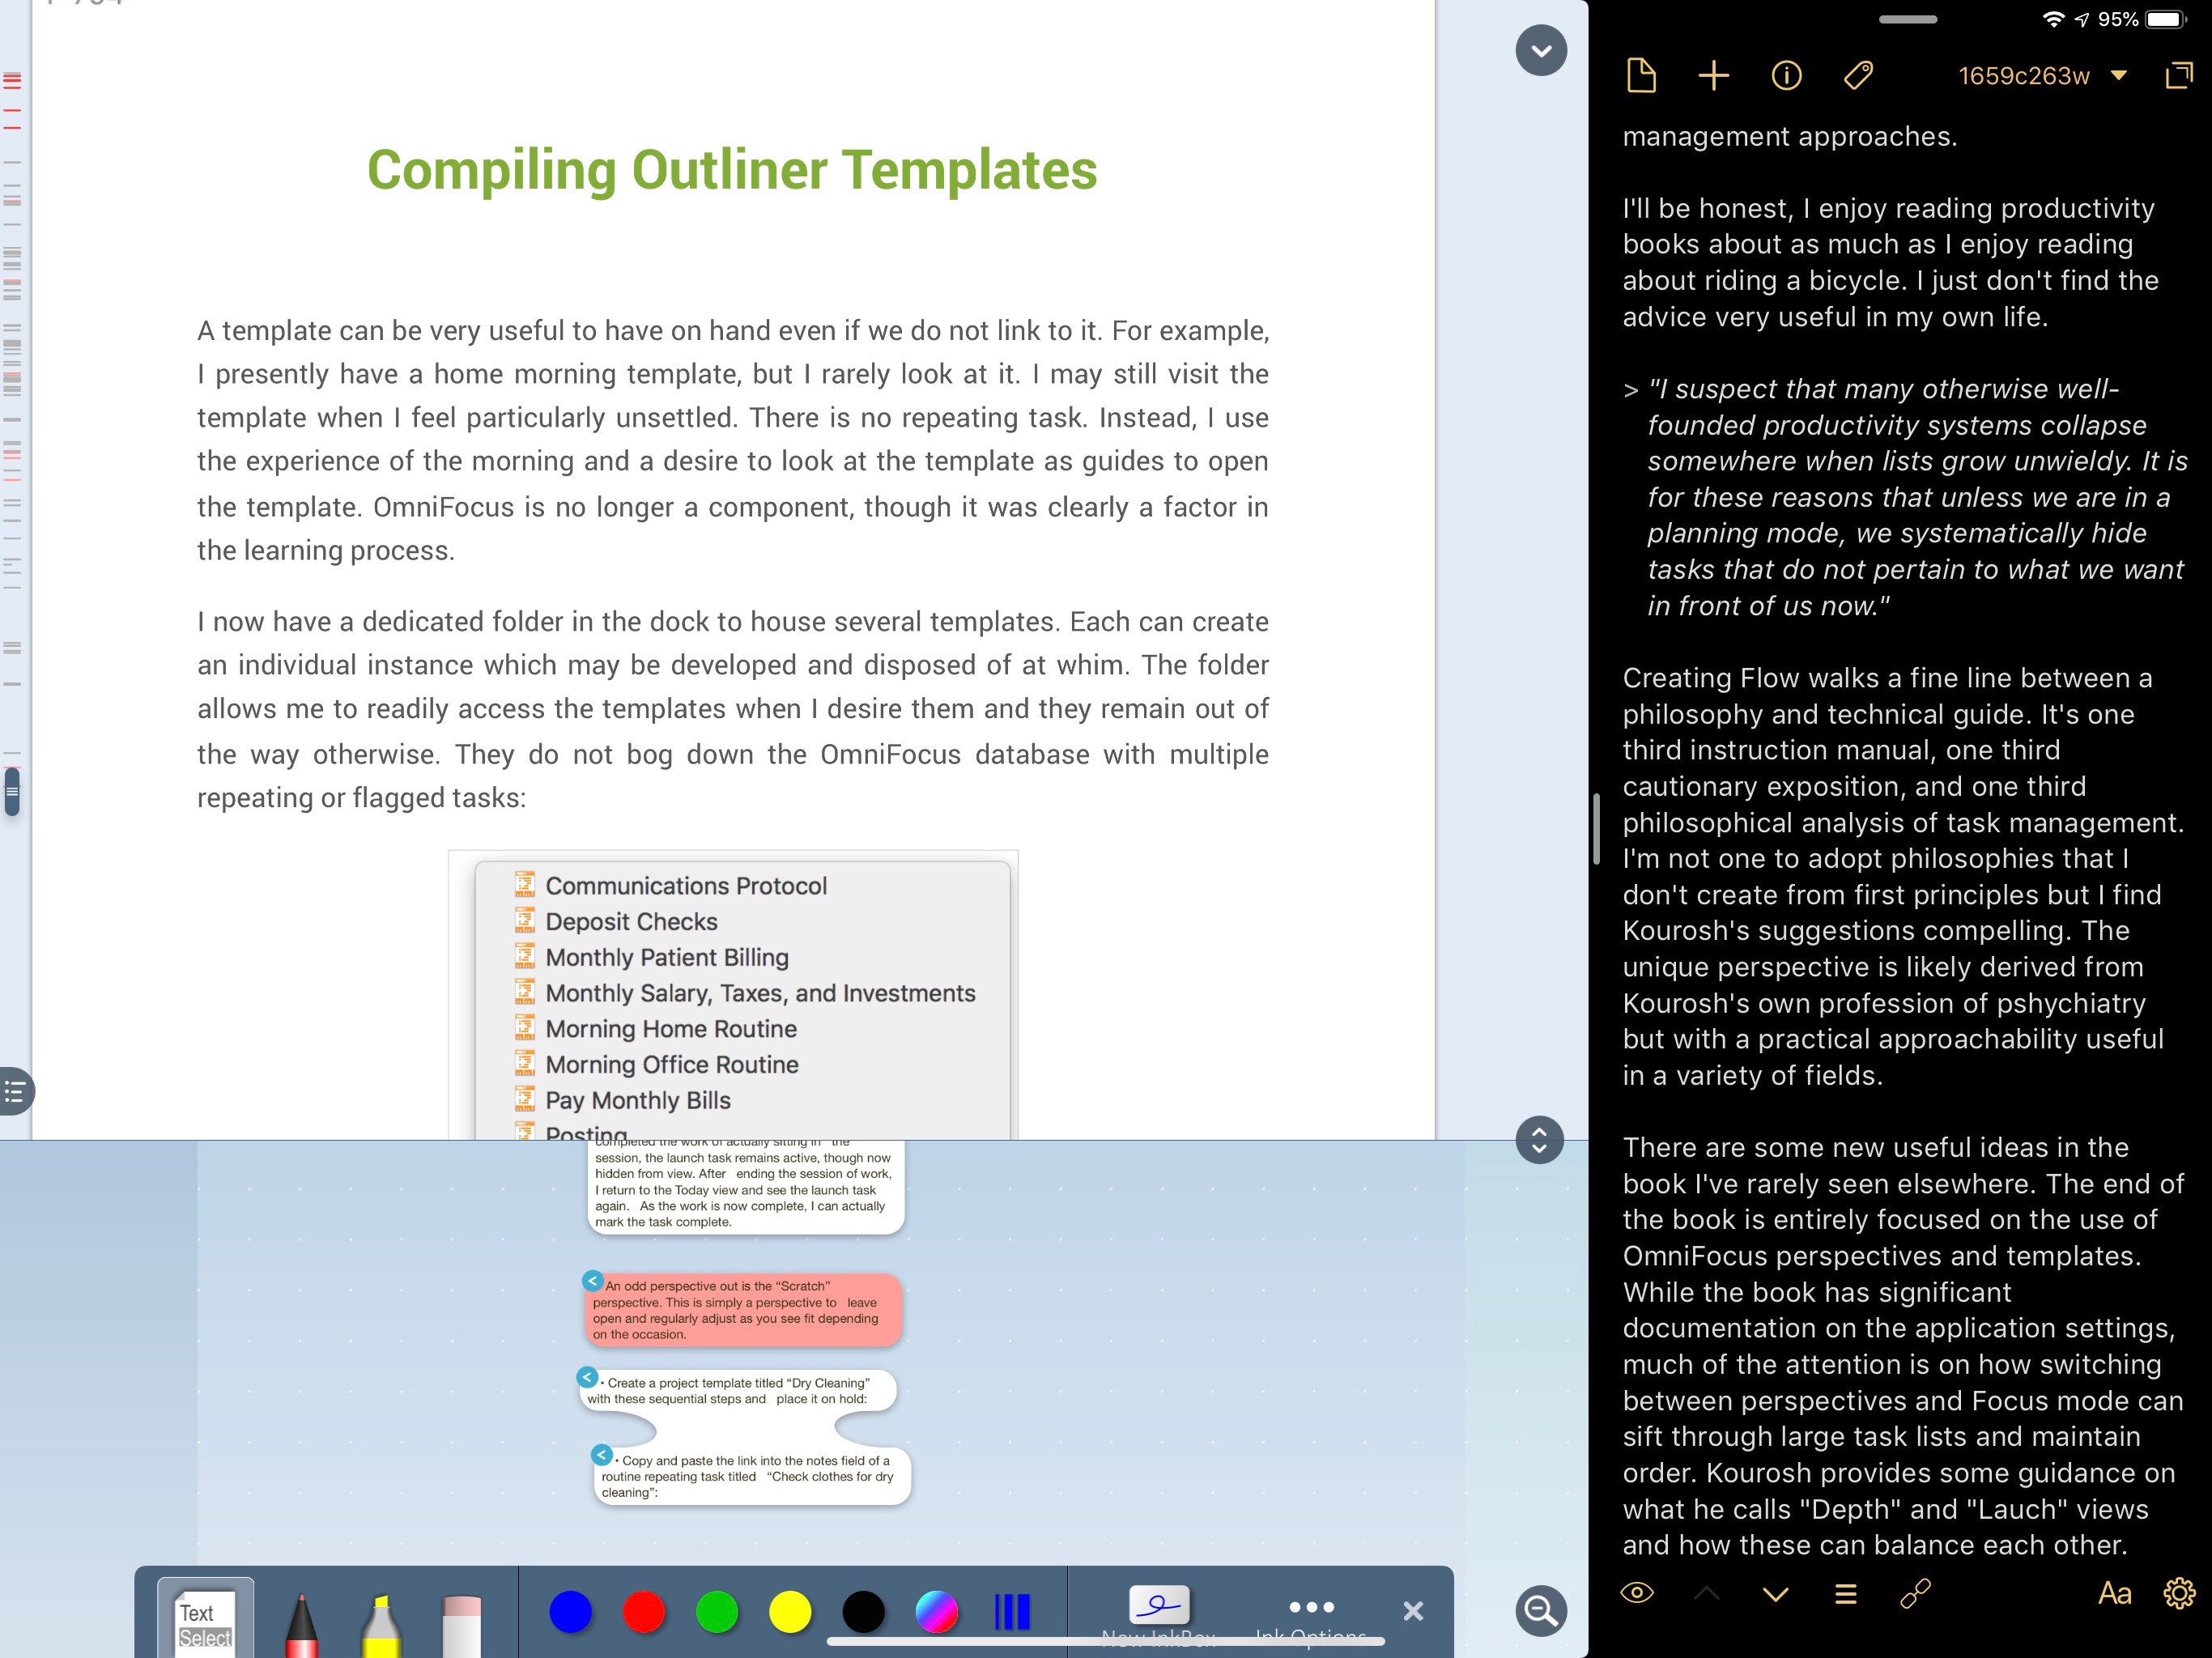
First, LiquidText handles large PDFs just fine. The Creating Flow with OmniFocus PDF is huge. Adding my own annotations and highlights makes for an even bigger PDF export. LiquidText handles it like a champ.
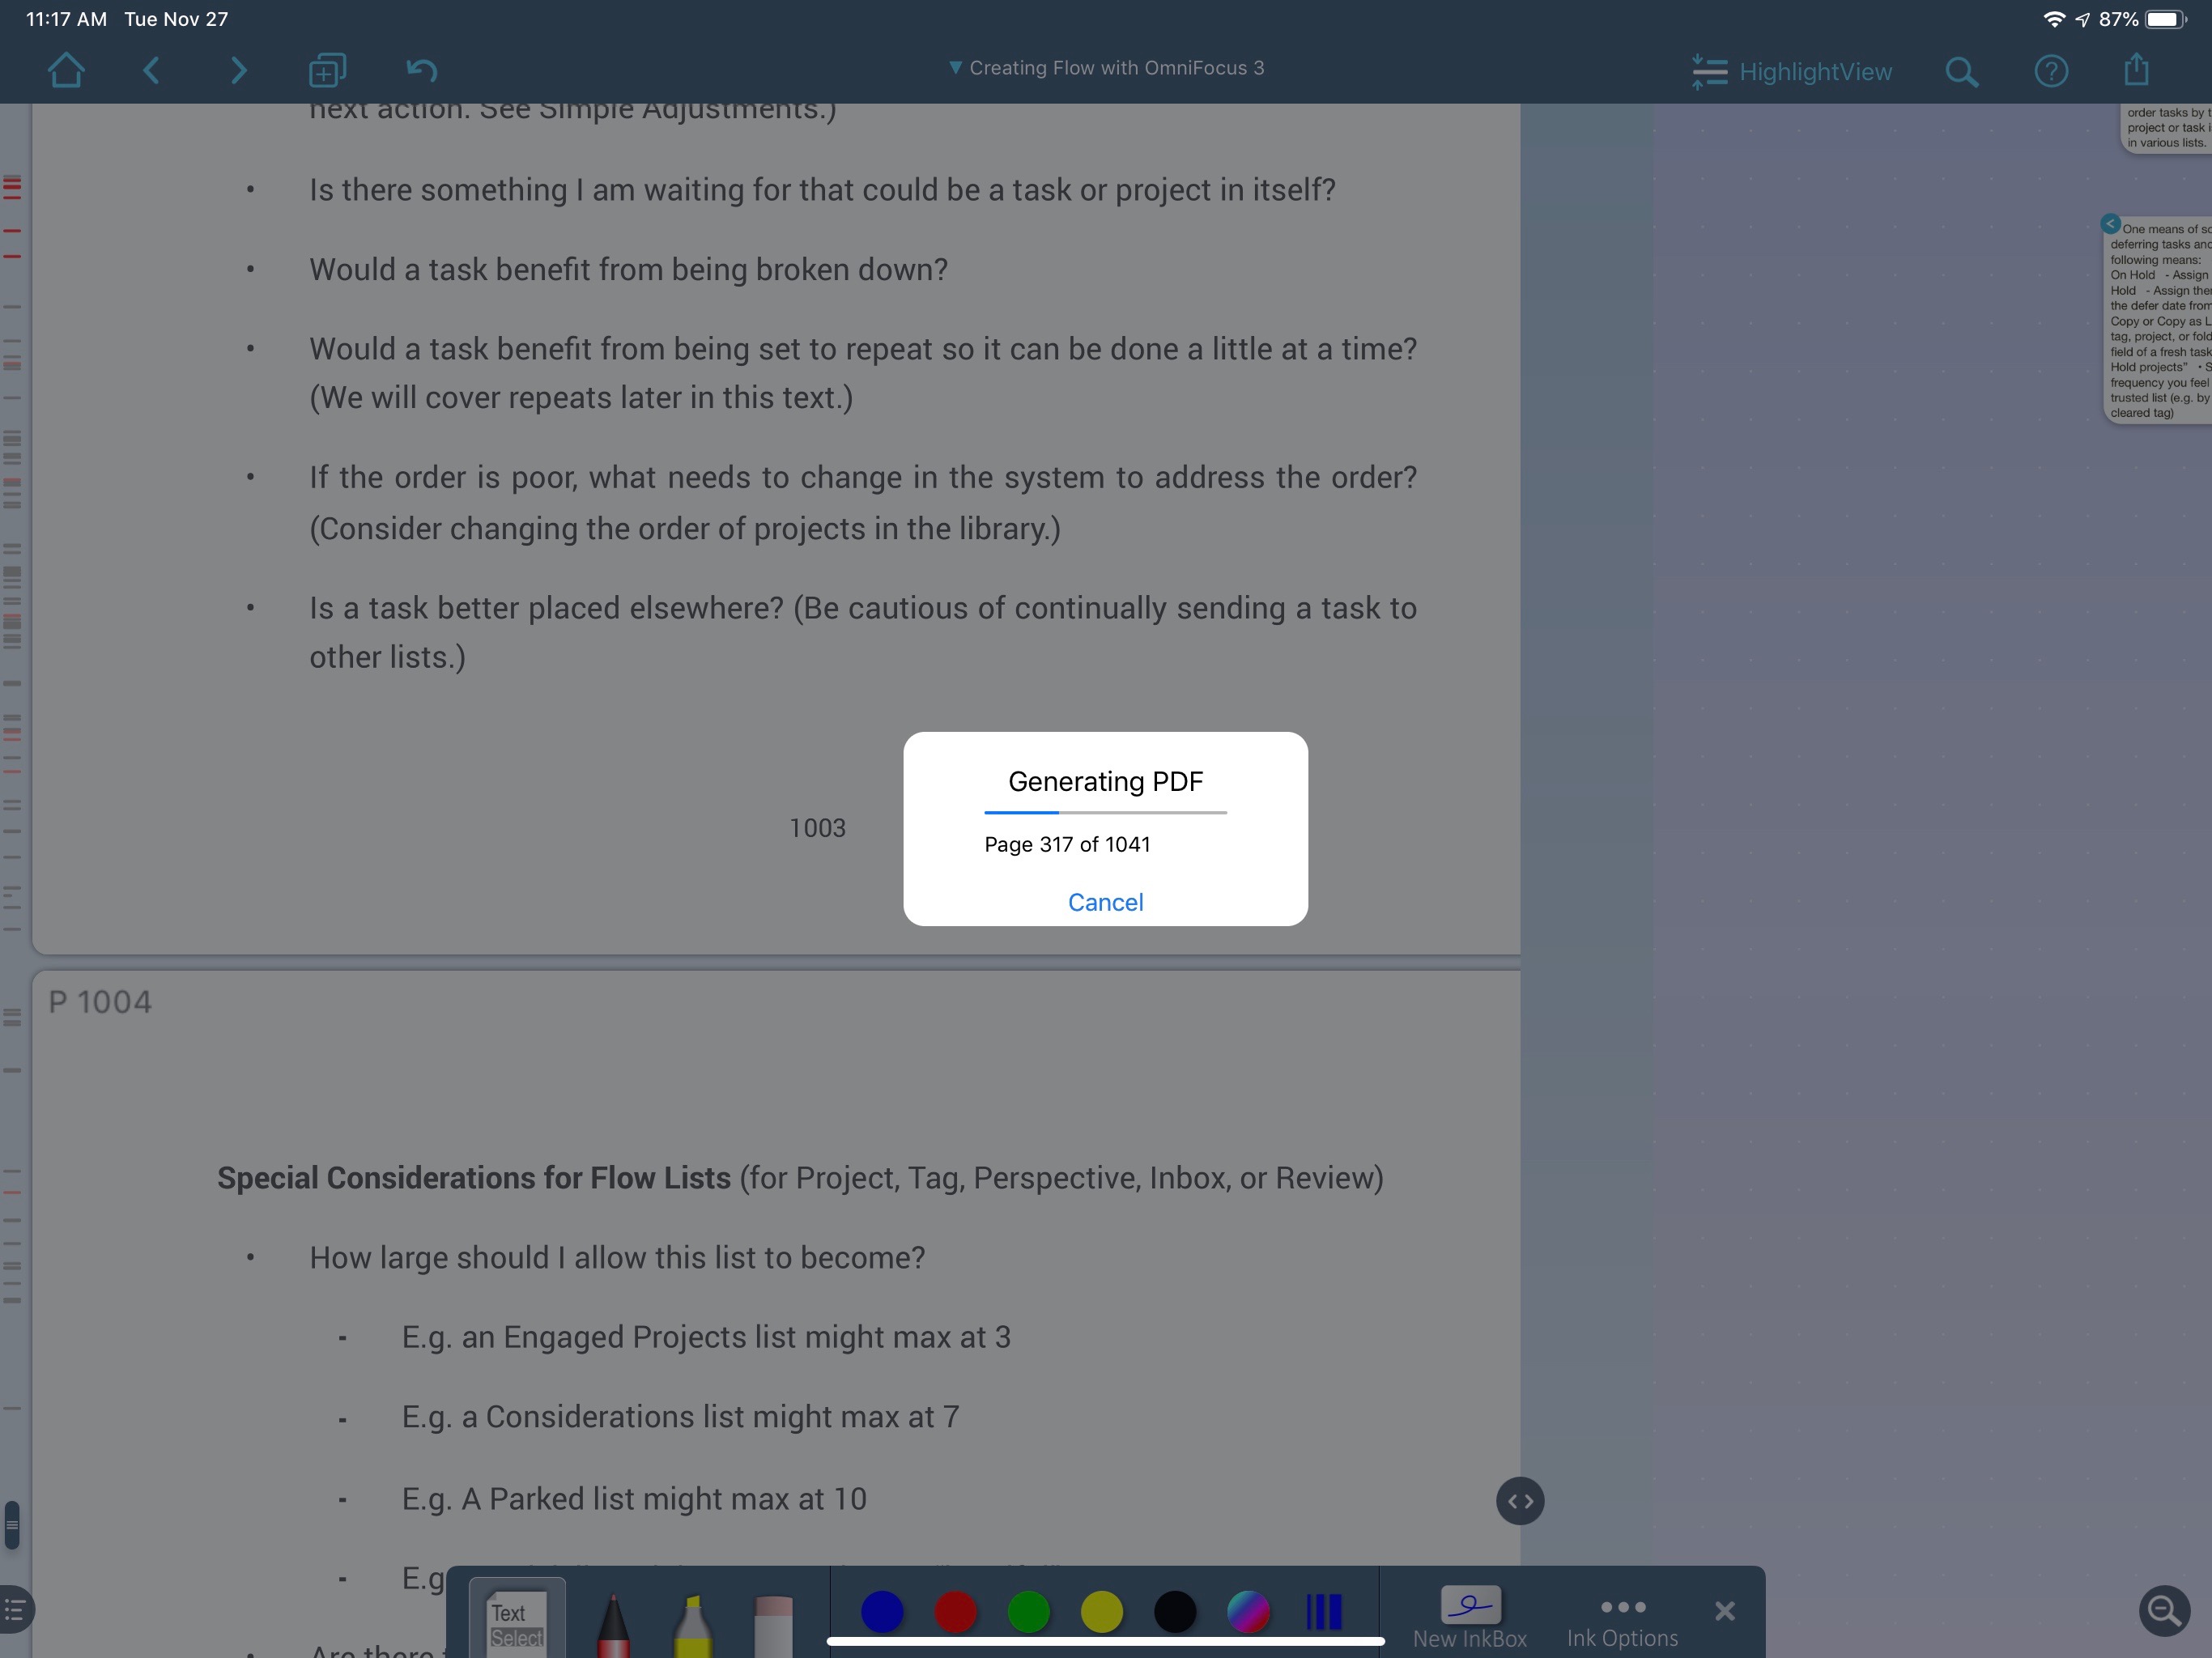
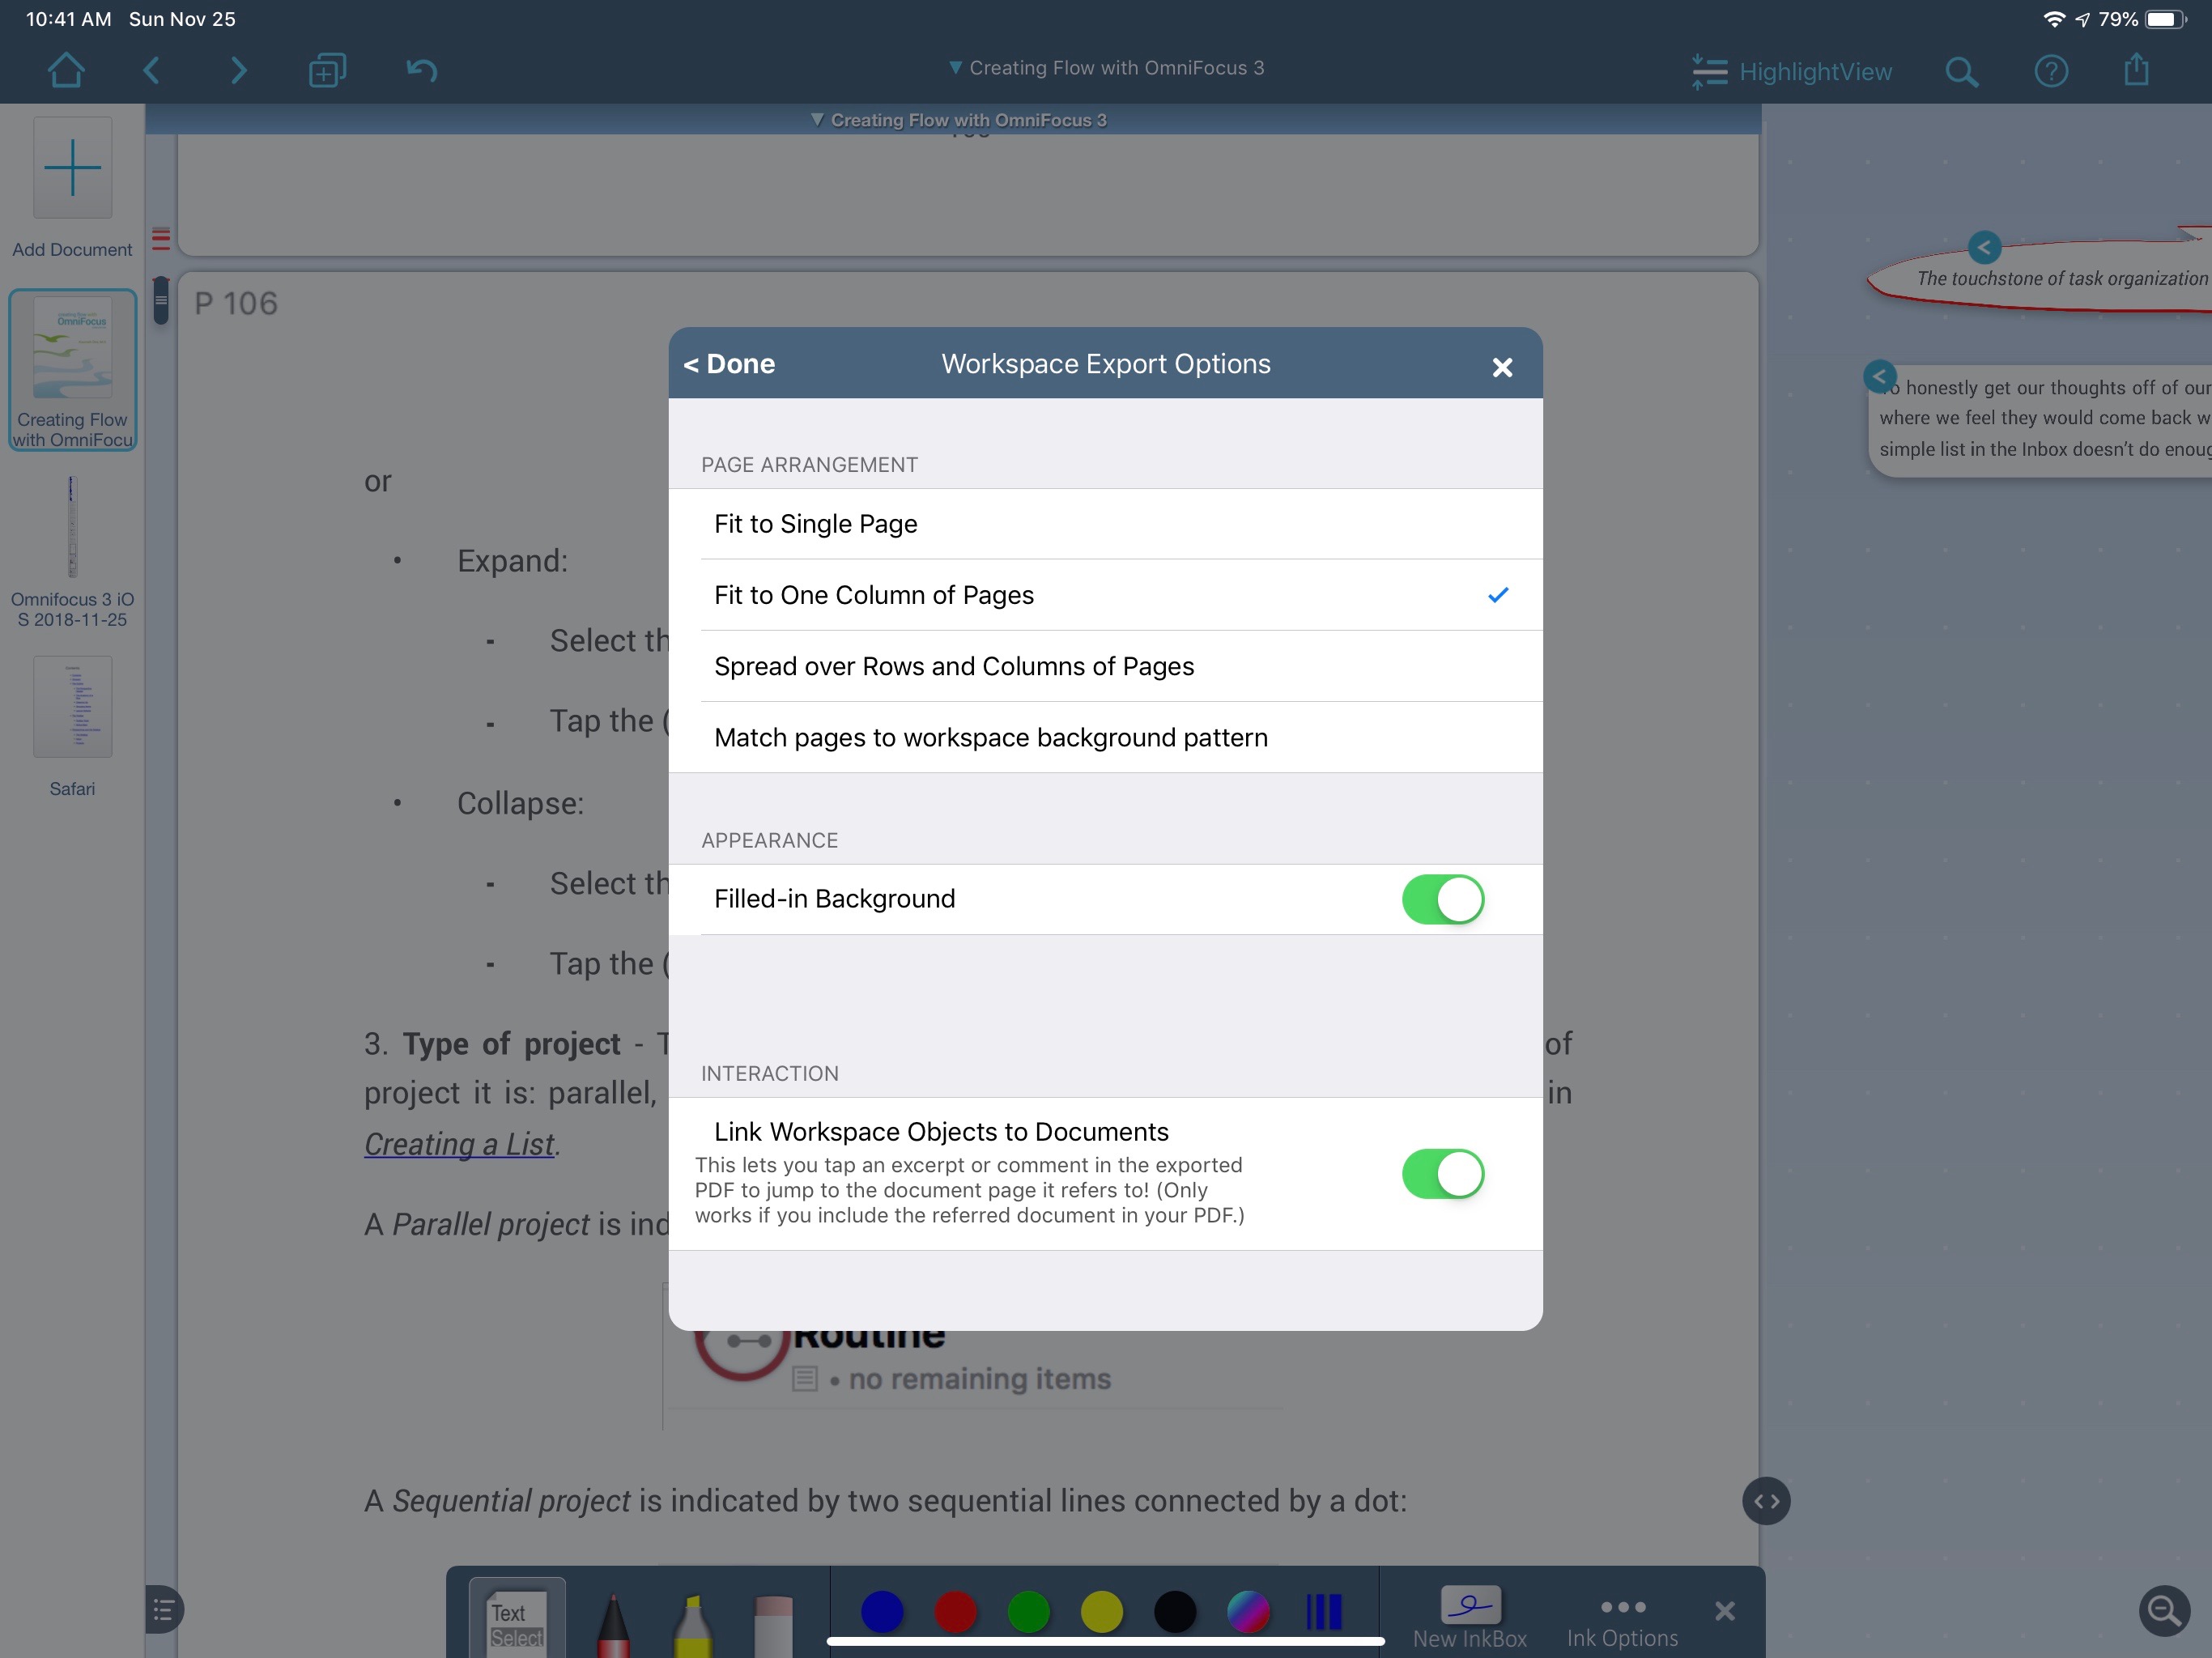
So, what kind of exports can we make? You name it. LiquidText is clearly made by nerds like me that love to mark-up documents but then want to actually use that information as part of the learning and ideation process. LiquidText provides a a long list of export options to create PDF and Microsoft Word exports of the annotations I create.
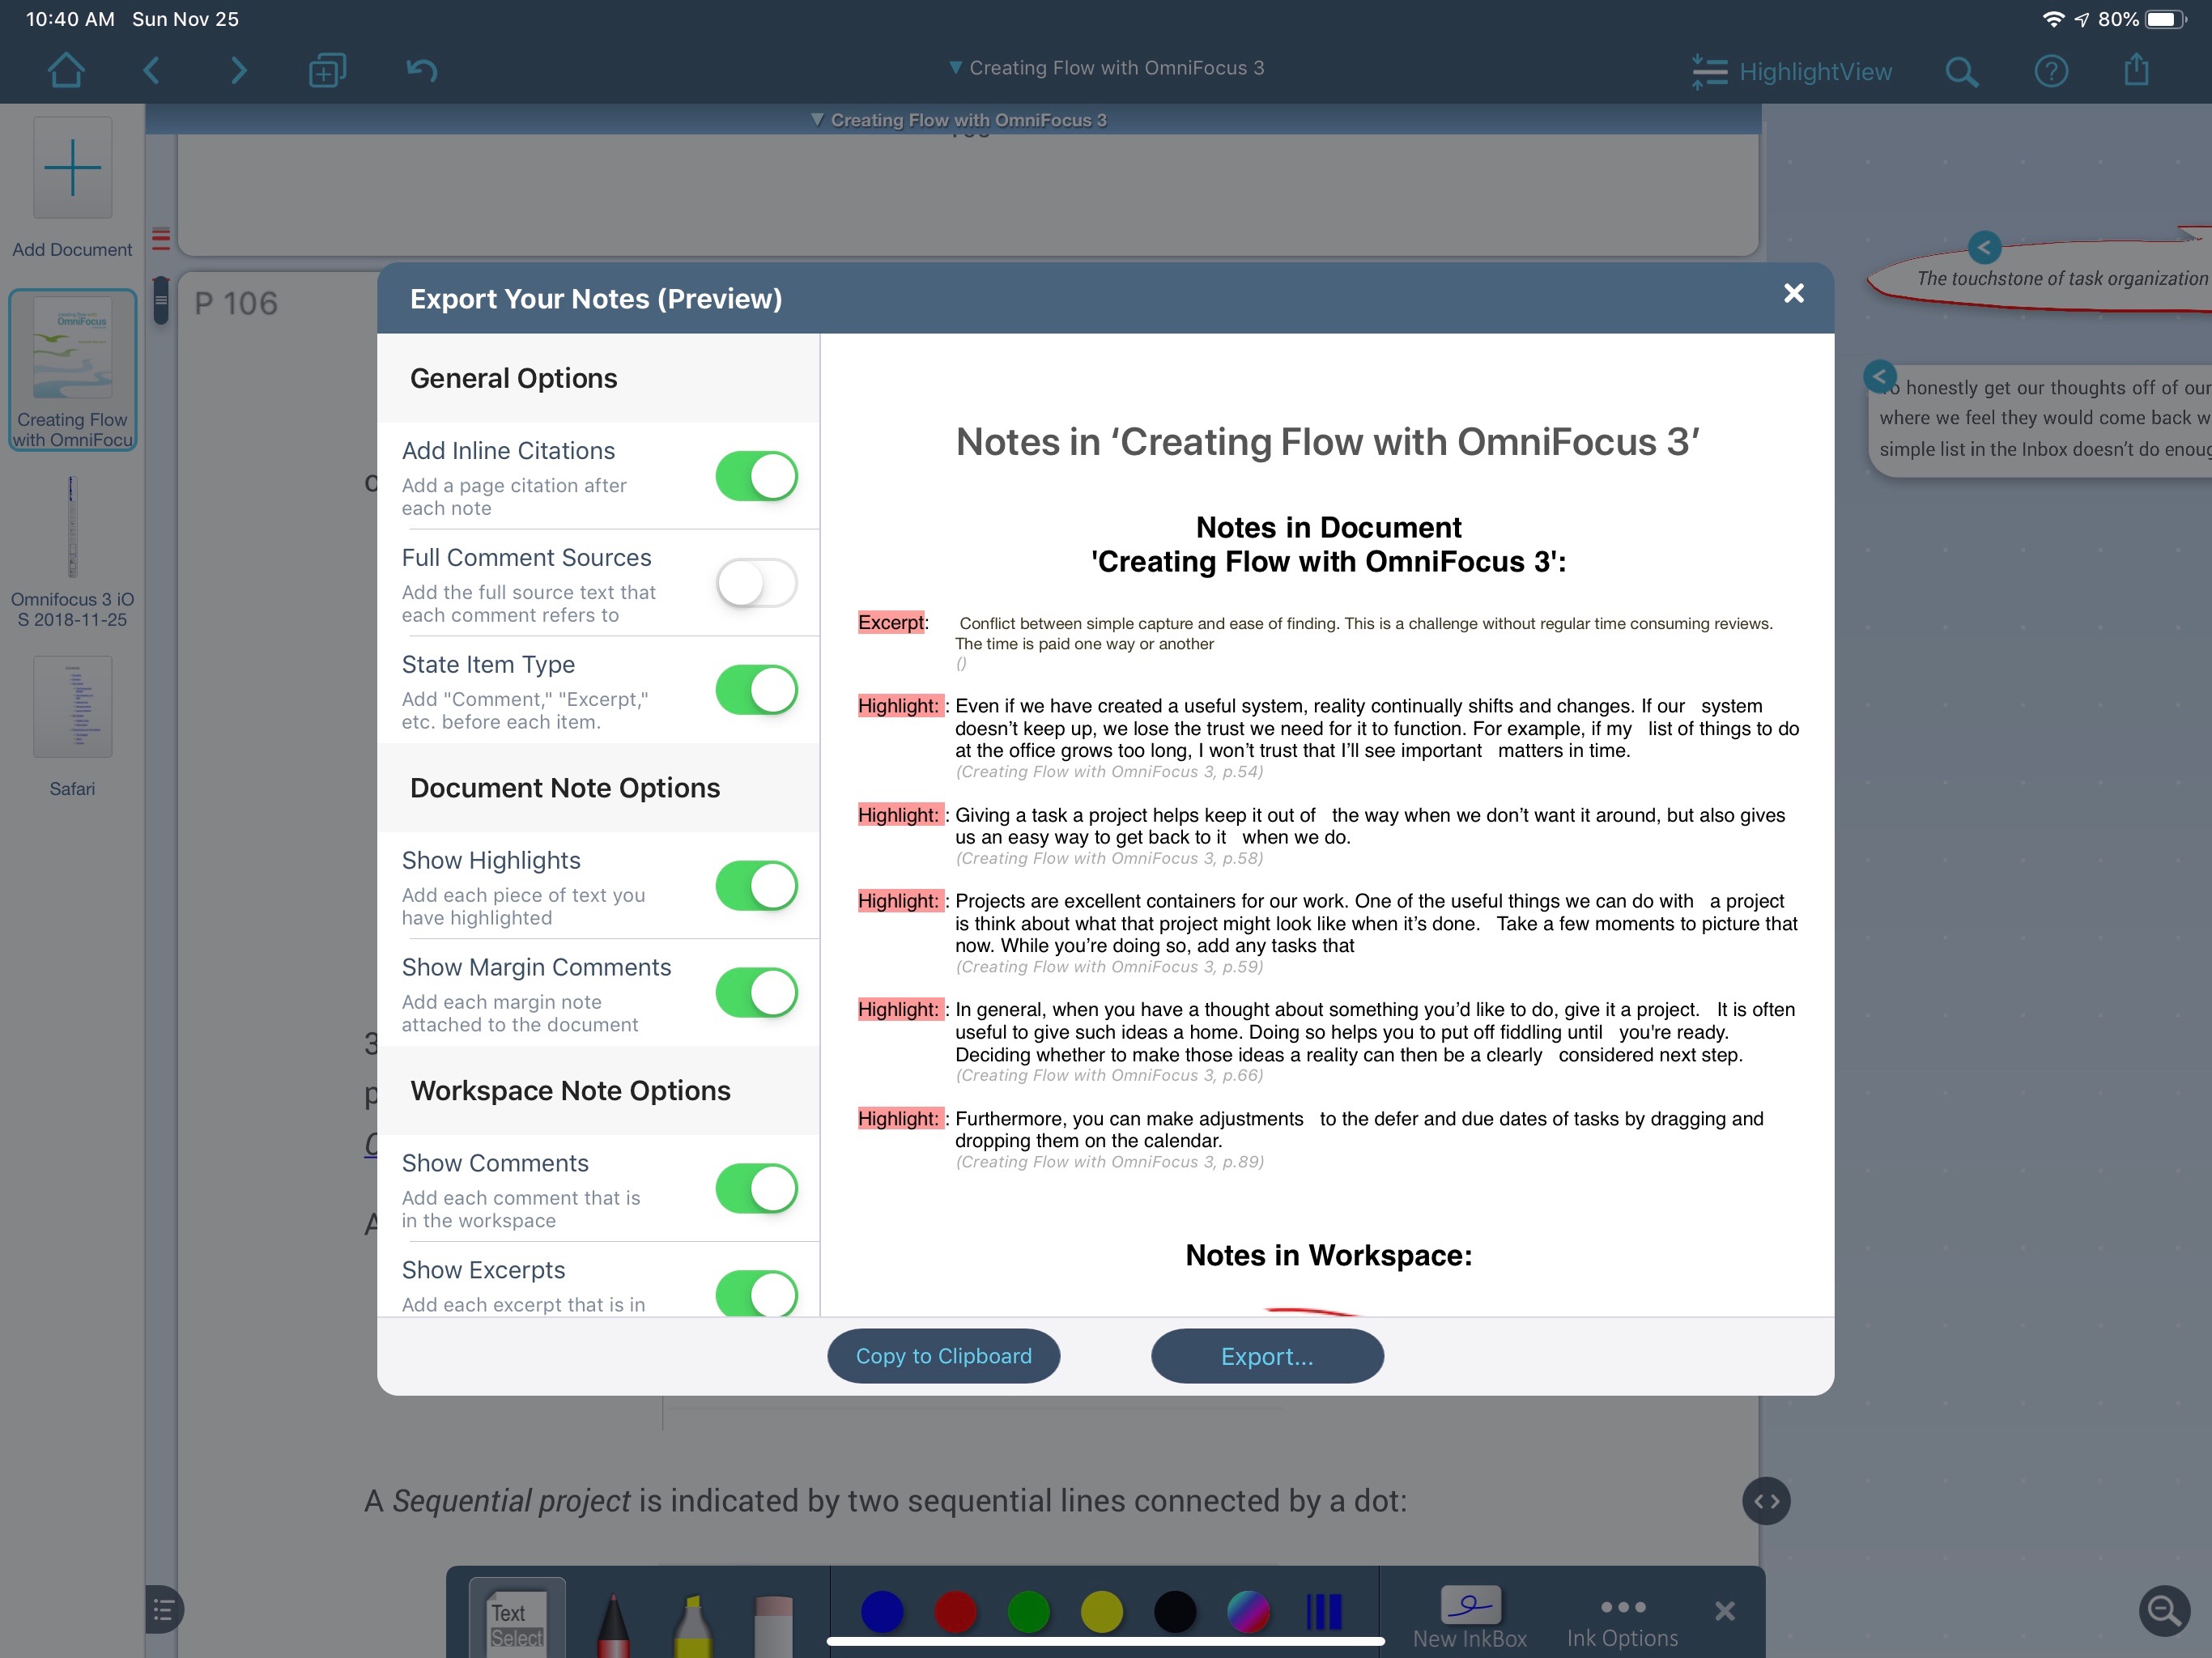
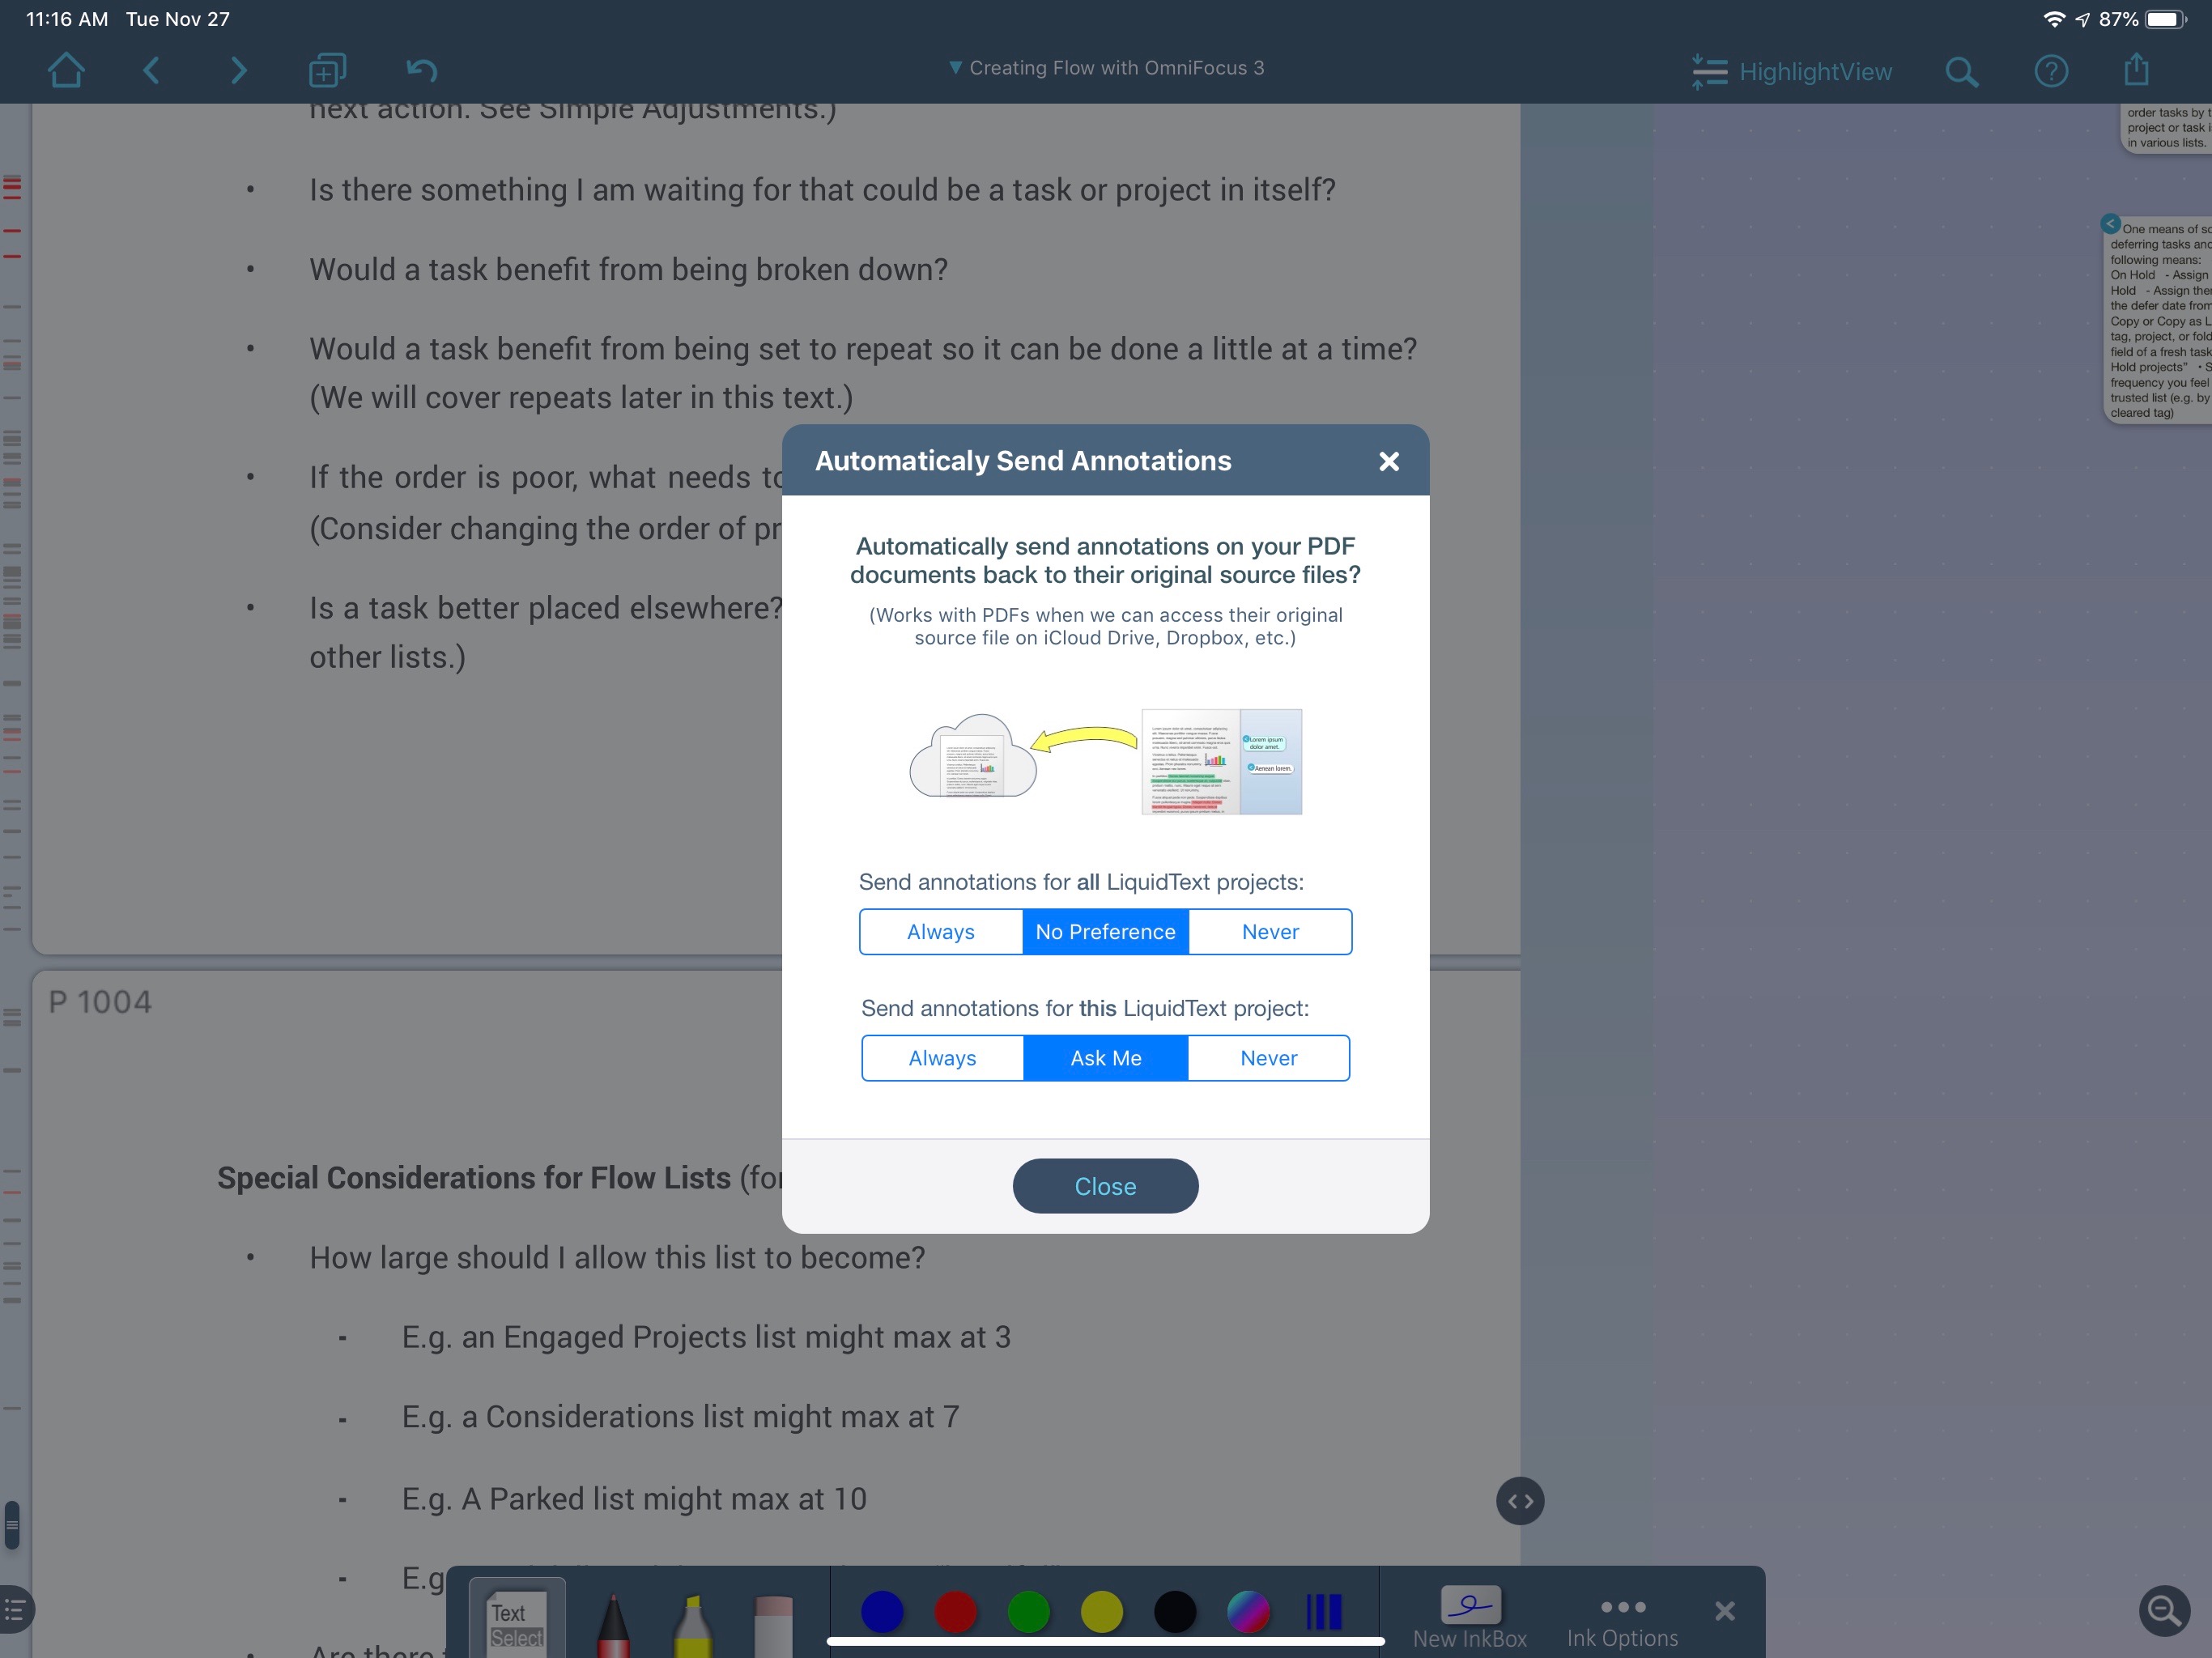
With all of the multi-document support I describe above, you might think that exporting would be a mess. You’d be wrong again, like I was. The team (or person) behind LiquidText has really considered a lot of the problems that are created by over-laying multiple sources with annotations. The export options simplify the entire thing. Exporting a PDF with annotations creating a new PDF with the original content linked to the excerpts as it is within LiquidText. Send these exports to anywhere else and the links still work.
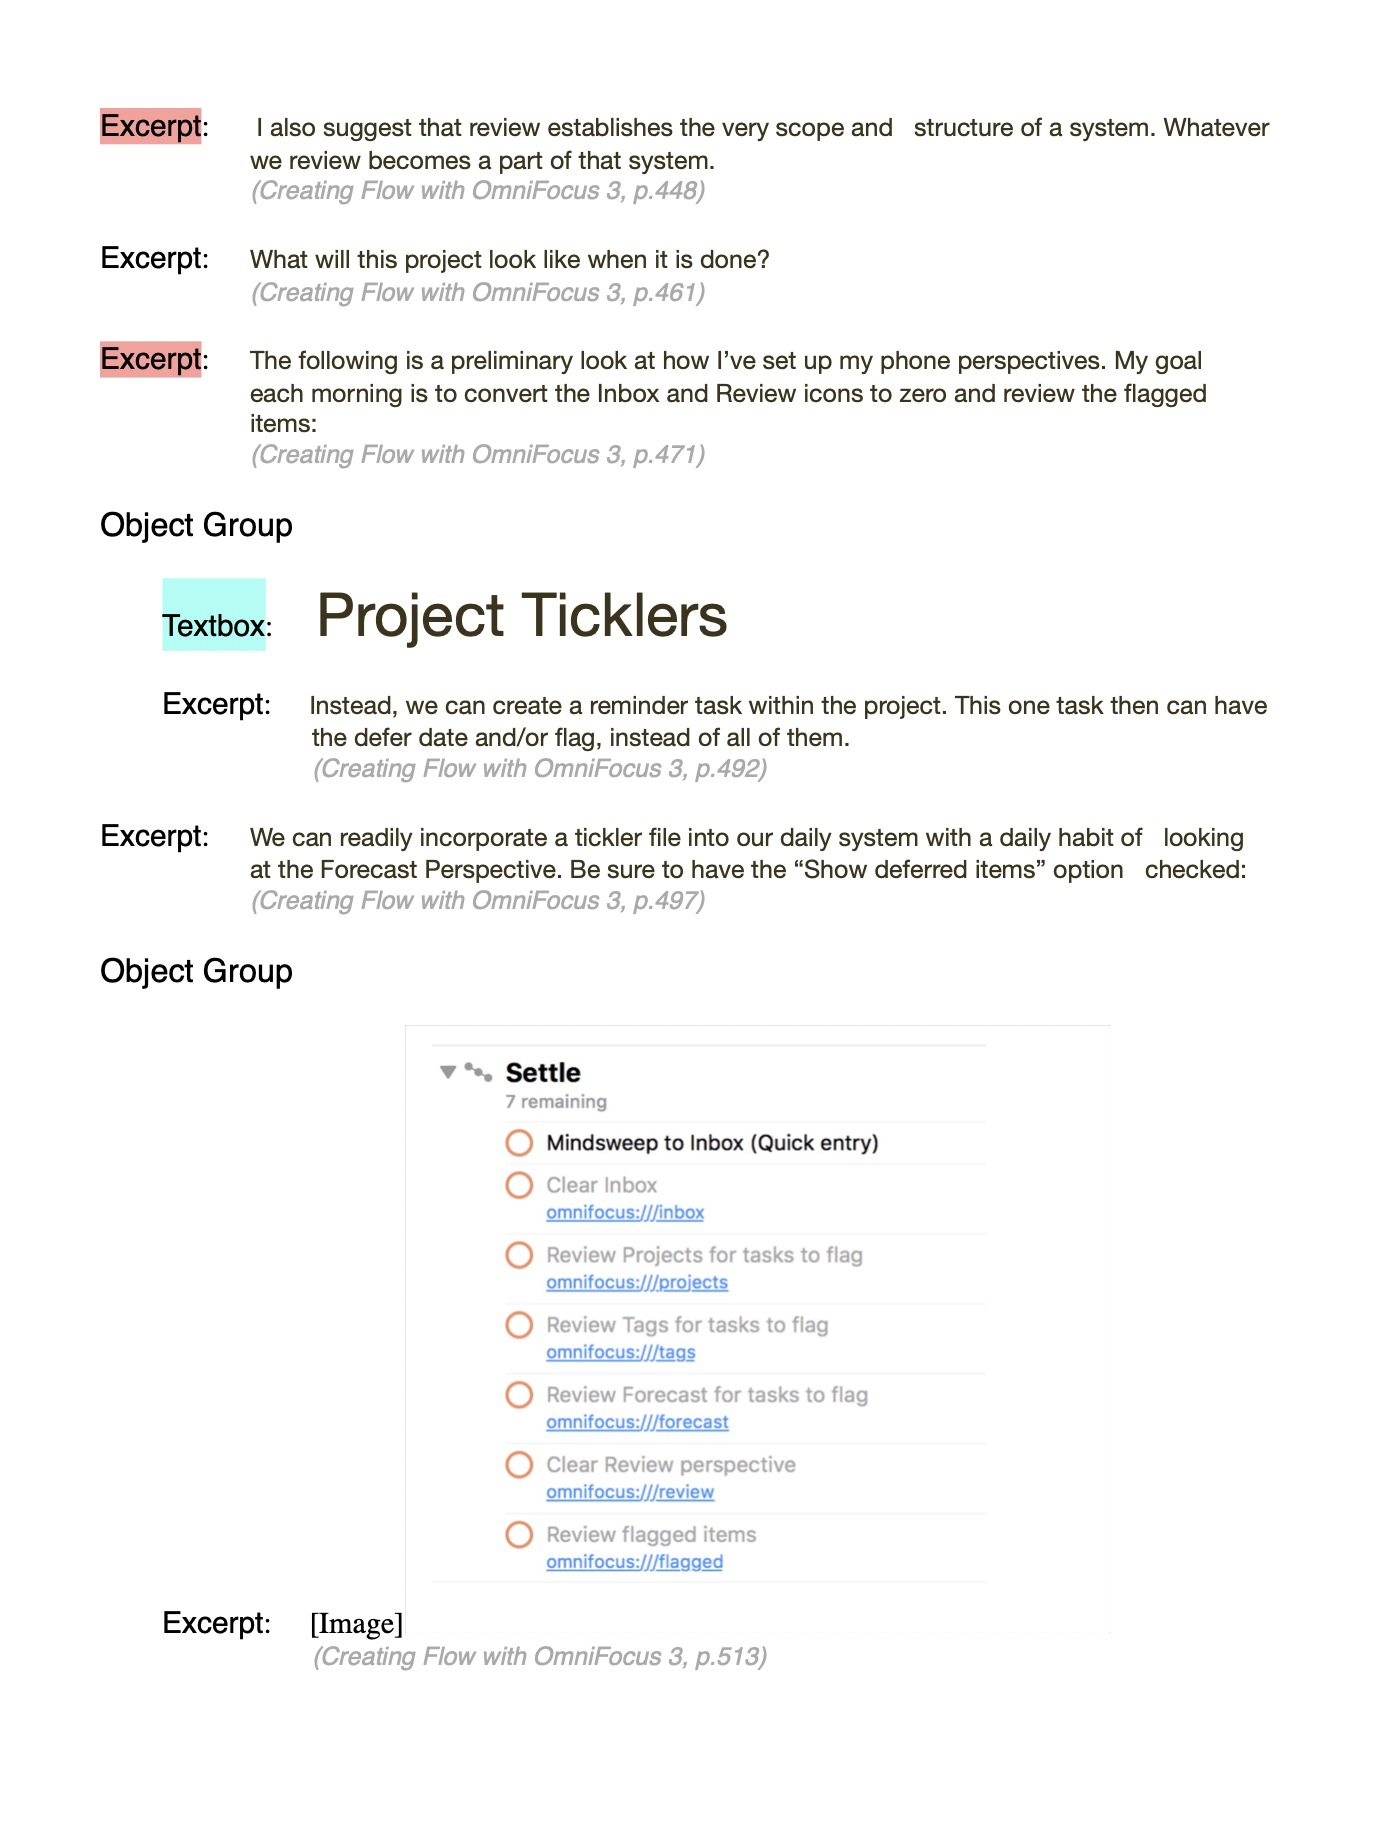
Exporting annotations to Microsoft Word creates a more streamlined but equally useful document. Every note, highlight, and image extract is preserved in the note export.
Conclusion
LiquidText is not cheap. It’s free to download on the AppStore but $30 for all of the features I’ve described. If the iPad Pro only allowed me to use LiquidText, I think it would still be worth it. This is the kind of app that justifies the iPad and the expense of the incredibly powerful hardware Apple is developing.
I’ve spent my entire career working with PDFs as reference material. I have thousands of documents and many, many notes. I feel like I spent my life doing it all wrong. LiquidText is an indispensable tool for any researcher or student. It’s $30 well spent and one of the apps that keeps me coming back to my iPad.
LiquidText | iPad Only | $30 for All Features