After trying out the millionth notes/scrapbooking app for the iPad, I realized that I should ditch apps altogether and just use the built-in Files app. It might be severely limited as an actual file browser, but Files has some big advantages over scrapbooking apps. It makes everything available to Spotlight searches, for one, and it doesn’t create duplicates of your files, because you’re always working with the originals.
Another huge advantage is that marking up PDFs with the Apple Pencil is instant. With all other PDF editors I’ve tried, you have to tap to enter a markup mode. In Files, you just start writing on the PDF. And that’s just the beginning.
Let’s see how it all works.
All other scrapbooking and note-keeping apps
Here’s what I use an Evernote-type app for:
- Keeping and marking-up PDFs of music scores.
- Keeping PDFs of user manuals.
- Storing video tutorials I’ve downloaded from YouTube using Shortcuts.
- Creating and viewing text notes.
- Storing and annotating photos.
When I realized I could do most of this in Files, I got excited. Then I realized that I could easily add other features using Shortcuts, and I was all in.
Tags as notebooks
I’ve never really managed to make tags work until now. I’ve always found stuff by searching for it, and if something needed to be in a particular place, I’d put it in a folder, as Jobs intended. But this time around, tags just clicked.
In this setup, I’m using tags as a kind of super-flexible notebook. Whenever you create a tag in the Files app, it shows up in the Files sidebar. Just tap the tag to view all files with that tag. It has some limitations — only tagged files in iCloud Drive appear. If they are stored in the Files silo of another app, like Dropbox, then they don’t appear when you tap the sidebar tag button.
To add a tag to a file or a folder, you just long-press it, and choose tags from the popover bubble. This opens up the Tags Edit panel. You can create and assign tags here1, or just drag a file to a tag in the sidebar.
Tags vs. folders
The advantage of tags over folders is that you can add multiple tags to the same file, so that it can appear in several places at once. For instance, I keep a tag for music scores, and also one for work in progress. That way I can see all my scores in one place, just as if they were in a folder, but I can also mark something I’m currently learning as In Progress. Later, I can remove that tag, but keep the Scores tag. This is no different to tagging on any other platform, but it works so well on iOS. That’s because tapping a tag in the sidebar acts exactly like tapping a folder. It’s instant, and you can sort the view however you like.
Instant markup
The other thing I love about the Files app is Instant Markup. It doesn’t sound like much, but in everyday use it makes a big difference. You just start drawing on a PDF (or an image), and the Pencil just works. Just like real pen and paper. These are standard annotations, too, so they stick with the PDF if you do open it in another app.
The actual Files PDF viewer is limited. You can’t search inside a PDF, and you can’t view a grid overview of the pages. But for that, you can just use PDF Viewer Pro, which will open PDFs from the Files app without duplicating them.
Shortcuts for power users
I quickly realized that there are a few tasks I need to do in an Evernote-style app, which can’t be done natively in Files. These are:
- Merging several PDFs into one.
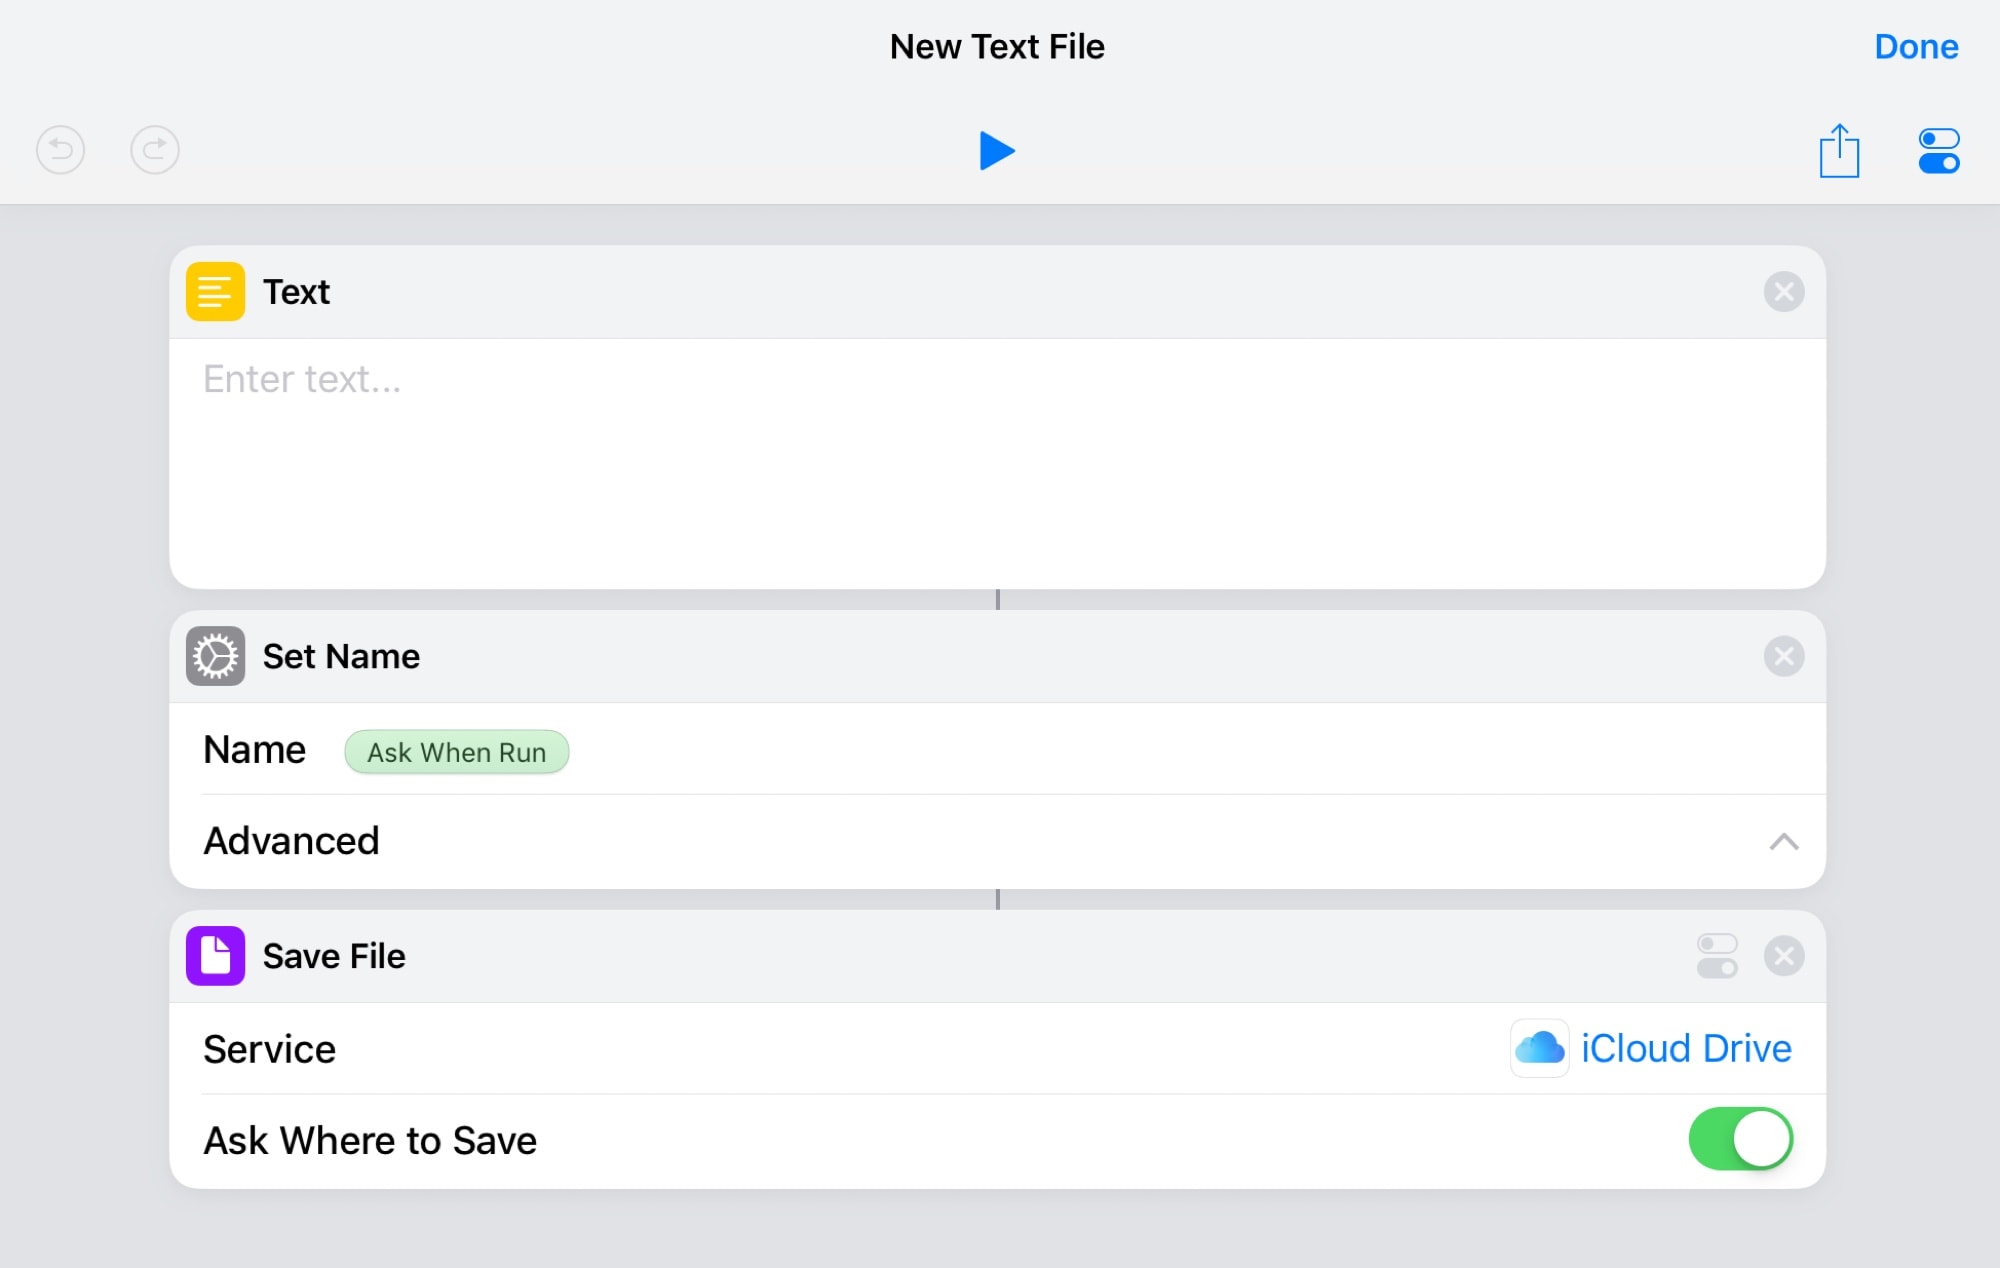
- Creating a new, blank, text file.
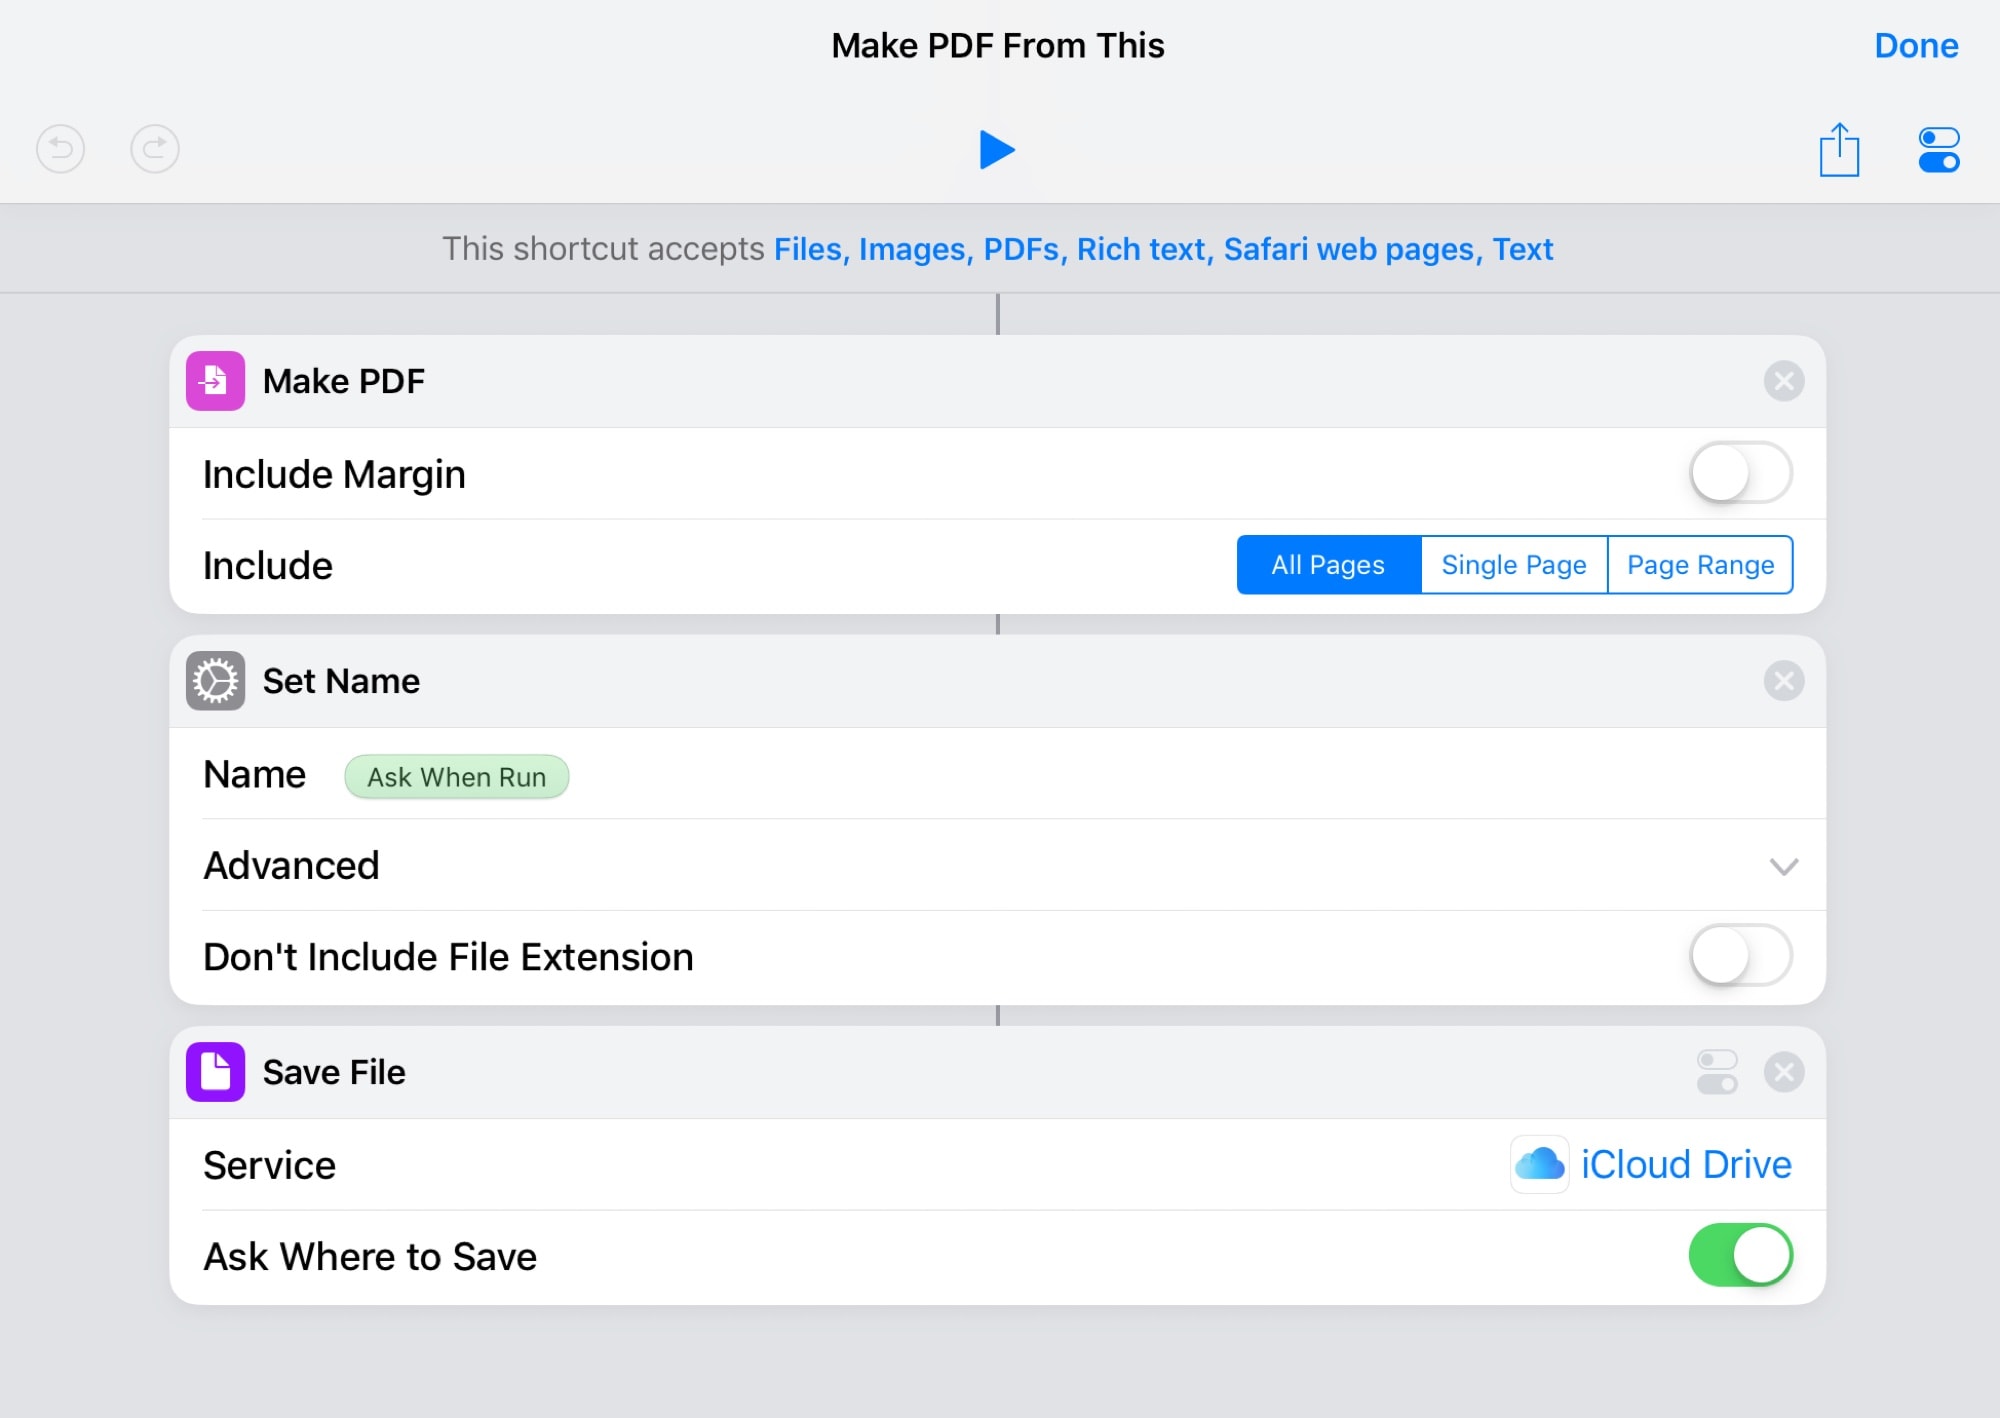
It took me all of ten minutes to fix this, using a couple of shortcuts. The first one lets you select several files, combines them into a single PDF. It’s not limited to PDFs either. You can add images too. Here it is:
 This shortcut combines multiple files into one PDF.
Just select some files, and share them to this shortcut. You can provide a name for the resulting file, and choose where to save it. The next one is just as simple:
 Create a blank text file in iOS Files app.
This one creates a new, blank text file with the name of your choice. Once it’s created, you can just tap on it in the Files app and it should open in whatever text editor you have on your iPad. I use Textor, which supports open-in-place. That is, it opens the file, lets you edit it, and then saves the original, just like it works on a Mac. Textor has disappeared from the App Store, but something like Pretext should do the trick. For this Shortcut, I save the icon to my iPad’s actions-based home screen so I can create a new text file with a single tap.
Works on the Mac too!
The neat thing about this setup is that it works on the Mac too. All those Files tags sync to become Finder tags, so you can carry on where you left off.
Now, I’m not trying to sell this method as a replacement for all Evernote-style apps, but for me it’s more than good enough. And because it’s so simple, anyone can use it. I used to be into all kinds of crazy roll-your-own solutions that required shell scripts and other nonsense, but these days it has to be simple. I also like using built-in tools, so if a third-party app dies, I’m not left in the cold.
Give it a try, and let me know if you come up with any neat hacks to use with it.
- If you want to change the color of these tags, you’ll have to do that on a Mac. ↩


