How to trace an image with your Apple Pencil on the iPad Pro — and when not to
 William Gallagher
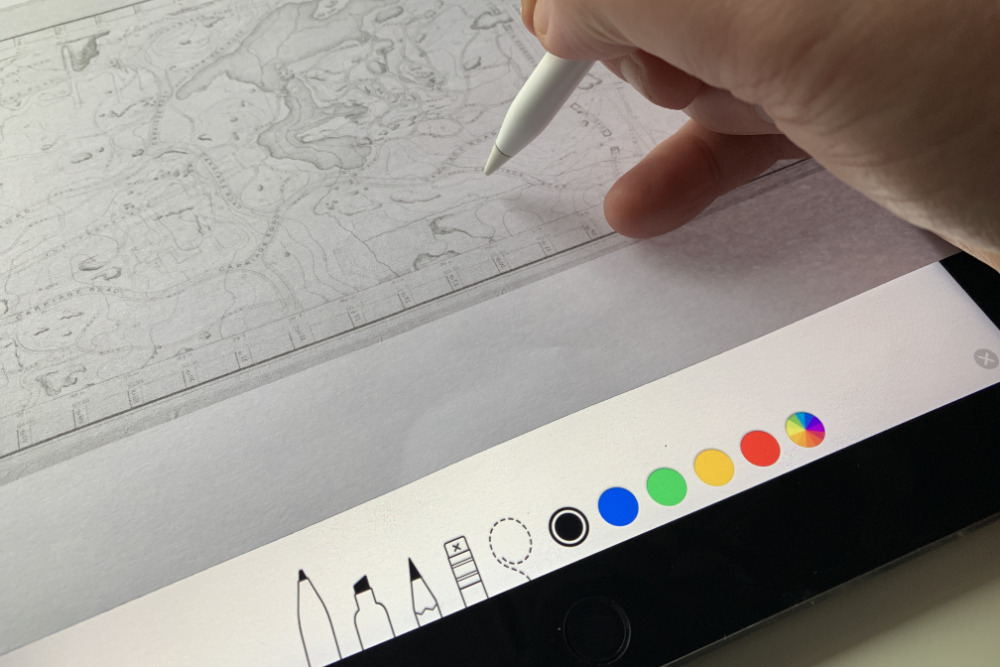
Despite all the tools we have for photographing images or scanning documents, sometimes they give us too much detail. Whether for study or artistic reasons, there are times when we want far less detail — but also need far more fine control. The Apple Pencil gives you the ability to trace what you want onto an iPad Pro.
There's a good chance that nobody at Apple even thought of this as something useful. Yet, whether by design or circumstance, the combination of the Apple Pencil — either version — and iPad Pro together gives us a whole extra way to digitize documents and images. As well as photographing, scanning or AirDropping someone else's JPEG version, you can trace an image directly onto your iPad.
This will work with one regular piece of US letter paper placed onto the iPad's screen. If you also have a screen protector, it's less certain to work and you may have to remove that first.
You're not going to do it every day. And when you do it, there are points you have to think about. However, there are times when tracing is significantly more useful. When you scan something, you generally scan it all. Even if you take the trouble to get the scanning app to focus on just one portion, it will take in absolutely everything that's there.
Whereas, if you have a paper document and you trace it, you can choose for yourself what to include and what to leave out.
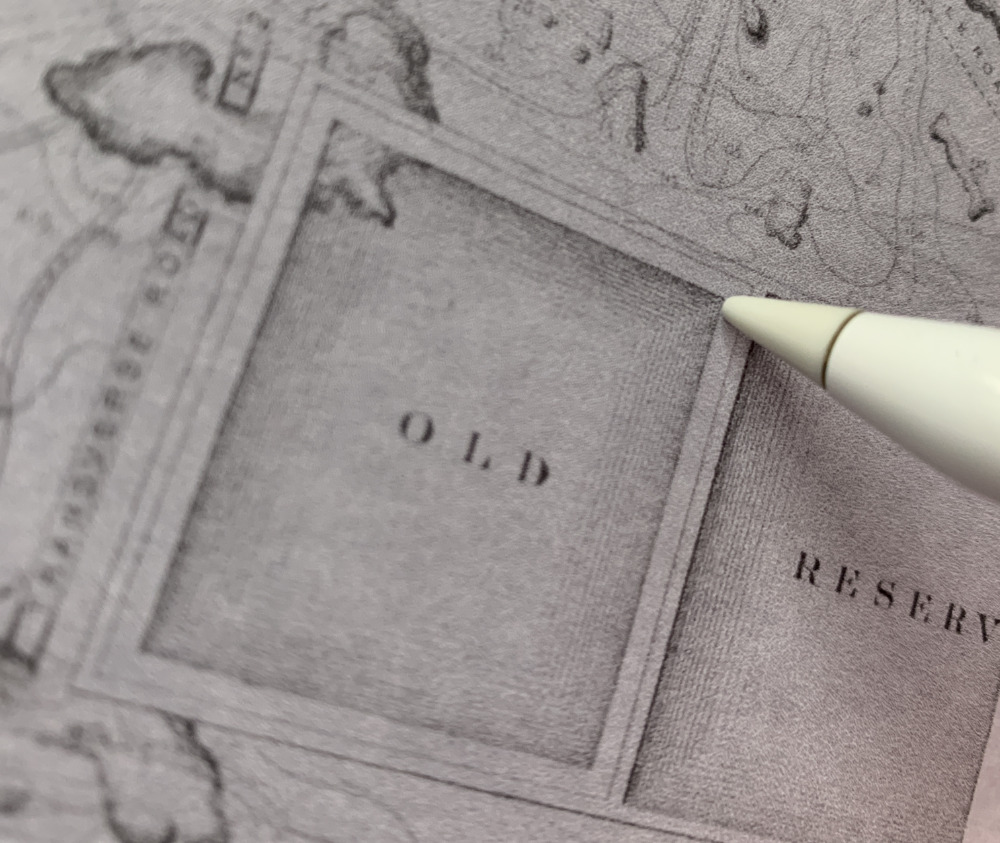
For example, we took an 1859 map of New York City from the astonishing public domain collection in the New York Public Library and what we downloaded was an image of the entire five-sheet fold out map.
-xl.jpg)
It's a gorgeous piece of work. And if it's hard for us not to get lost in the detail — notice the quaint "Vth Street" — then a scanner would get similarly bogged down. If we were just working on understanding the history of the city and how Central Park came to be, for instance, we might be less interested in Carriage Road and more in where the reservoir used to be.
If you scanned the original document or if you loaded the New York Public Library's own image of it into Illustrator or Pixelmator, you would take in everything. If you instead print it out, lay it on your iPad and get out your Apple Pencil, you're in charge.
The details
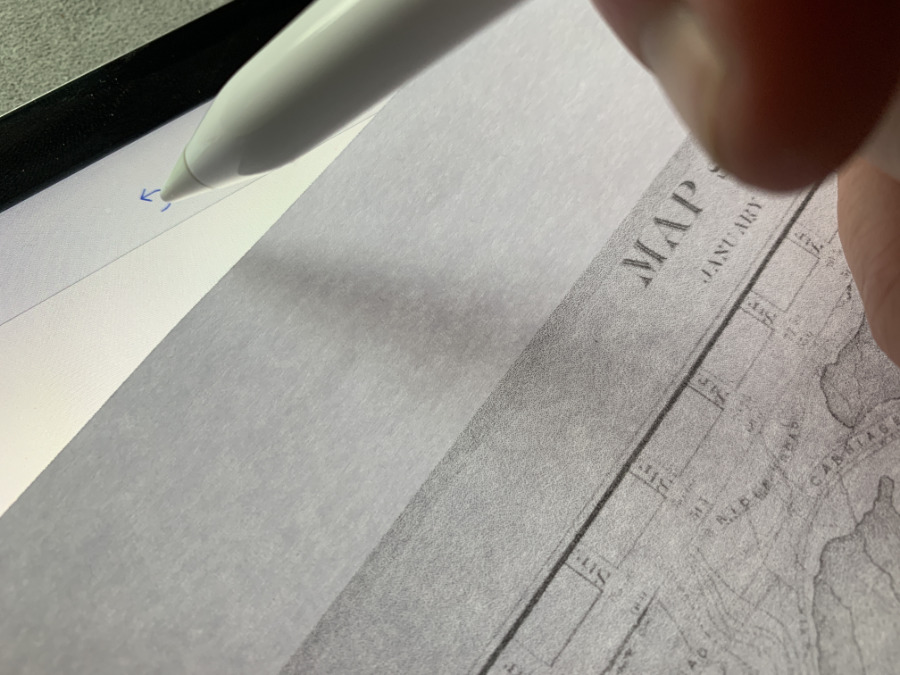
It is every bit as easy as it sounds to quickly trace an outline of an image onto iPad Pro with your Apple Pencil. Only, it's just as easy to go wrong with it too.
First you need to choose your app. Before you start investing in ones such as Paper by Fifty-Three, Procreate, Notability or Adobe Sketch, try what you've already got. Apple's own Notes app can be enough for this.
You need to do two physical things before you can get into using the software for this, however. First, turn the brightness up on your iPad Pro's screen. Even though you're going to be running the Apple Pencil over paper atop that screen, you have to have it bright so that you can see what you've done and what's left to trace.
Next, find a way to fasten down the paper to the iPad. That's trickier than it sounds because you never want to damage the iPad and if you're working with an original document, you won't ever want to damage that either.
You absolutely must fasten it, because the glass of the iPad Pro is too smooth for this. Your paper will move as you run the Pencil over it. You could try weighting down either side of the paper if it's bigger than your screen. Or you could try Post-It notes.
Do it so that the paper stays steady but don't do it so that you have to undo everything each time you need to change a control on the iPad.
Controls
You have to keep the paper steady, but also not so locked down that you can't reach the app controls. Either you'll forget to switch the app from typing or handwriting to sketching, or something you do will make the iPad change the tool for you.
The single most exasperating thing we found was when an accidental finger press would change the tool we were using, or would constrain a line we were trying to draw, making it perfectly straight when we were trying to follow a contour.
You do also need some skill and hopefully you'll get it from practice, but a good artist's eye and a steady hand is important.
If you fail
Tracing with iPad Pro and Apple Pencil is not a quick job. Certainly it's enormously slower than just scanning a document in. If you have limited access to the document or image, take a photograph of it with your iPad's camera just in case.
Then if you really cannot get it traced neatly in time with the Pencil, take that photograph to a Mac and into something like Adobe Illustrator. This has a feature called Live Trace which turn any image into line art.
Only, as ever, it'll turn the entire thing to line art. Then, you'll have to go through with a very fine eraser picking out the detail you don't want.
One last tip
As much of a pain as it is stopping in the middle of tracing an image, stop often. Lift the paper and Share what you've got so far. It's the iOS equivalent of making a backup and you need it because ultimately you are working on a screen while choosing to cover up its controls.
You will erase something you didn't intend to and you will make mistakes in the tracing. If you spot them right away, you can lift the page and tap on the app's Undo button, though.
That's not something you can do with regular pen and ink tracing.
Keep up with AppleInsider by downloading the AppleInsider app for iOS, and follow us on YouTube, Twitter @appleinsider and Facebook for live, late-breaking coverage. You can also check out our official Instagram account for exclusive photos.


 Wesley Hilliard
 Andrew Orr


 Amber Neely