Did you know that you can send the audio from your iPhone or iPad to your Mac via the Lightning cable? That audio stays in pristine digital ones and zeros, and can be recorded (or otherwise used) anywhere you can edit audio on your Mac.
For musicians, this turns your iPad and all its music apps into a plugin for your Mac. And for anyone else, it could just be a neat way to route audio into your Mac’s speakers. The feature is called iDAM, and it’s built into your Apple devices. Oh, and it works with MIDI too.
IDAM
IDAM stand for Inter Device Audio and MIDI. We won’t cover the MIDI aspect today, but if you’re familiar with MIDI, then you won’t need any extra explanation. You can find the settings in the same spot as the audio setup.
The IDAM feature exists to let you easily use your iPad (or iPhone) as as an audio source an app like GarageBand or Logic on the Mac. This lets you use any of the zillions of amazing music apps on iOS, and record their audio and MIDI output into your Mac app, without the audio degradation or converting to an analog signal and back again.
How to enable iDAM on the Mac
To set up iDAM, just plug your iOS device into your Mac with its supplied Lightning-USB cable. If you have a 2018 iPad Pro, you may need a USB-C to USB-A cable, or an adapter of some kind, depending on the age of your Mac.
Then, launch the Audio MIDI Setup app. You’ll find this in the Applications > Utilities folder. If all is working as expected, your connected iPad/iPhone will show up in automatically:
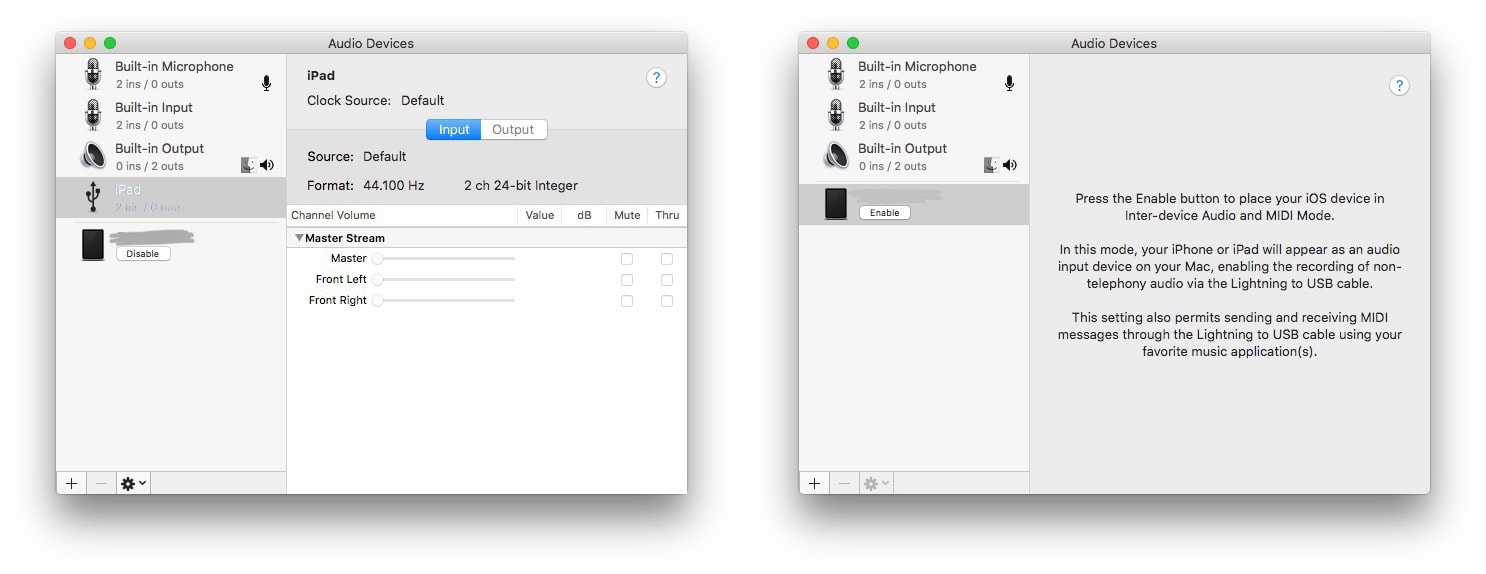
Photo: Cult of Mac
Click to enable. Nice done, your iPad is now connected to your Mac as both an Audio input, and a MIDI source/destination.
How to use iDAM on the Mac
Now, you need to send some audio. The iPad configures itself automatically, as if you’d plugged it into an audio dock. In fact, if you just play some music using the Music app, it will get sent down the USB cable to the Mac.
If you’re using AUM or AudioBus apps to route your audio, then it’ll look like this:
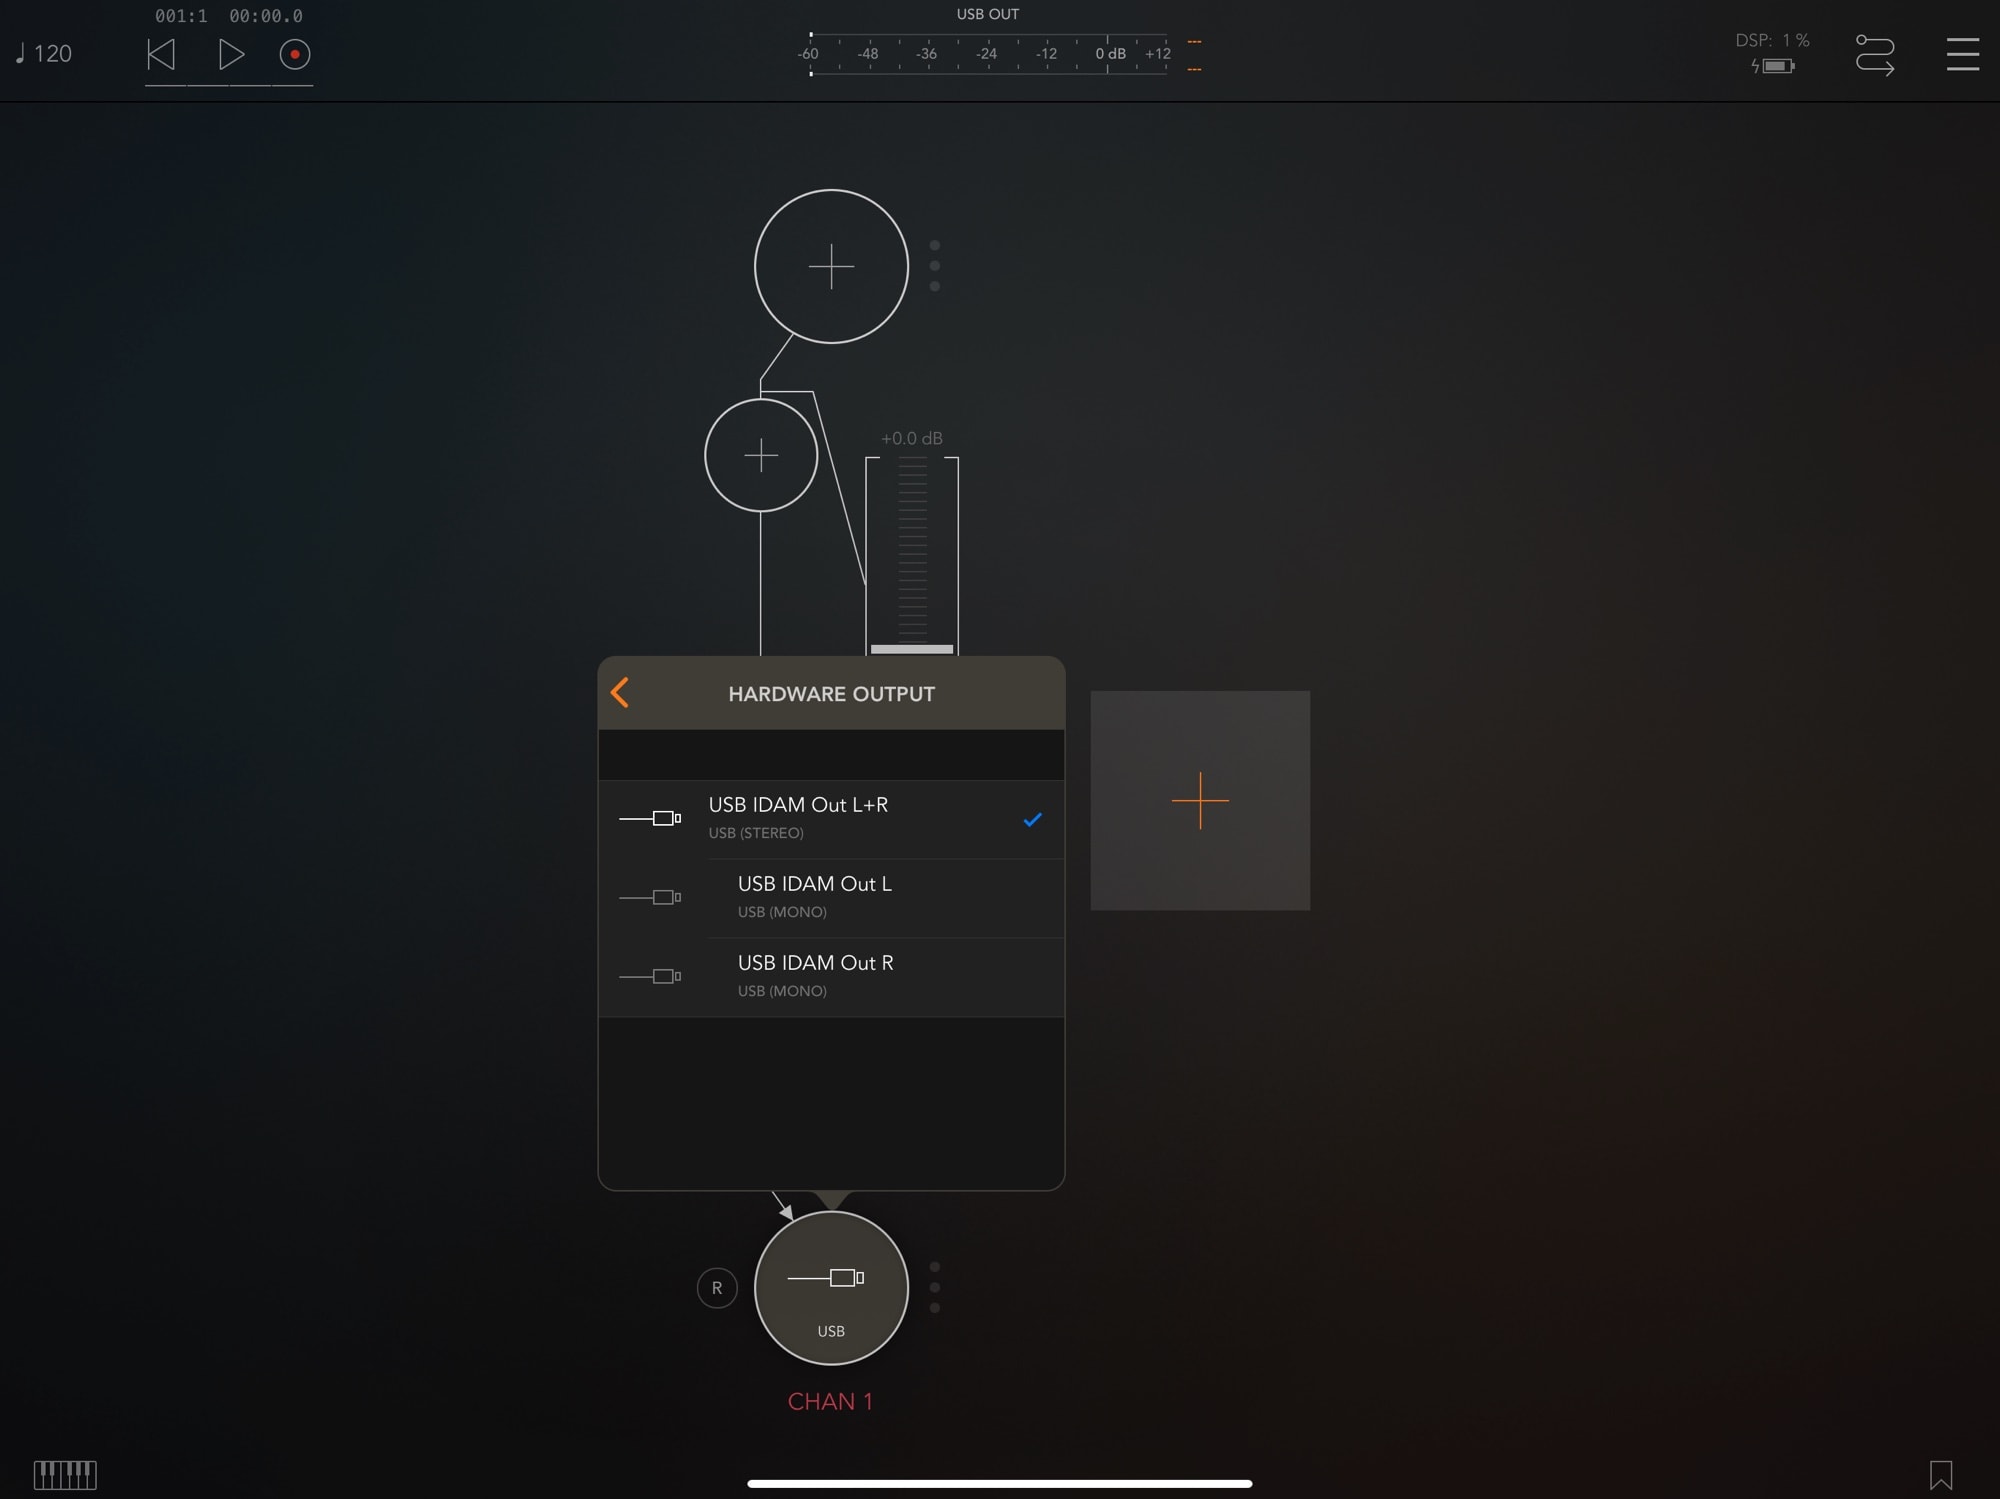
Photo: Cult of Mac
And here’s MIDI in AudioBus 3:
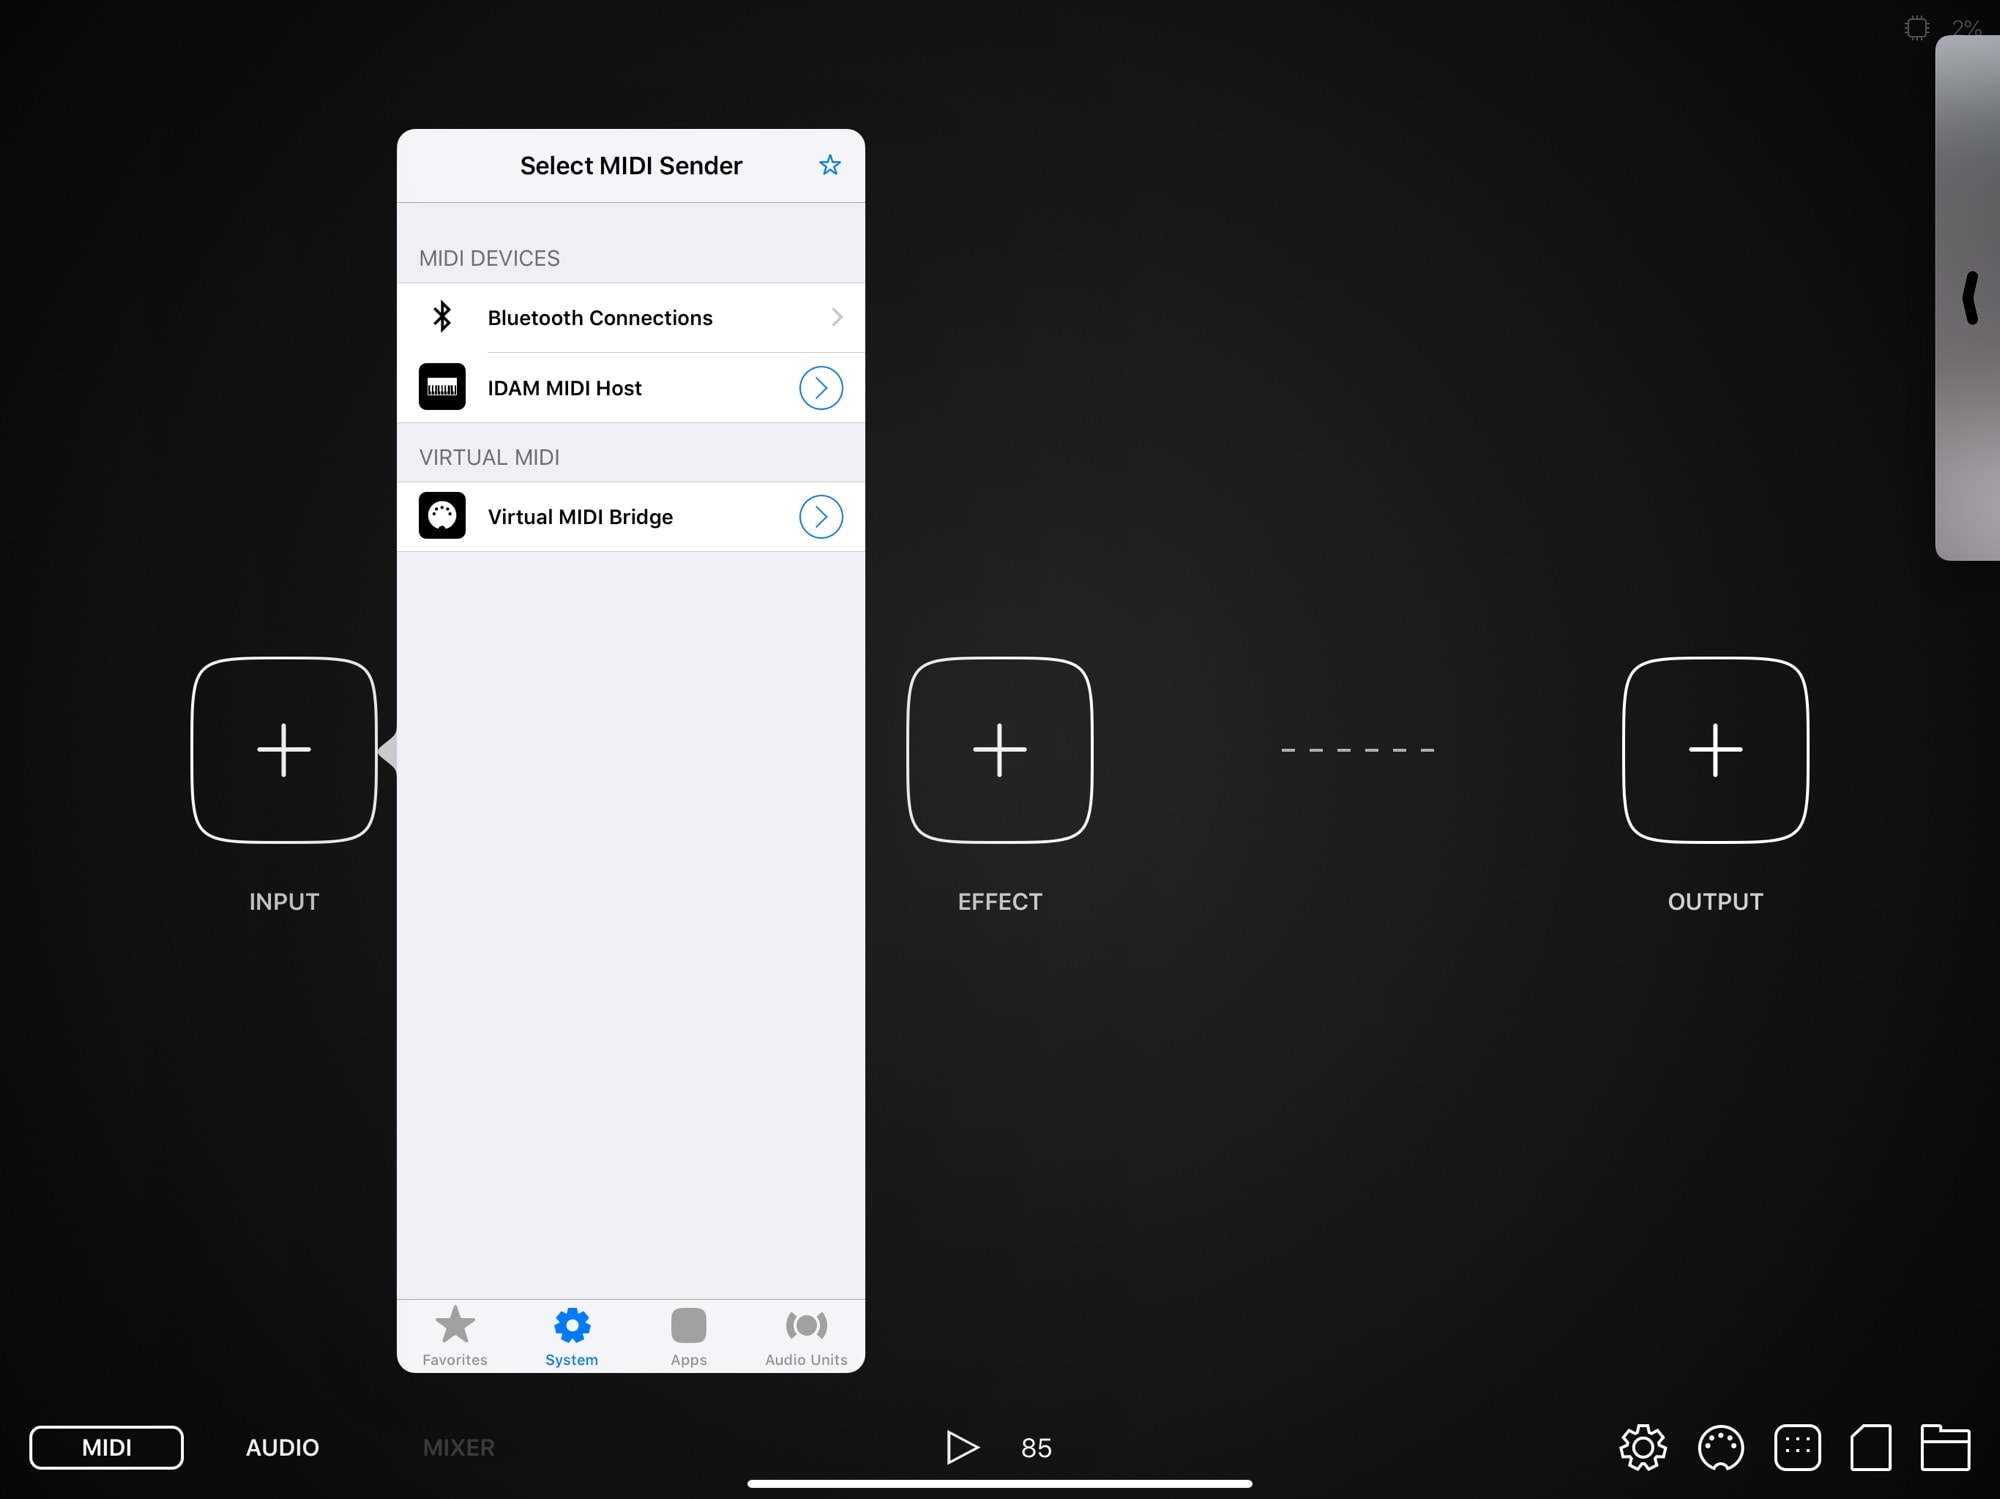
Photo: Cult of Mac
That’s sending audio taken care of. Receiving it on the Mac is just as easy. Open up GarageBand, or other audio app of choice. Your iPad will show up alongside all the other audio inputs:
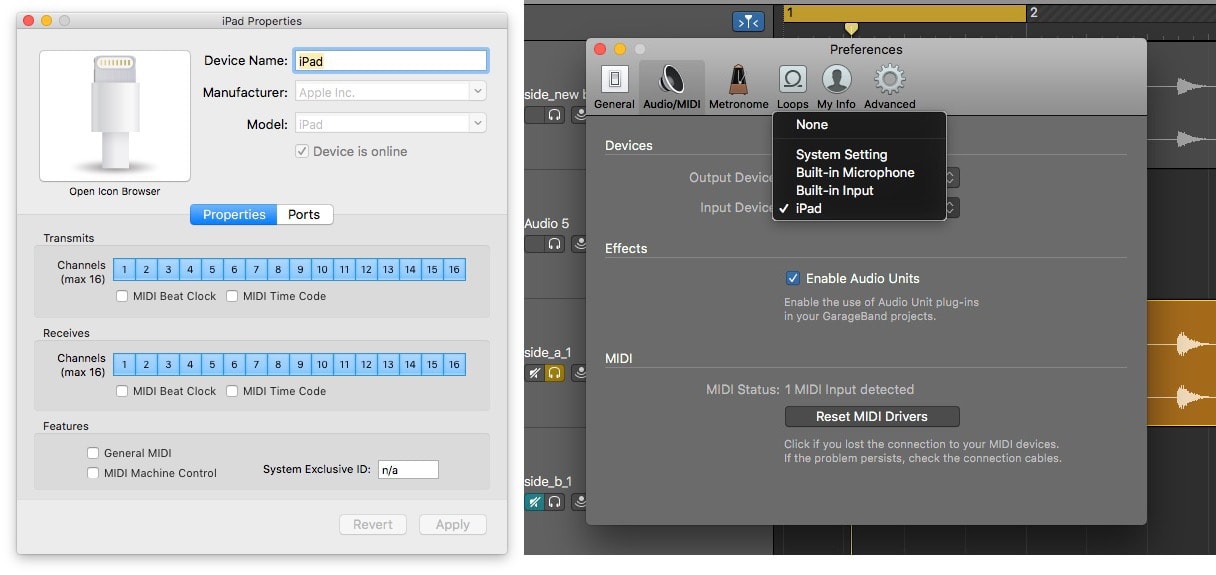
Photo: Cult of Mac
To actually record that audio, just proceed like you would from any other audio interface or input.
Easy hookups
I was surprised how easy iDAM is to setup and use. Once you’ve added the iPad as a source in the Audio MIDI Setup app, it’s pretty much plug and play from then on (you have to enable the iPad in Audio MIDI Setup each time you connect it). It’s a shame that the audio doesn’t go both ways like the MIDI. It’d be neat to be able to send your audio out from the Mac, have it processed on the iPad, and then sent back.
But I’m not complaining, becasue it’s already super useful. For instance, iDAM lets me sample GarageBand’s amazing built-in software instruments, which is impossible to do on iOS alone. Check it out.
