How to recover your data from a dead partition on macOS

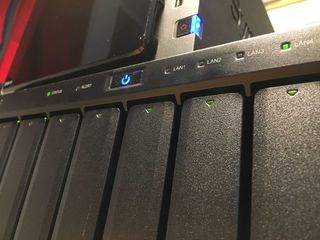
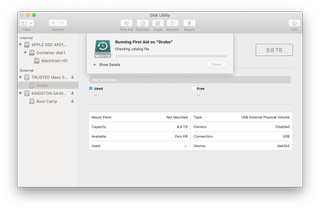
Data loss sucks. Data loss without a backup really sucks. I recently had to restore some archived data that I had "responsibly" stored on a redundant storage backup device called a Drobo that unfortunately for me, decided to have an HFS+ filesystem partition failure. I could see the Drobo in my Disk Utility, but I could not see the 8 TB partition with my archived data. Yikes.
Luckily, I used some recovery tools, both free and paid, to not only fix my partition, but to also get my data back onto another redundant networked attached storage array called a Synology Diskstation. Here's how!
- Don't touch anything
- I have a broken partition, now what?
- Testdisk and Photorec
- Data Rescue and Disk Drill
- Conclusion
Don't touch anything!
First rule about data recovery and fixing disk partitions is that you do NOT want to make any changes to the environment, the disk in question, the partition, etc. Well, not until at the very least you can assess that the device truly has a damaged partition. I can't say how many times someone has come to me to recover a partition or data, only to find out that a forced disk check, copying new files to the partition, or switching to a new machine has caused permanent unrecoverable damage to the files. It's very important to assess the situation as prudently as possible before acting. In fact, I even advise against powering down the system unless absolutely necessary.

I have a broken partition, now what?
Once you've determined that you are in a situation that you need special tools to be able to recover your partition and data, then you'll need to decide how you want to proceed by choosing from the type of recovery tools available.
There are free and open source tools that, with a tiny bit of getting your hands dirty in a terminal, will get your partition back up to a point where it will either be fixed or be put in a position where you'll be able to copy your data off and reformat your disk.
There are also utilities that give you a nice graphical interface that makes recovery of data as painless as possible, for a fee. Many of them allow you to download the product for free to see if the program will be able to detect any partitions or data before you buy and then unlock the necessary components to actually allow you to get your data.
We'll show you examples of each but no matter the method you choose, neither will be as costly as paying a professional to recover your data.
Master your iPhone in minutes
iMore offers spot-on advice and guidance from our team of experts, with decades of Apple device experience to lean on. Learn more with iMore!
Testdisk and Photorec
For our free and open source options, I used TestDisk and Photorec. These program work in tandem to give you a full recovery suite that non-free programs provide. Both applications are part of a single download.
Testdisk
Testdisk is a powerful partition table recovery software. It can get your partition to the state that, at the very least, will make it visible to the OS so that you can copy off your data or, even better, fix the partition to become fully functional once again.
- Download Testdisk.
- Extract the zip file in Finder.
- Open terminal.
- Navigate to the Testdisk directory, typically ~/Downloads/testdisk-VERSION_NUMBER.
- Start test disk with the ./testdisk terminal command.
- Create a new log file for recovery.
- Enter your password when prompted and press return.
- Select the physical disk that you need to have the partition repaired and press return. You can use disk utility to find out the disk name in the form of Device: disk1.

- Select your partition type to recover. Testdisk will try to autodetect the partition as well.
- Select analyze and press return.

Testdisk will now try and read the data on the disk, detect the partition type and geometry from a few of the files it finds and try to suggest a new "fixed" partition table.
If Testdisk can find a damaged partition successfully, it will be listed.
- Highlight your partition.
- Highlight Write to rewrite a new partition table.

- Press "Y" to Confirm.
- Press OK.
- Quit Testdisk.
- Reboot your computer.
Photorec
That was enough for me to get back at my data to copy it all off and reformat the drive. However, sometimes Testdisk might not be able to fix your partition table. That's where Photorec comes in. As described, Photorec ignores the file system; this way it works even if the file system is severely damaged.
- In the same working directory for Testdisk, start Photorec with the ./photorec command.
- You'll get a similar menu selection as in Testdisk. Select your the physical disk for the partition you want to recover from.
- Photorec will analyze the drive and attempt to find a partition. If the partition is in very bad shape, it may find multiple instances. You'll need to Search from each.
- Photorec will request a location to copy your files to. Make certain you have enough space.
- Photorec will start the very long and slow process of recovering your files.

The major drawback of Photorec is that due to how deeply the program scans the drive, the process is very slow. However, it is very effective.
Data Rescue and Disk Drill
If you're not wanting to fiddle in the command line or would prefer an easy to use click and go recovery option then you might prefer the paid options. These programs are easy to install and are straightforward in their usage. Simply, install, run, point to your drive, scan, recover. Done.

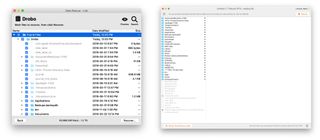
Both Data Rescue 5 and Disk Drill offer try before you buy functionality. In each program, you'll be able to scan your failed drive to search for partitions. In each, you'll be able to determine if either program is even able to see the data you need to recover. Once you're satisfied that your data is there and recoverable, you can restore your data by enabling the paid content by buying a license. Data Rescue 5 retails for around $99. Disk Drill retails for around $89 for a single device. More devices cost extra. Both were able to see my borked partition and were able to recover my files.
Conclusion
Having backups of backups or off-site backups would have avoided this situation entirely. Ultimately that's the best remedy. It used to be that your only recourse was to bring your hardware into a specialist that would recover your data for hundreds of dollars. Although not ideal, at the very least, you can now do your own recovery on your macOS device for a fraction of the price, or even for free. Have a recovery success story? Tell us in the comments!
Most Popular


