Tips: How to get started with your first few HomeKit devices
 William Gallagher
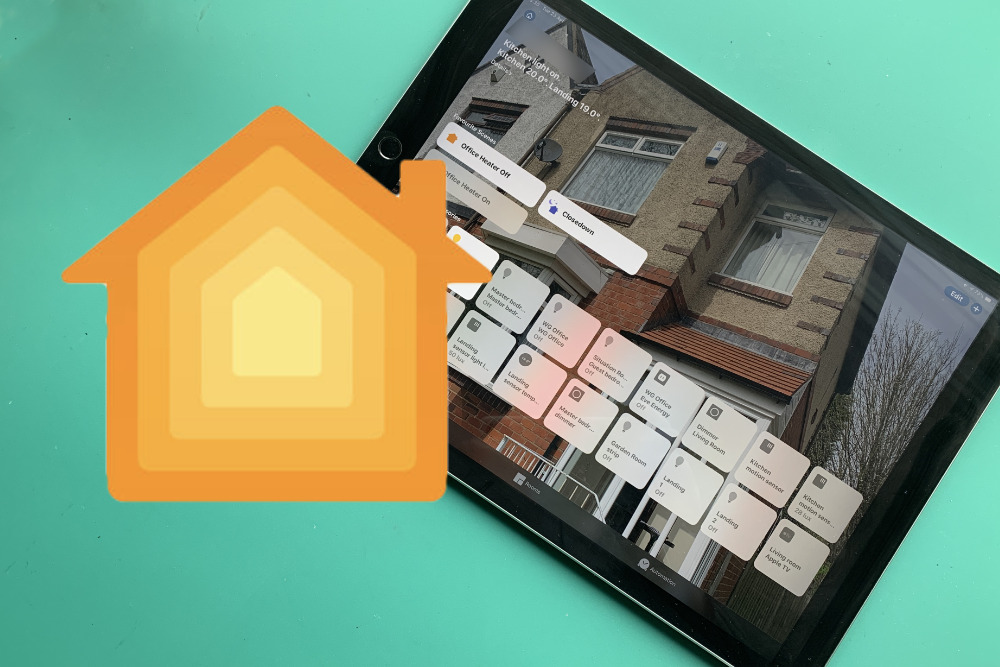
If you've decided to get into HomeKit and you're just now thinking of which smart devices to buy for your home, there are some things you need to know to make this practical and cost-effective.
You've already got HomeKit. It's Apple's standard for smart devices and it comes as part of iOS, macOS and tvOS. You can just buy any HomeKit device and know that you'll be able to control it via your iPhone, iPad, Apple TV, Apple Watch or Mac.
What you need first is to plan. Having decided that HomeKit is right for your needs, now you need to look at what you actually want from HomeKit, then at which devices you'll need — plus where you're going to place them in your home.
Zoning out
Divide up your house into rooms and zones before you think about where you'll place the devices. This will seem like admin overkill if you're only ever going to buy one HomeKit security camera, but you're never just going to buy one thing.
Every HomeKit device identifies itself by name on your network and if you let them all stick to their default one, such as "Bulb," you'll get confused. Trust us on this one, we're begging you: don't go through the madness we have when we've ended up having to run between two rooms to see which light switches on when we press which button.
Instead, be sane and start with naming rooms in the Home app on iOS. While there is now a Home app on the Mac, it's limited. You can't add rooms in it and you can't even add any smart devices.
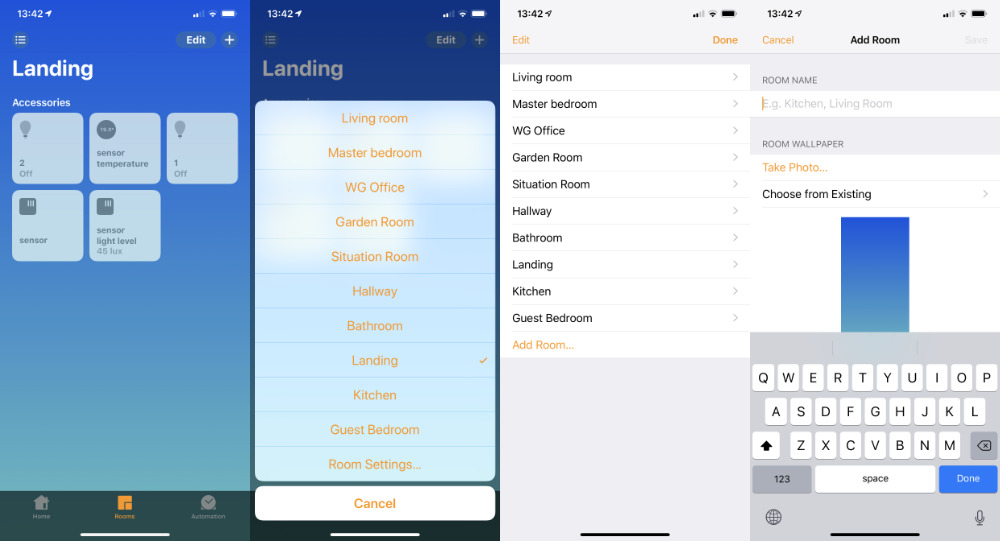
On iPhone or iPad, open Home. By default, it will open on a page headed My Home. There are options for renaming that or adding new homes if you happen to have more than one. And there are also options for inviting other people into the home. Both of these are available through tapping the home icon at top left of the screen, but for now, leave them.
You can set those at any time, but it helps to get the rooms and zones done first. Tap on the Rooms tab at the bottom of the screen. On the screen that appears, press the menu icon at top left. There is a simple plus sign at top right which you would think would add a new room, but it doesn't.
When you press that menu icon, you get a list of all the rooms that have currently been set up in the Home app and that's likely to be none. Tap on Room Settings..., which is always the last on the list. Now you again get a list of any existing rooms you've set up, but you also get an option to Add Room... at the bottom.
Tap that and then give the room a name. You can also add a photo of the room or set a wallpaper and whichever you pick will be used as a background image in the Home app.
When you tap Done, you come back out to the list of rooms. Tap on the room you've just created and you do go back into the same screen you were just in, but there's now an extra option called Zone. Tap on that line and you'll get a button called Create New plus some suggestions of typical zones like Basement or Outside.
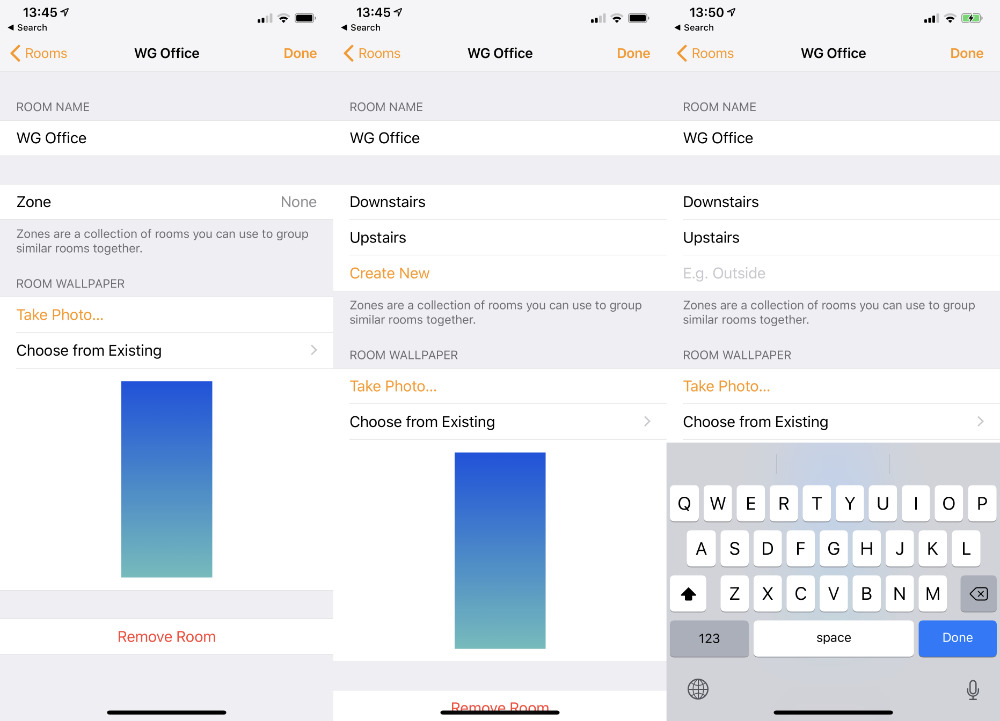
Give the zone a name and then tap Done.
Devices and destinations
Now you're ready to add any HomeKit device and slot it into the right place in your home. The way you do this is the same for any HomeKit device, regardless of type.
In the Home app — again, only on iOS — tap on the Home tab, then on the plus sign at top right. From the pop-up menu that appears, tap on Add Accessory.
Every HomeKit device has an 8-digit setup code which is either printed on the box or is on the device itself. If you've got the device in front of you, you can point your iPhone camera at it and the Home app will do the rest. Similarly, if you've got a HomeKit label on the device, you can hold your iPhone near it.
If it has neither or, more likely, you've just fitted the device somewhere you can't now reach to photograph the setup code, tap Don't Have a Code or Can't Scan? and then tap on Enter code to crane your neck and manually type it in.
There is one situation that can be slightly different and that's when the device comes with its own associated hub, sometimes called a bridge or a gateway. In that case, you need to download and use the app made for that accessory first.
Finishing up
Once you have your device in the Home app, you can give it a name and assign it to a room. Do both. Adding it to a room also adds it to the zone that room is in, too.
So without doing anything more than assigning the device to a room, you can control it alongside all your others. Say "Hey, Siri, turn on Upstairs," and every HomeKit device in your 'Upstairs' zone will turn on. And if you instead say "Hey, Siri, turn on all the lights upstairs," that's what will happen. Any other smart devices like plugs will stay off and all your lights will turn on.
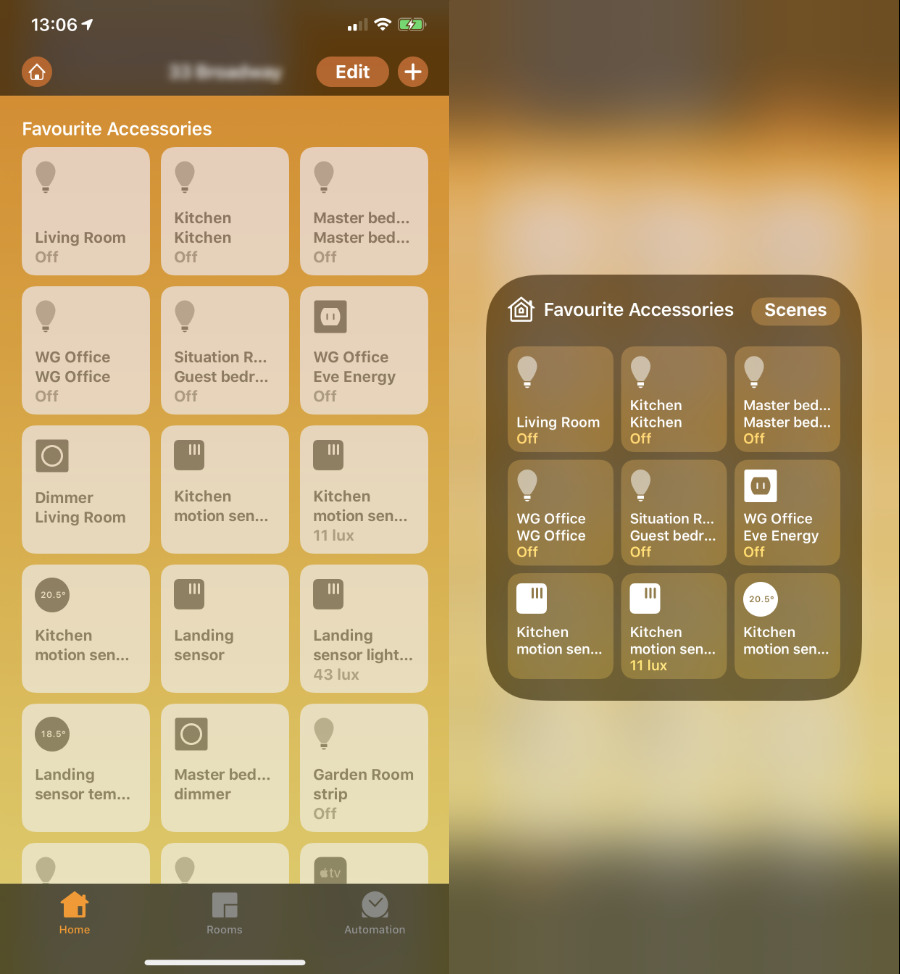
When you're naming a device, you can also mark it as being a Favorite. If you do that, the device or accessory will get its own tile in the Home app. What's more, it will also get its own tile in the version of the Home app that you can get via Control Center. Swipe down to get Control Center and you'll see a button with the Home icon.
Tap that and you'll get a grid of your favorite HomeKit devices. However, choose carefully. The Control Center version of Home only gives you a grid of nine devices. You can have as many as you want in the Home app on iOS or Mac, but each tile takes up quite a chunk of room so you will soon fill the screen and need to scroll.
Moving on
You will move your HomeKit devices around, especially at first when you still think you're only going to buy one or two of them. Typically, for instance, you'll decide that you really need a smart bulb in the den more than you do the garage, and you'll move it. When you do that, edit the device's details in the Home app.
Open Home. If the device is a Favorite, you can long-press on it to bring up some controls. At bottom right of those controls, there will be a Settings button. Tap on that and you're back editing the name and room of the device. Change it to whatever room you want and you're done.
If it's not a Favourite, you get to the same screen by tapping on the Rooms tab, then on the menu icon at top left, and finally picking the current room. The device will show up as a tile in that room and you can long-press there.

Now you know how to add, change and move any HomeKit devices, you just need to buy some. Even that needs a little planning, though.
Buying HomeKit devices
Buying a HomeKit device should be so easy and it is not, most especially because Amazon is not your friend here. Type "HomeKit bulb" into Amazon, for instance, and you will get some but they will be buried beneath an avalanche of smart devices that instead work with Amazon's Alexa system. Some will also work with HomeKit, but you cannot know that from the search, you have to go into each listing.
Even then, you'll see a prominent Works with Alexa and the word 'HomeKit' may be buried somewhere. Seriously, press Command-F on your Mac or tap in the address/search bar in Safari on iOS and type the word 'HomeKit.' You could extremely easily miss it if you just try reading the page and, if it's there at all, it could be in any number of different sections in the listing.
There is in theory a quicker way, which is to start from Apple. There is a list of all HomeKit accessories available in your country and it's maintained by Apple, so you know it's right.
Or you would hope it was. Currently, if you're in the US, then the list will show you 399 HomeKit accessories — but 99 of them are "Coming soon" or "Announced." Then as you click through the different sections, you will routinely find that a link either dead-ends with a 404 or does take you to a manufacturer's page, but there's no sign of the HomeKit device there.
And we say HomeKit isn't ready for primetime.
There are two things that help, though. One is that once you find one HomeKit device manufacturer, you can be sure they do several devices. They're likely to do ones that aren't HomeKit, but you've at least narrowed your search.
And what you can do at any time is keep an eye on the AppleInsider HomeKit news page. This is continually updated with all HomeKit news and it's the place to see who has released what.
The future
The future will be better. There were many HomeKit devices announced at CES 2019, for instance, which are slowly coming to market. The more devices there are, the better, and the more we buy then, the more stores will list then.
Plus, while there are currently more devices that work with Alexa than with HomeKit, it's increasingly common for them to be made to work with both.
So the pot of potential HomeKit devices you can buy is growing all the time. The way you install them may not get dramatically easier — though we're hopeful the Mac version of the Home app will be improved this year — but as long as you plan what you're doing, HomeKit is brilliant.
Keep up with AppleInsider by downloading the AppleInsider app for iOS, and follow us on YouTube, Twitter @appleinsider and Facebook for live, late-breaking coverage. You can also check out our official Instagram account for exclusive photos.


 David Schloss
 Andrew Orr

 Marko Zivkovic
 Wesley Hilliard
 Andrew O'Hara

 Amber Neely


9 Comments
I just read in the Washington Post that Siri keeps al the things you say, much like Alexa. Doesn’t this go against privacy policies Apple is pursuing?
https://www.washingtonpost.com/technology/2019/05/06/alexa-has-been-eavesdropping-you-this-whole-time/
Just because a device (eg, a bulb) isn't listed as HomeKit compatible doesn't mean it isn't HomeKit compatible. Most of the devices that I have are not listed as HomeKit compatible on their packaging but they are because they work through a hub that *is* HomeKit compatible. Even the Apple website which is provided by AI above lists only the bridges for some vendors and does not list the HomeKit compatible products. As a techie I understand this but the average consumer would not.