Setting a default email account can save you time and effort by eliminating the need to manually select an account each time you compose a new email.
In this tutorial, we will walk you through the steps to set your default email account on your iPhone, iPad, and Mac, so you can send and receive emails seamlessly across all your devices.

The nice thing about the Mail app on iOS and Mac is that you can set up multiple email accounts. This lets you manage emails from other services like iCloud, Gmail, Outlook, and more. Even though you set up these other accounts, you may not compose messages from them very often. This is when having a default email account comes in handy.
If you set up a default account, you don’t have to worry about the email address attached to the messages you compose or trying to remember to change it before you send your email.
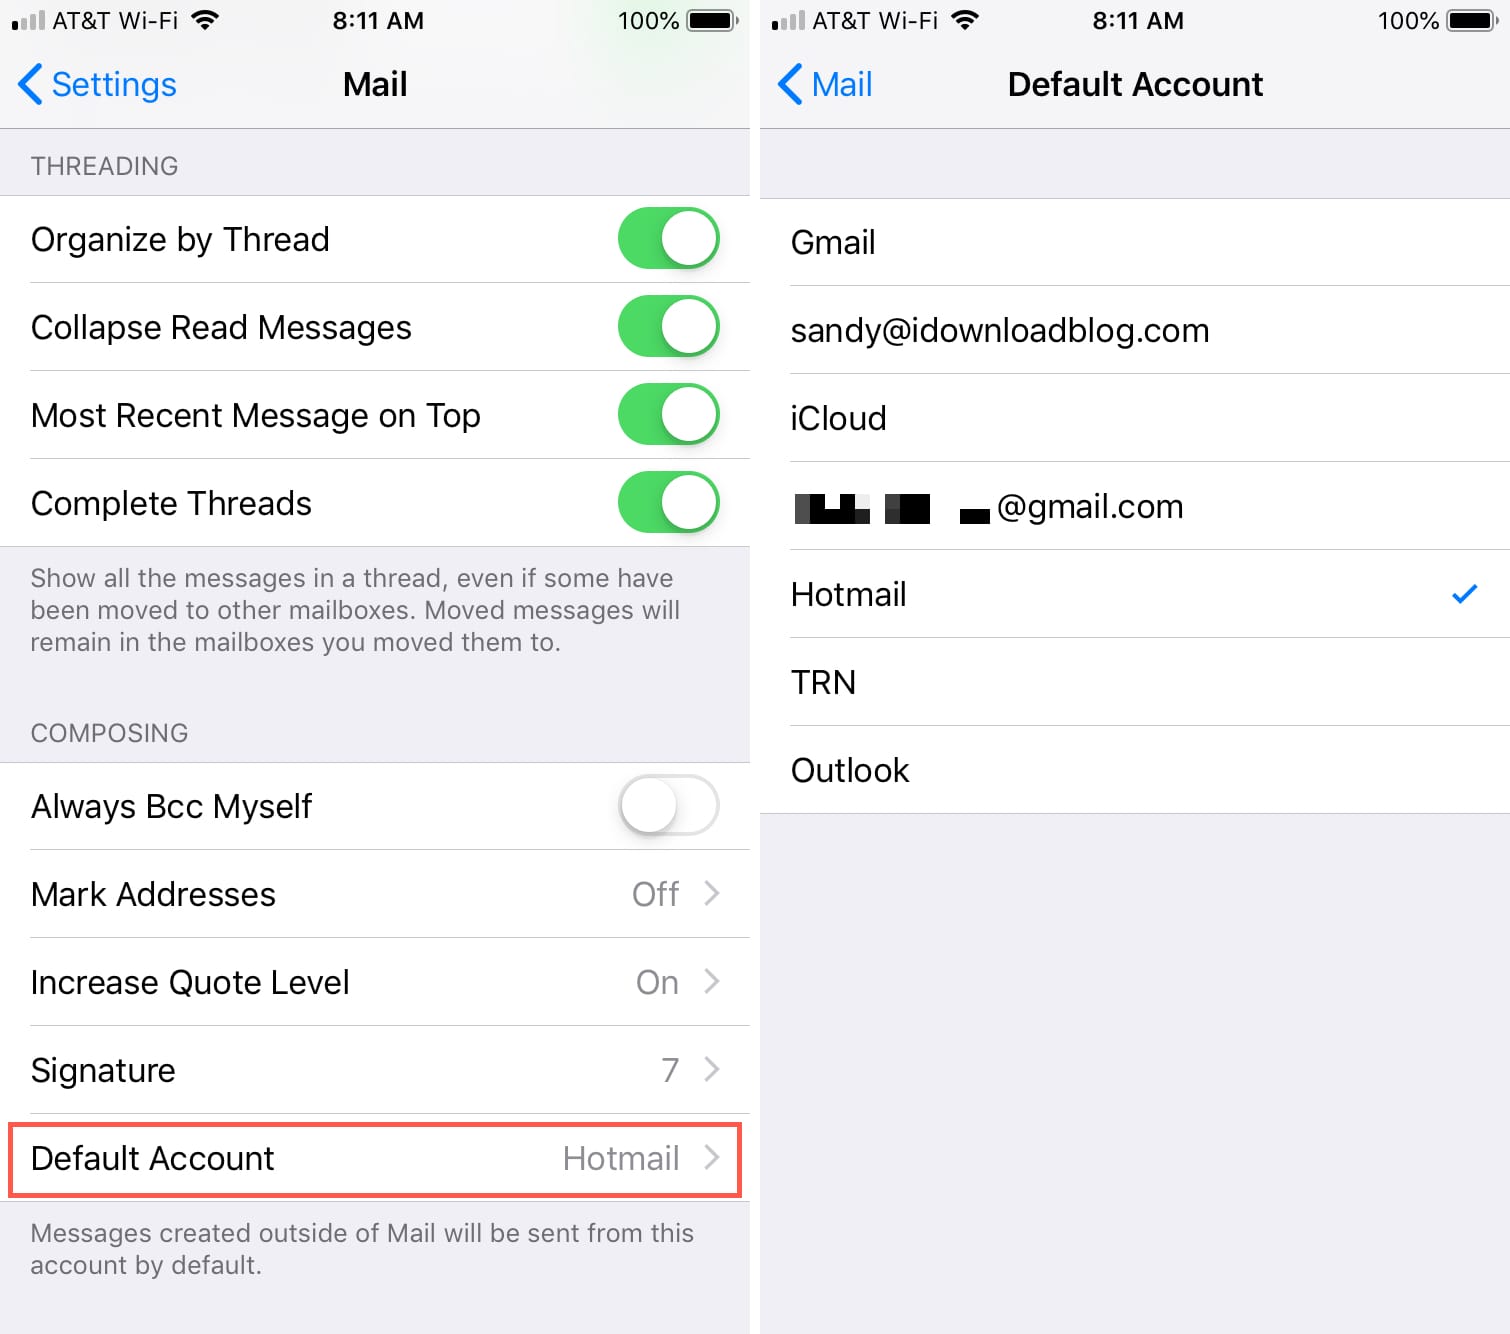
Set your default email account on iPhone and iPad
- Open the Settings app and tap Mail.
- Scroll down to the Composing section and tap Default Account.
- Select the account you want to use and come out of the Settings app.
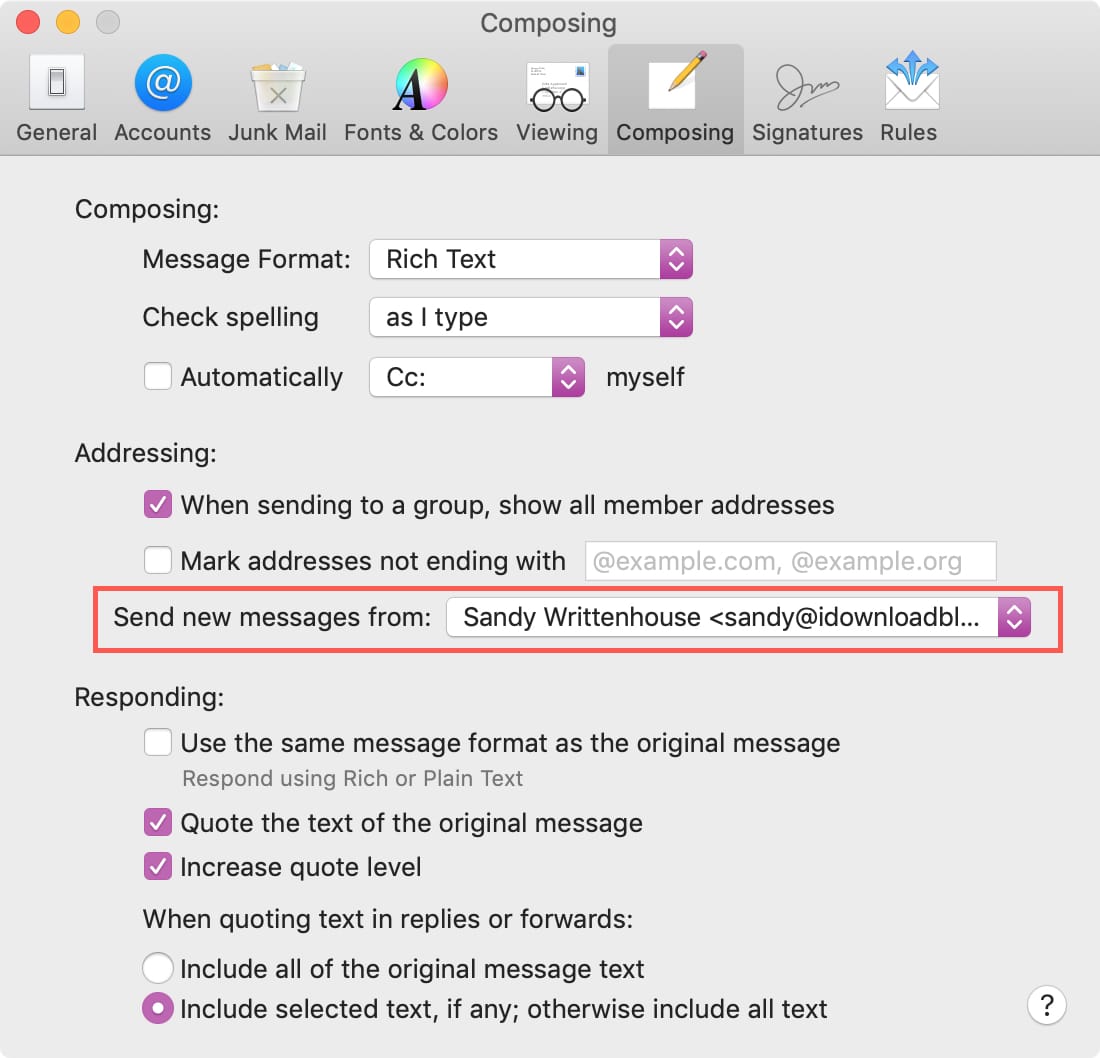
Set your default email account on Mac
- Open the Mail app and from the top menu bar, click Mail > Settings or Preferences.
- Select the Composing tab.
- In the drop-down box next to Send new messages from, choose the email account you would like as your default. If you leave it as Automatically select best account, Mail will pick the account to use based on the address of the first recipient in your email and the current mailbox.
Now, whenever you compose a new email, the default address you chose above will be the one used by Mail.
Other tips for the Mail app: