How to use your Mac to become a paperback writer: Part 1
 William Gallagher
You can become a full paperback and e-book publishing house using just your Mac, key applications, and online printing companies. First you have to write the book, though.
Back in the earliest days of the Mac, we used to produce these one-sheet PageMaker documents out of our LaserWriters and think it amazing. It was amazing, but only compared to the dot matrix nonsense we had before. Today you can sit at your Mac and produce an entire book that is indistinguishable from one any publishing house makes.
Don't let us make it sound easy. There is a lot to do, and it takes everything you know how to pull off on your Mac, but it's achievable and the results are perfect.
Before you self-publish
While we're going a lot further than simply making an e-book, still this is all self-publishing and you need to decide whether that's right for you.
If you write a book that gets picked up by a publisher, you will instantly get far greater distribution. Their copyeditors and designers will unquestionably make your book better than you ever could by yourself.
Oddly, in our experience, the publisher may not publicize the book as much as you'd expect. And you will definitely have to promote it yourself.
Plan out the job
Writing a book is easily as much about organizing as it is typing. There are so many different things to think about that the text is just the start.
Ultimately, you need to use your Mac to get to the point where you have that text in a format that a printing company can use, most often a PDF. There much also be enough text to make it a book.
The number of words you need to make a paperback varies depending on the size of the book, called its trim, the font, and a dozen other choices to do with layout. However, for example, a regular 5in by 8in paperback will have no fewer than 30,000 words.
You can publish less, but then you're making a stapled pamphlet. For a proper paperback with a spine, you're making what's called a perfect-bound book.
Next you'll need all of the cover done. That's the front image, the back blurb, and the spine. We'll cover all of this in part 2 when we detail producing the book.
Preparing the text
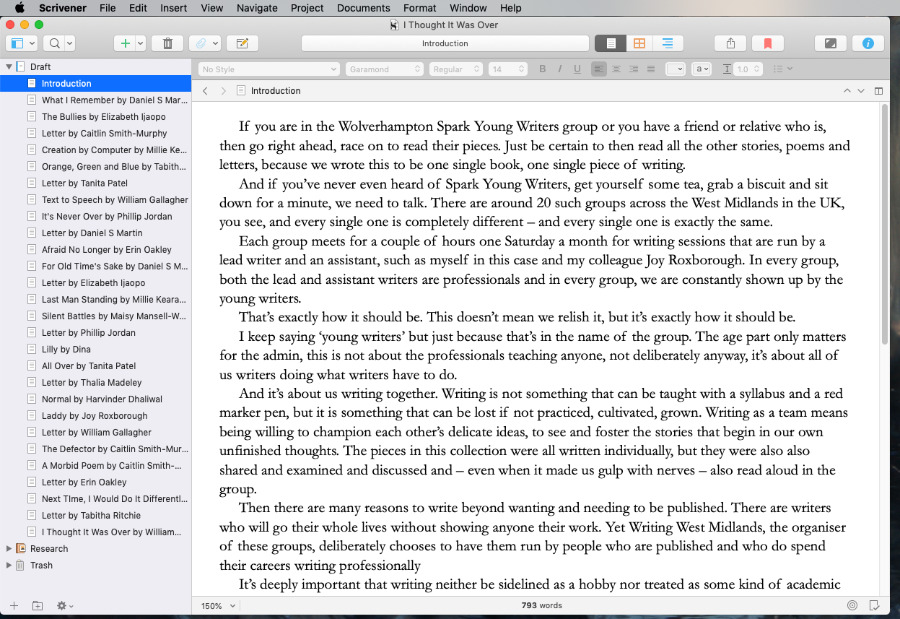
First, write your book. How you do that is as up to you as what the book is about, though to be clear, everything we say here applies equally to fiction and non-fiction.
Since you will need to keep track of all the different chapters or sections of the book, though, we recommend a combination of Scrivener and OmniOutliner.
Scrivener is a word processor that's designed for long-form work. Its ability to let you focus on just chapter 3 now, but later both 3 and 17 together, makes it a better tool than Word.
One reason we prefer Scrivener to Word, is that it's great for assembling materials even if they're not going to end up in the book. So we have one Scrivener document on our Macs, iPads and iPhones. Wherever we go, we have all of our text but also all of our research.
The same document can hold links to websites, PDFs we've collected, or rough notes we've made.
While we're going to use a different app for the main production of the book, Scrivener is like a writing studio. It's the app you use for everything you do in your writing, from the actual typing to the editing and the revisions.
It can also be where you do outlining. If you're the kind of writer who dislikes planning ahead too much, you might expect to ignore outlining. However, an outline needn't be a plan for the work you're going to do, it can be a way of organizing what you've already done.
Scrivener contains an outliner, and so does Word, yet we still go for the separate third-party app OmniOutliner.
OmniOutliner lets us jot down ideas or note what sections are finished. It then lets us move those elements around to find the best structure for it — and to check that we weren't duplicating anything.
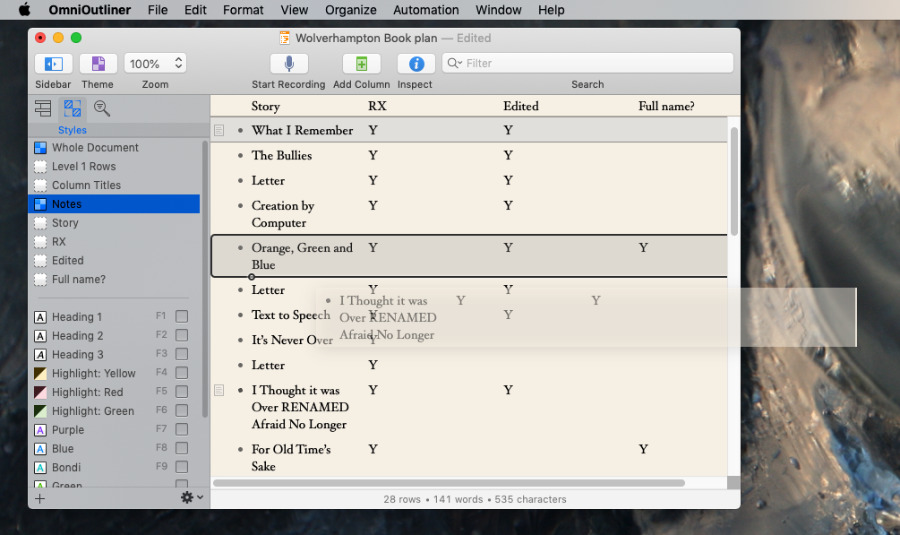
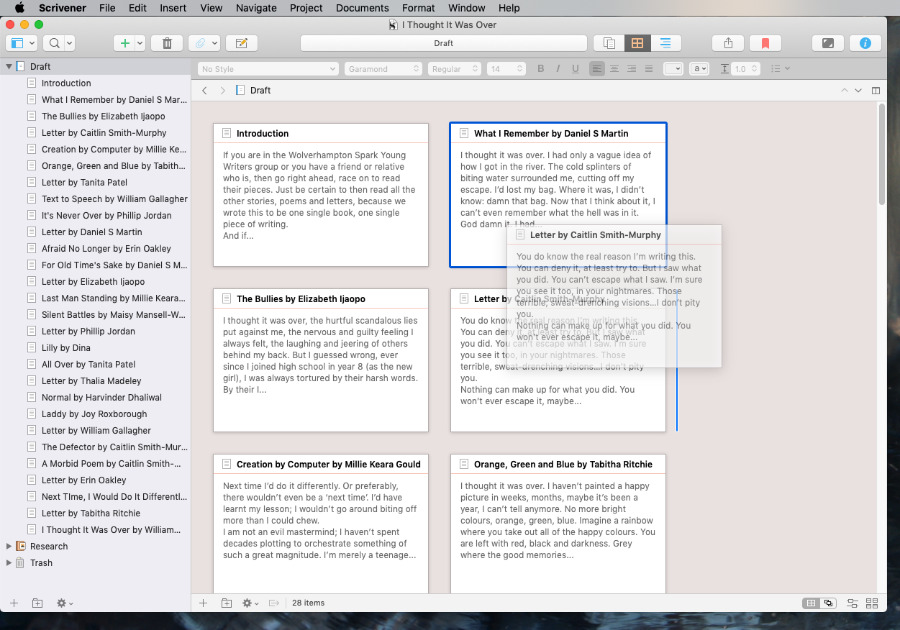
The book we produced as research for this article was a piece of fiction called "I Thought It Was Over," and it was written by a group of young writers. OmniOutliner let us track who had delivered their text plus whether we'd got it into Scrivener and were finished with it. As we were dealing with younger writers, we also had to check with their parents about whether we could use their full names, and OmniOutliner let us keep a note of who had said yes.
OmniOutliner is the best tool we know for juggling, planning, and structuring complex ideas of any description, so it's particularly fine for book-length projects.
Collaboration
Ultimately though, your software and your Mac can only do so much. You have to manage the project and you have to do the writing.
If you were writing a manuscript for a publisher, you would now solely concentrate on that and on editing issues that they come back to you with.
Eventually, you might be talking to them about descriptions of the book, though they are likely to have their own copywriters to do this.
As you're going to be your own publisher, think ahead. Alongside writing the manuscript, think about all of the elements that will have to go into a book.
When we produce an e-book and a paperback in the next article, you'll need the book's text plus descriptions or blurbs — and you'll need a cover. All of which is covered in part 2.
Keep up with AppleInsider by downloading the AppleInsider app for iOS, and follow us on YouTube, Twitter @appleinsider and Facebook for live, late-breaking coverage. You can also check out our official Instagram account for exclusive photos.


 Malcolm Owen
 William Gallagher and Mike Wuerthele
 Christine McKee


 Marko Zivkovic