This has been a year of new creative projects for me. In addition to some personal endeavors that have yet to see the light of day, I joined Federico as the co-host of Adapt, a new iPad-focused podcast on Relay FM. Learning the art of expressing my Apple takes in speech rather than text has been an adventure in itself, but I’ve also grown to cultivate a very different skill: audio editing.
When I was charged with editing this iPad-focused podcast, I naturally turned to an iPad-based editing tool: every episode of Adapt has been edited in Ferrite Recording Studio, and I’ve never even tried using another app. Most podcasters I’m familiar with edit in Logic, but my Mac mini is purposely utilized as little as possible, so I knew when I dove into podcasting that I wanted an iPad-based solution if at all possible. On multiple occasions I’ve heard and read Jason Snell extol the virtues of Ferrite, so that was the app I turned to.
Getting started with podcast editing, even with an app like Ferrite that’s built for it, can be extremely intimidating. There are lots of settings, and unless you have previous experience working with audio, you likely have no idea what any of them do. I learned a lot from Ferrite’s user guide in the early days, and the aforementioned Jason Snell articles on Six Colors. And before long, I found an editing setup that worked well for me. Now, I want to share it with you.
Everyone has their own preferred methods of editing podcasts, so while I hope documenting my own workflow will be helpful, what I share shouldn’t be taken as prescriptive in any way. Ferrite offers a variety of tools and means of working with it, many of which I don’t use. For example, I’ve heard the app pairs nicely with the Apple Pencil, but I never use my Pencil in editing – I prefer keeping my hands on the keyboard as much as possible, so fumbling with the Pencil would just be cumbersome.
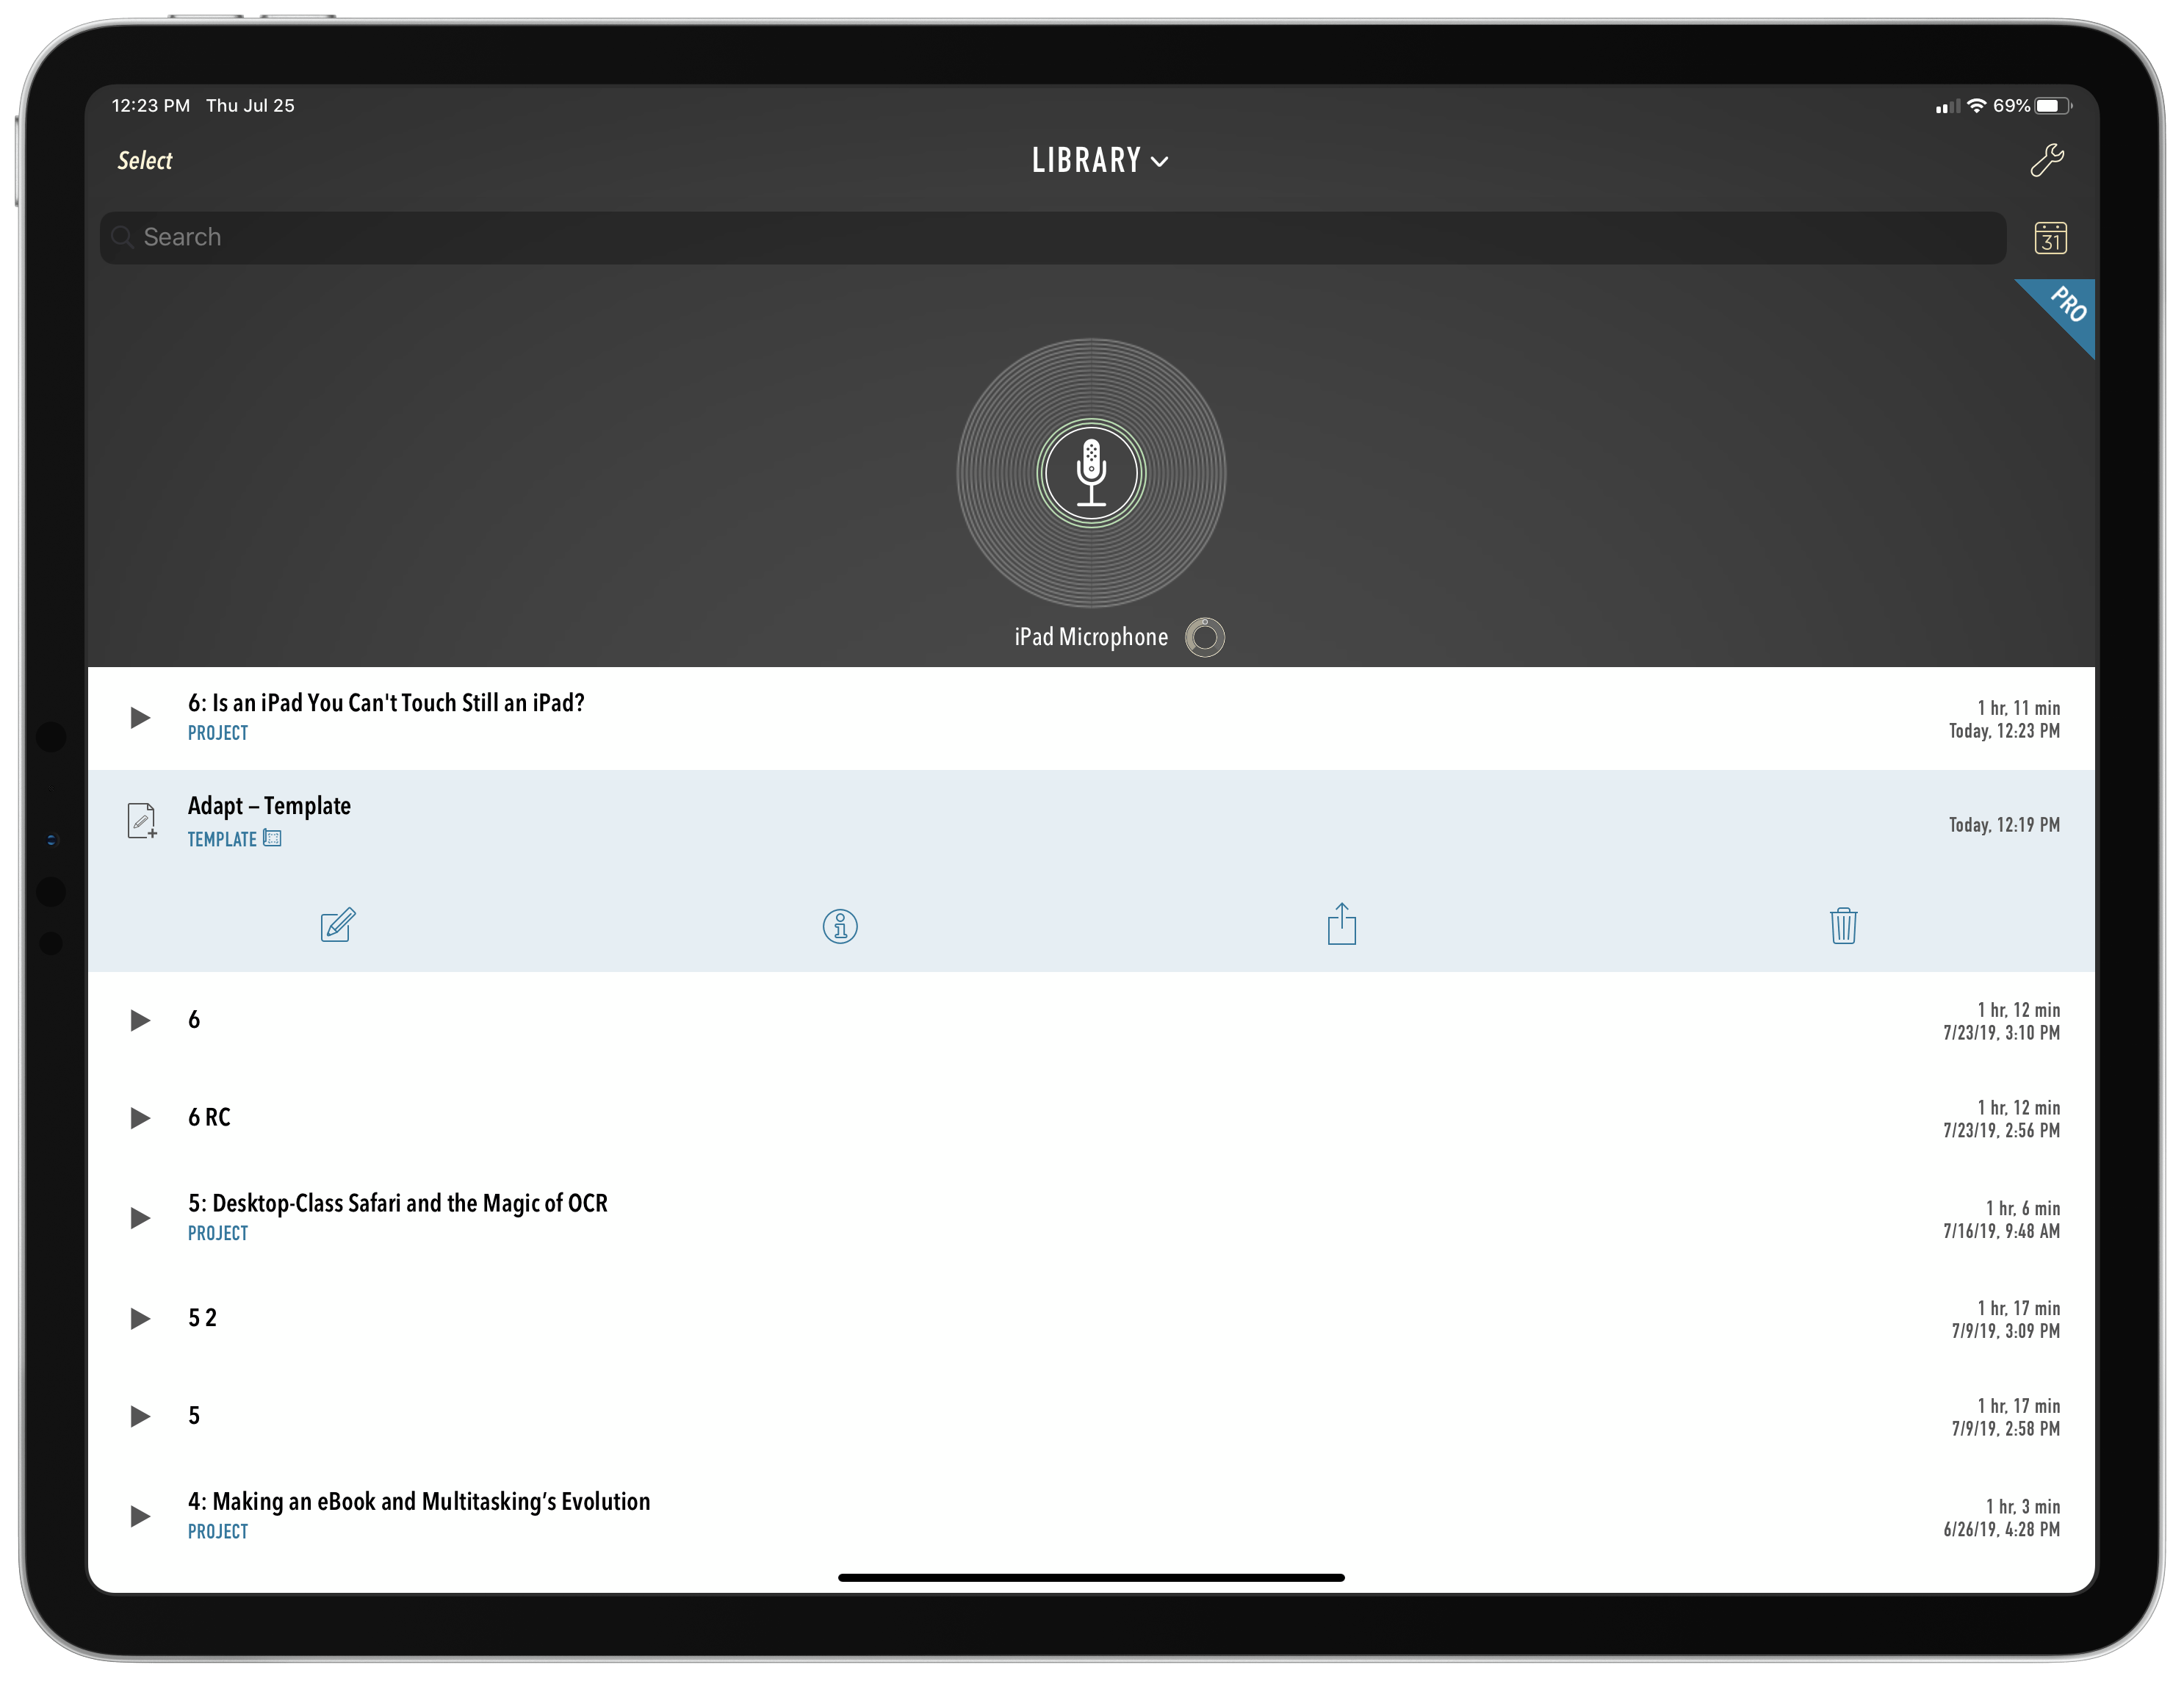
Explaining the start of my editing workflow requires going backwards a bit. Every new episode of Adapt begins with creating a project from an existing template I’ve set up. Templates, however, can be only be formed when you first have a project.1 And in Ferrite, you can’t create a project without first having some audio to work with.2 So I start with a new project created from a template, but to create a template in the first place you need an initial project, which requires some audio. It seems confusing at the start, but once you’ve done the initial template setup it’s easy to get going with each new episode.
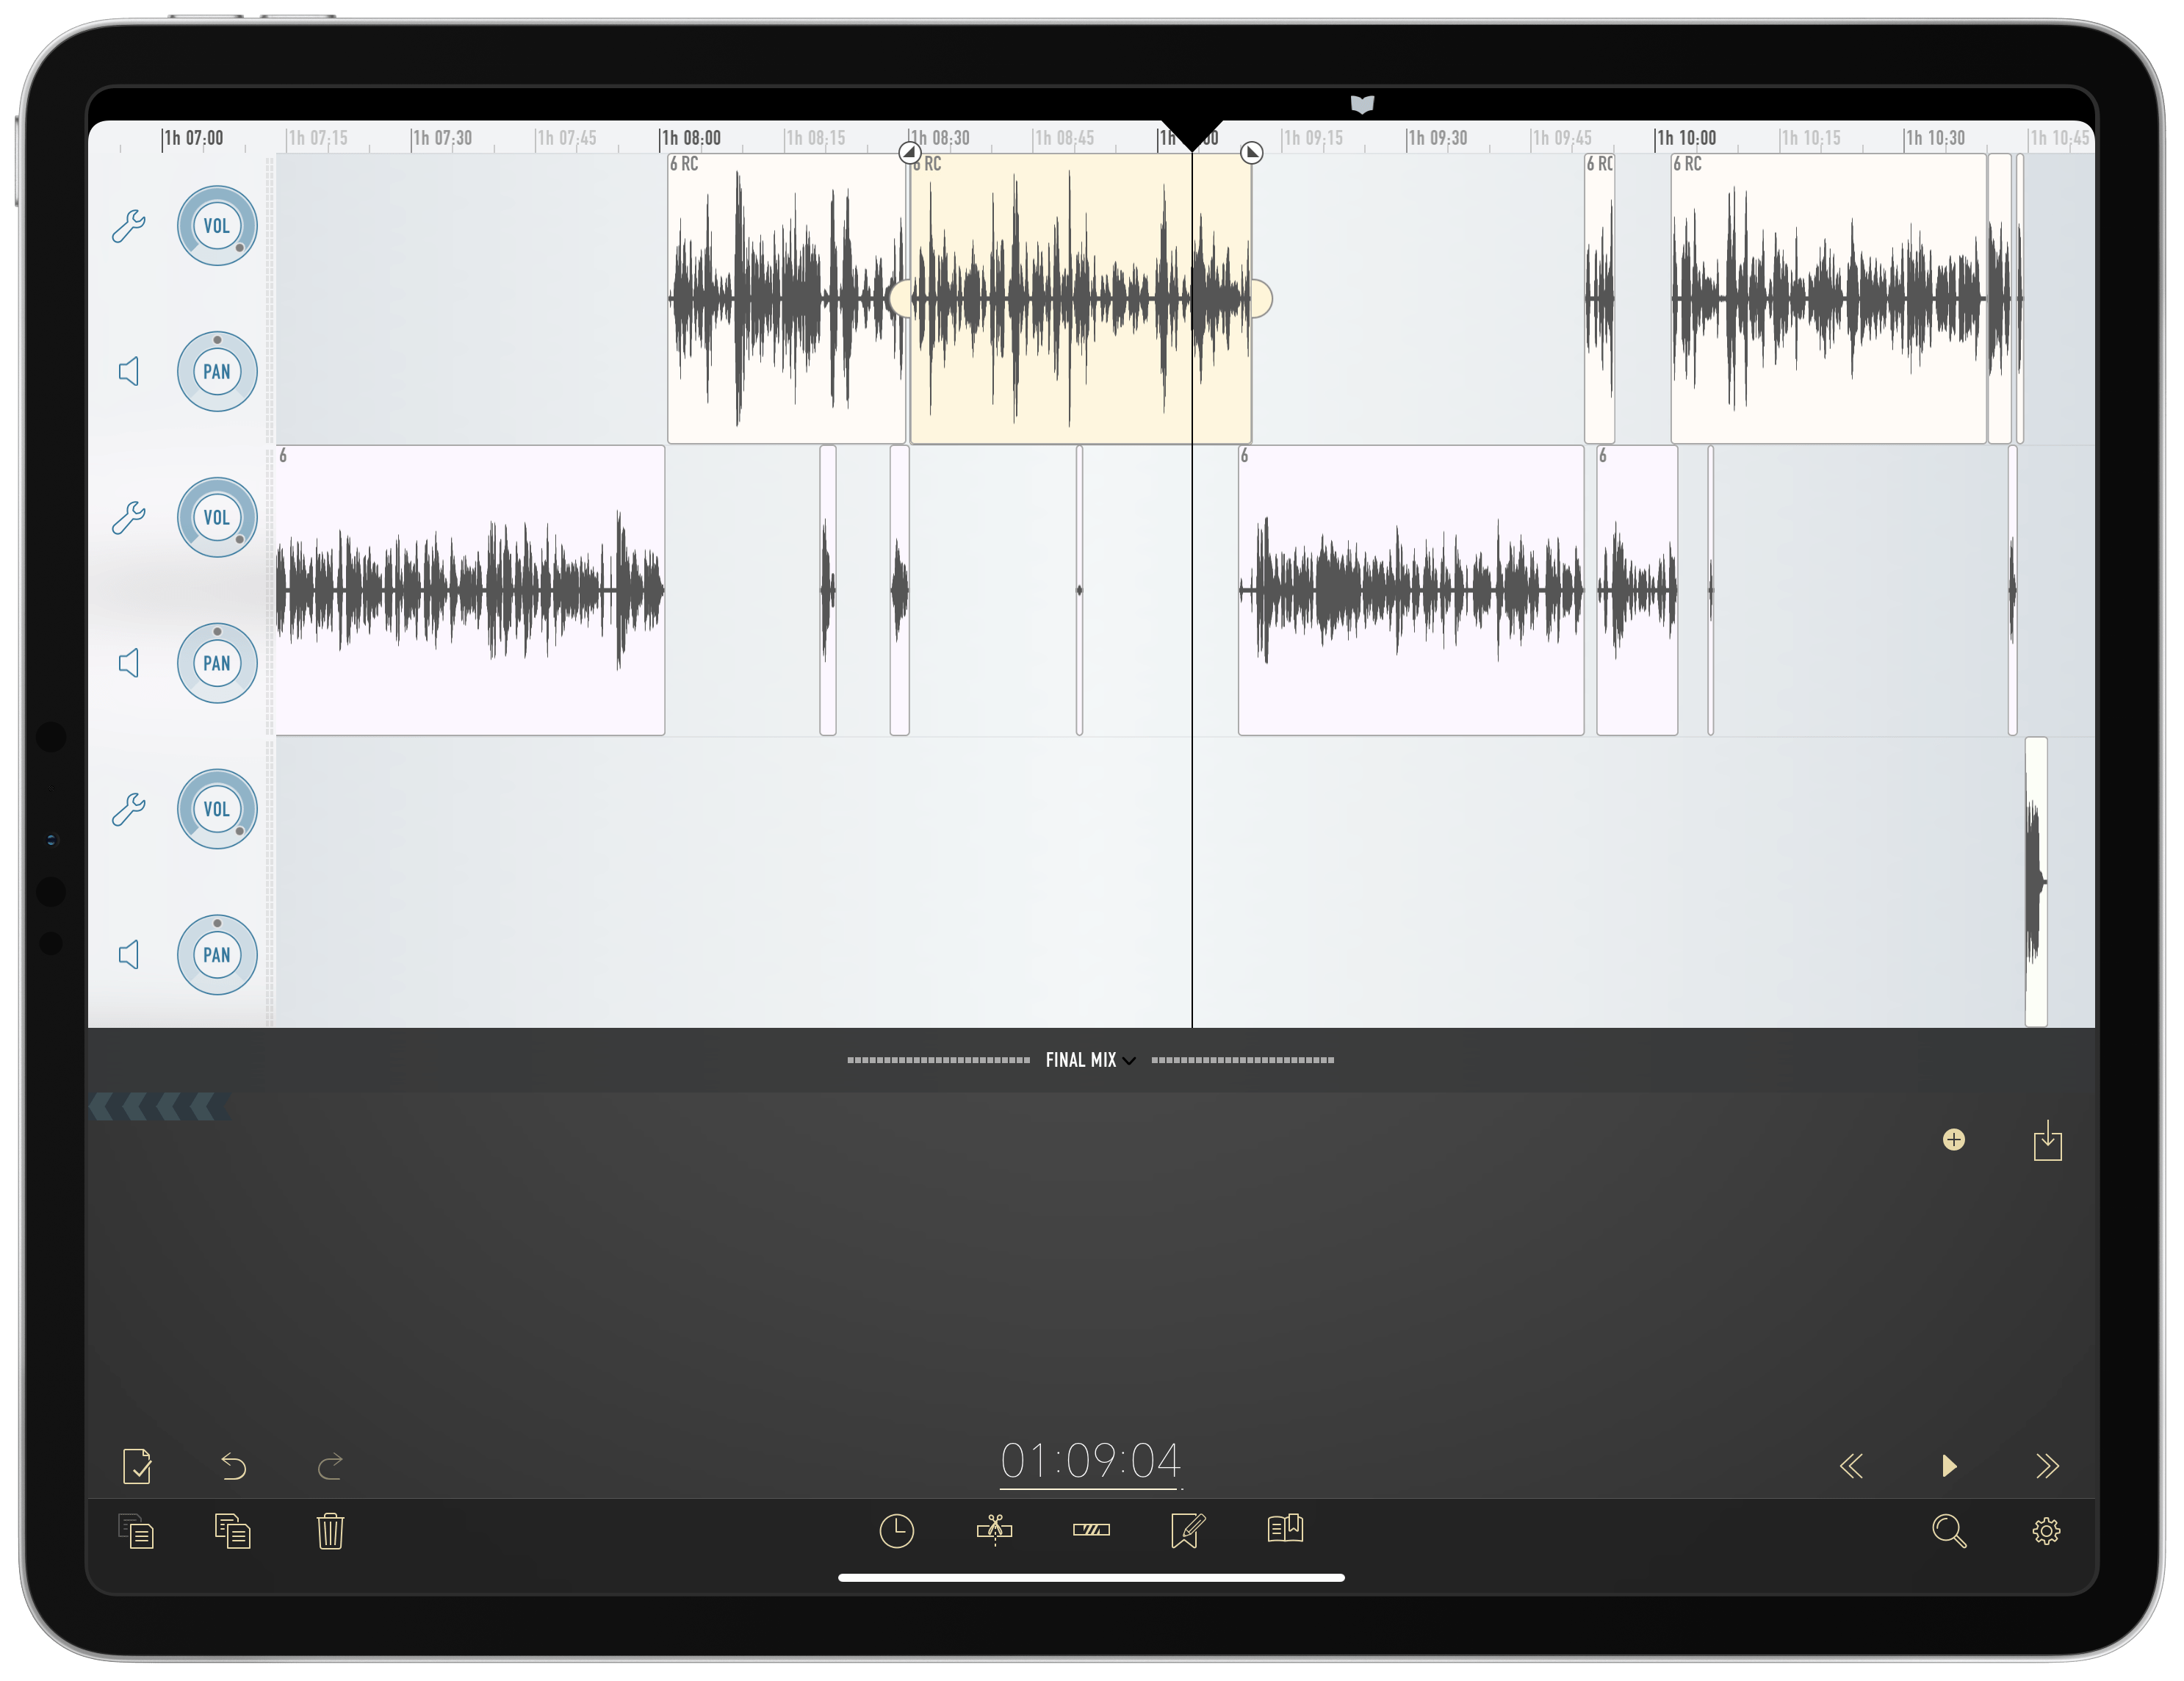
The template I use for Adapt includes three tracks where audio can live: the top track is where I put my own audio, the middle track holds Federico’s, and the bottom track perpetually contains our intro and outro music. The intro music sits at the start of the episode, while the outro is placed about an hour in because that’s the average length of our show. The other two tracks, while empty at first in the template, importantly retain their respective effect settings that I previously configured.
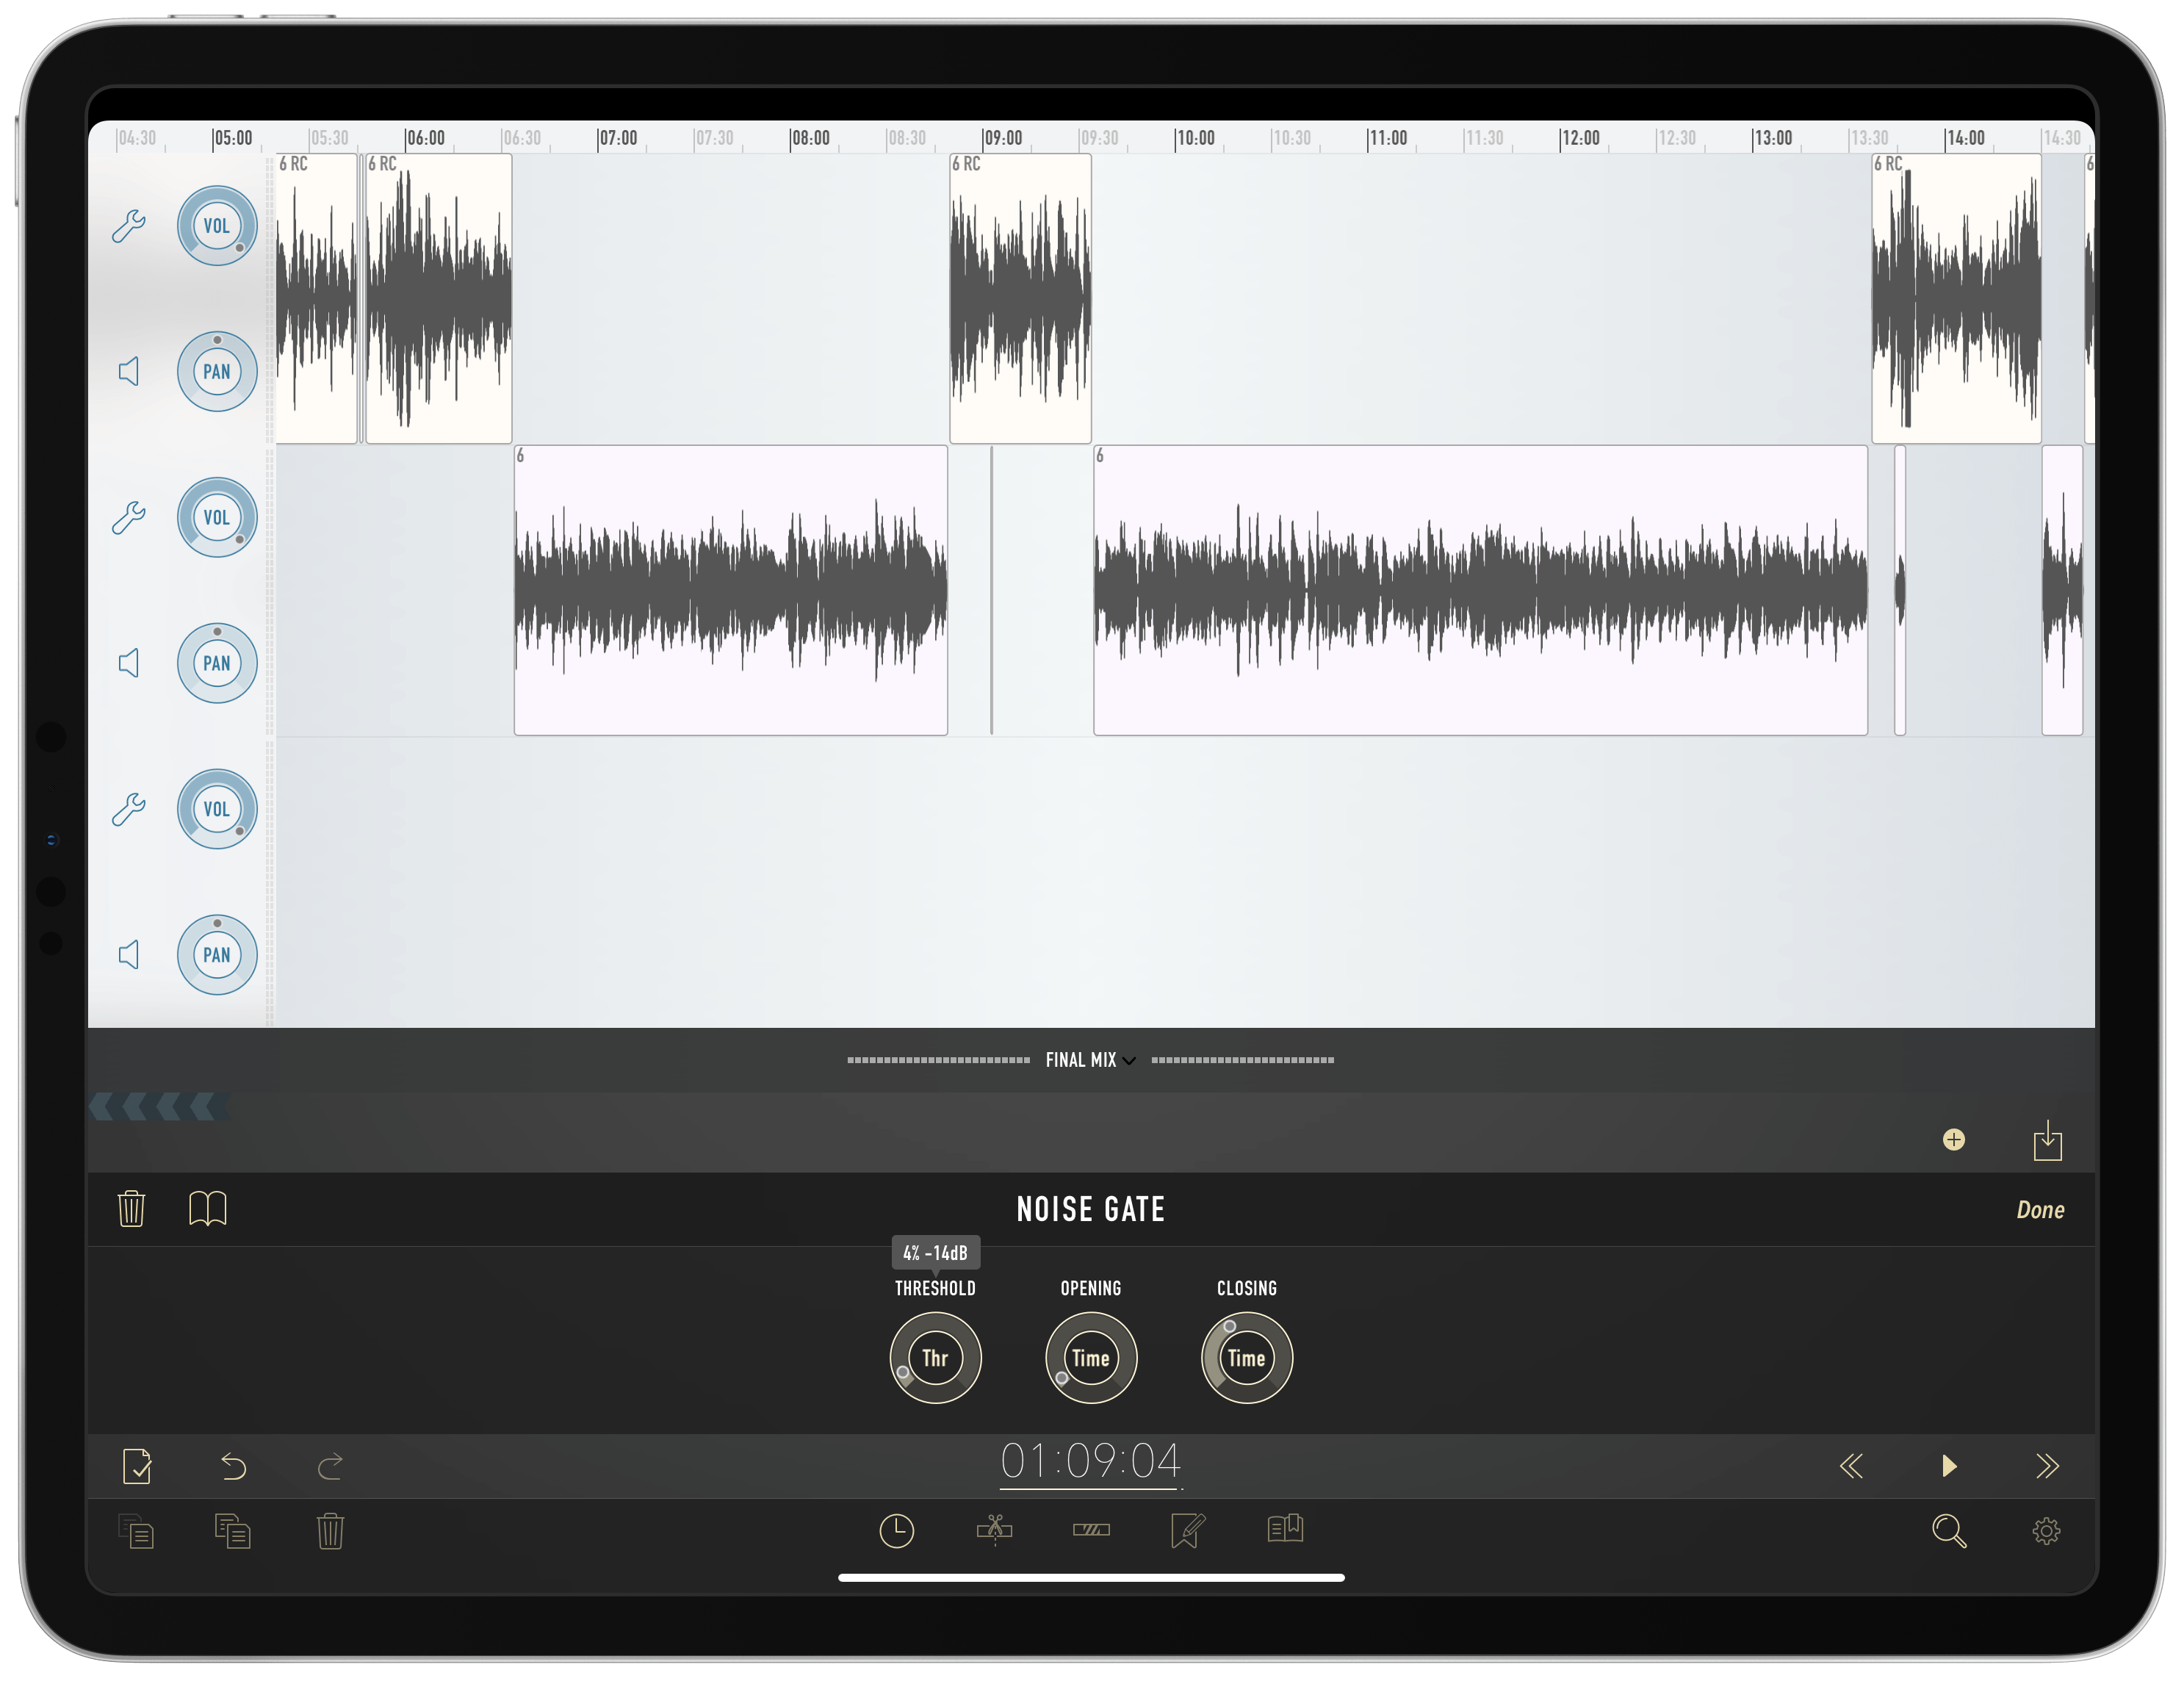
For both my own track and Federico’s, I’ve applied Ferrite’s Noise Gate effect as part of the Adapt template. Currently the same settings apply to both of our tracks: the Noise Gate has a -14db threshold, 30ms opening time, and 200ms closing time. It’s taken a lot of trial and error making minor tweaks to arrive at these levels, so they may change again, but for now they work well for me. Noise Gate cuts out noise below a certain threshold, which I primarily use to eliminate unwanted breath sounds but it also helps with water gulps and other undesirables.
Besides having all my track needs set up automatically, another benefit of creating new projects from templates is that metadata like the show artwork and show name don’t need to be entered more than once. I set them months ago and they’re saved with my template.
After Federico and I finish recording an episode, I hop into Ferrite, find my Adapt template, and tap the new project button on its left side. I then rename the project with the new episode’s title and update a couple other pieces of metadata, then enter the editor.
My first step from here is importing the appropriate audio files. Tapping on a track presents the Import option, which loads Ferrite’s Library – but my files aren’t there yet, so I hit Import again, add my recording to the Library, and select it from there; I repeat the same process for Federico’s recording.
After the files are loaded in the editor, I tap each one and select the Strip Silence action, which breaks a long, continuous audio stream into a whole bunch of smaller snippets. I find this an essential step for making my life easier during the full edit – cropping clips is a lot quicker when you don’t have to first split them out of a longer track. Once this step is done, I’m ready to truly begin.
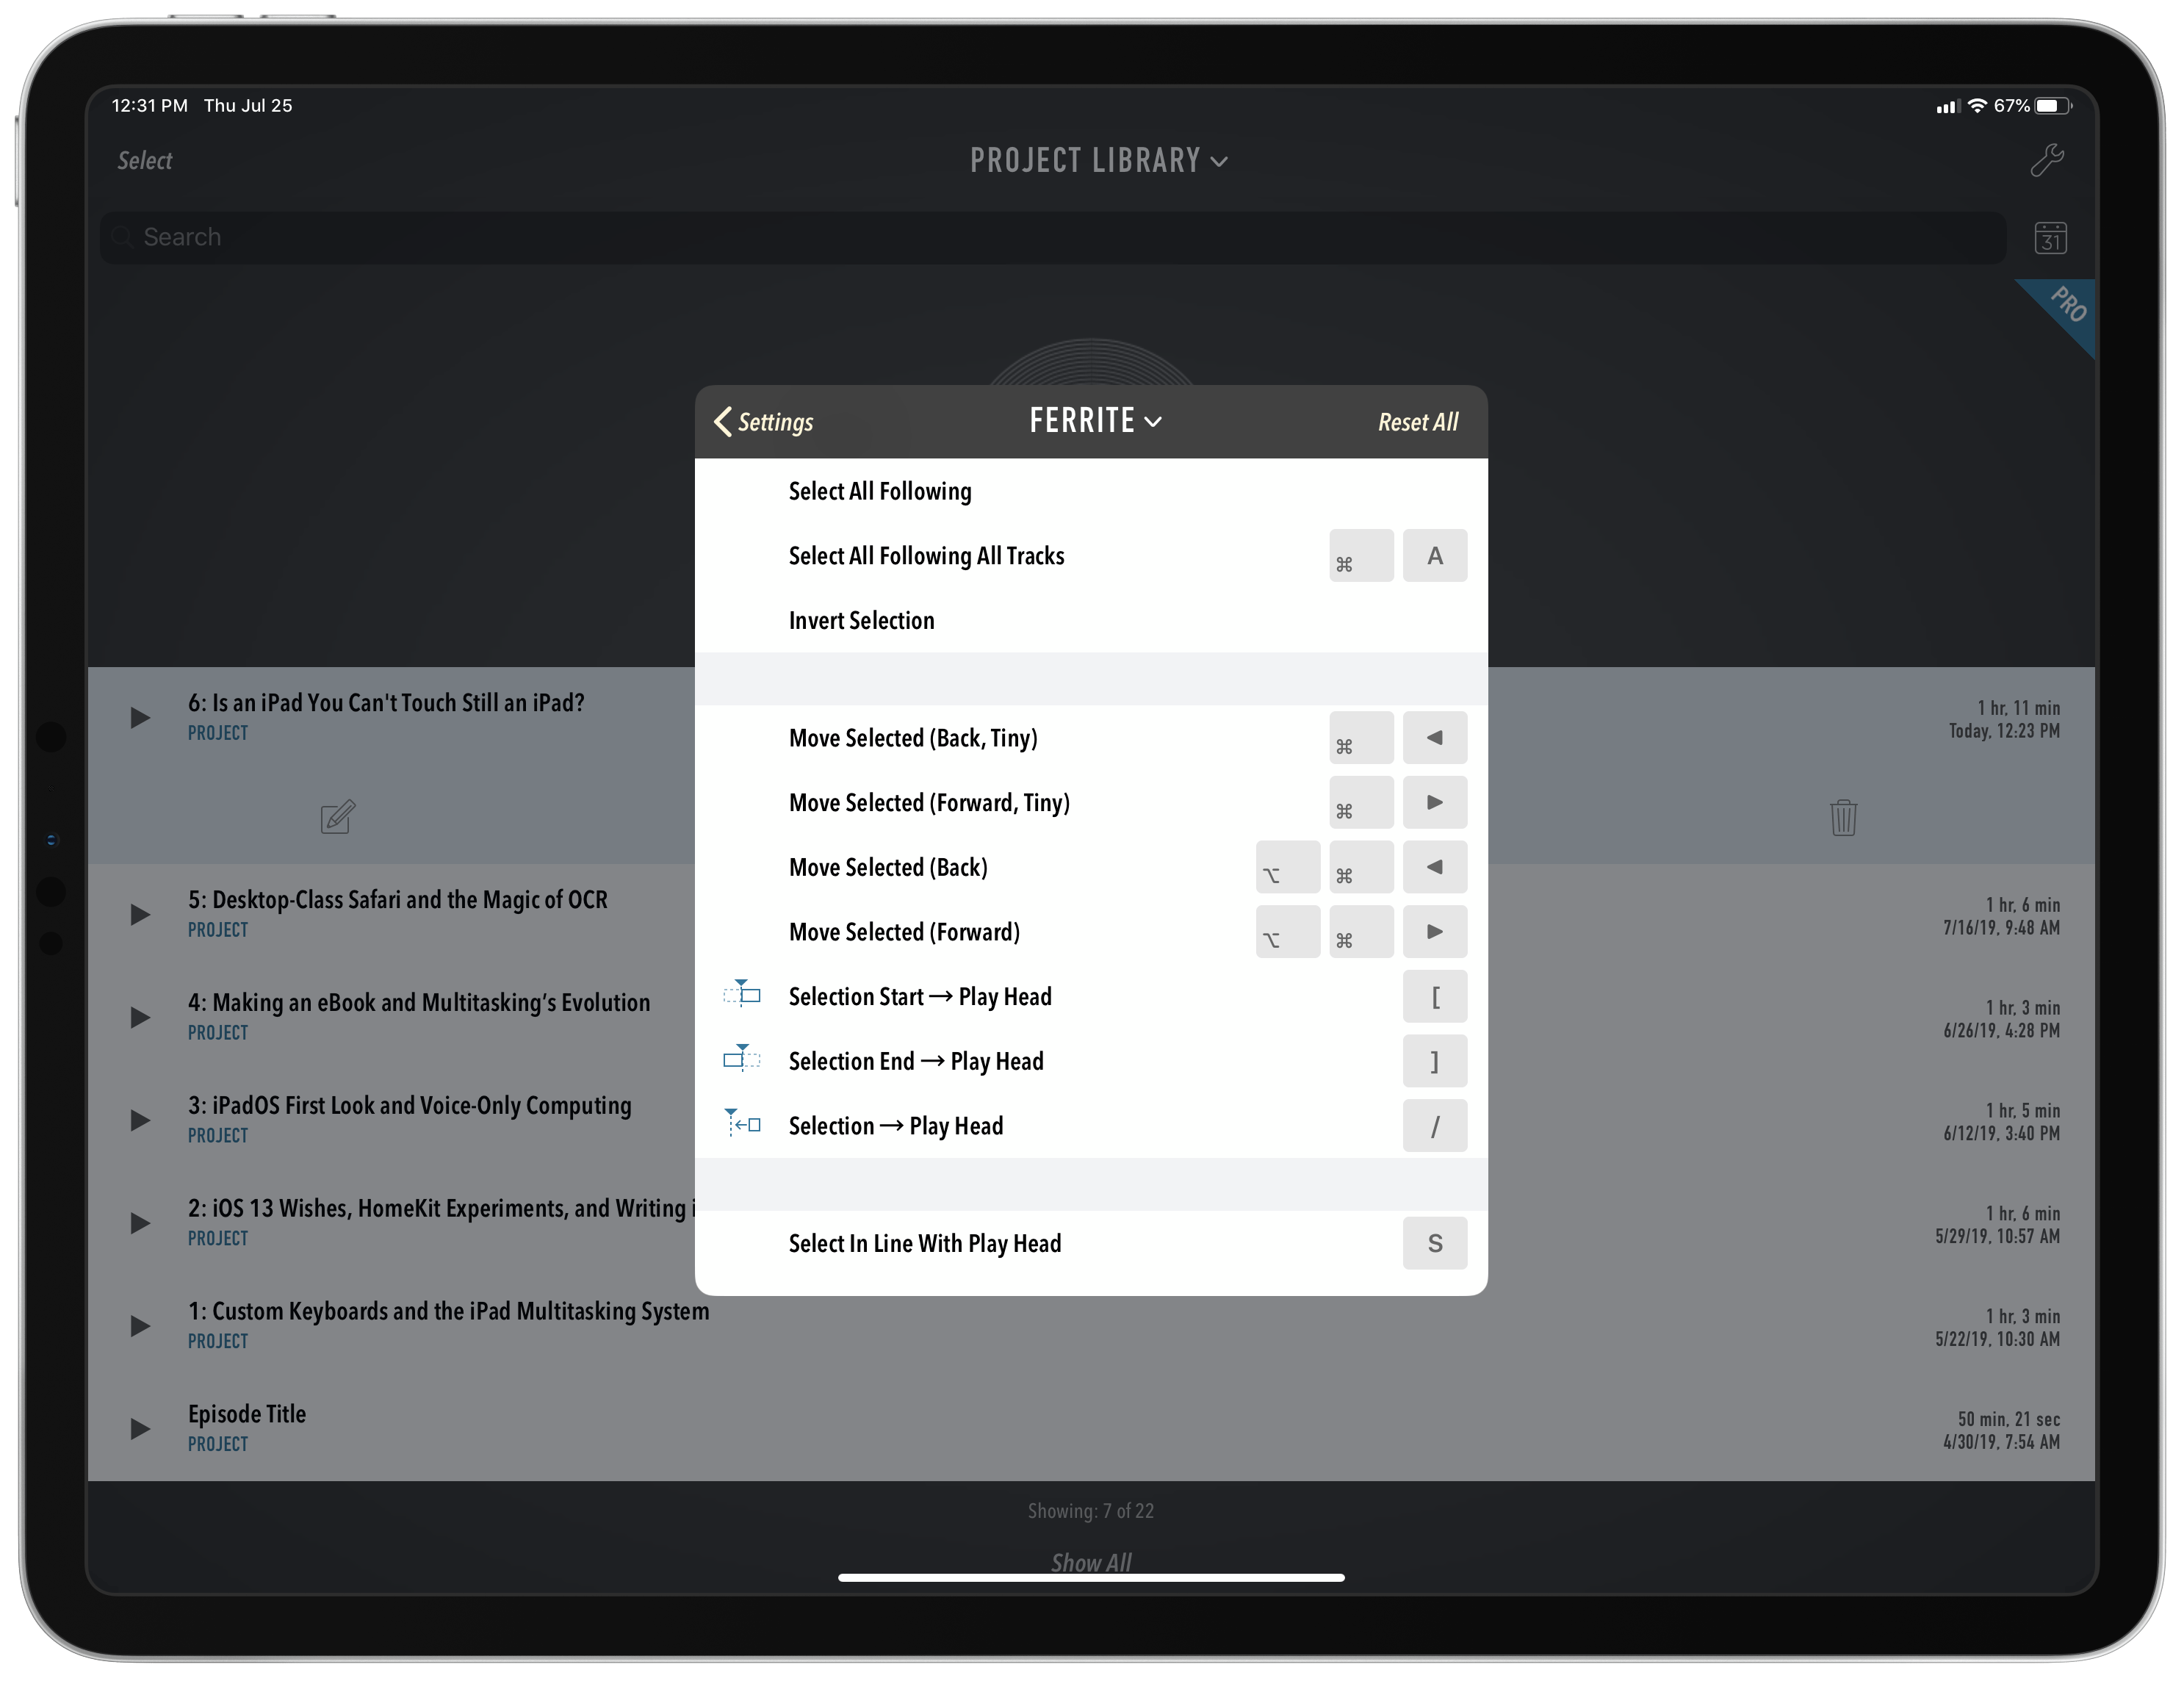
As I already mentioned, I like to keep my hands on the keyboard as much as possible while editing, and I’m able to do that because Ferrite offers an extensive set of keyboard shortcut actions, all of which can be customized to your liking. The full set of actions is far broader than what I actually use, but the ones I do use are invaluable in my editing process. Listed below are the shortcuts I rely on, and the keystrokes I’ve configured for them.
- Spacebar = Play/Pause
- Left/Right Arrow = Rewind/fast forward three seconds
- B = Adds a chapter bookmark with title
- S = Selects what’s under the playhead
- Command + A = Selects all following audio in all tracks
- Command + S = Splits the selected track at playhead
- Command + Delete = Deletes selected track
It’s rare to find an iPad app that exposes practically every piece of functionality as a keyboard shortcut; it’s even rarer to find one that lets you customize each of those shortcuts to whatever keystrokes you prefer. These features are common on the Mac, but Ferrite is one of the only iPad apps that exposes this level of power and flexibility.
Some editors of conversational-style shows such as Adapt don’t listen to the full episode in the edit, and instead only remove unwanted bits they made note of while recording. Perhaps some day I’ll do that myself, but for the time being I prefer working through episodes from start to finish, making tweaks as I go based on what I hear.
As I listen through an episode, I’m adding chapters where they’re needed, as well as cutting out moments where we had to stop talking briefly, perhaps due to sirens outside my New York City apartment window. More than those things though, I like to listen through the whole episode so I can make smaller tweaks that result in a better finished product. These smaller tweaks fall into two basic categories: effect-induced aberrations, and speech polishes. The former refers to tiny blips that are typically leftovers from the noise gate’s work. At times the gate will remove most of a breath, but not quite all of it; a tiny bit gets through, resulting in an undesired aberration, which I trim out. Speech polishes are things like shortening excessive pauses between words, when appropriate, and eliminating ‘um’ and ‘uh’ sounds when doing so wouldn’t make the remaining speech sound unnatural.
My process for making these smaller cuts involves some of the keyboard shortcuts mentioned above. When I hear something that needs removing, I’ll do the following:
- Pause using the spacebar.
- Hit S to select the current clip.
- Use Command + S to split the clip at the selection point.
- Via touch, crop the new clip to remove the unwanted audio; if I’m making a very small cut, I’ll first pinch to zoom in so my crop can be more precise.
If all I’m removing is a small aberration in-between words, I can stop there. However, if the audio I deleted leaves an unwanted gap between two clips, I have a few more steps to complete.
- Hit Command + A so the current and all future clips are selected.
- Pick up the selection via drag and drop and move it left to the appropriate spot.
- Finally, I either use Left Arrow to move back a few seconds, or do it manually via touch, before hitting the Spacebar to resume playback and ensure the edits accomplished what I intended.
Depending on what shape the recording is in, and how much work it needs, I may perform this sequence of actions just a few times per episode, but in some cases I’ve even done it dozens of times during a single edit. It’s become such a habit though that it takes only a few seconds per occurrence.
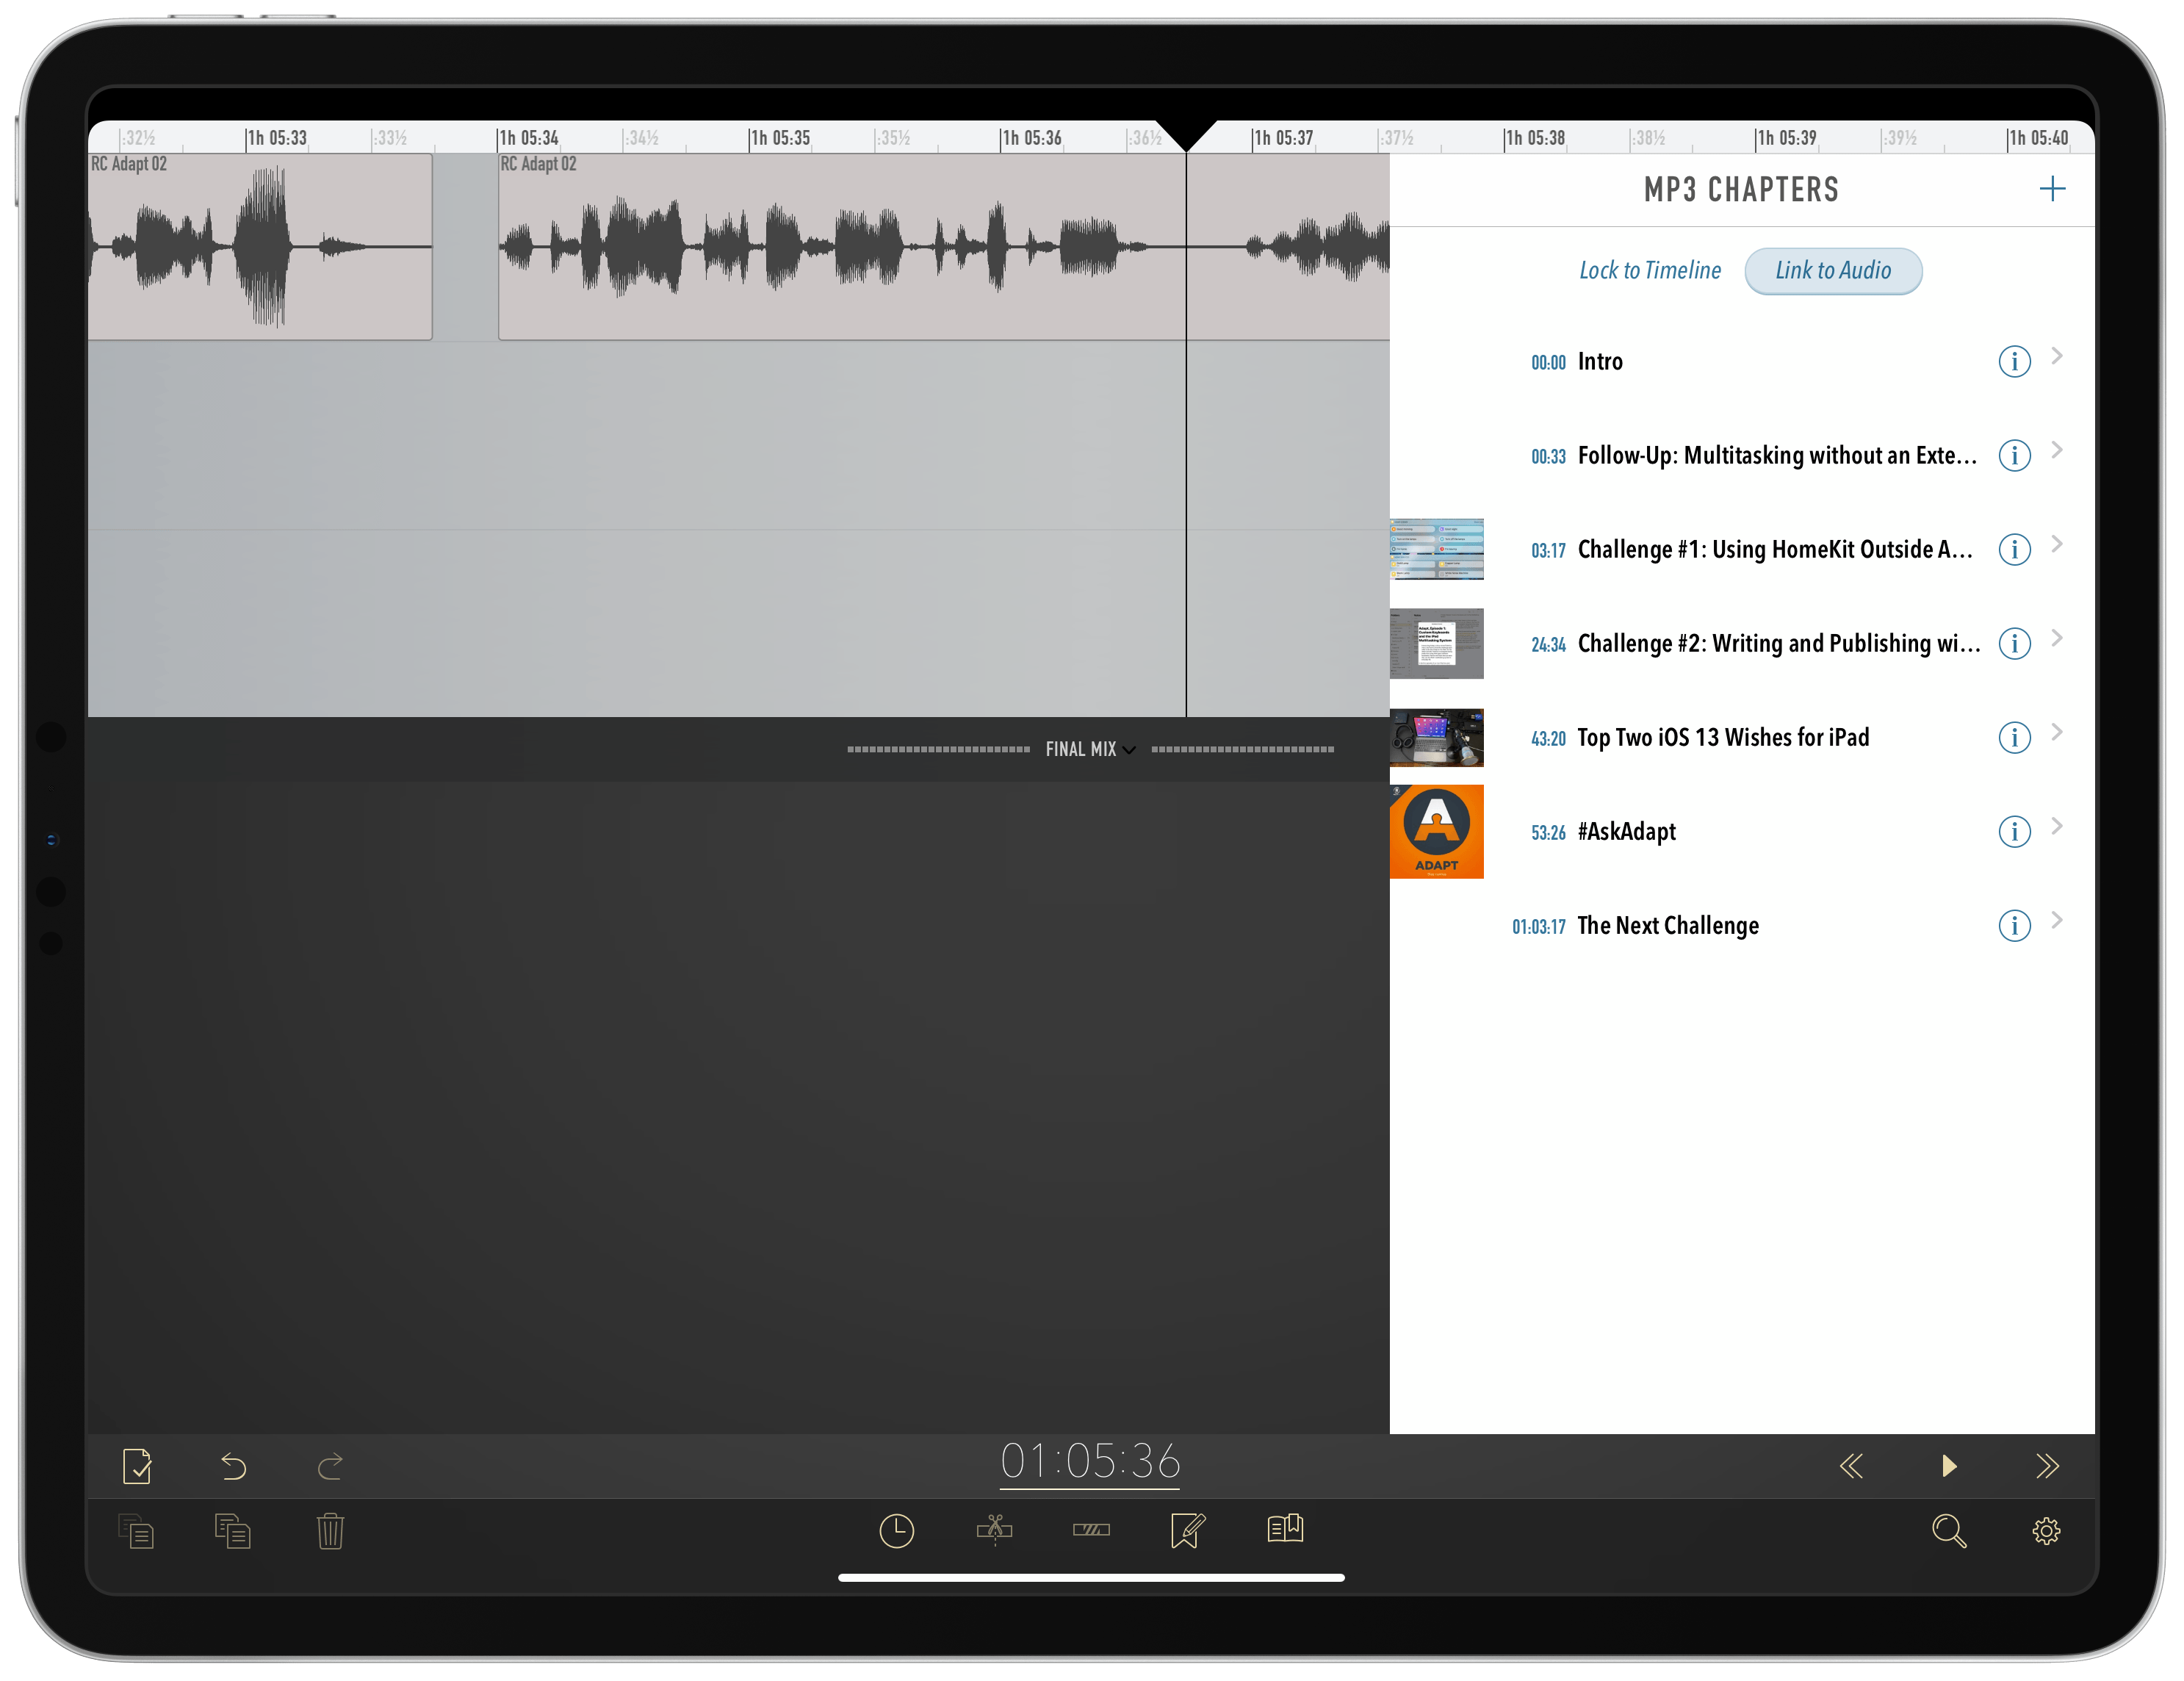
After I’ve listened through a full episode, it should have all the edits and chapters it needs to then export and upload to Libsyn, where Relay FM hosts its audio. The only potential work I may still need to do is add chapter-specific artwork or links if the episode calls for it; if so, that’s done from the chapter editing screen, which I have configured as a button in Ferrite’s shortcuts toolbar at the bottom of the screen. After that’s done, then from Ferrite’s Library I hit the share icon and save the finished episode to Apple’s Files app, where it’s ready to add to Libsyn.
Over the past few months of podcast editing, I’ve found that so much of the work involves setting yourself up for success. If you have a poor recording, or you don’t know which effects or automations to use, or you haven’t optimized keyboard shortcuts, Pencil gestures, or a template to your needs, then the editing process can become a major slog of manual work that takes far too long. However, when you land on the right preparation and set up, the edit becomes simpler and less time consuming.
Since I’ve never tried any other app, it’s impossible for me to compare Ferrite Recording Studio to editing alternatives. Taken alone though, while the app can be challenging to navigate at first, as the way it’s organized isn’t the most intuitive or standard for iOS, I quickly grew accustomed to it and have no desire to edit anywhere else. It does exactly what I would hope for: provide tools that I can customize to my liking so each edit is a pleasant experience rather than a frustration.
Developing a new creative skill is always a challenge, but it becomes a lot more manageable when you have the right tools at your disposal.
- Tap the ‘i’ button under that project’s name in your Library, then hit the wrench icon in the top-left corner and tap ‘Make Template.’ ↩︎
- Tap the wrench icon in the top-right corner then hit Import Audio, and once it’s been imported, select the audio and tap the pencil icon to create a new project. ↩︎