Get Started with Mail Rules on Your Mac
macOS Mail has built-in rules and filters that you can use to manage all of your accounts. These run whenever your Mac is awake and connected to the internet and allow you to do anything from set the background color of emails in the list to executing AppleScript!
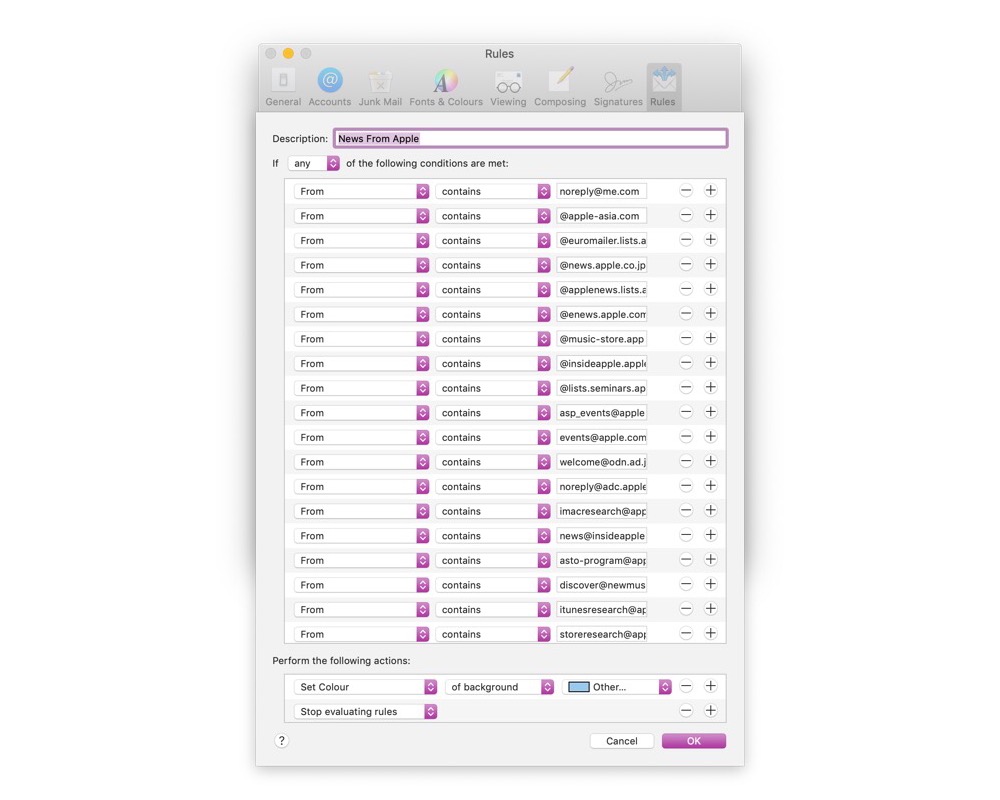
Start in Mail’s preferences and then go to the Rules tab. Unless you’ve played with these rules before, there will be one existing rule — News from Apple. This is a great sample rule to see how everything works. At the top, you see the conditions, and at the bottom you have the actions. Here the conditions are set to any, then the from addresses are a variety of email addresses Apple uses to send news. You could change the conditions to all, but in this example they would never match. There are two actions: set the color of the message and then Stop Evaluating Rules. This is very helpful as it means that the other rules won’t apply themselves to these emails.
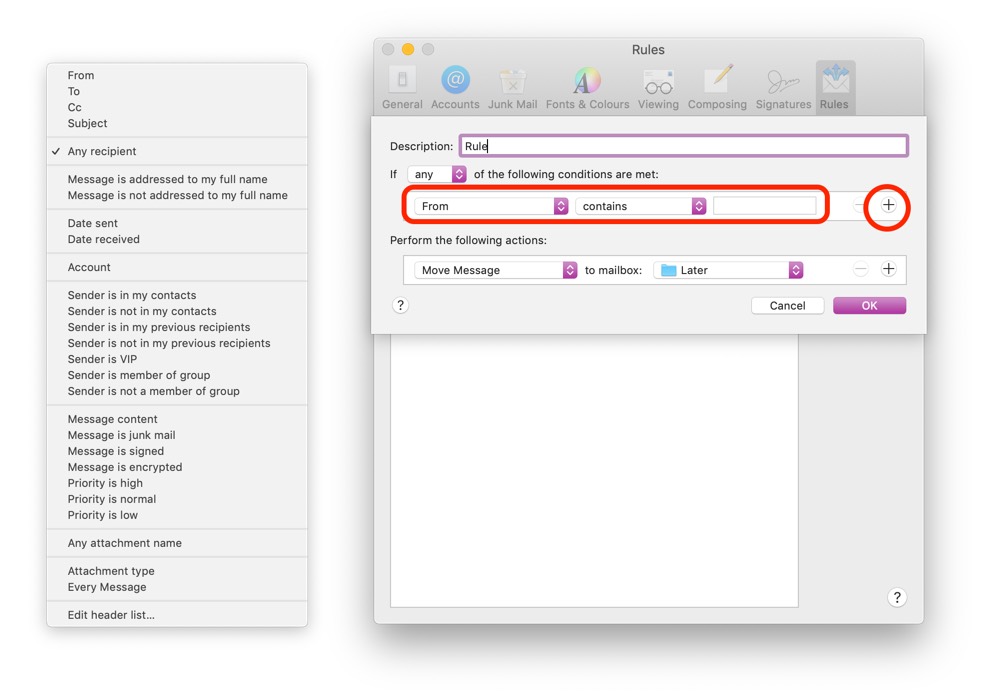
There are 28 different conditions you can use to filter your email, and you can combine these by clicking the + icon on the right-hand side of any existing condition. These are always combined with all or any, which you can select in the top-right above the conditions.
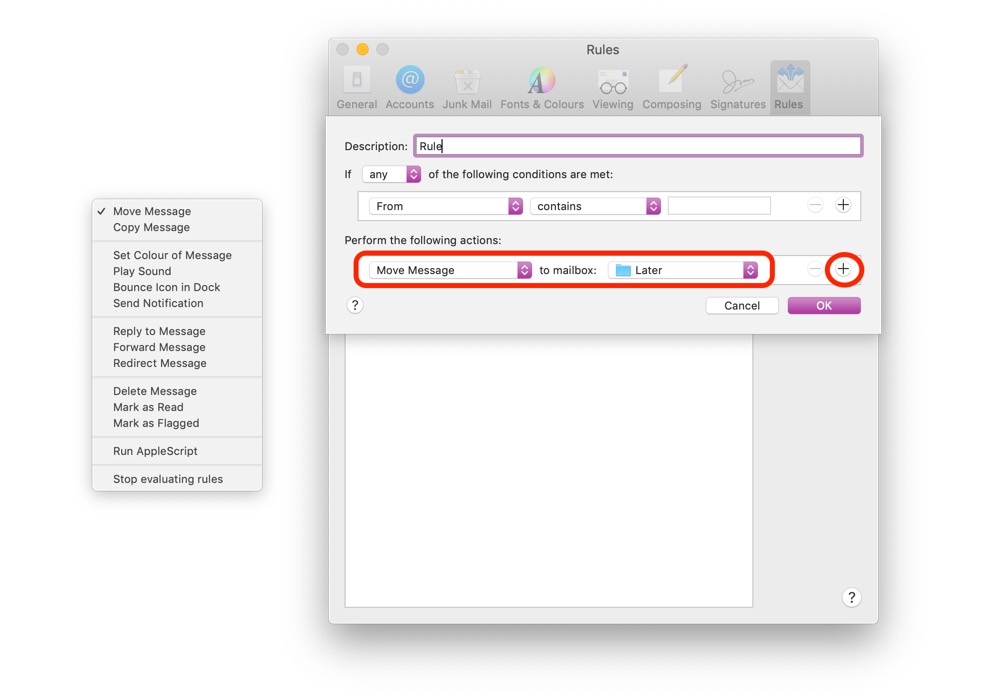
There are 14 actions you can execute when an email meets the conditions you have selected, and this includes AppleScript. The forwarding actions can let you either send a message along to a person or to a service like the OmniFocus or Things MailDrop addresses to filter some things directly into task management!
There are many ways you can use Mail rules on your Mac. Here are some examples:
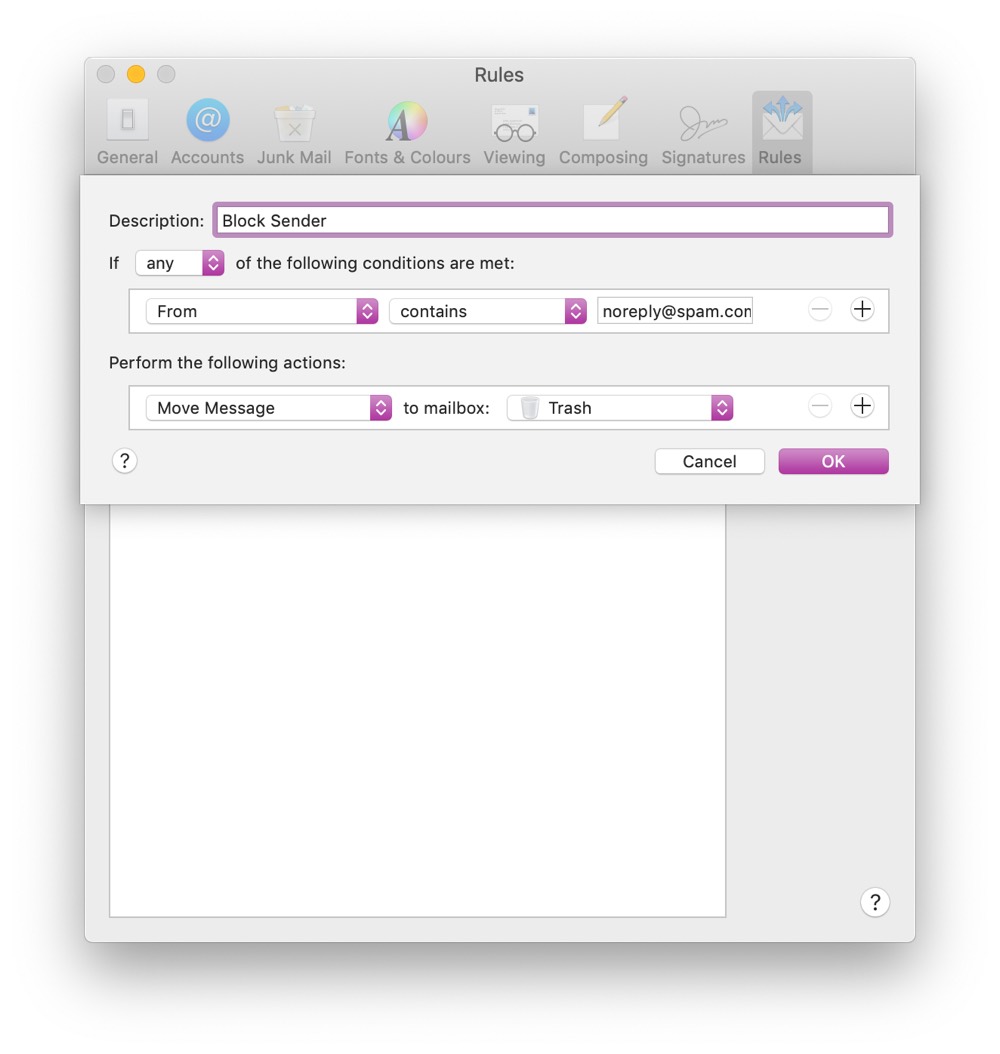
- Block Sender: Have anything from an email address automatically marked as read and moved to the trash.

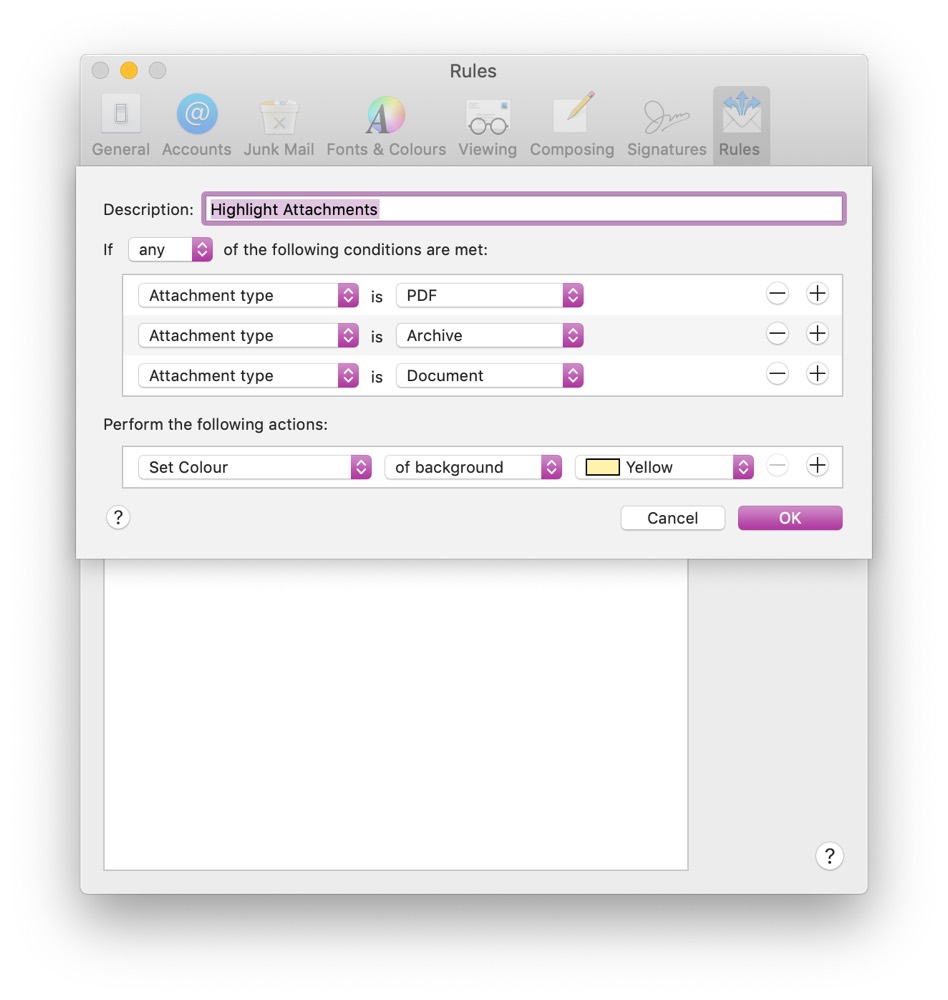
- Highlight Attachments: Use the any rules option to search for attachment types which are important to you and set the colour of the email.
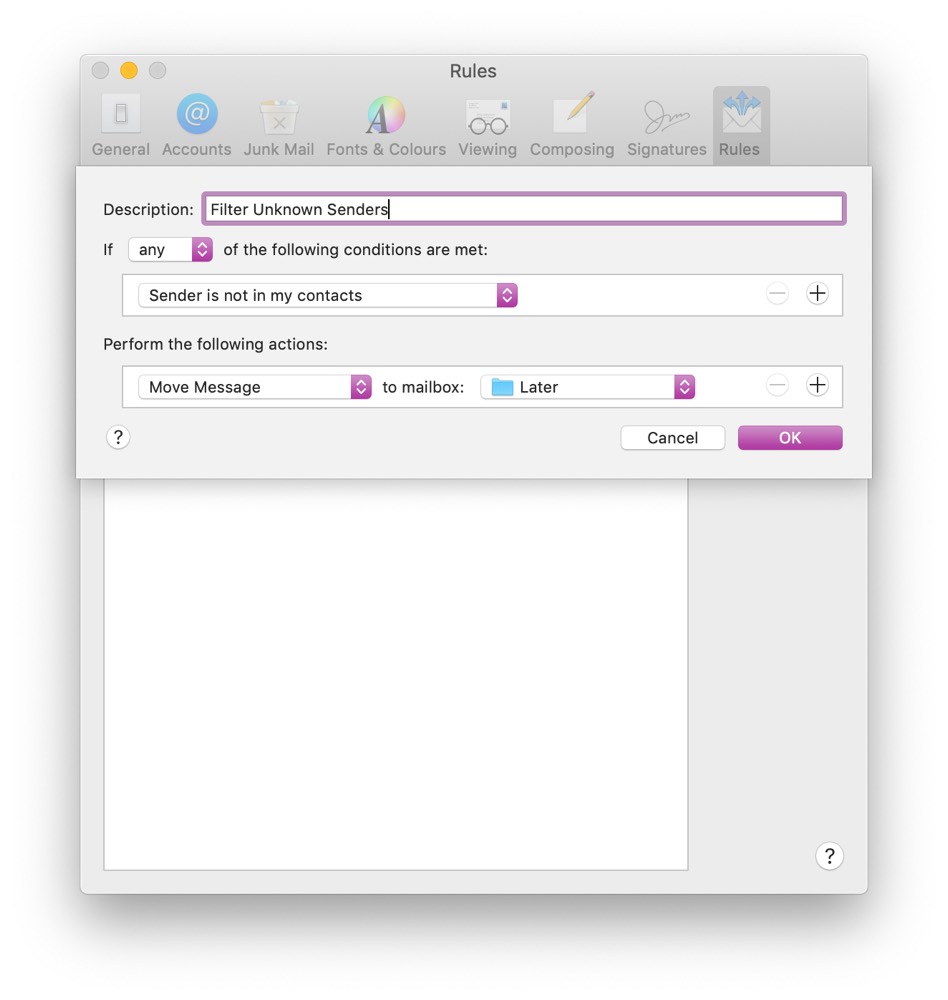
- Filter emails from unknown senders: Have any senders not in your contacts filtered to a folder for review, leaving you with just the emails that are important to you.
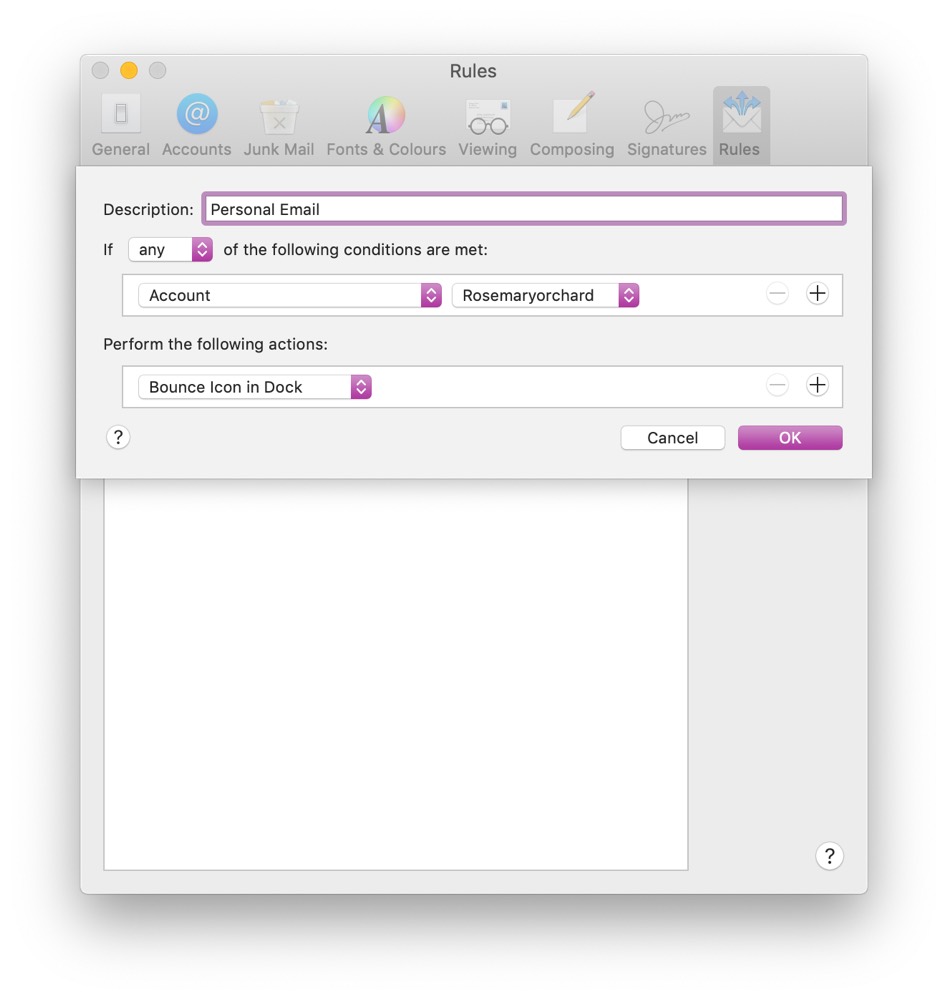
- Alert for your primary email account: Have any email sent to your primary account make your dock icon bounce.
These rules are all designed to trigger when an email comes in, and that’s how Mail works — it works through the rules for every email that comes into your inbox. You can select emails and right-click to apply rules individually, though. This allows you to create a rule that trashes everything older than a week (or marks it as read if you prefer a less final approach). Simply select all the emails in your inbox and apply the rules every so often and those with conditions that only apply to older emails will also be run. The same approach works for emails in folders, which can let you create a series of rules to clean up your email and go through applying them once.

Have fun filtering your email!
We have more useful workflow and automation examples right here.
Wait. There’s a Bonus….
Custom Productivity Templates
We have a set of custom productivity templates that work well with the iPad app, GoodNotes. And if you want to try them out, we’ve put together a free guide that can help you.
We’ll show you…
- How to create and save custom page templates in GoodNotes.
- How to use those page templates to transform GoodNotes into your own productivity notebook (or any other type of notebook replacement).
Plus, we also have included a couple of our custom productivity templates for you to get started with. These templates are right out of our popular productivity course.
The custom templates and the guide are available for FREE to our email subscriber community. And you can get it right now. By joining the Sweet Setup community you’ll also get access to our other guides, early previews to big new reviews and workflow articles we are working on, weekly roundups of our best content, and more.