This tutorial walks you will teach you how to work with Regions in GarageBand, including cutting and pasting, joining and splitting, and more.
When you’re ready to compose music in GarageBand, it’s important to become familiar with Regions. Regions are the foundations of your musical creations. Whether you add an Apple Loop, record an instrument, or insert a media file, it creates a Region. Each Region displays at the top of your GarageBand screen in the Tracks area as a rounded rectangle. And as you have probably guessed, Regions can be manipulated. Here’s how to do that on Mac, iPad, and iPhone.
Working with Regions in GarageBand on Mac
Types of Regions
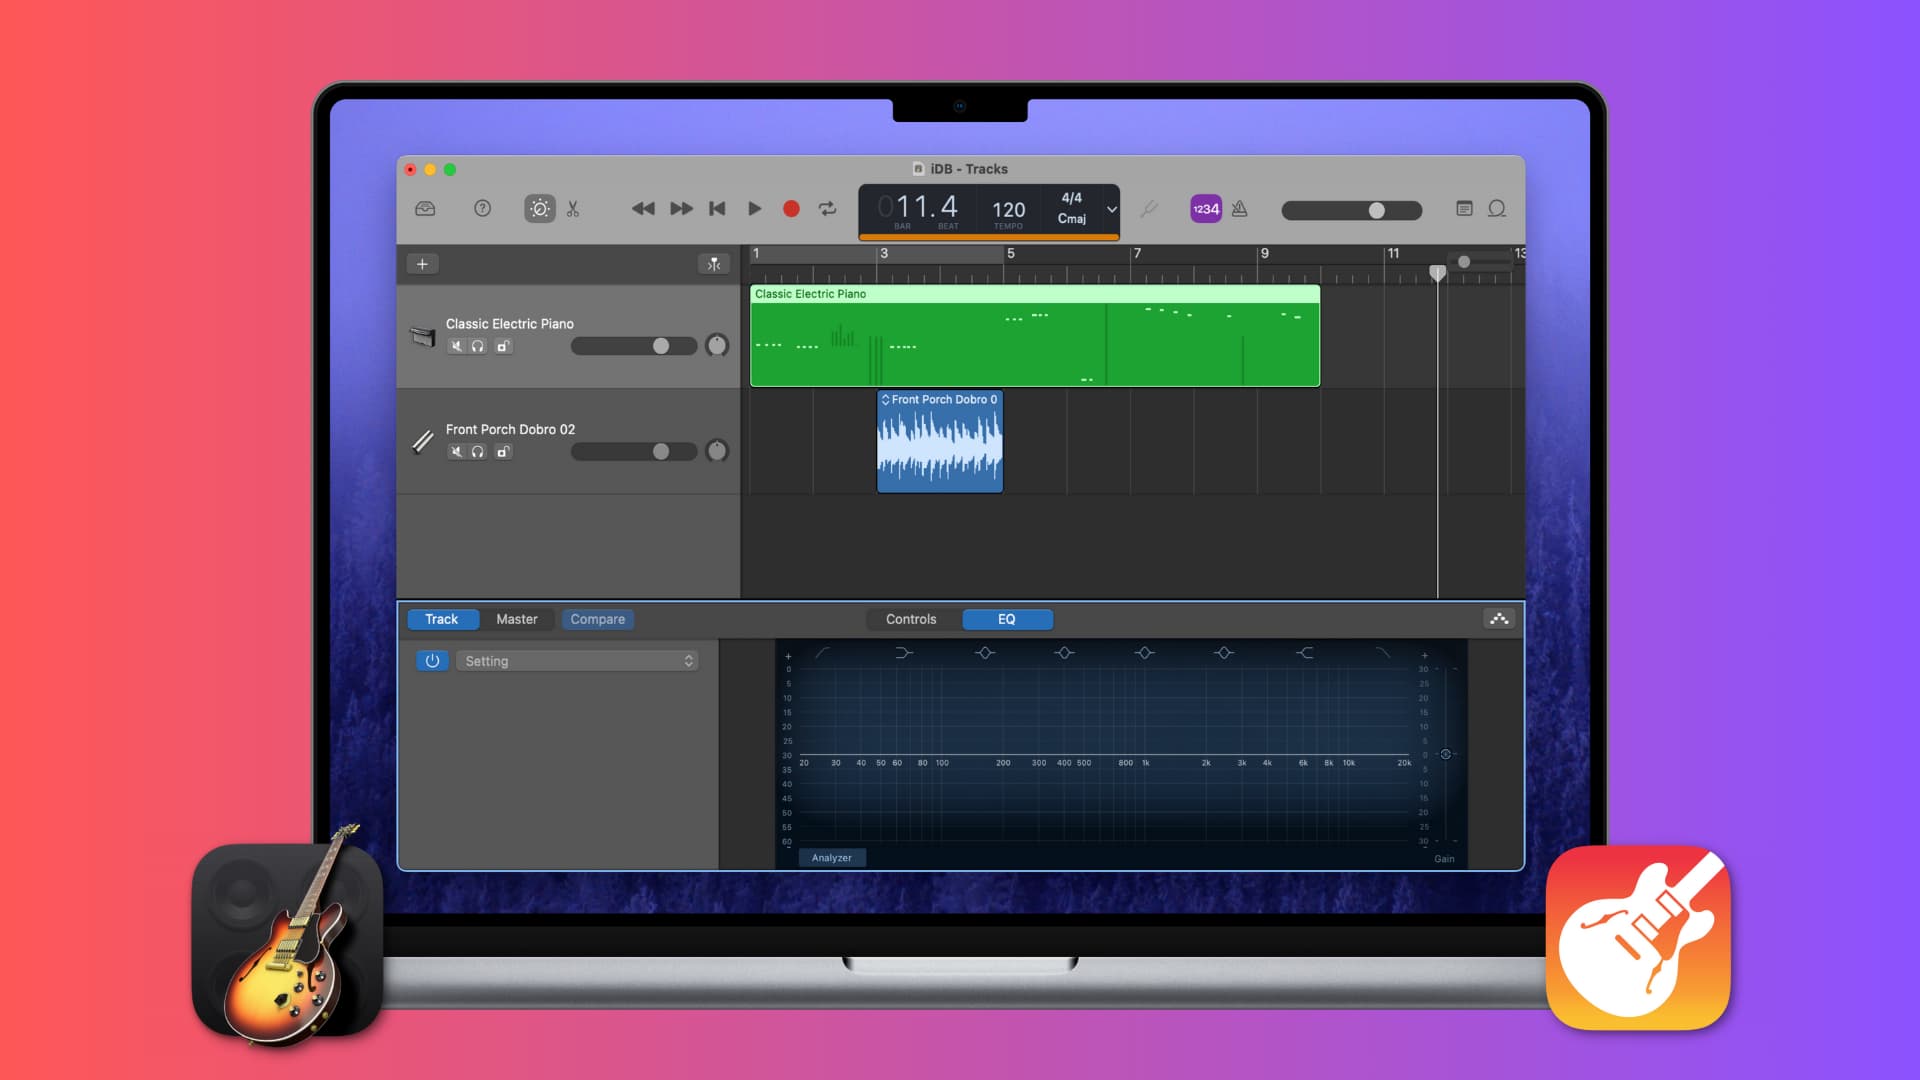
You’ll be working with different types of Regions in GarageBand on Mac, and each is colored-coded so you can quickly identify its type.
- Blue Regions: Audio recordings and some audio Apple Loops
- Green Regions: MIDI regions from software instrument recordings, instrumental Apple Loops, and imported MIDI files
- Orange Regions: Imported audio files without tempo information
- Yellow Regions: Drummer tracks
Now that you know the types of Regions available in GarageBand, it’s time to move on to how to edit them.
Select a Region
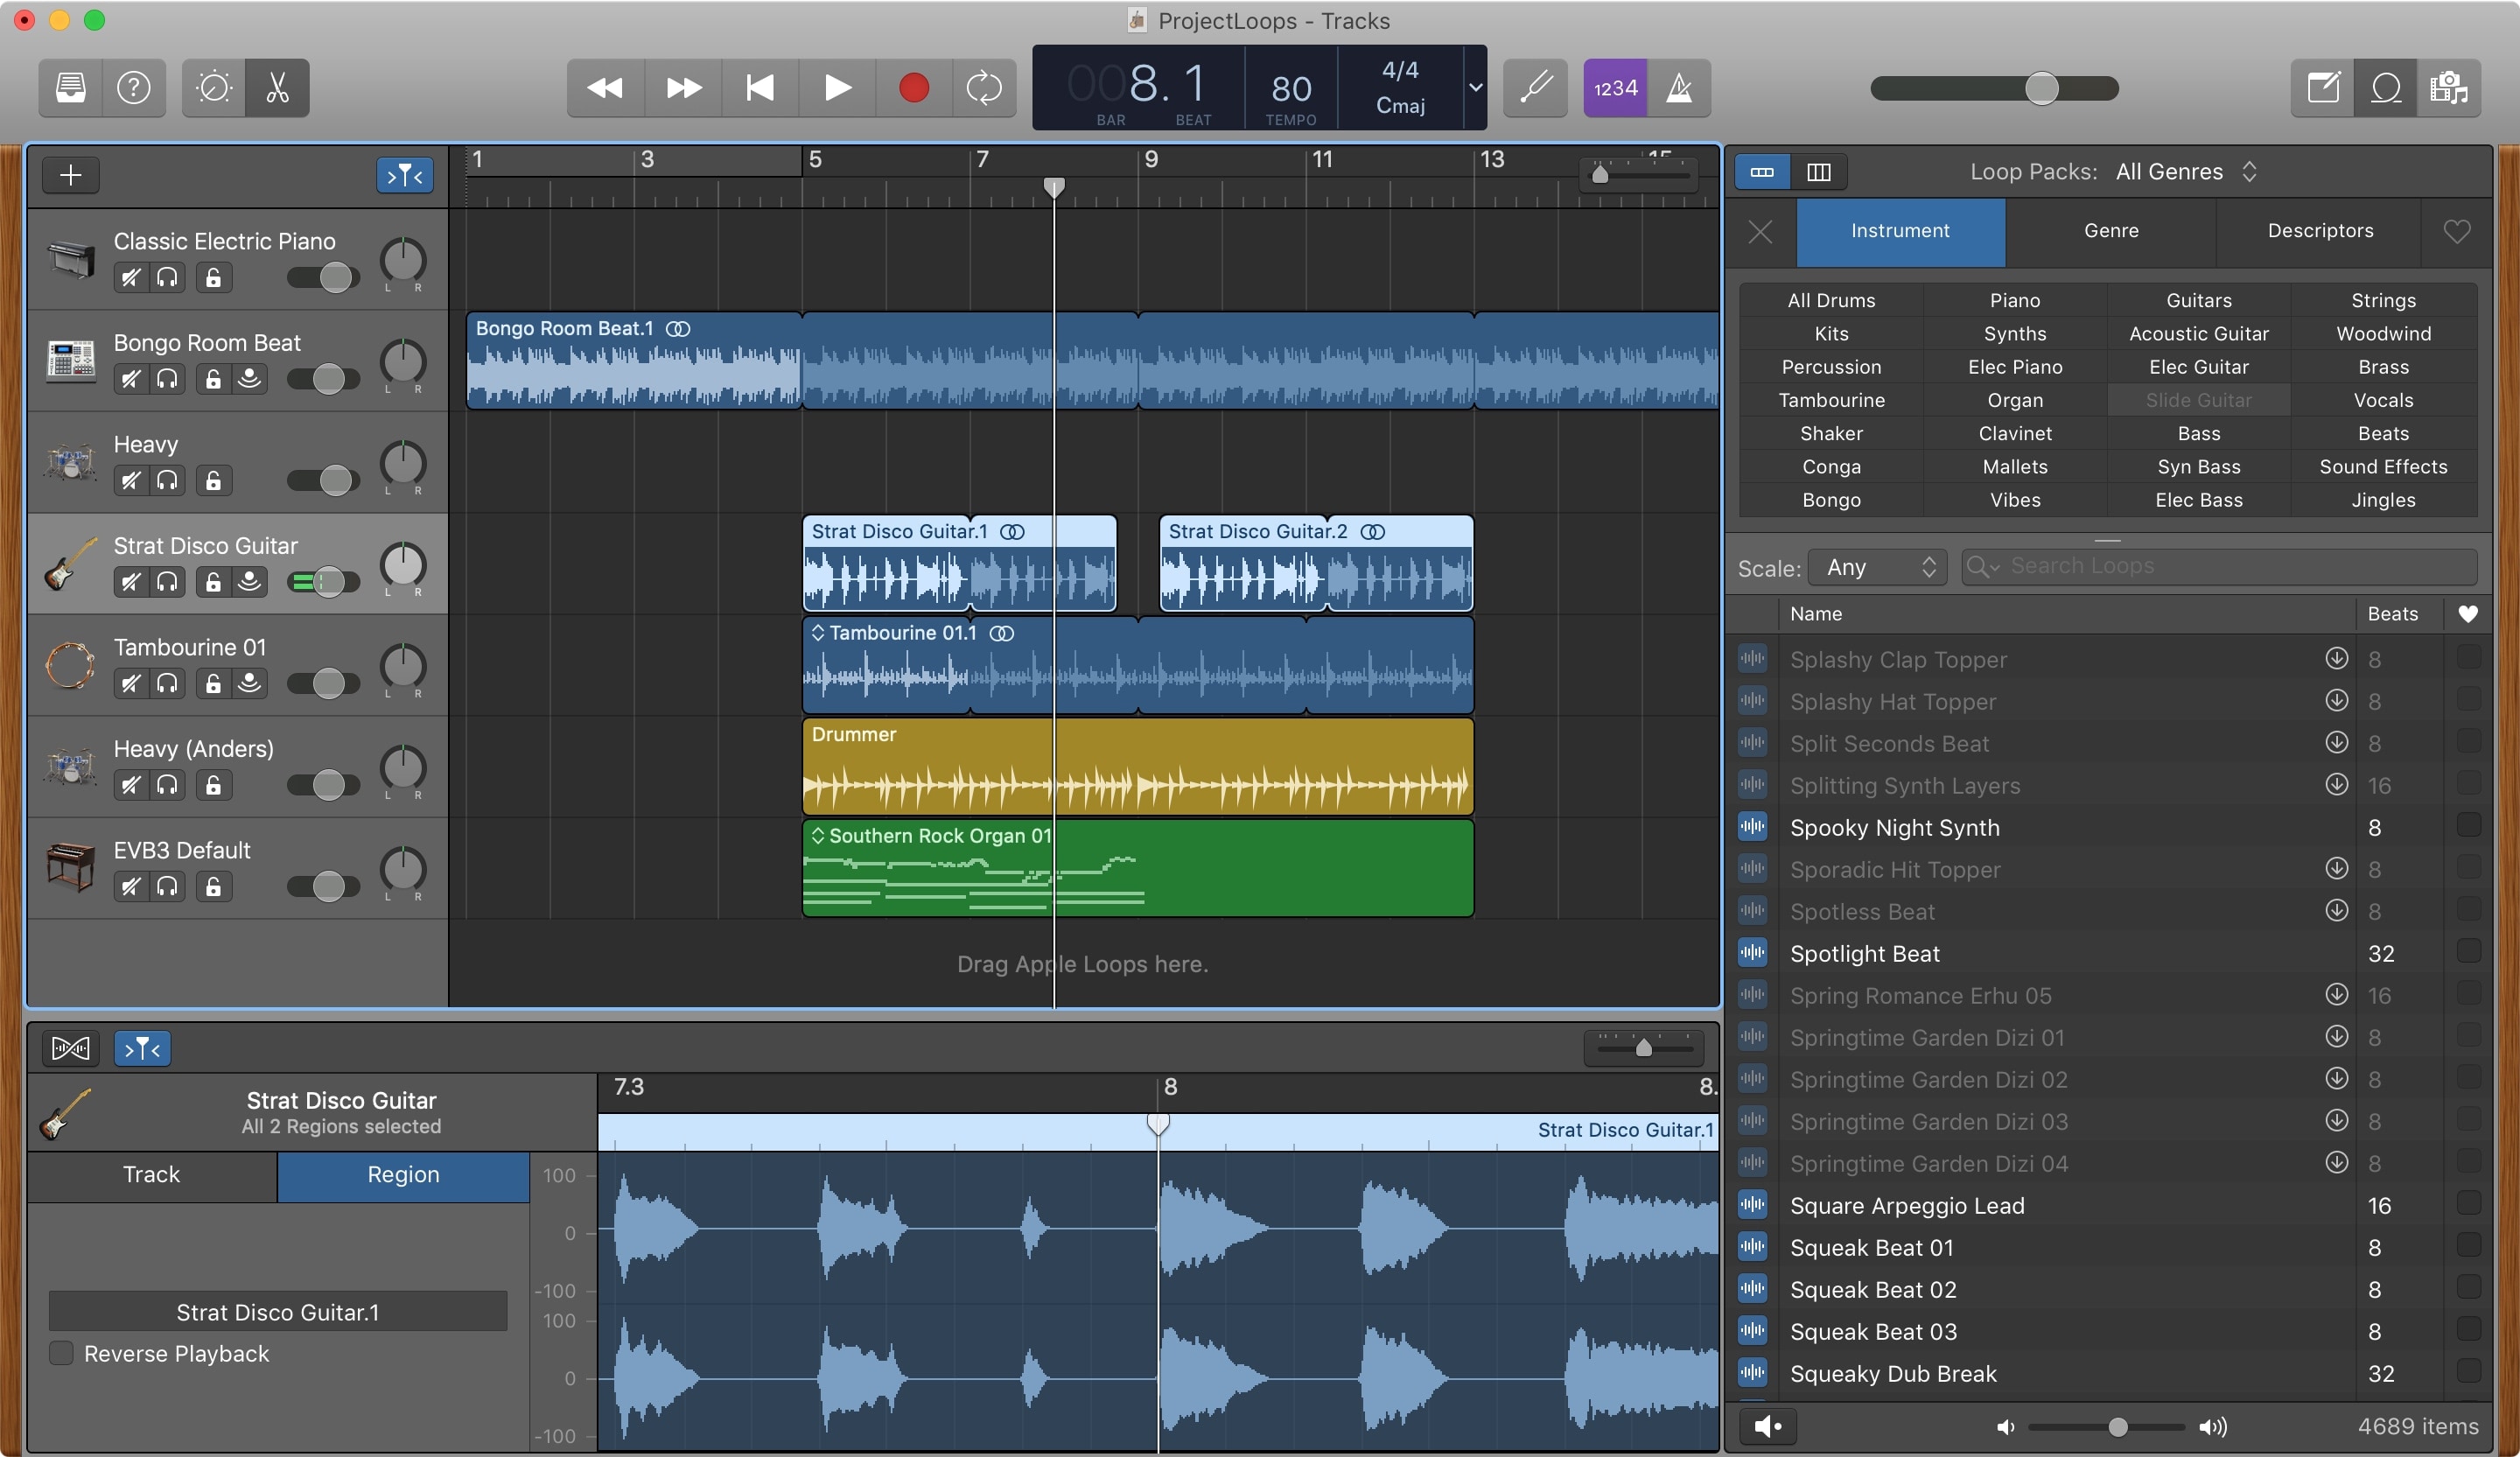
To edit a Region, you have to select it, and you have a few different ways depending on if you want just one, several, or all Regions.
- One Region: Click the Region in the Tracks area.
- Multiple Regions: Hold Shift and click each Region or drag around the group to select several.
- All Regions in a track: Click the track header.
- All Regions in a project: Click Edit > Select > All from the menu bar or use the Command + A keyboard shortcut.
Cut, copy, and a paste Region
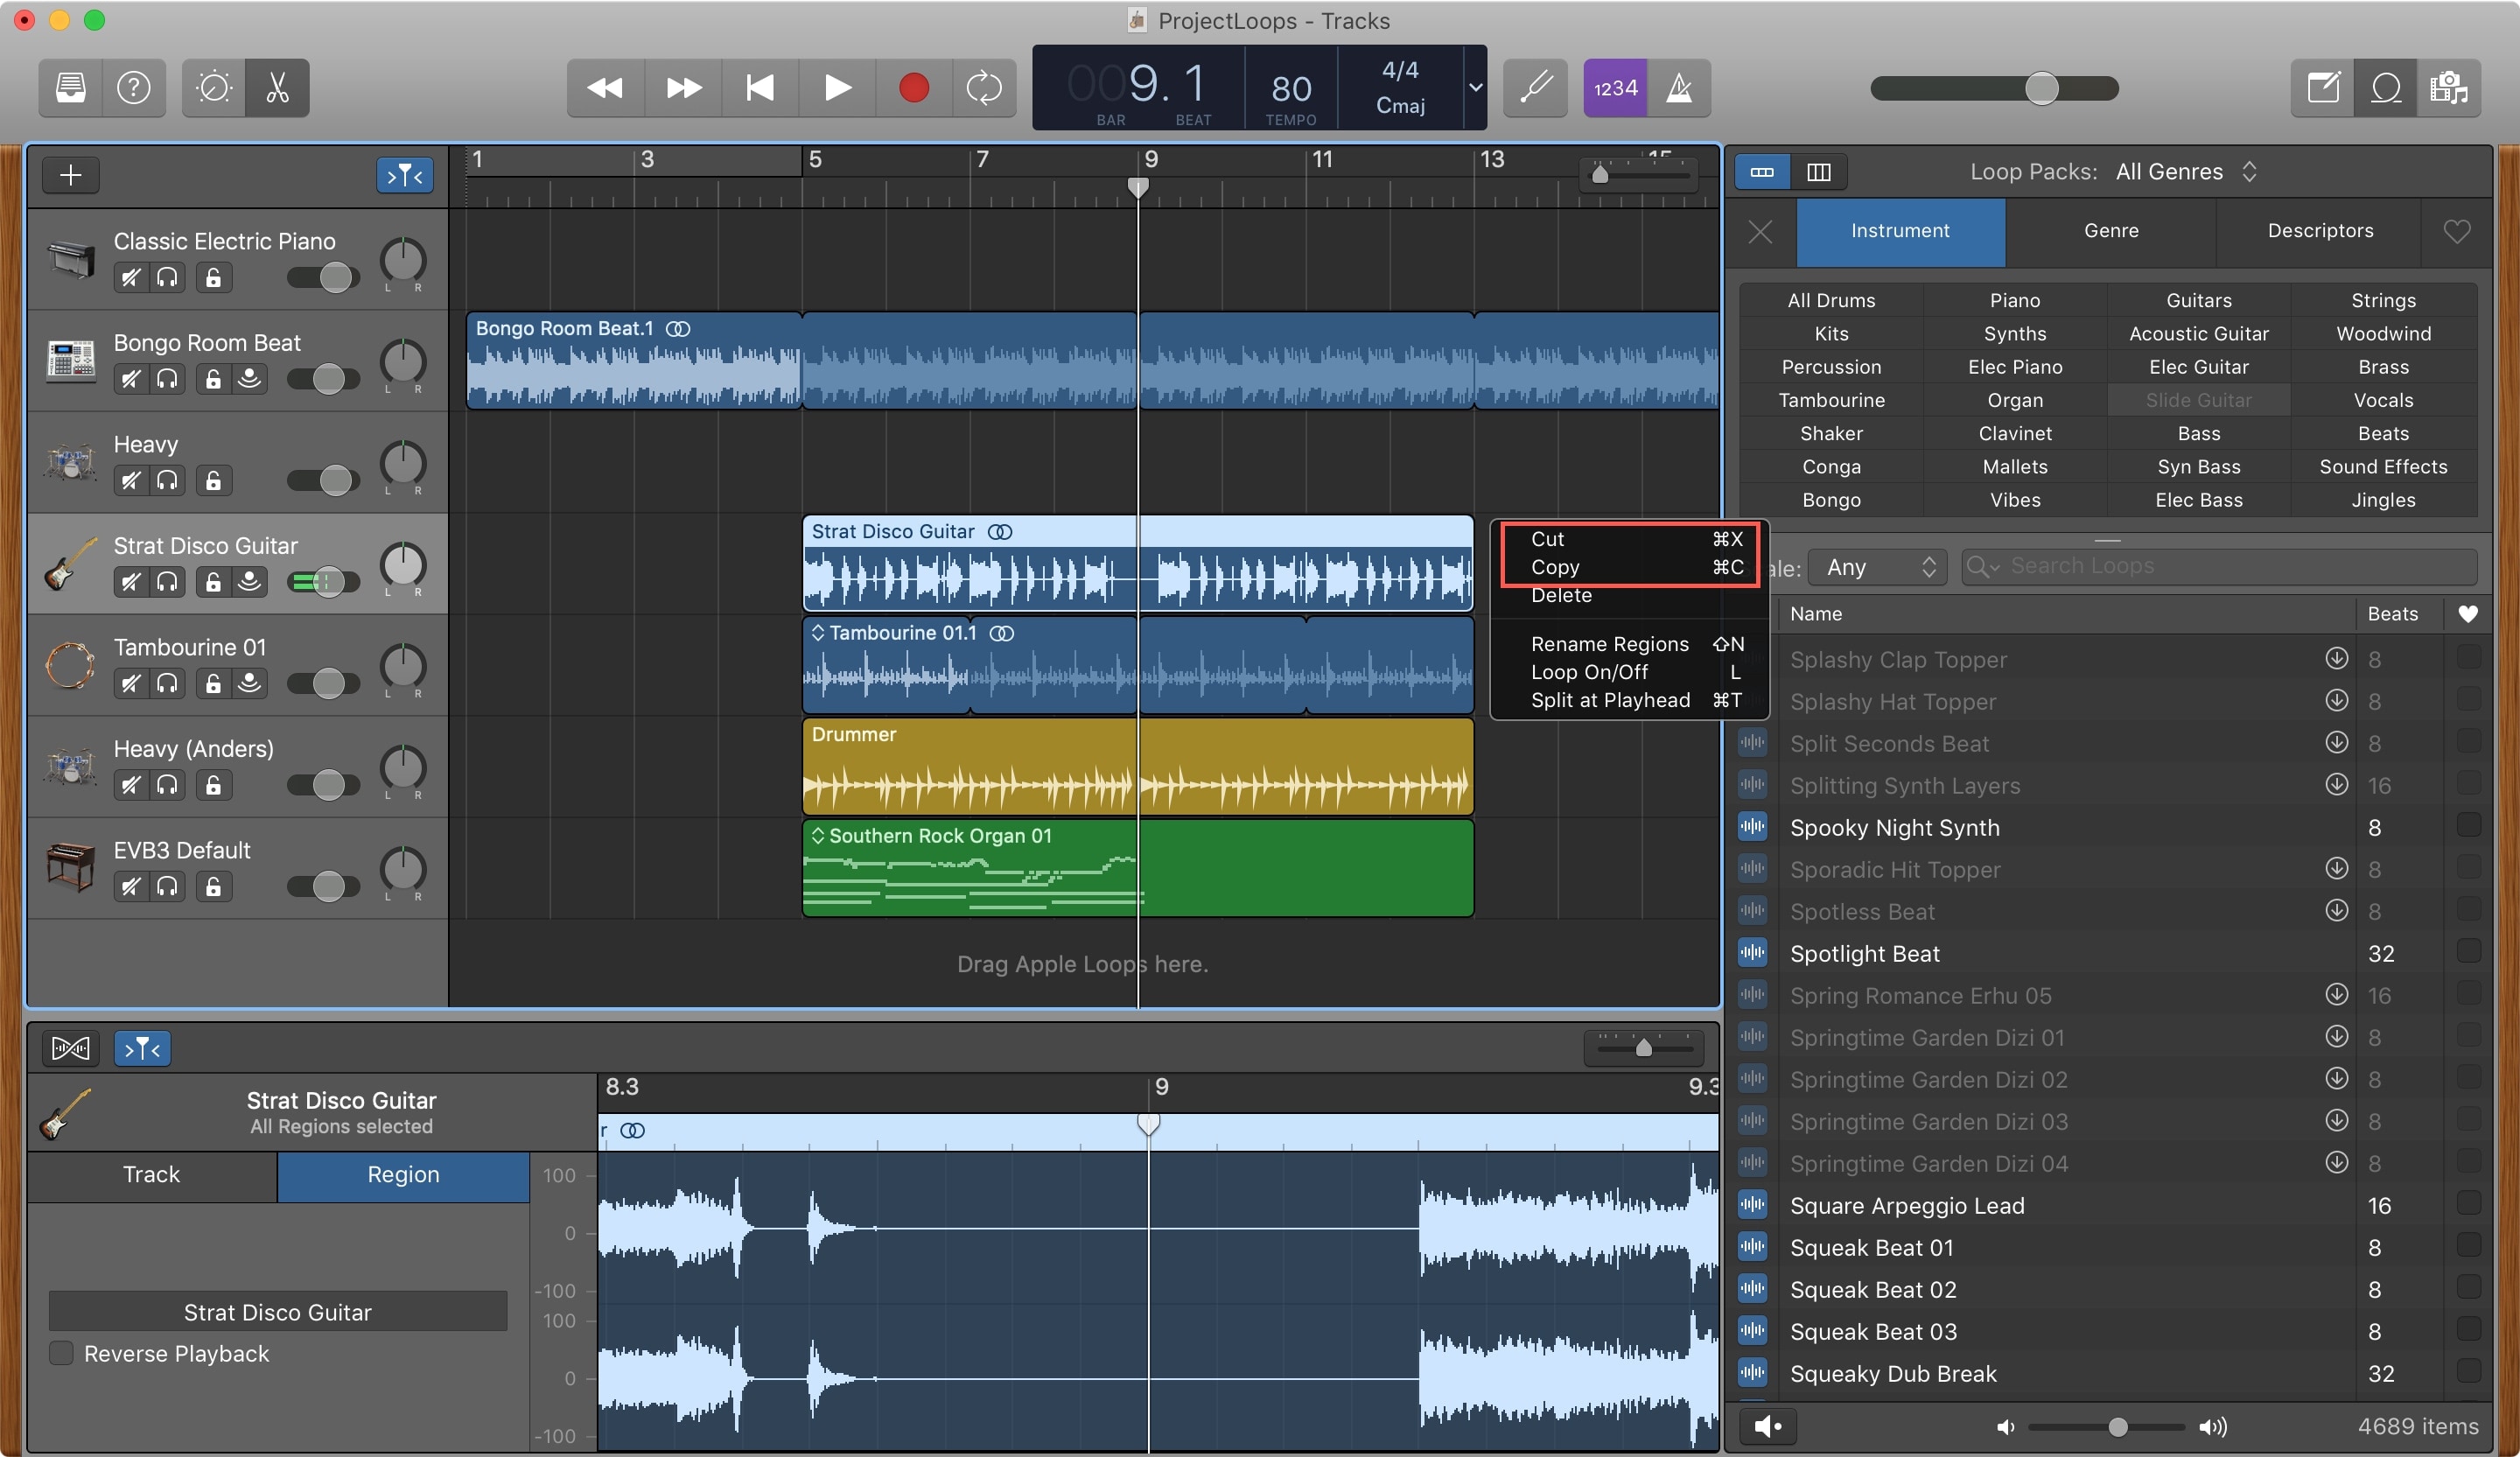
As described above, select the Region(s) you want to cut or copy and then do one of the following:
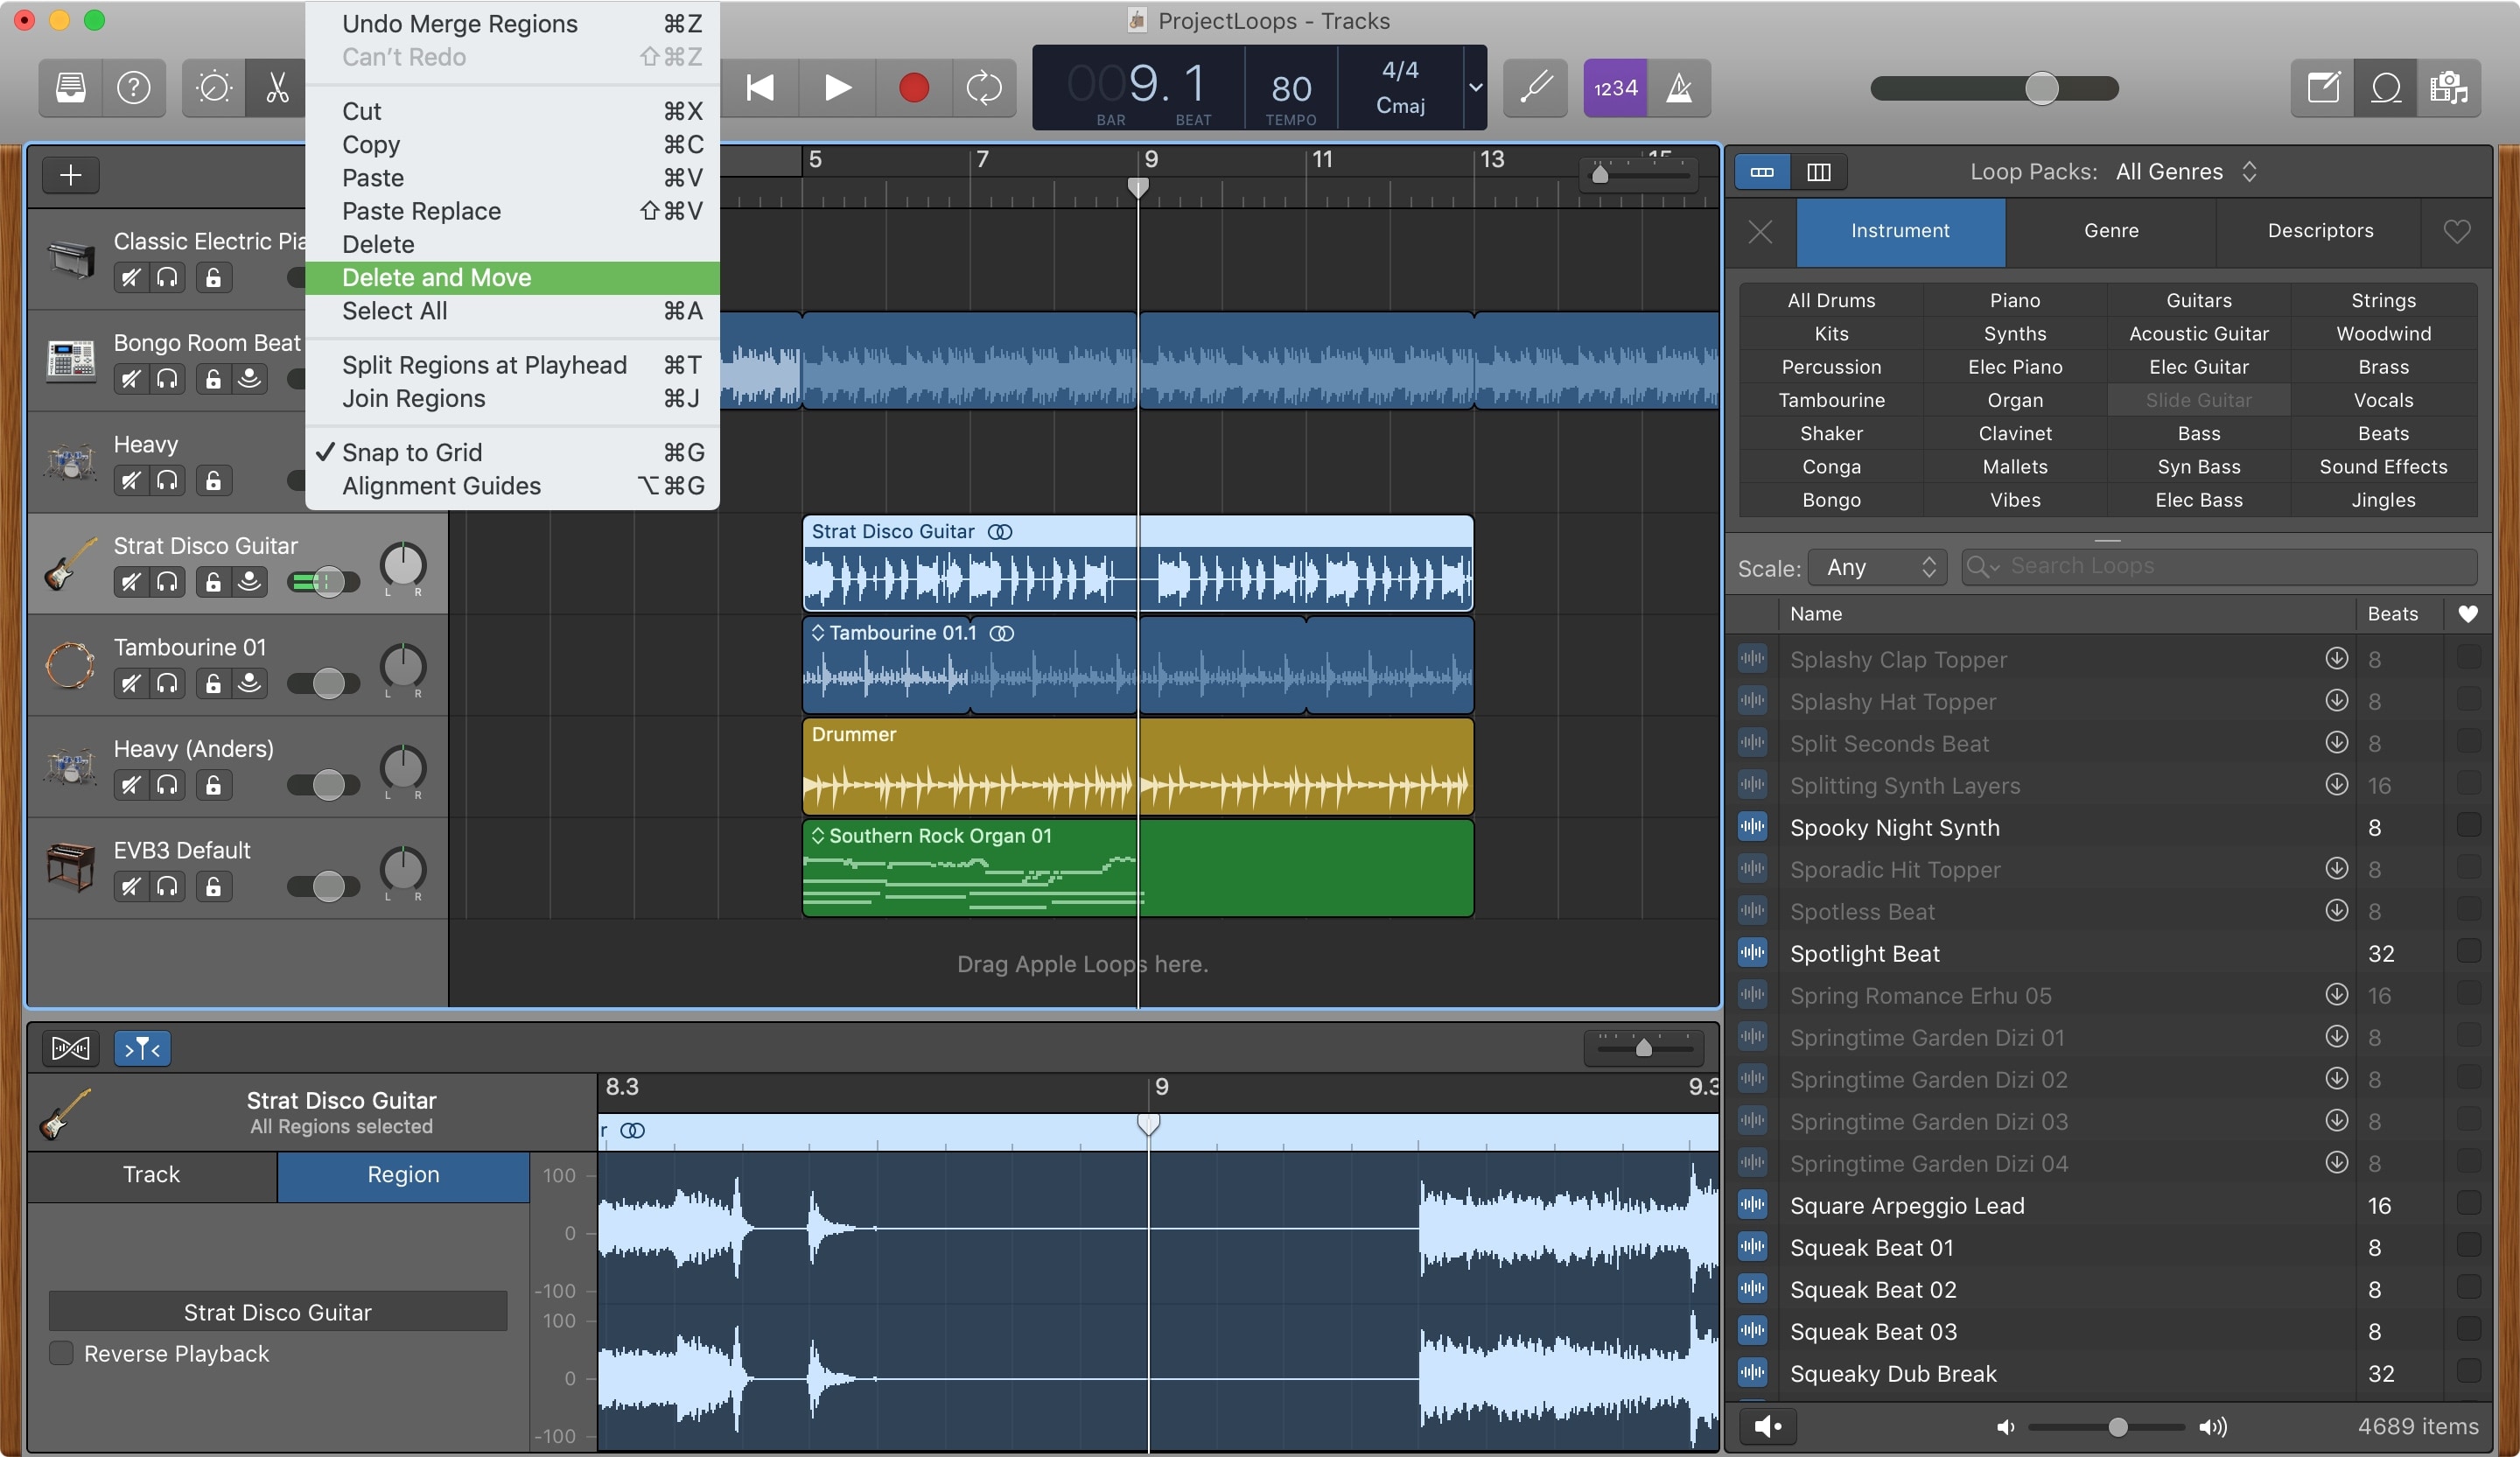
- Cut: Click Edit > Cut from the menu bar, press Command + X, or right-click and pick Cut from the context menu.
- Copy: Click Edit > Copy from the menu bar, press Command + C, right-click and pick Copy from the context menu, or use Option + drag.
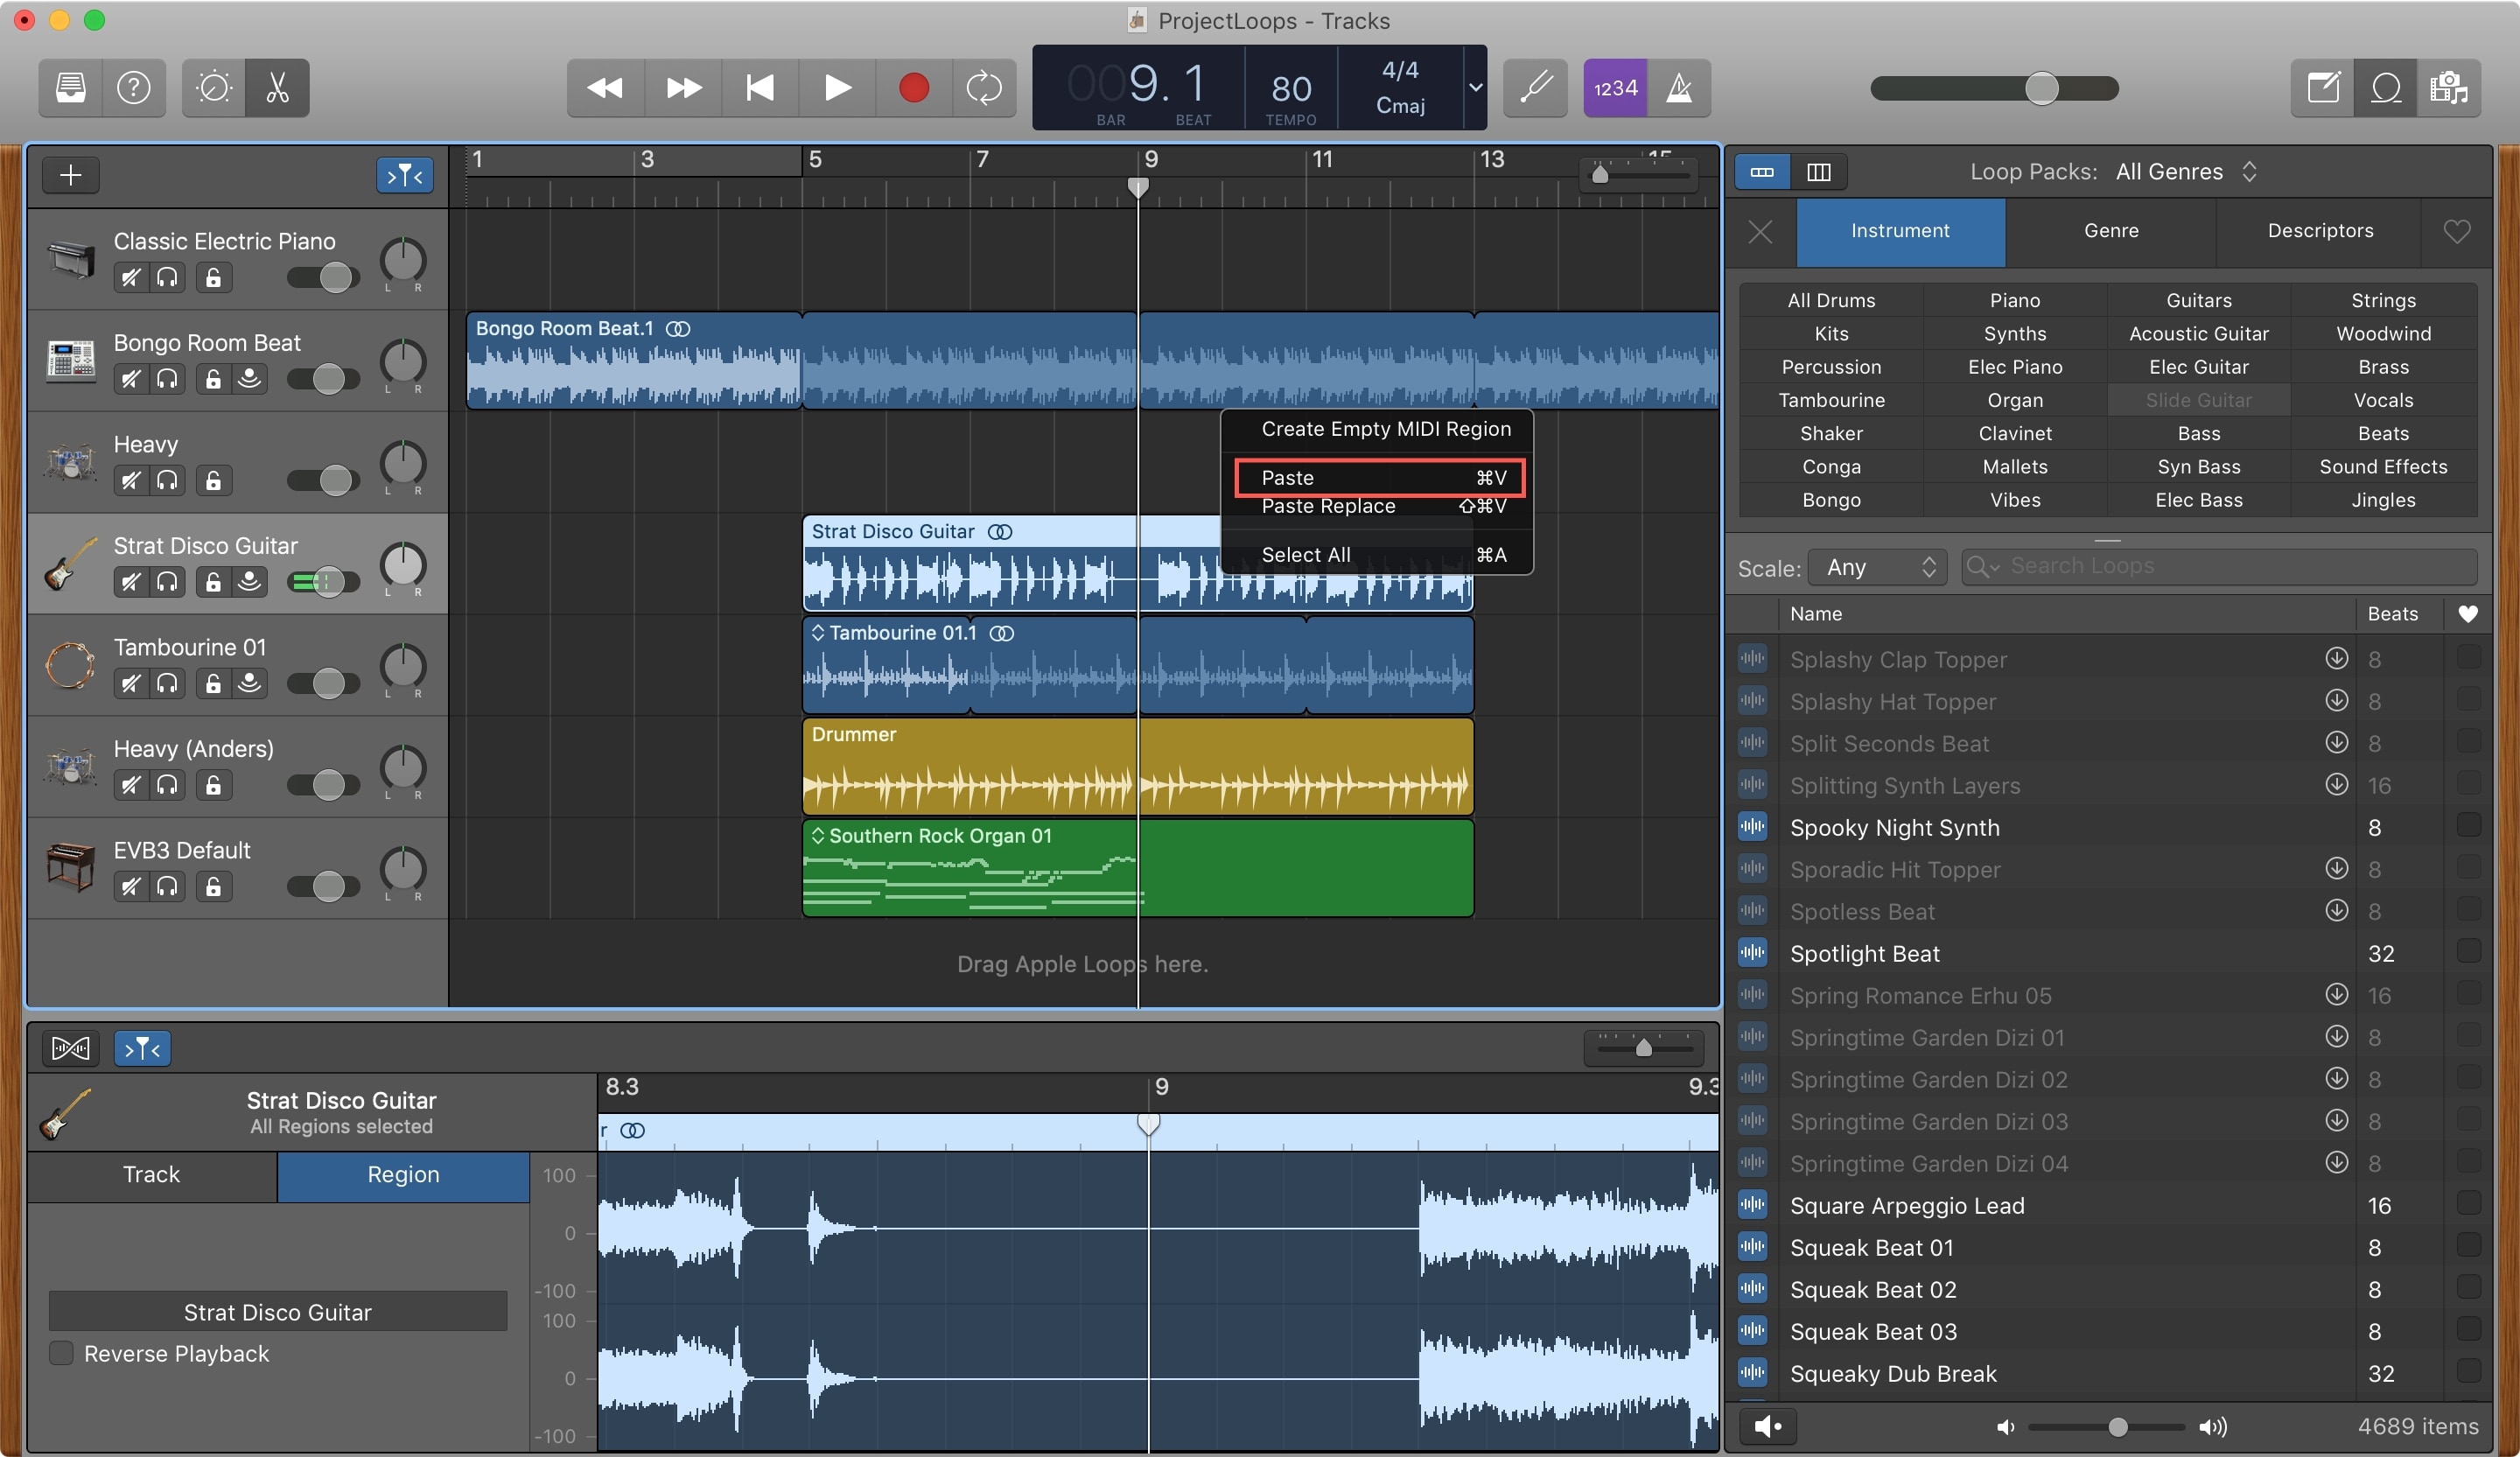
When you’re ready to paste a Region you’ve selected and cut or copied, move to the point in the Tracks area where you want it and either click Edit > Paste from the menu or use Command + V.
Resize a Region
To shorten or lengthen an audio or MIDI Region, select it using a method above. On the bottom right corner, you’ll see a Resize pointer. Drag left or right to shorten or lengthen the Region.
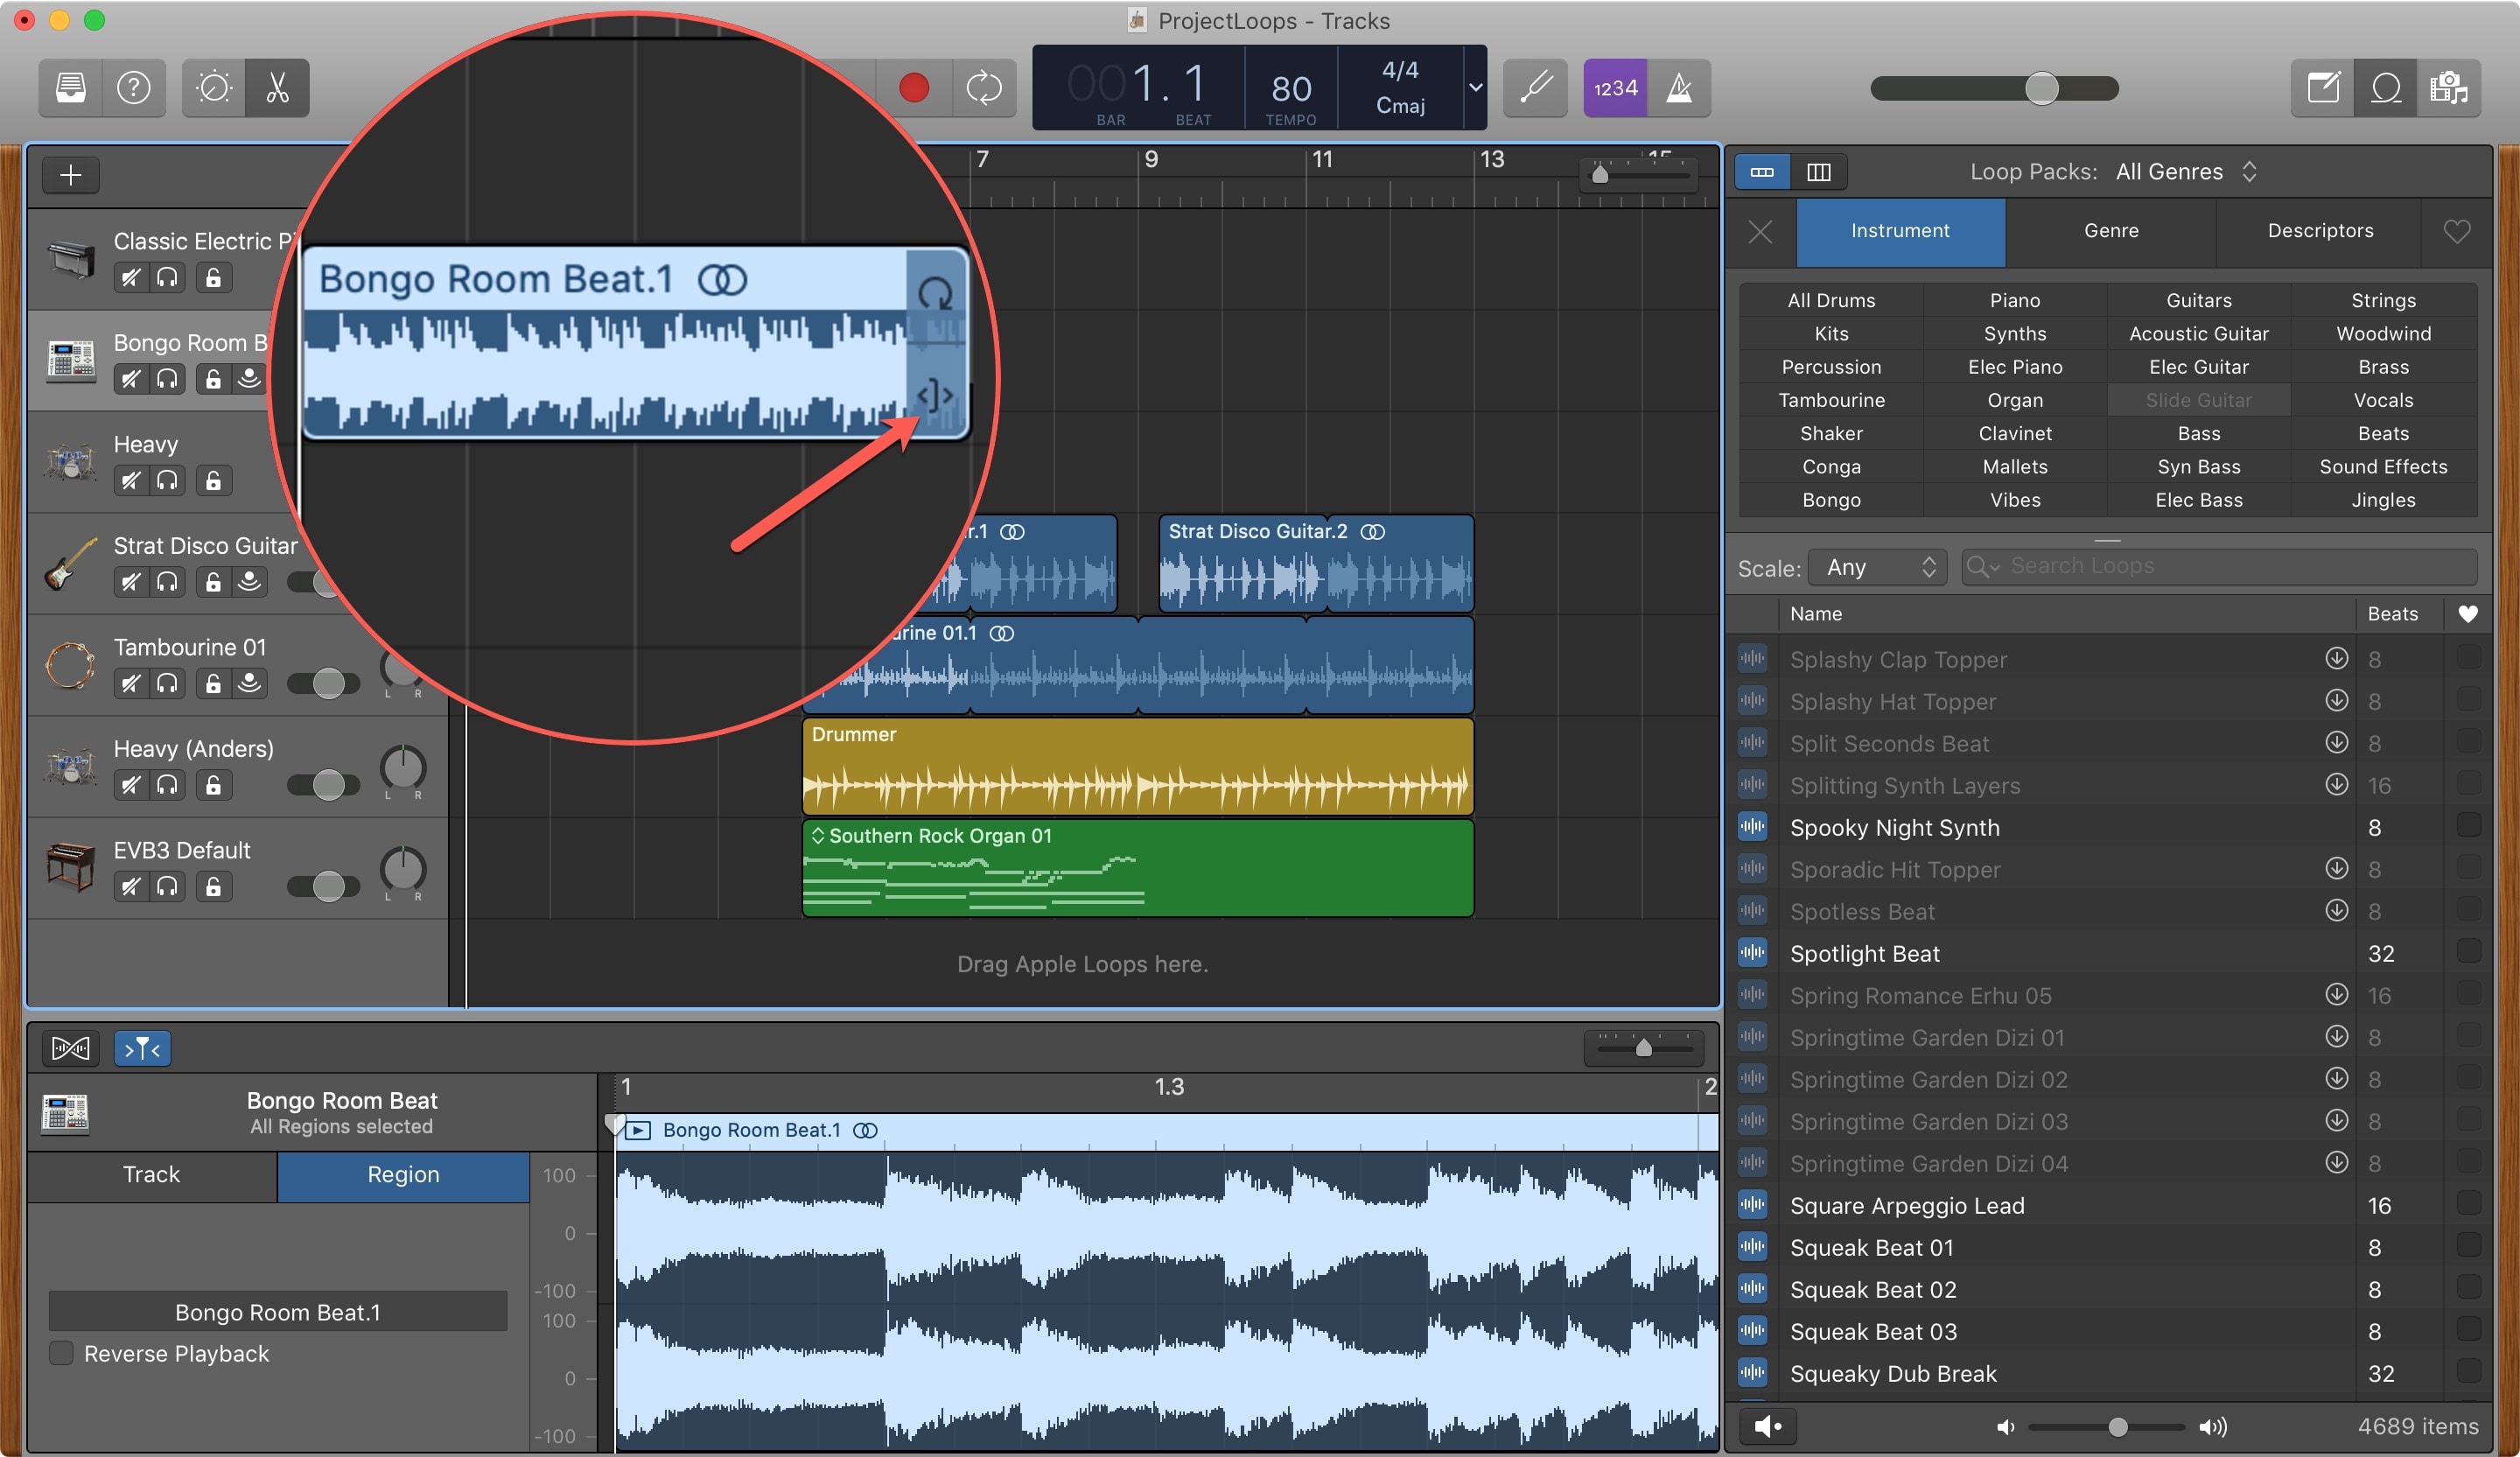
Loop a Region
You can loop a Region once or repeatedly until the end of the track, and both are just as easy.
- Loop once: Select it and then on the upper right corner, you’ll see the Loop pointer. Drag it until it lines up with the point you want the loop to stop.
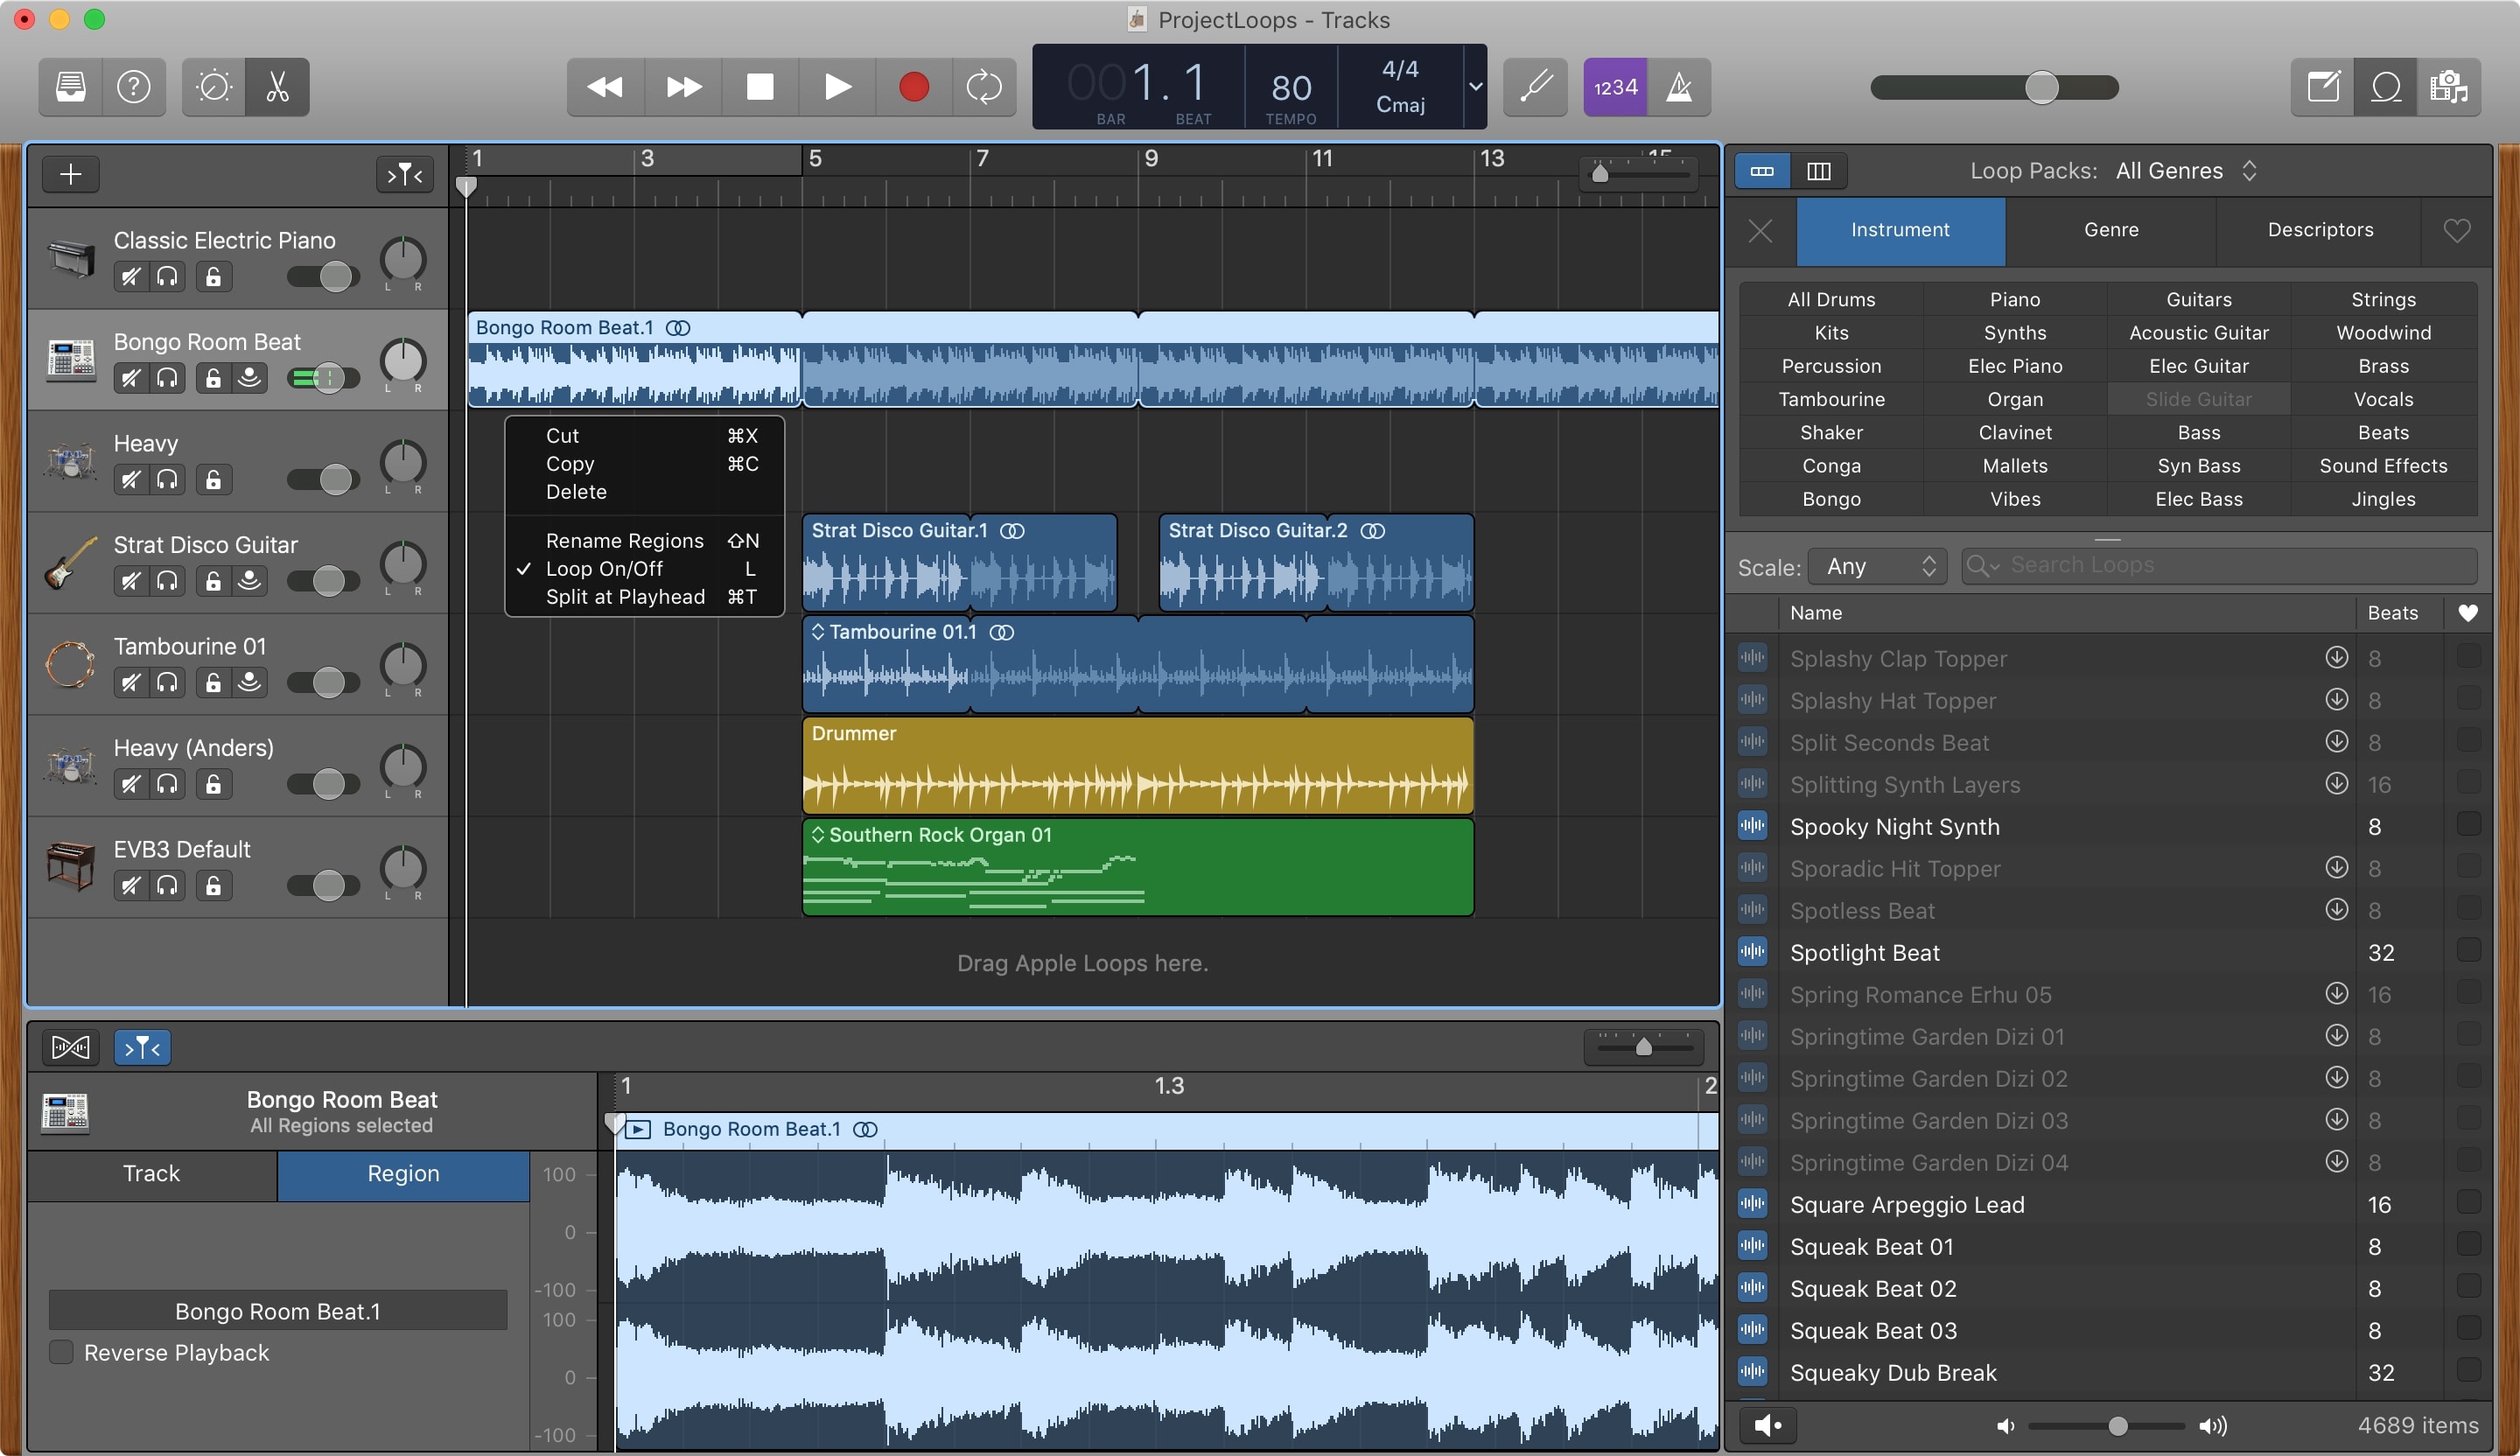
- Loop repeatedly: Select it, right-click and pick Loop On from the context menu. To unloop it, do the same thing but pick Loop Off from the context menu.
Join and Split Regions
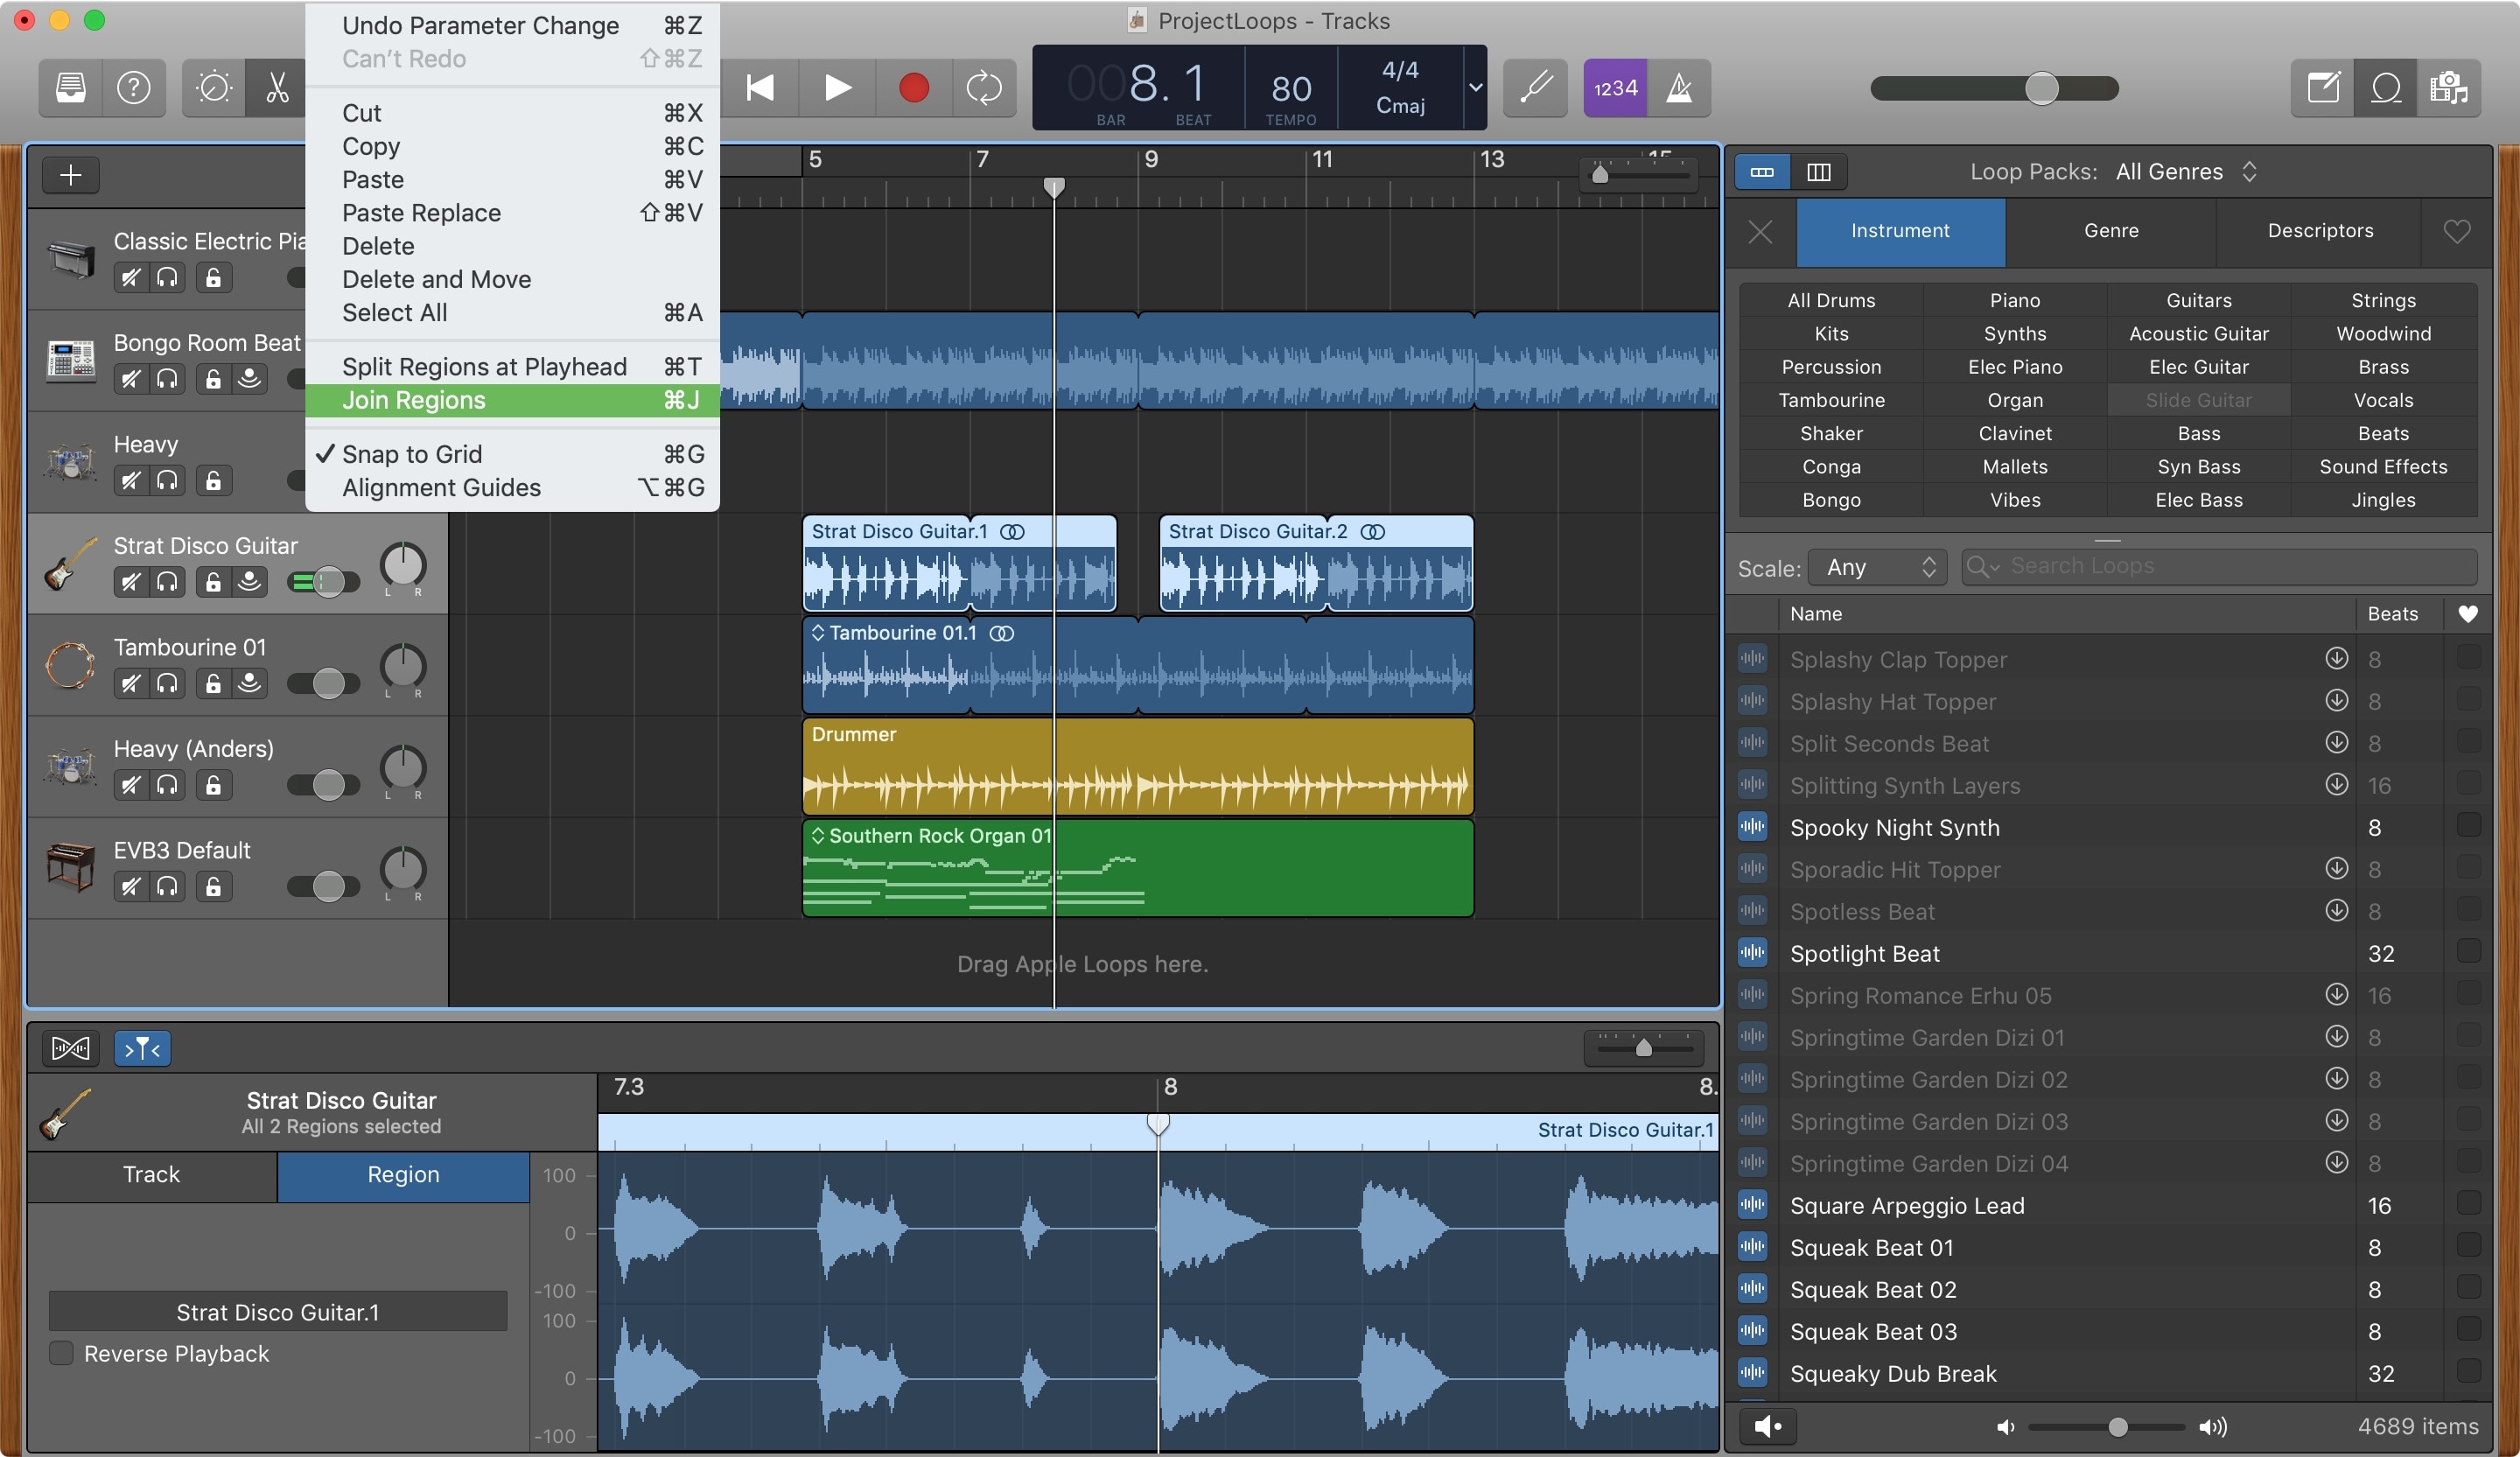
You can join certain types of Regions as long as they are next to each other in the track. Select the Regions you want to join and click Edit > Join Regions from the menu bar.
You can split a MIDI Region in your track by first selecting it. Then, in the Tracks area, move the playhead where you want the split and click Edit > Split Regions at Playhead in the menu bar or right-click and pick Split Regions at Playhead from the context menu.

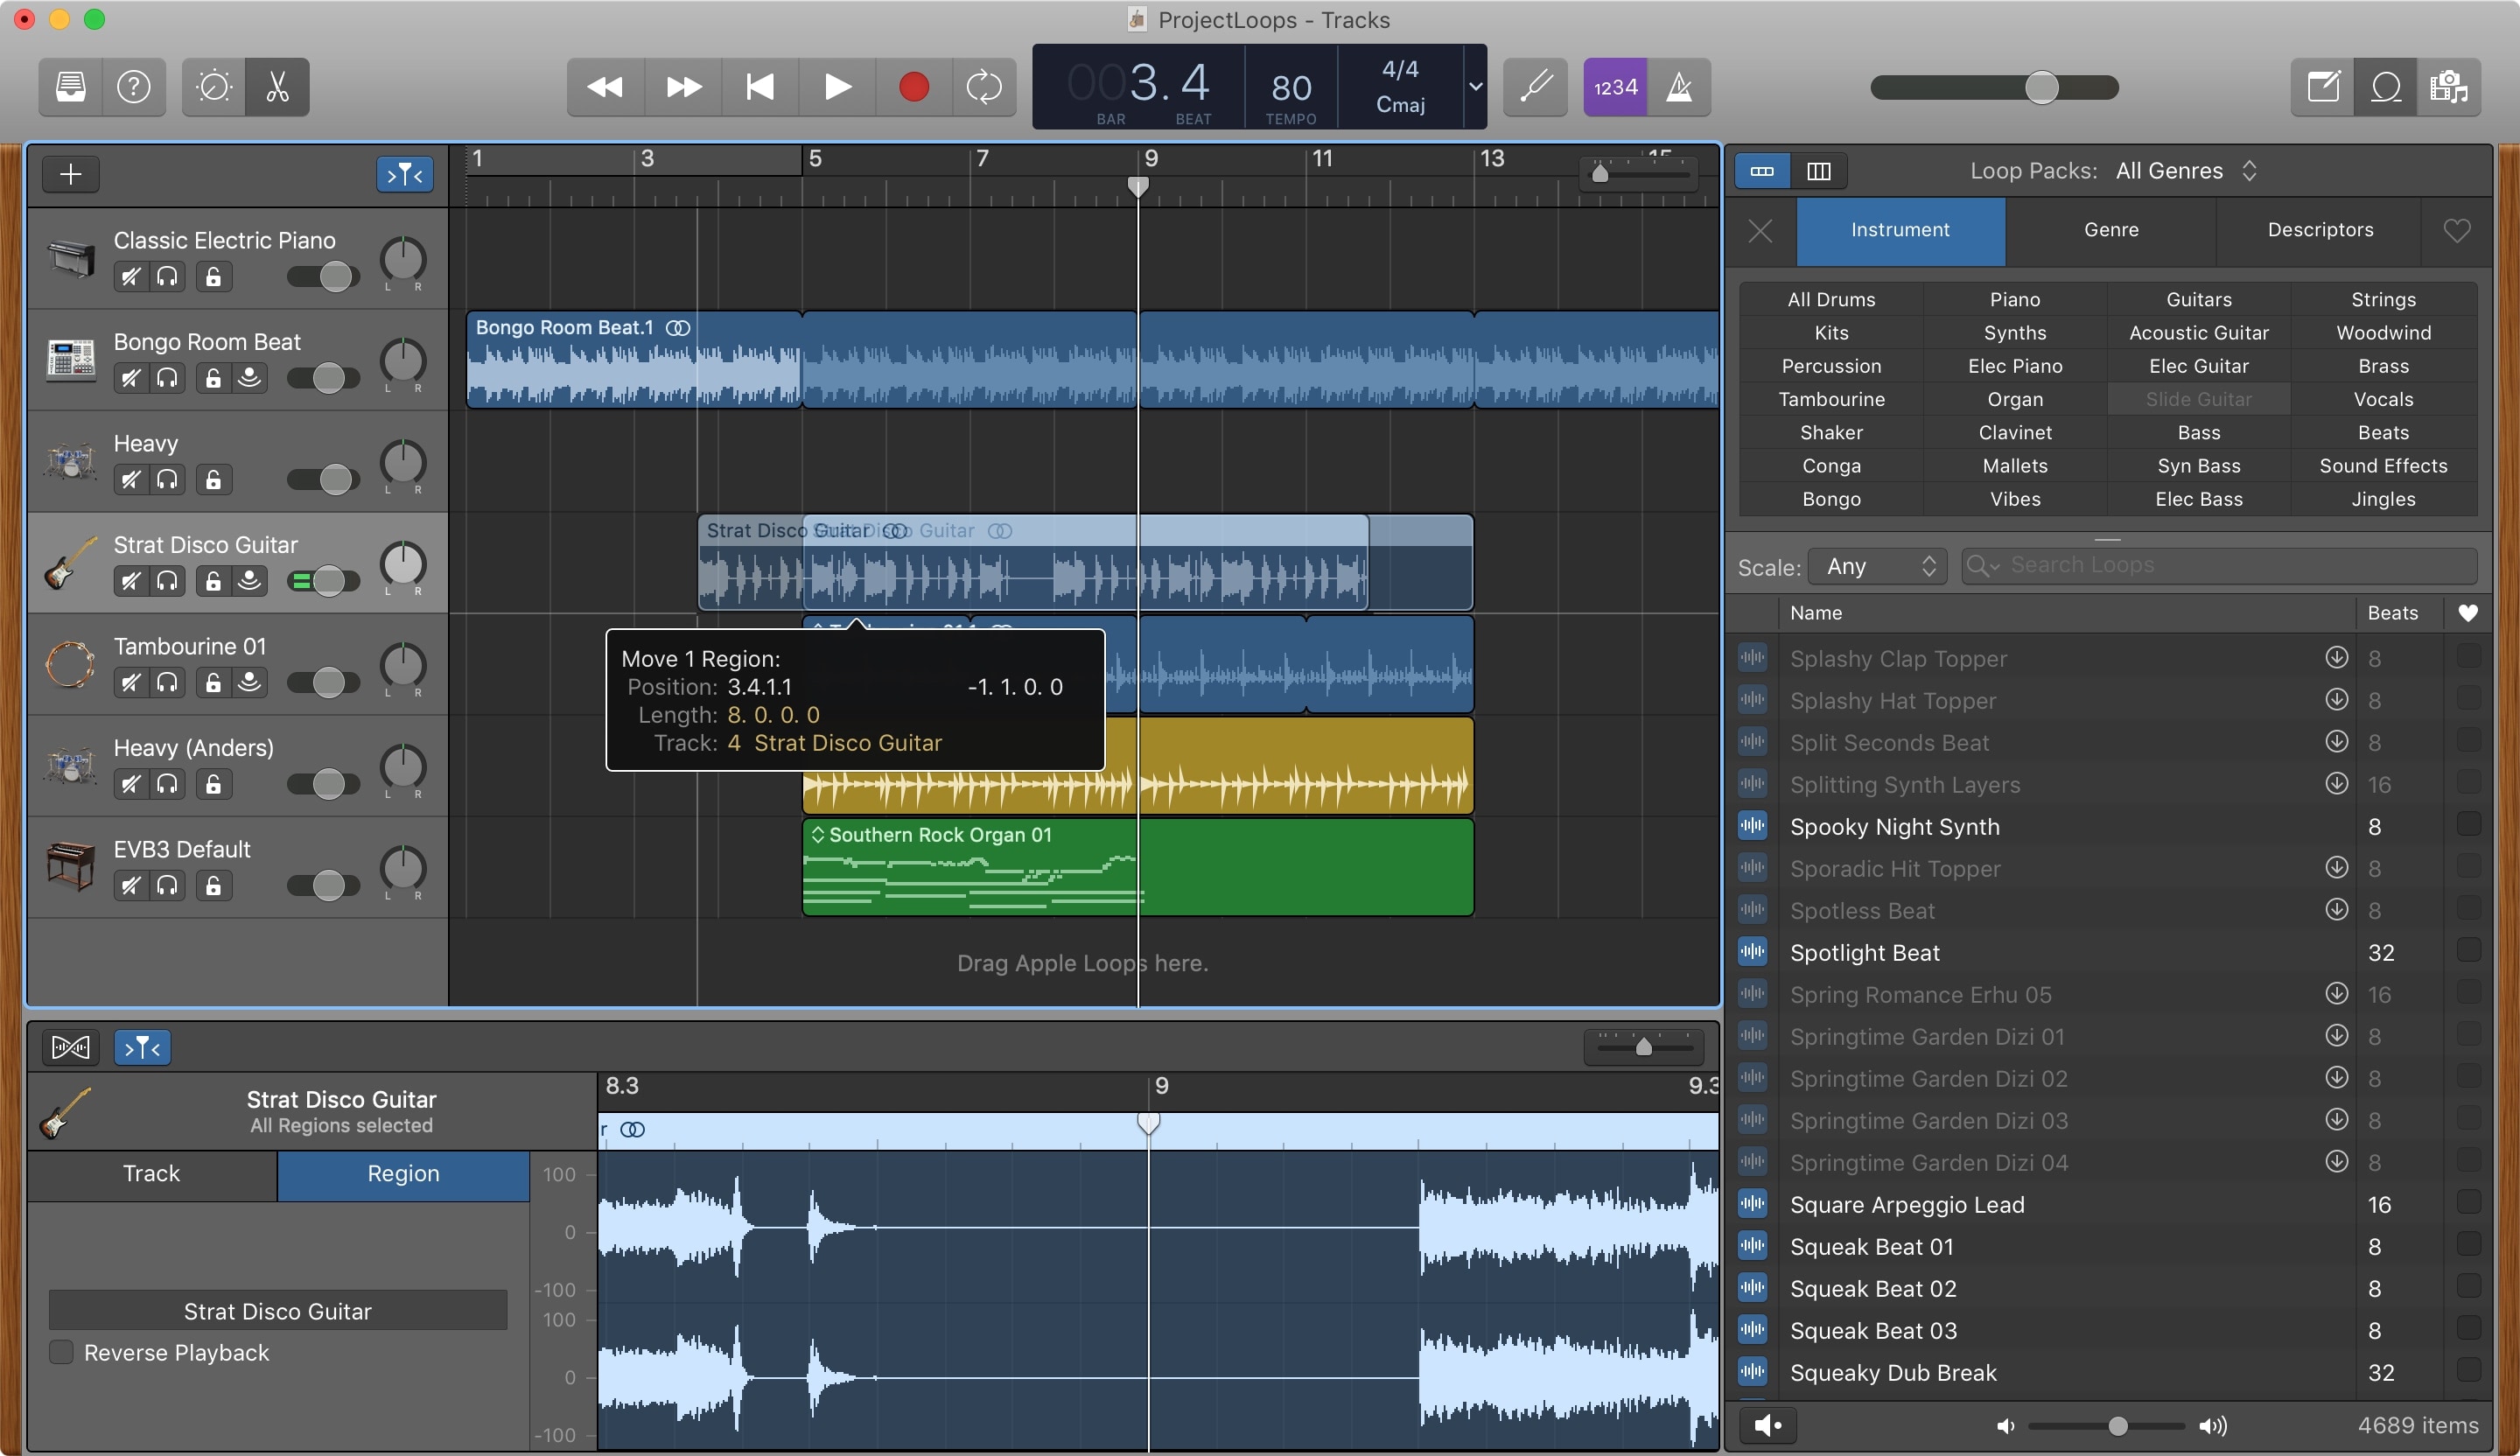
Move a Region
You can move Regions to different spots in the same track or to another track of the same type. To move a Region, select it and drag it to its new location.
Delete a Region
If you want to remove a Region from your track, select it and click Edit > Delete from the menu bar, press your Delete key, or right-click and choose Delete from the context menu.
If you want to move the Regions that follow the one you’re deleting, select the Region to delete, click Edit > Delete and Move from the menu bar.
Working with Regions in GarageBand on iPhone and iPad
Types of Regions
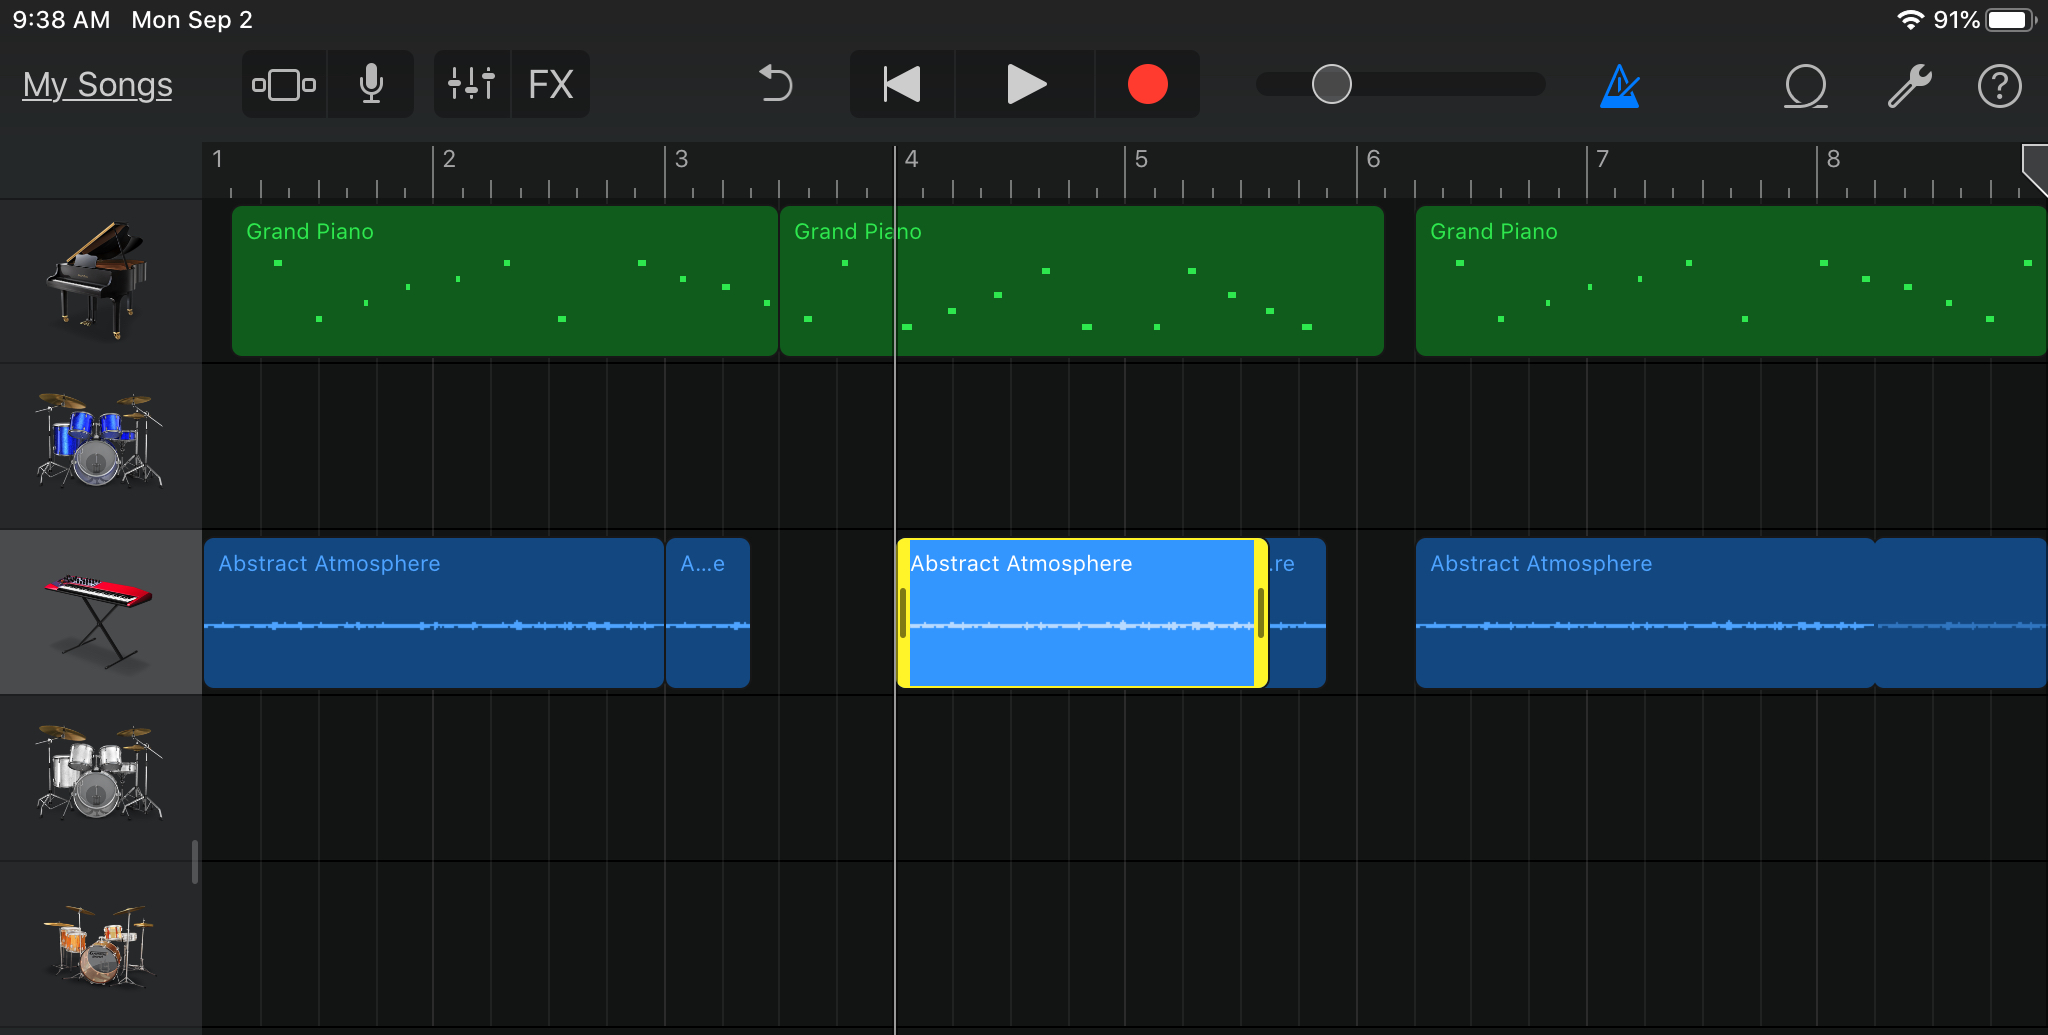
You’ll be working with different types of Regions in GarageBand on iOS as well, and each is colored-coded so you can quickly recognize it.
- Blue Regions: Audio recorder, amp recordings, and imported audio files
- Green Regions: Touch instruments
- Yellow Regions: Drummer tracks
Select a Region
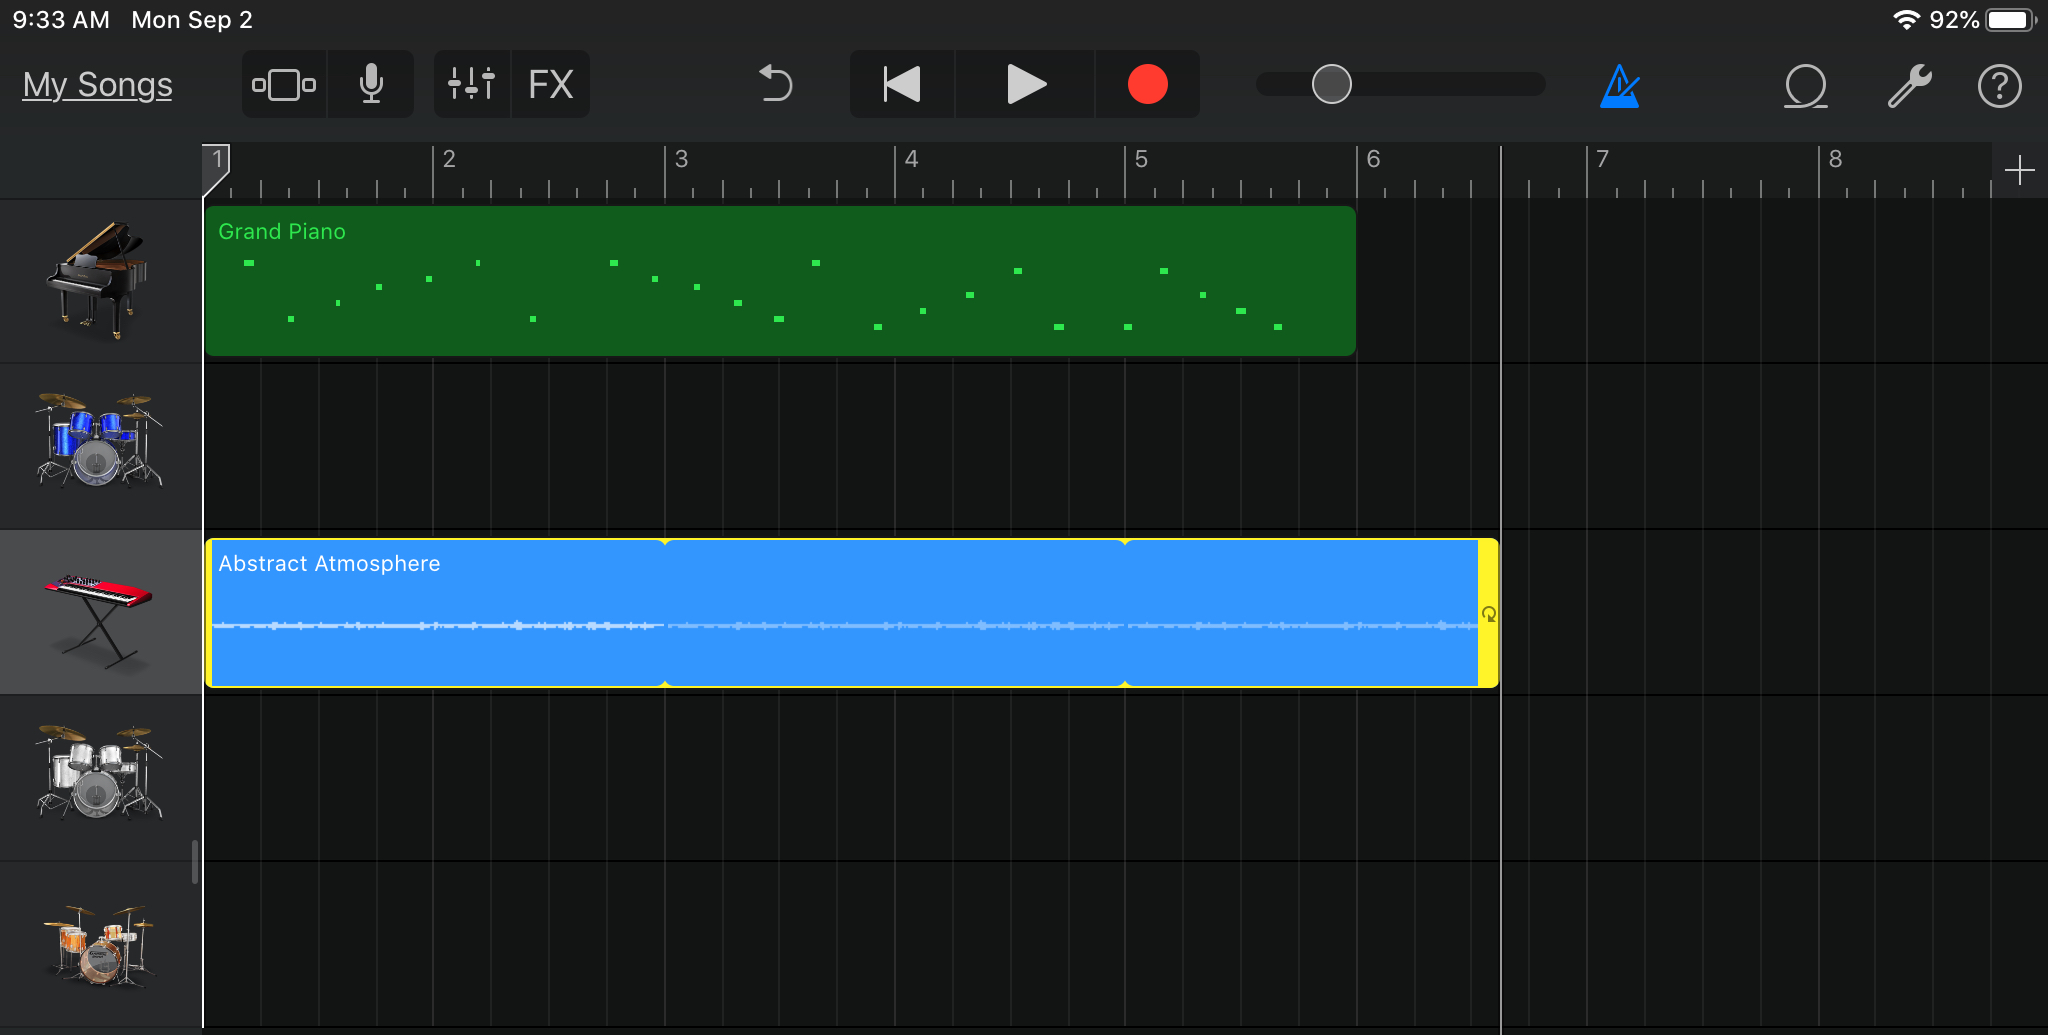
To edit a Region on iOS, you have to select it. And like on Mac, you also have different ways to do it depending on if you want just one, several, or all.
- One Region: Tap the Region in the Tracks area.
- Multiple Regions: Tap and hold a Region and then tap the others to select several.
- All Regions in a track: Tap the track header.
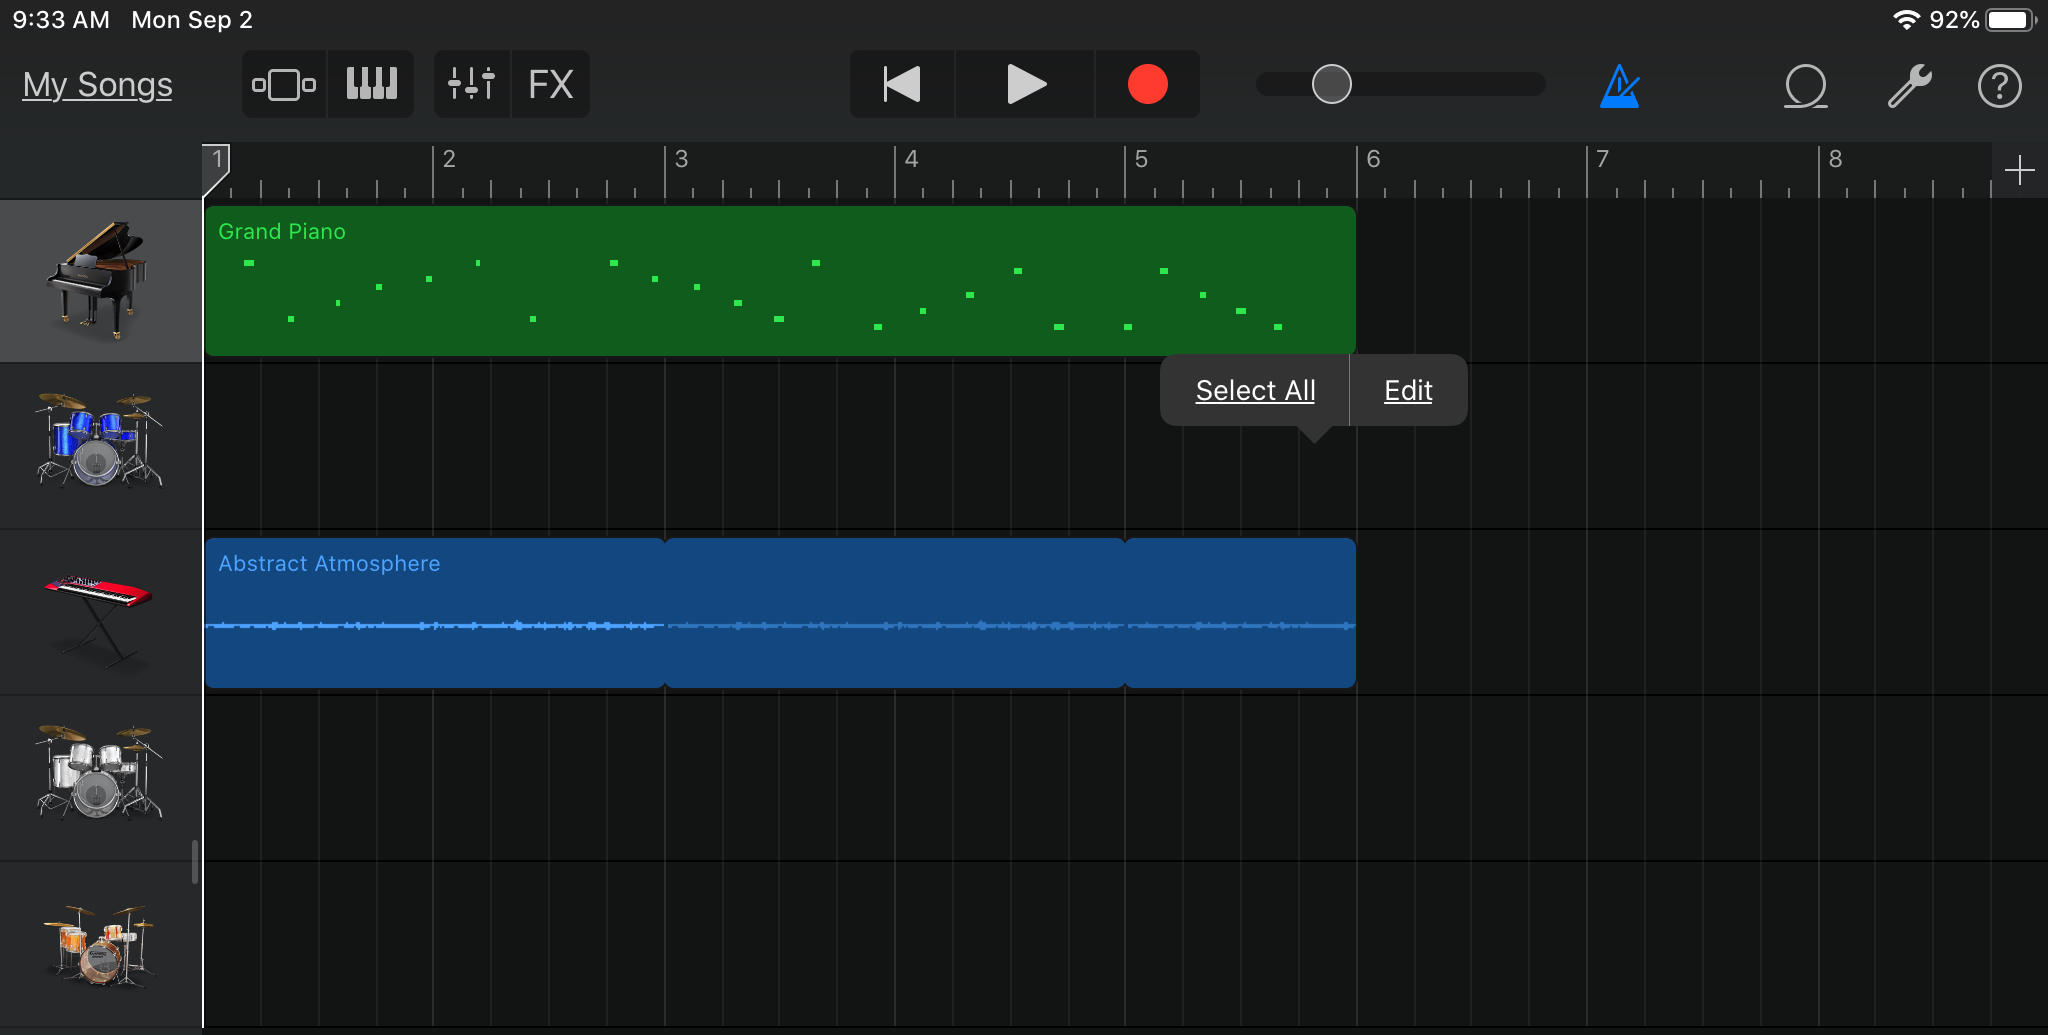
- All Regions in a project: Tap an empty spot in the song section and then tap Select All.
Cut, copy, and a paste Region
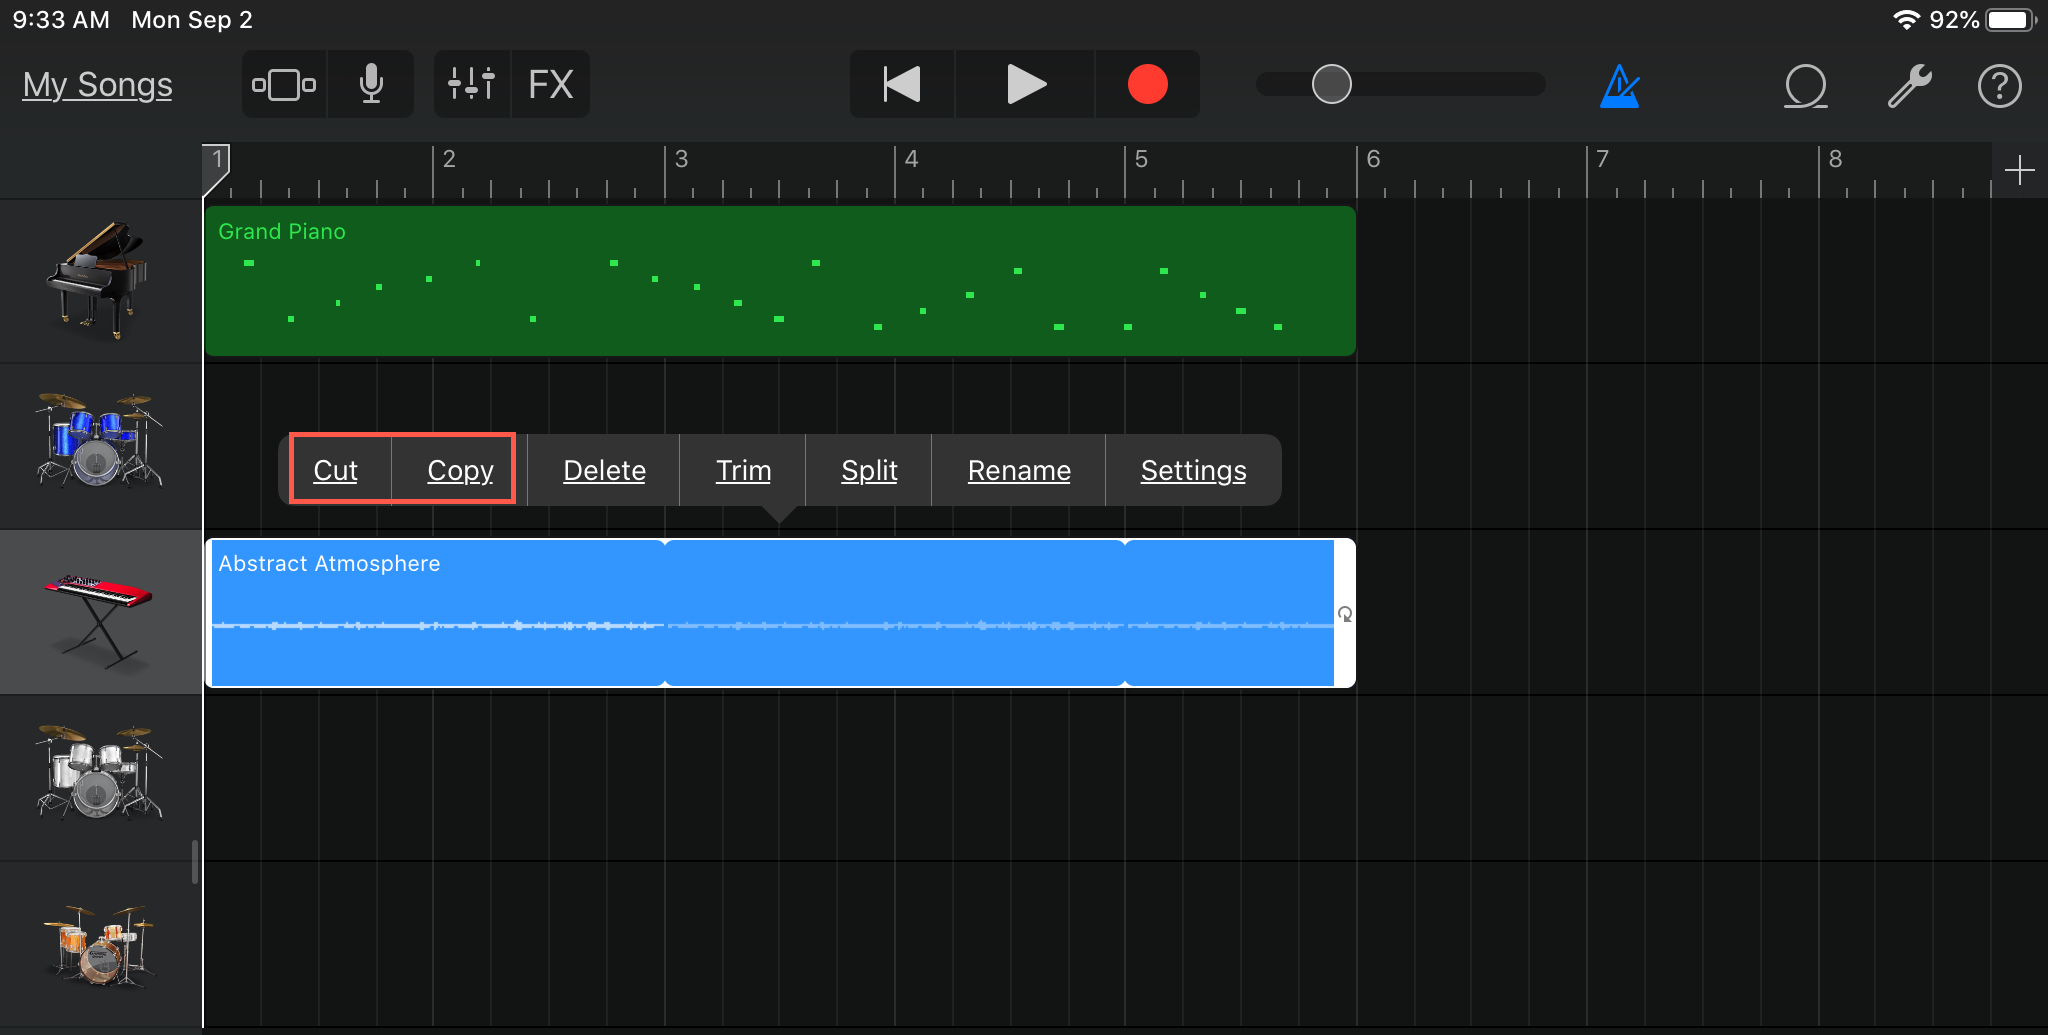
Tap to select the Region(s) you want to cut or copy and then tap it again. Select Cut or Copy in the shortcut menu.
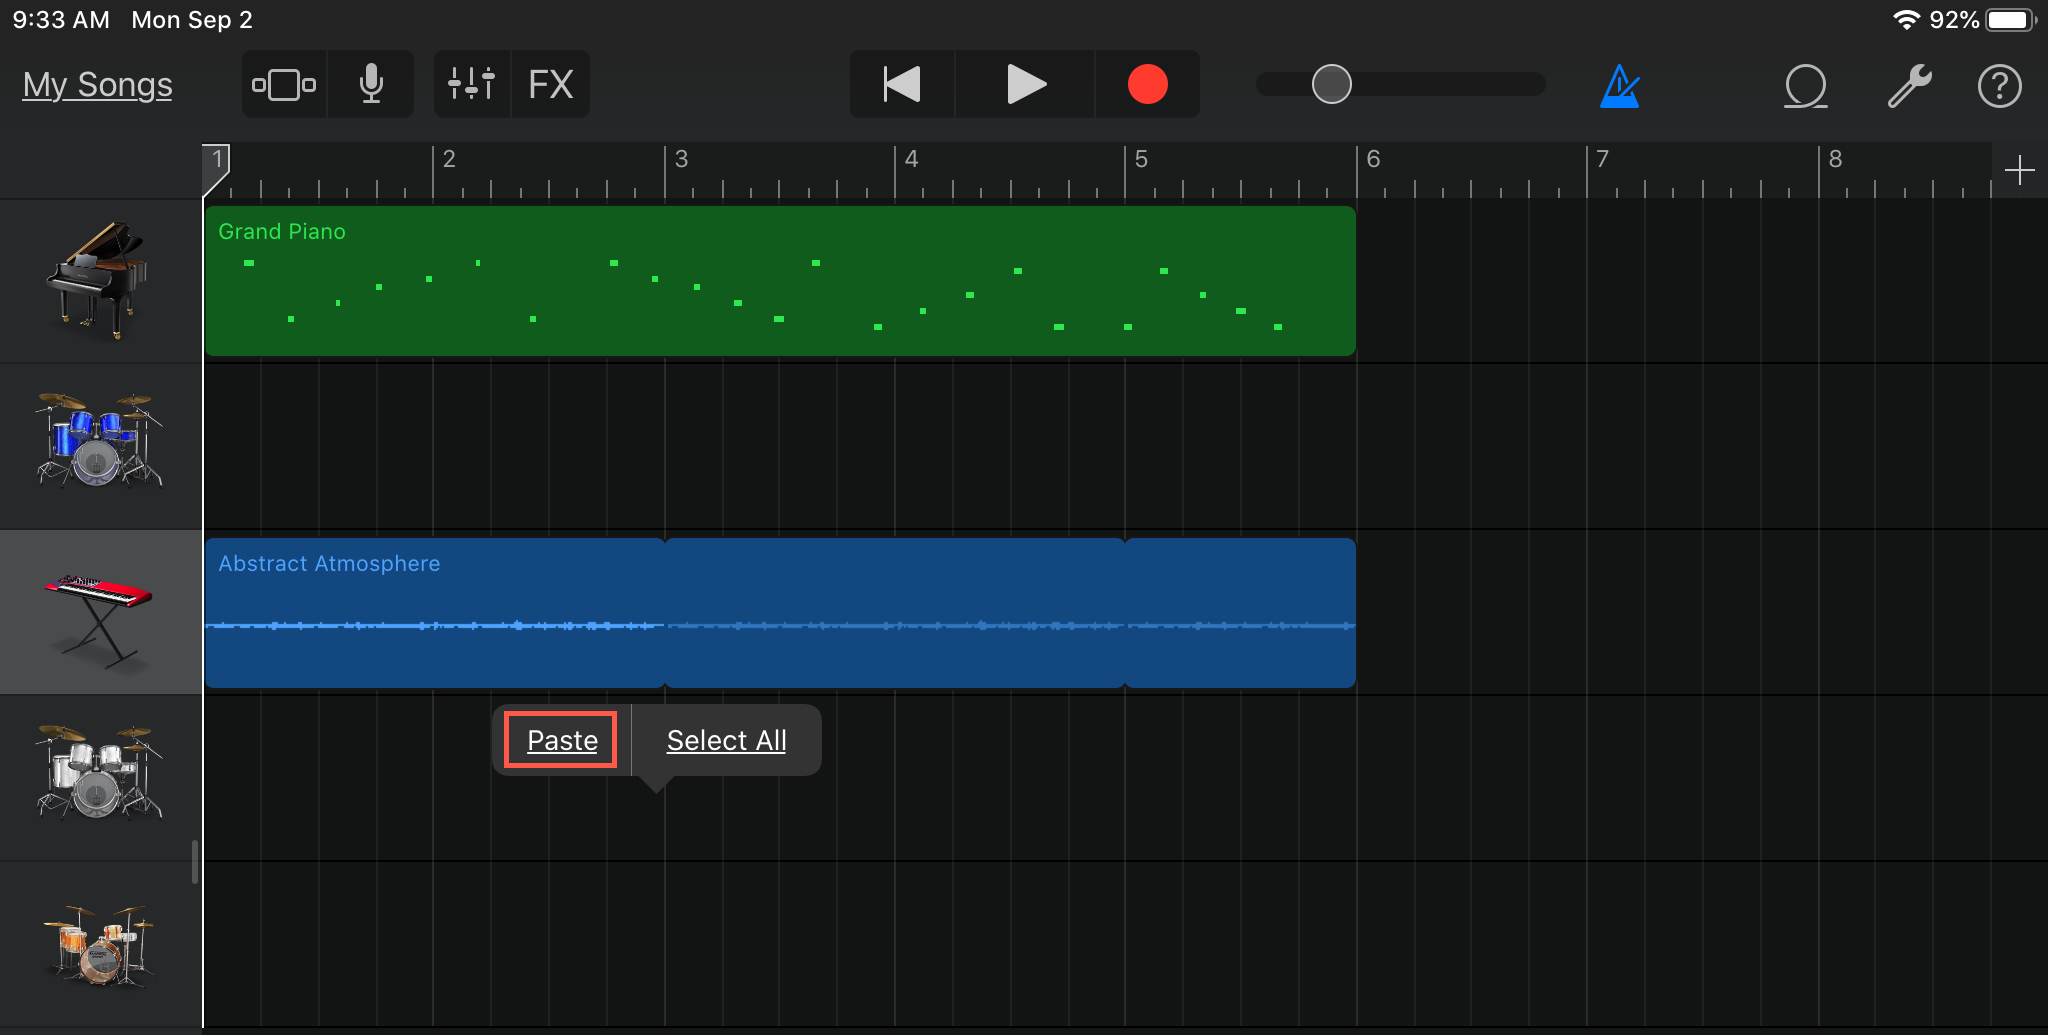
When you’re ready to paste a Region you’ve cut or copied, move the playhead to the location where you want it. Tap the track header and select the track. Tap once more and pick Paste from the shortcut menu.
Resize a Region
To shorten or lengthen a Region, select it using a method above and then drag the edge. You can only lengthen a blue Region to its original length, but you can shorten or lengthen a green Region as you please.
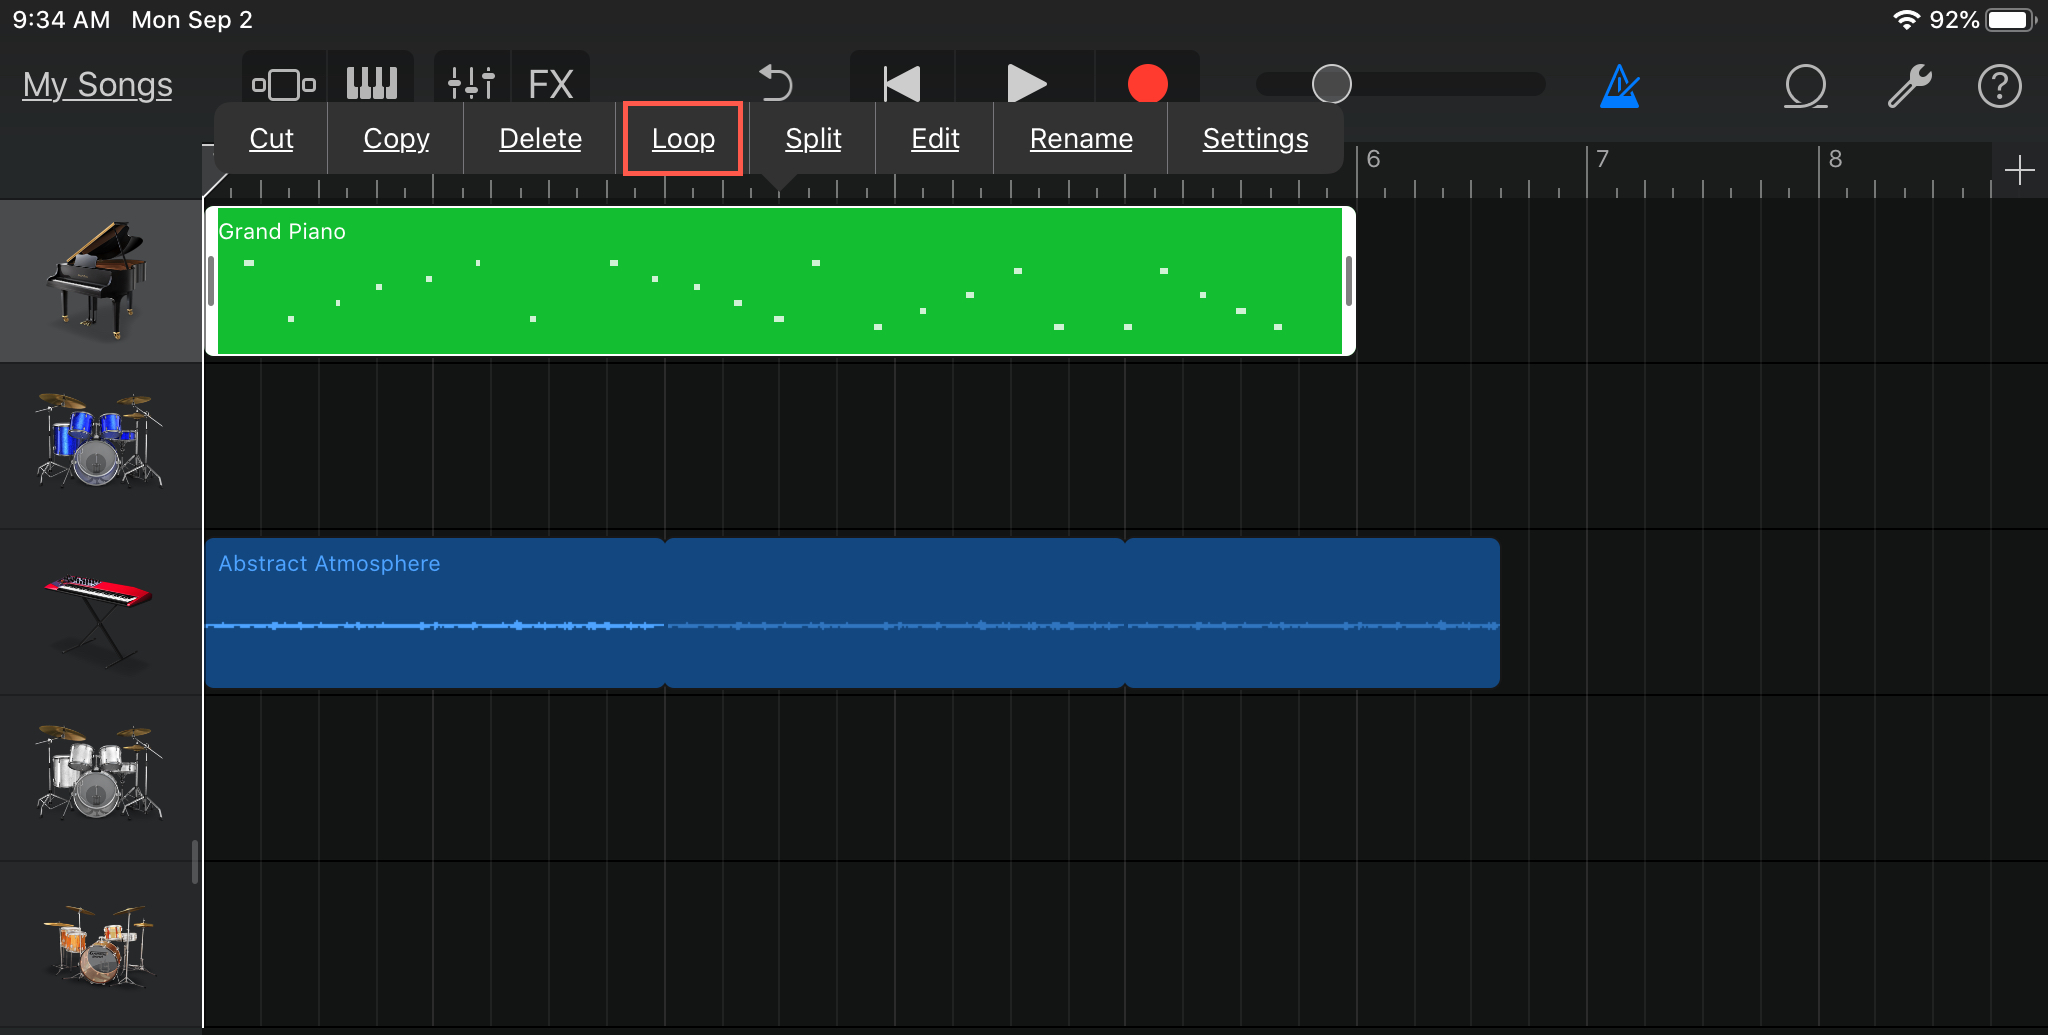
Loop a Region
To loop a Region on iOS, tap to select it, tap it again, and pick Loop. That Region will then loop until the end of the song section or until it reaches the next Region in the same track.
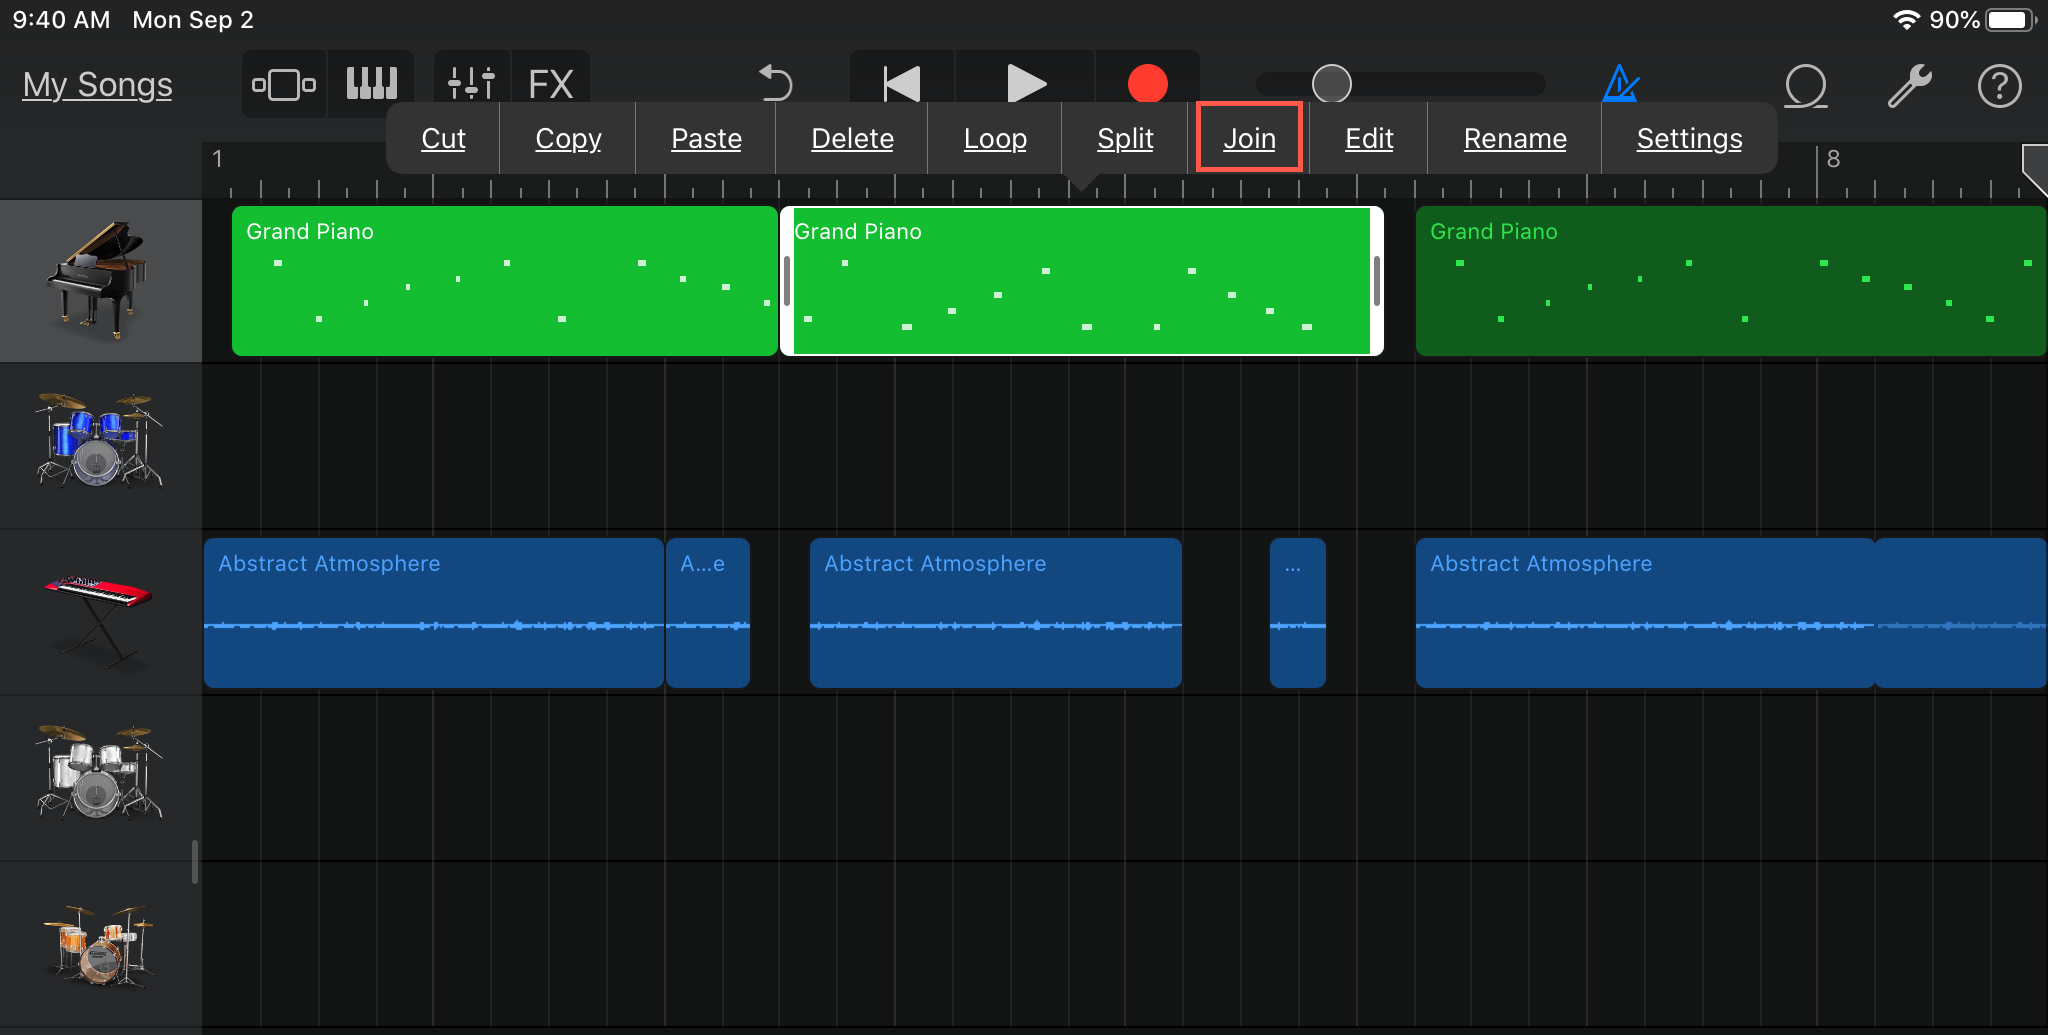
Join and Split Regions
To join Regions, make sure there are no other Regions between them. Then, tap and hold the first one and while holding, tap the second one. Tap one of the two and select Join.
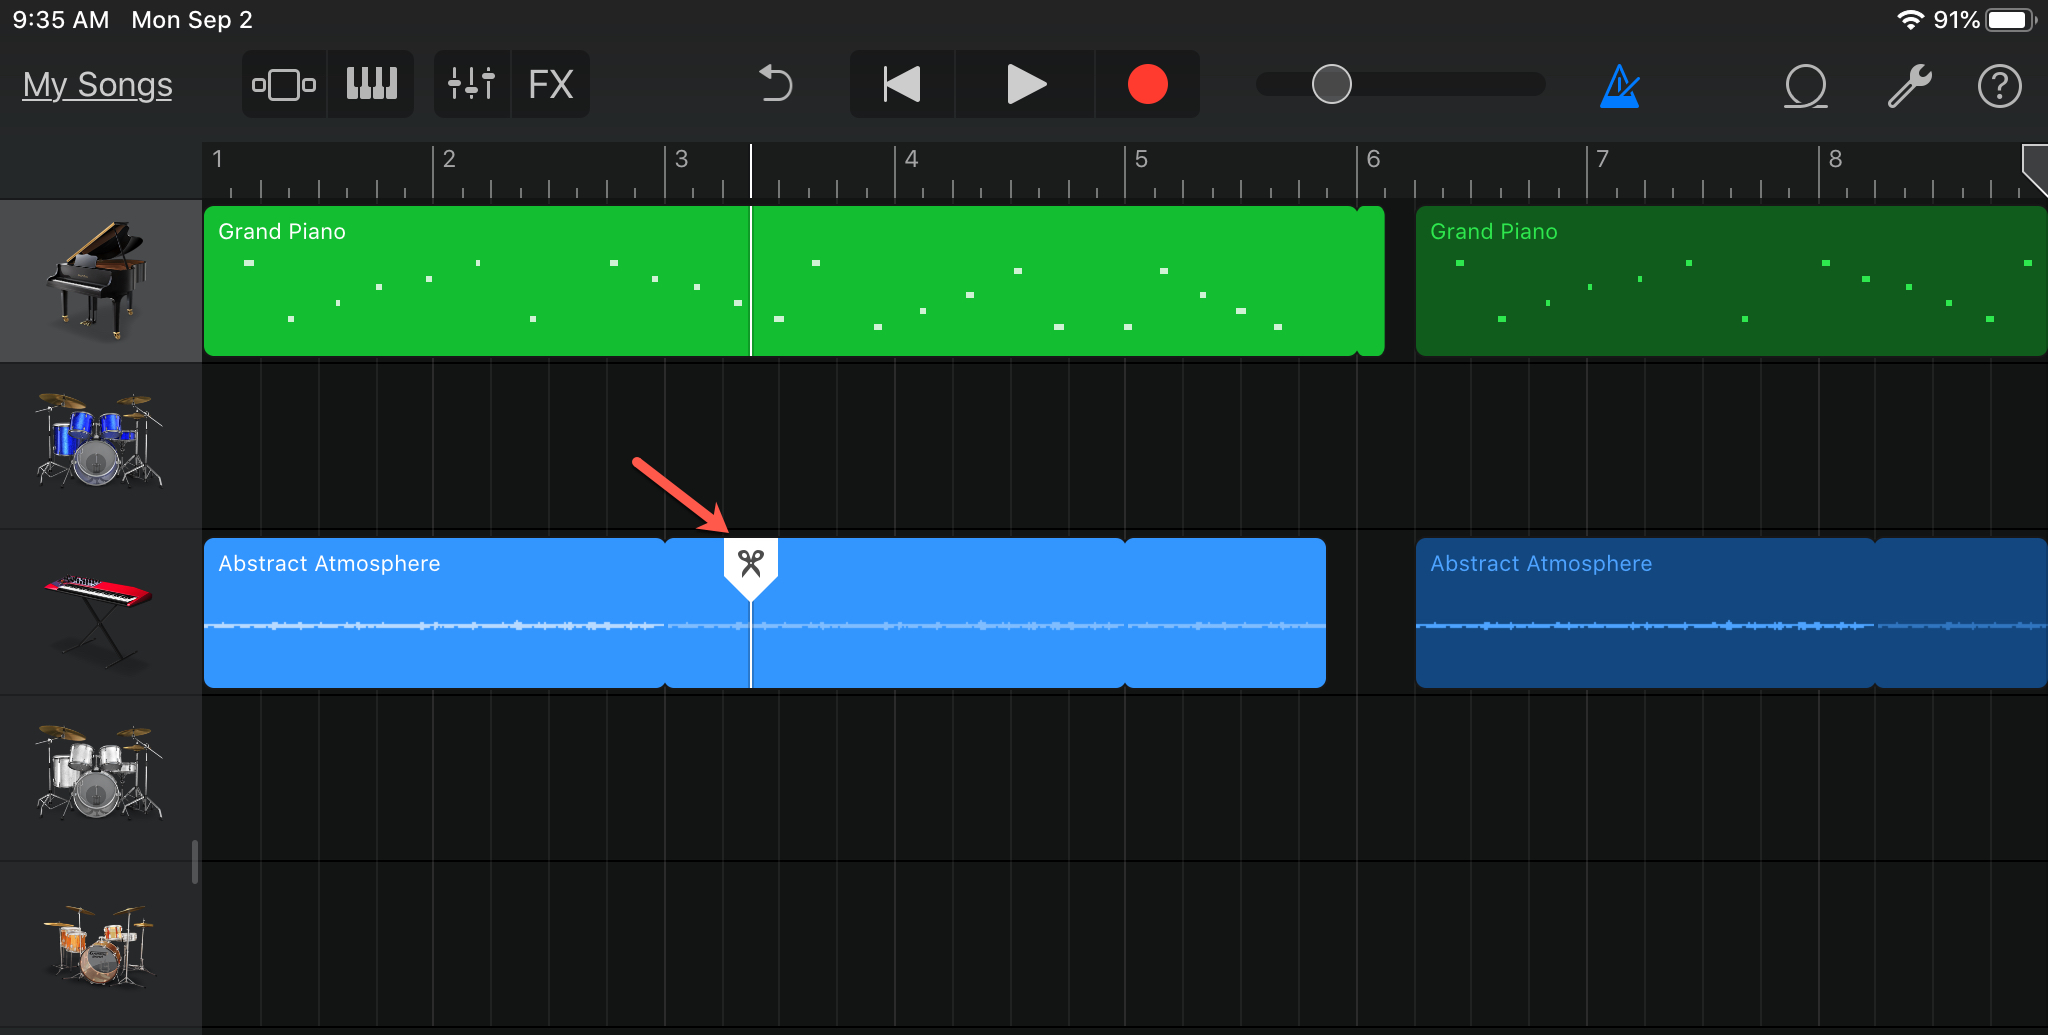
To split Regions, tap the Region and then tap it again and select Split. Drag the Split indicator left or right where you want the split, and then drag the indicator downward.
Move a Region
You can move Regions to different locations in the same track or to another track of the same type. To move a Region, select it and drag it to its new location.
Delete a Region
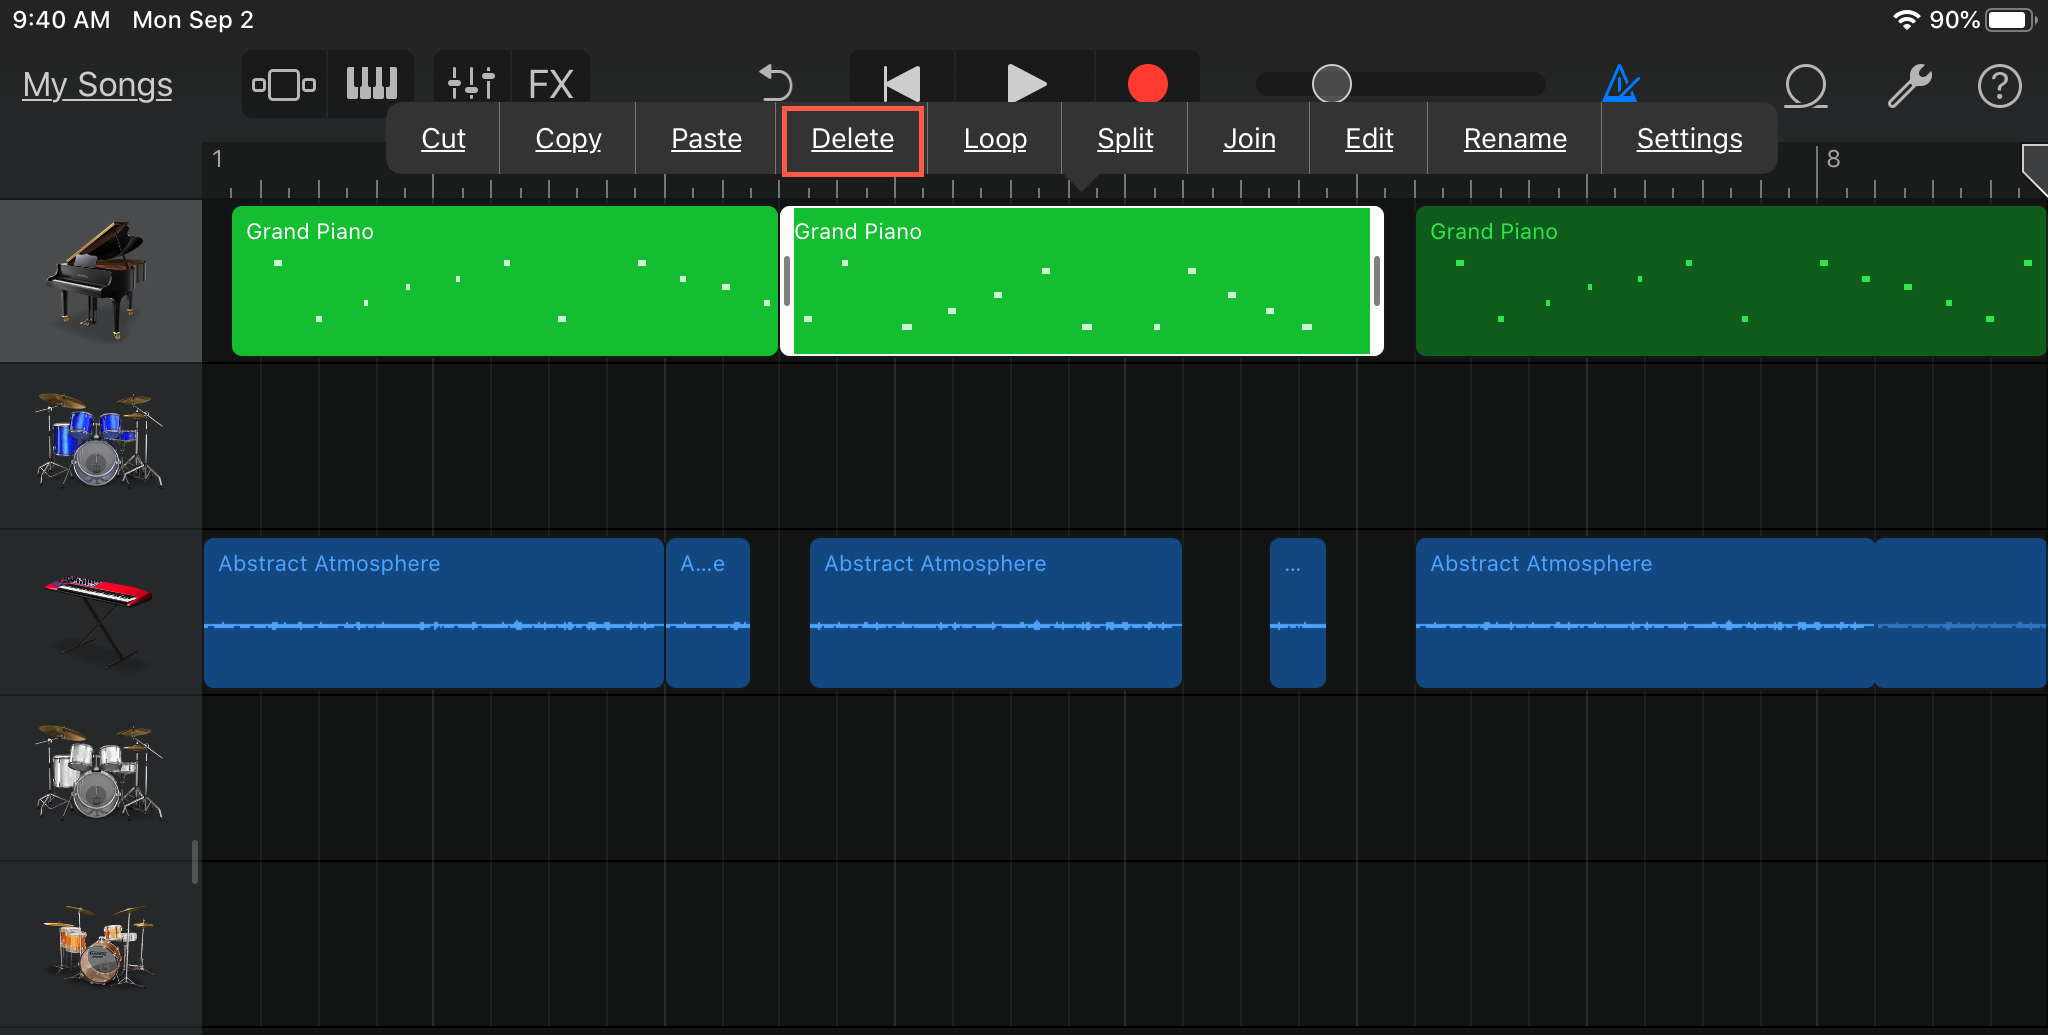
If you want to remove a Region from your track, tap to select it, tap it again and choose Delete from the shortcut menu.
Knowing how to work with Regions in GarageBand, whether on Mac or iOS, is a key element of the app. These Regions are the base for your song and are flexible enough to be manipulated as you need them.
Other GarageBand tutorials: