How to create a bootable macOS Catalina installer on a USB drive
 Malcolm Owen
If you have more than one Mac you want to upgrade to macOS 10.15 Catalina but don't want to waste so much bandwidth downloading it for each machine, one option is to create a bootable installer on a spare USB flash drive. Here's how to do it with the Terminal.
One of the problems with the release of a major operating system update like macOS Catalina is the amount of times it has to be downloaded. As Apple usually intends each Mac or MacBook needing to be updated to download it, the process isn't really efficient enough for instances where many Mac desktops need the upgrade, like in a school or business if there isn't device management or macOS Content Caching for whatever the reason.
The strain could also be felt by users who own multiple Macs but also have a limited data allowance from their Internet provider, or a small amount of bandwidth that could make updating multiple machines take a very long time and saturate the available connection.
While in the olden days it was possible to get the software update on physical media, Apple doesn't offer that option anymore. However, it is still possible to create your own media, such as a spare USB thumb drive, that can do the same job.
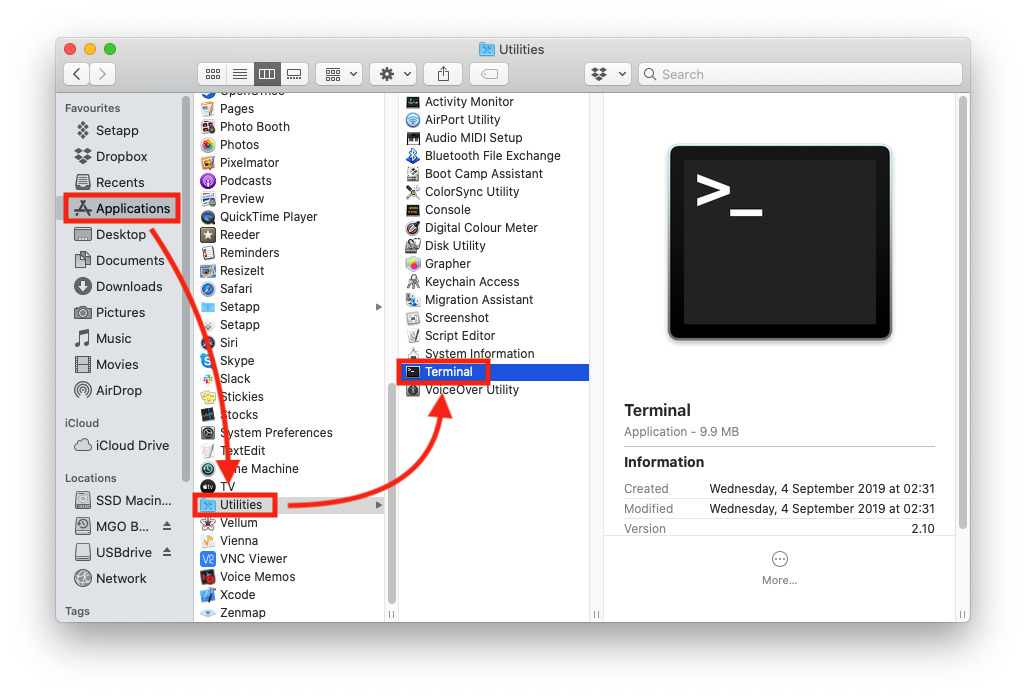
Acquiring the Installer
The first hurdle is to actually get the macOS Catalina installer onto a Mac. This is an unavoidable part of the process and will require just over 8 gigabytes of drive capacity to store.
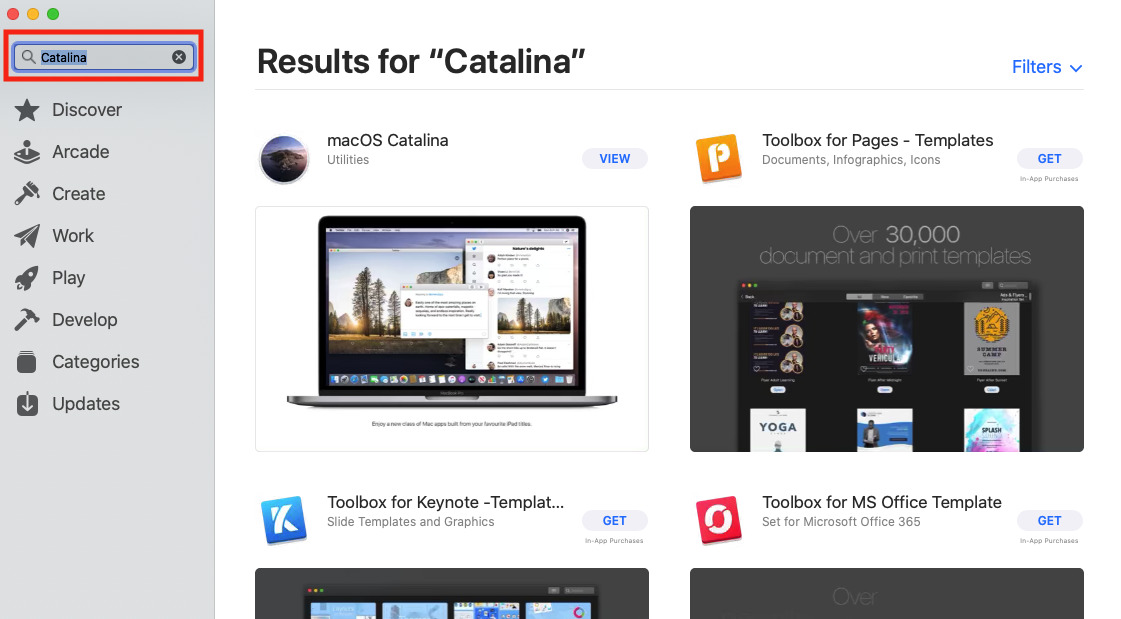
Go to the Mac App Store and search for Catalina using the search bar, then click on View next to the macOS Catalina listing. Alternately, open the Mac App Store Preview page for macOS Catalina here then select View in Mac App Store.
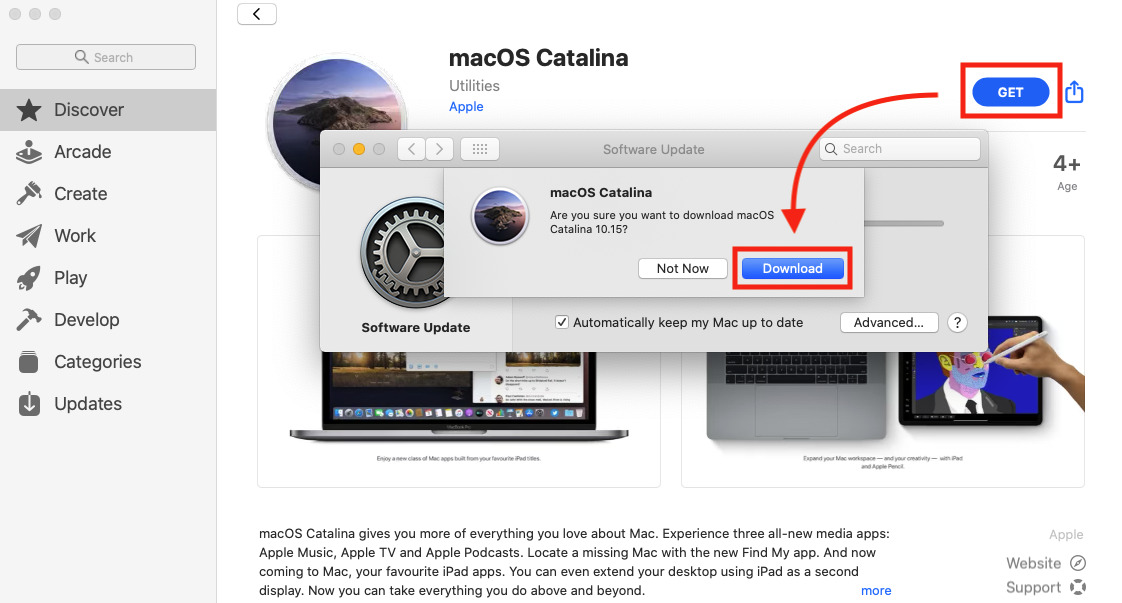
Click on Get. This will load up the Software Update utility, which will ask if you want to download macOS Catalina. Click Download.
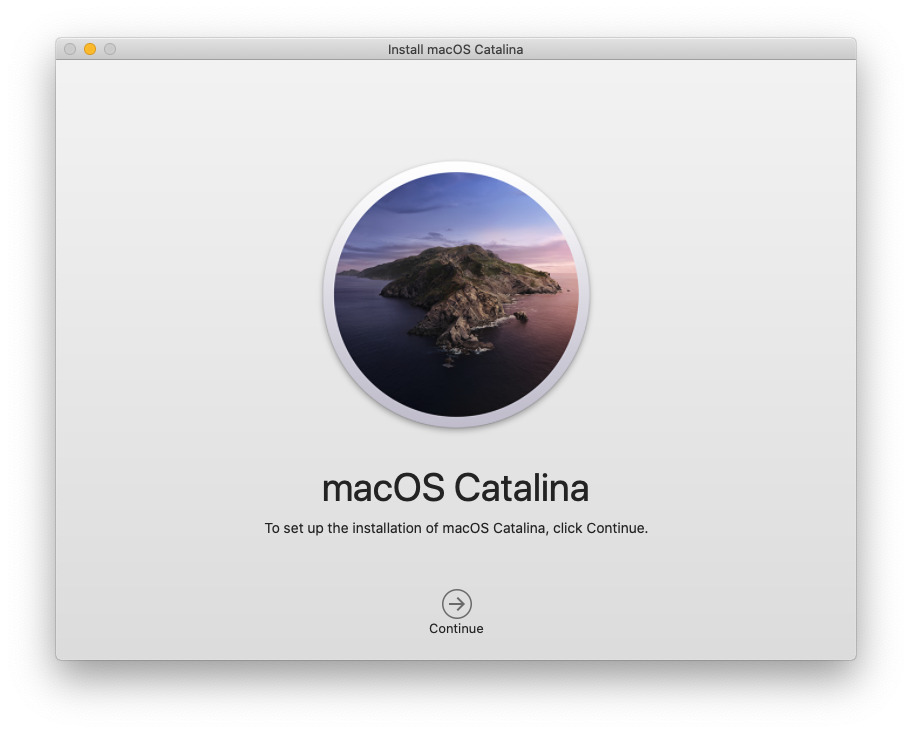
After the download has finished, macOS will automatically start the installer. Press Command-Q to quit the installer before it continues, as the update will be deleted upon installation.
Creating the Bootable Drive
You need an external drive to turn into a bootable version, and since it needs to be portable, your best choice is a USB thumb drive with a capacity of 16GB or more. Be aware that the drive will be wiped as part of the process, so ensure there isn't any precious data on the drive that could be lost if it isn't backed up elsewhere.
Connect the external drive to your Mac, and make a note of the external drive's name as it appears within macOS. This is important, as using the wrong name could lead to another connected drive being wiped by mistake.
Open Terminal within the Utilities folder within the Applications folder and enter in the following command by copying and pasting it directly into the window. Make sure to change the element titled "USBdrive" for the name of the drive you intend to become the bootable installer.
sudo /Applications/Install\ macOS\ Catalina.app/Contents/Resources/createinstallmedia — volume /Volumes/USBdrive — /Applications/Install\ macOS\ Catalina.app
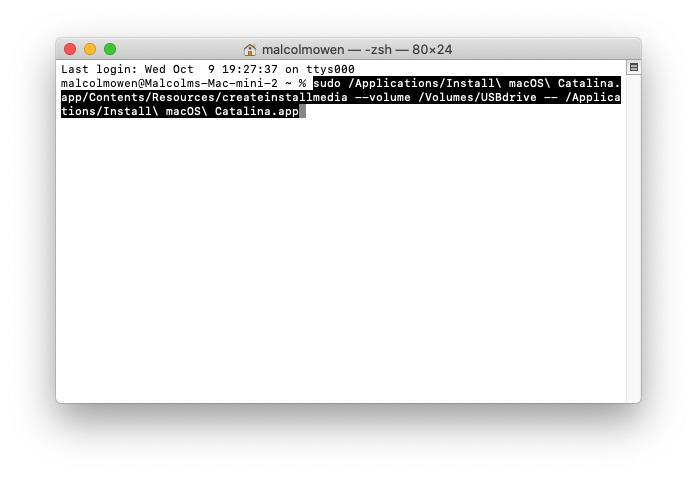
Once pasted and corrected, press enter, then enter your password for macOS and press enter again.
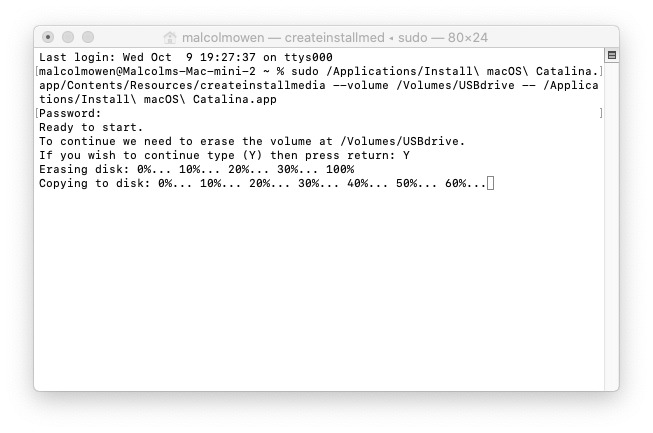
Terminal will then warn of the USB drive being wiped as part of the process. Type "Y" and press enter. Leave the Mac alone as it formats and copies over the installer.
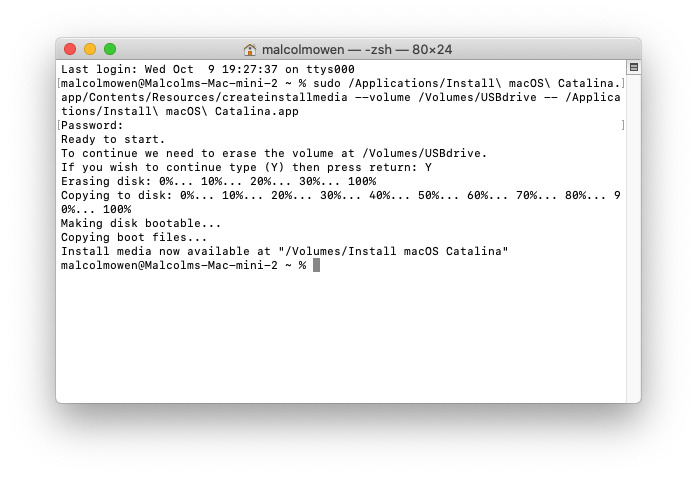
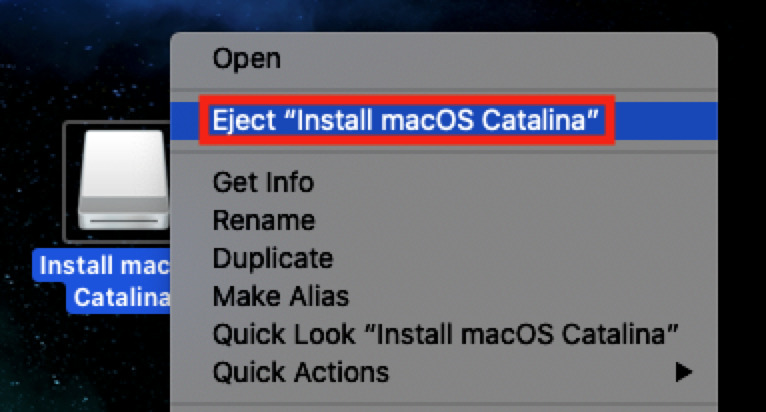
Once Terminal says "Install media now available," it is safe to right-click the removable drive on the desktop renamed "Install macOS Catalina" and select the "Eject" command. It is now safe to remove the drive from the Mac.
Upgrading another Mac
Before proceeding, ensure there are adequate backups available for the Mac you are about to upgrade before the process starts.
With the target Mac you want to upgrade turned off, connect your external drive. When turning on the Mac, hold down the Option key on the connected keyboard to bring up the Startup Manager.
The Startup Manager is used to boot from a different drive from the default. In this case, select "Install macOS Catalina."
The Mac will then bring up a macOS Utilities window. To perform a straight update, select "Install macOS" and follow the prompts.
The macOS Utilities menu also allows you to erase the Mac's drive, which you can optionally do if you do not wish to save any of the data and want a completely clean slate for the installation.


 Chip Loder
 Andrew Orr
 Marko Zivkovic
 David Schloss


 William Gallagher