Here’s a complete tutorial on how to jailbreak iOS 13 to iOS 13.2.2 using Checkra1n on Mac on a compatible iPhone or iPad device.
As you may already know by now, bootrom checkm8 exploit-based iOS 13 jailbreak dubbed checkra1n is now out to public. It supports all devices up to iPhone X and up to iOS 13.2.2 firmware. Here in this post we will show you how to go about jailbreaking your device using checkra1n.
Requirements: For this jailbreak, there are a set of requirements that you need to meet before going ahead with it. Here’s what you need:
- A5-A11 iPhone or iPad. (iPhone XS/XR and above aren’t supported by checkm8 exploit)
- iOS 12.3- iOS 13.2.2. We recommend installing the latest iOS 13.2.2, which you can download from here.
- A computer running macOS. (Windows and Linux support are coming later)
- Latest version of iTunes installed if using a Mac running anything prior to macOS Catalina.
- Checkra1n jailbreak app. (Download from here)
How-to jailbreak iOS 13.2.2: If you meed the above requirements, simply follow the instructions below to jailbreak your iPhone or iPad.
Step 1: Connect your compatible iPhone or iPad device to computer via USB and launch checkra1n jailbreak app by right-clicking on the app icon and then clicking on “Open”. Make sure you give full permissions to the app, and disable FileVault if the app seems to have problem running with it turned on.
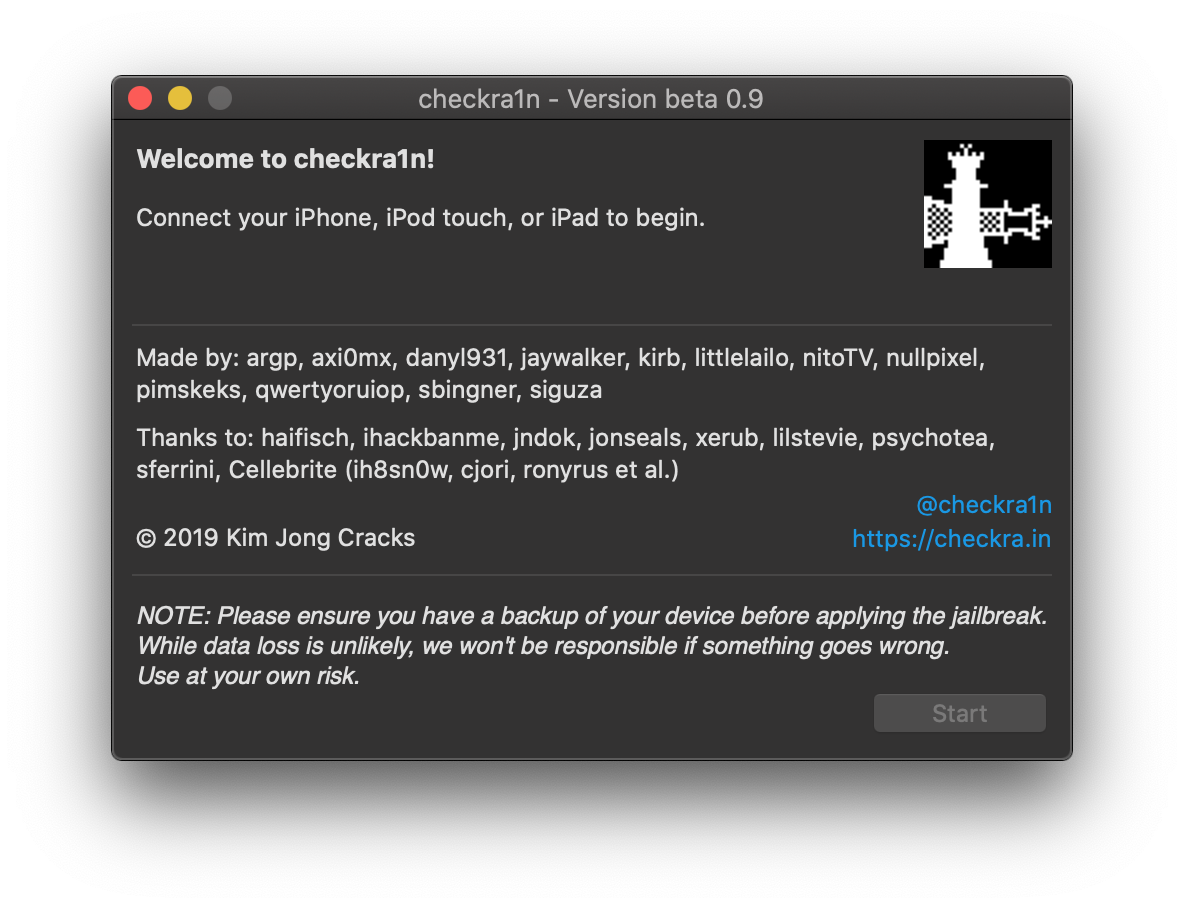
Step 2: Once checkra1n detects the connected device, click on “Start” button followed by “Next” to continue jailbreaking process.
Step 3: On the next screen, checkra1n app will provide you instructions on how put the device into DFU mode for jailbreak to commence. Follow the on-screen instructions to put your device into DFU mode. If you are having trouble following the on-screen steps, you can follow our own instructions on how to put your device into DFU mode here:
- iPhone 8 / 8 Plus, iPhone X / XR / XS / XS Max / 11 / 11 Pro / 11 Pro Max, or 2018 iPad Pro owners can follow this guide.
- iPhone 7 / 7 Plus owners: Enter DFU Mode On iPhone 7 Or iPhone 7 Plus, Here’s How
- If you have an iPhone 6s / 6s Plus or any other iPad, then follow the instructions here.
Note: If you fail the DFU mode step. The jailbreak app will restart and have you try the process again and it will repeat this until you get it right.
Step 4: Once the device is in DFU mode, the actual process of device exploitation and jailbreaking will begin. During this, your device will show verbose log of jailbreak process. Just do not do anything with the device and your computer at this point and let it do its thing.
Step 5: Once done, your device will respring and you should see checkra1n app on the Home screen.
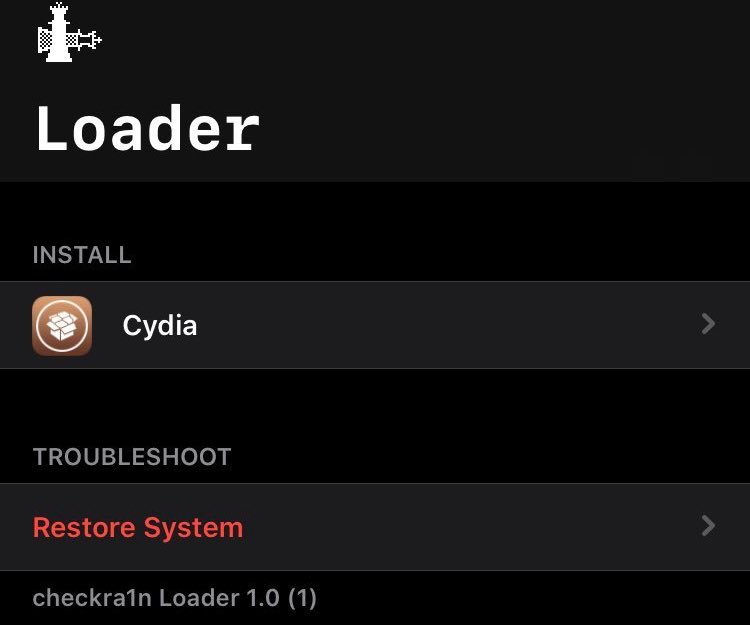
Step 6: Run this app and new Loader screen will launch. Here, select Cydia and let it install.
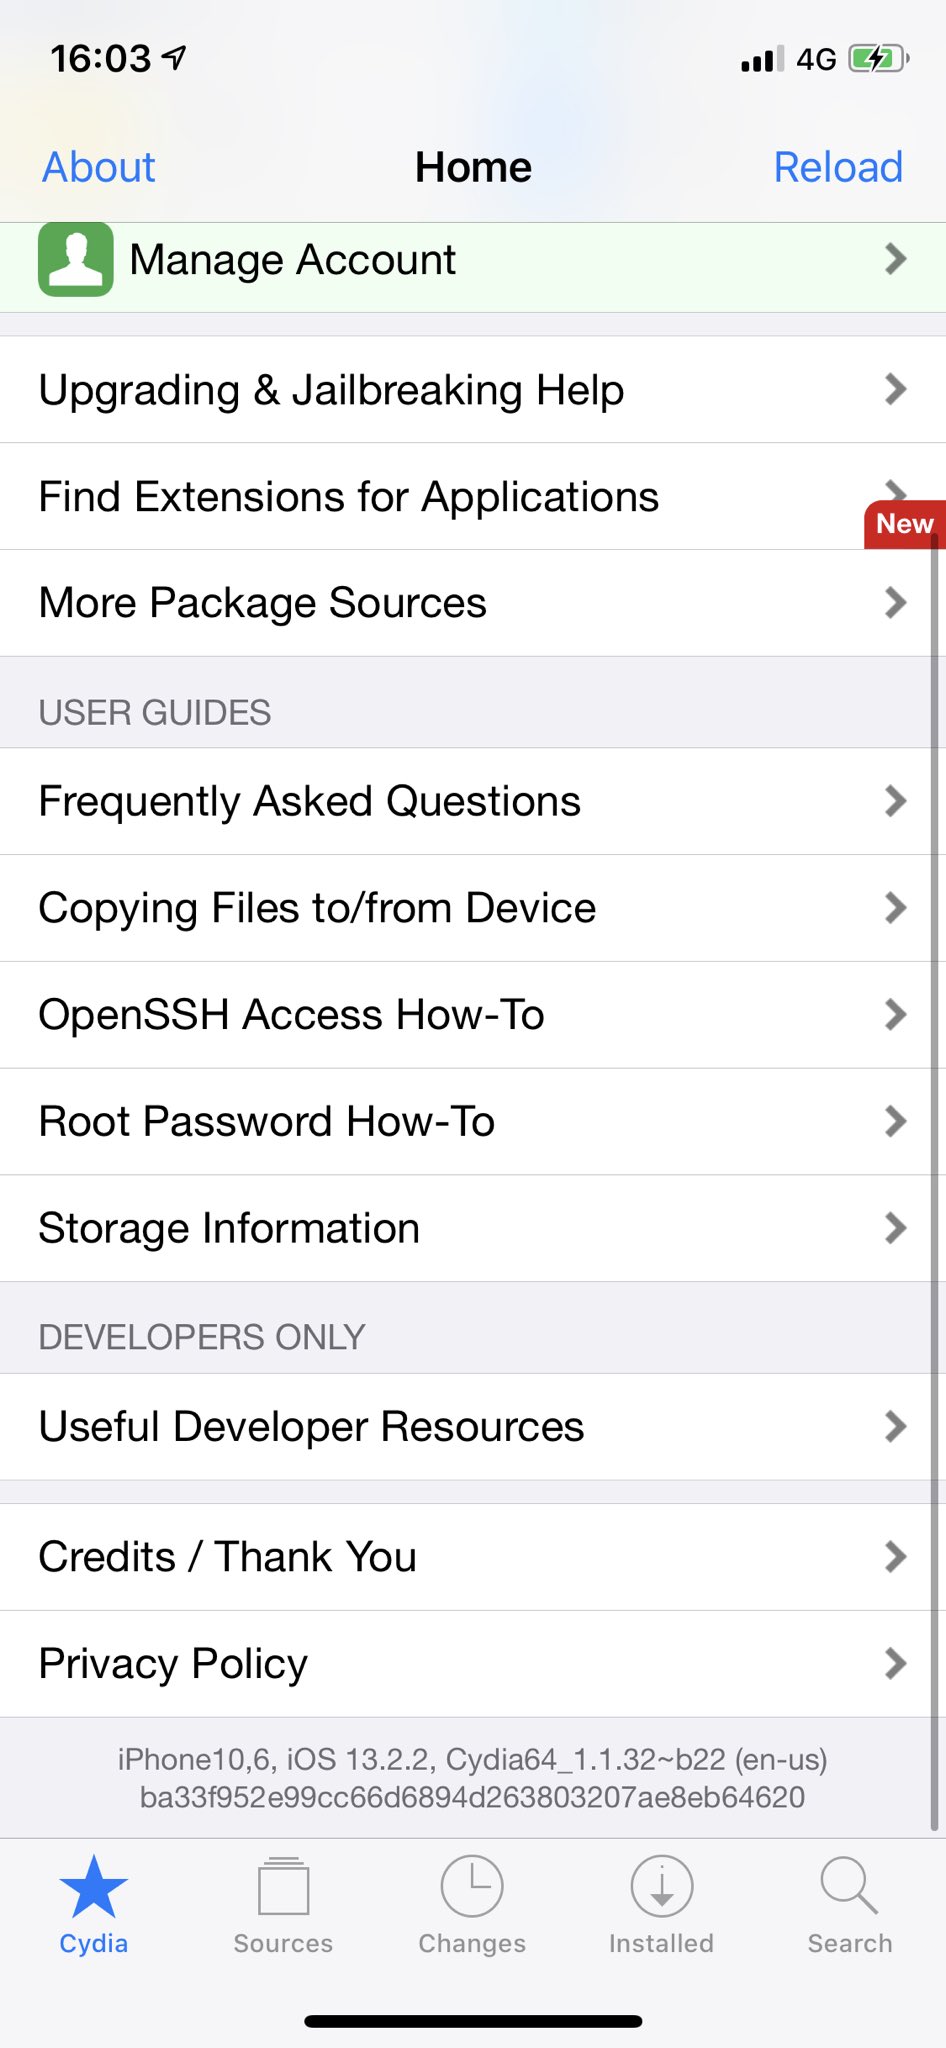
Step 7: Once Cydia is installed, the device will respring again, this time with Cydia icon on the Home screen.

That’s pretty much it. Run Cydia and let it complete reloading and refreshing sources. Install upgrades if Cydia prompts to.
Since this is a semi-tethered jailbreak, what that means is that if you reboot your device, you will have to put it back into jailbreak mode every time by connecting your device to your computer, running checkra1n app, putting the device into DFU mode and then letting the app put it back into jailbreak mode. If you don’t do this, Cydia and all other tweaks will crash.
Here’s a video of it all in action:
Subscribe to our YouTube channel for more videos.
Enjoy the jailbreak!
You may also like to check out:
- Fix iOS 13 Apple Notes App Sync Not Working With Catalina And Other Devices, Here’s How
- Download: iOS 13.2.2 / iPadOS 13.2.2 IPSW Links, OTA Update Released
- iOS 13.2.2 Release Notes, Changelog: All New Features And Changes In One Place
- Gold iPhone 11 Pro Max: Case, Lightning Cable, Wireless Charger, Band, Speaker, More
- Red iPhone 11 Accessories: Case, Lightning Cable, Wireless Charger, Band, Speaker, Much More
- Yellow iPhone 11 Accessories: Case, Lightning Cable, Qi Wireless Charger, Band, Speaker, Much More
- Purple iPhone 11 Accessories: Case, Lightning Cable, Qi USB Charger, Band, Speaker, Much More
- Green iPhone 11 Accessories: Case, Lightning Cable, Qi USB Charger, Band, Speaker, Much More
- Midnight Green iPhone 11 Pro Max: Case, Lightning Cable, Wireless Charger, Band, Speaker, More
- Best iPhone 11, 11 Pro Max Case With Slim, Wallet, Ultra-Thin Design? Here Are Our Top Picks [List]
- iPhone 11 / 11 Pro Max Screen Protector With Tempered Glass: Here Are The Best Ones
- Apple Watch ECG App Hack: Enable Outside US In Unsupported Country On Series 5 & 4 Without Jailbreak
You can follow us on Twitter, or Instagram, and even like our Facebook page to keep yourself updated on all the latest from Microsoft, Google, Apple, and the Web.
