Procreate 5 for iPadOS is out with an impressive roster of new features. The update by Savage Interactive includes a new graphics engine, an updated color picker and color management tools, an incredibly deep and flexible brush studio, and a fun new animation assistant that brings your creations to life. Remarkably, these robust new features don’t clutter the app’s UI or add undue complexity. Instead, Procreate 5 delivers its added flexibility and power gracefully and in a manner that I expect both veterans of the app and newcomers alike will appreciate.
Procreate has been around since the earliest days of the App Store and has been used to create fantastic art. Over the years, we’ve covered stories of artists using the app to create everything from the Stranger Things poster art and a photorealistic portrait of Morgan Freeman featuring 285,000 brush strokes to a recent Apple ad. Procreate’s capabilities are impressive, but also a little intimidating.
I don’t consider myself much more than a doodler at best, which made me question whether the app was for me and whether I should tackle reviewing it at all. Here’s the thing, though: you don’t have to be a professional artist to enjoy drawing. Art is for everyone, and the key to Procreate’s success over its long history is that it too is for everyone. The app’s UI is a model of simplicity and progressive disclosure that stays out of the way, revealing its powerful tools only if and when you need them. Combined with a reasonable $10 price tag, Procreate is a fantastic choice for dabblers or pros alike, and with version 5 out today, Procreate is more powerful than it has ever been, but just as easy to use.
New Features Tucked Away in a Familiar Interface
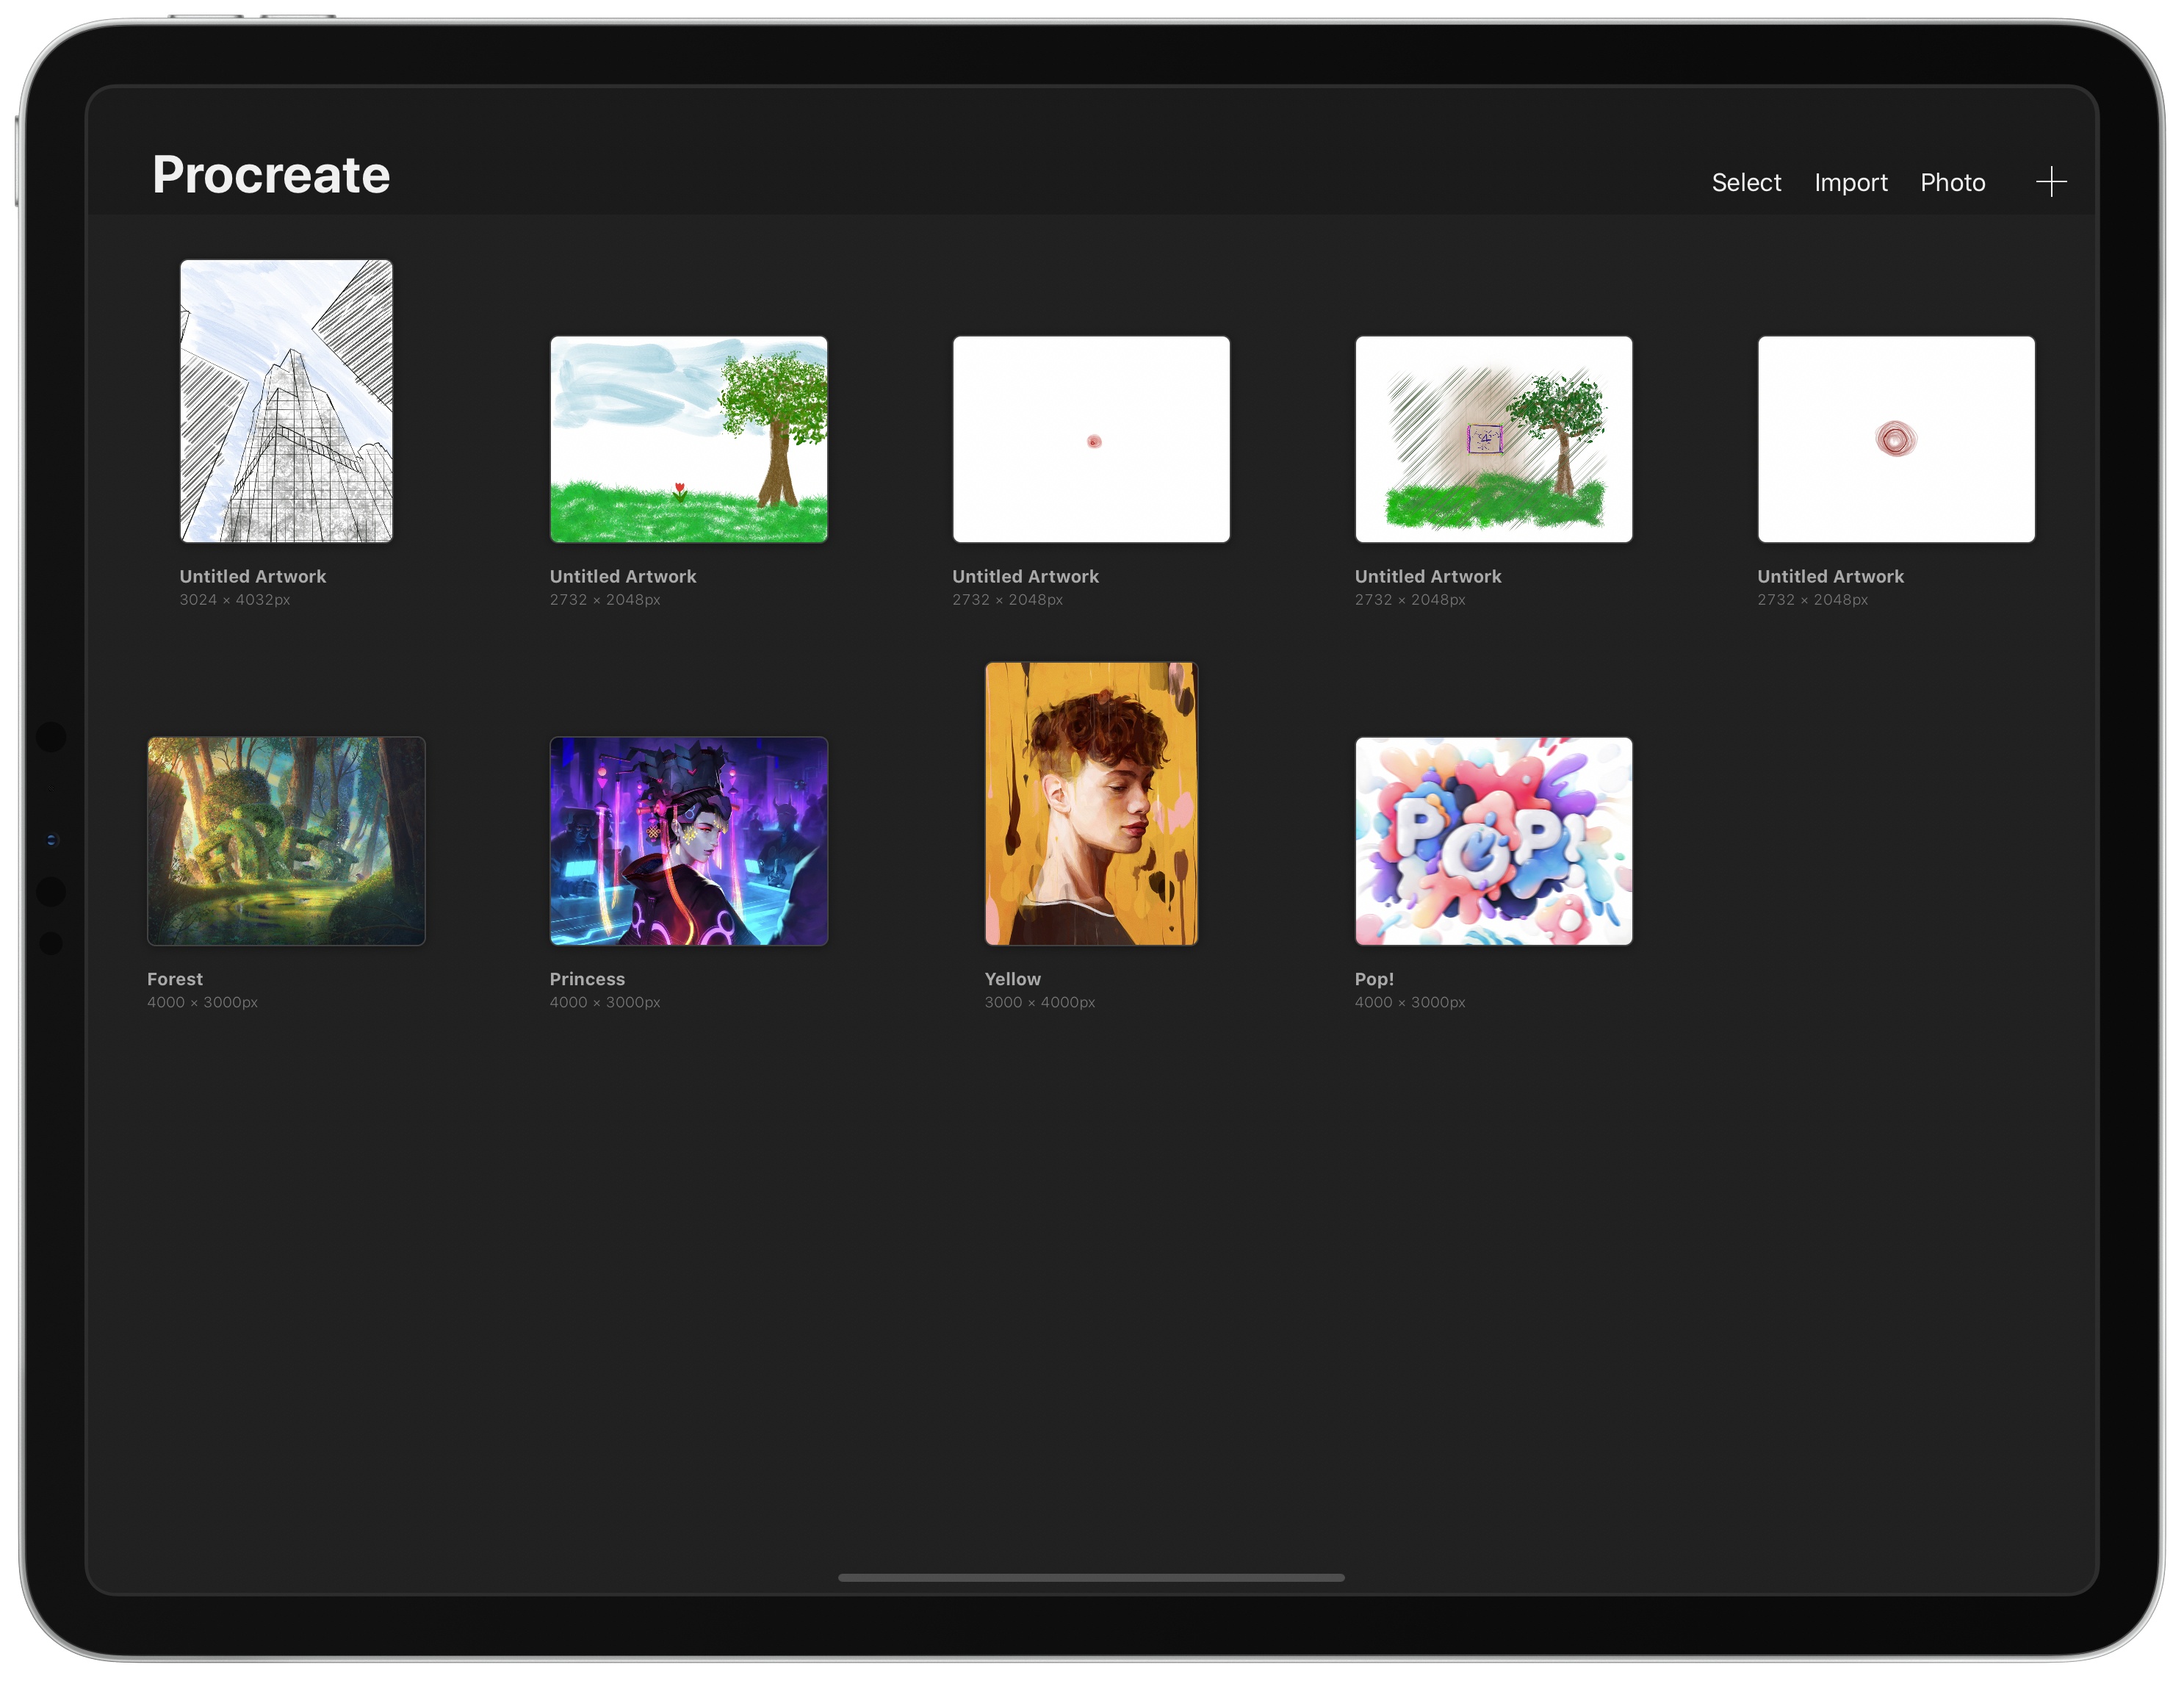
If you’ve used Procreate before, the first time you open the Gallery in version 5 will be familiar because the UI hasn’t changed. Procreate includes its own interface for opening and managing files in the app instead of using the iOS and iPadOS document browser. From the app’s Gallery, you can create a new document from scratch using any of seven pre-defined templates, create a custom template, or import from the system file picker or your photo library. The Select button activates a mode that allows you to manage files by creating Stacks, which are essentially folders of images, or preview, share, duplicate, or delete files.

Once you open an image, you’ll enter Procreate’s editor, another familiar view that hasn’t changed. Along the top and left edges of Procreate’s main edit view are toolbars that serve as the gateways to the app’s full set of features. On the left edge of the screen are sliders for adjusting brush size and opacity along with a modify button that is part of the app’s extensive library of gestures. It’s impressive that the Procreate team has managed to resist overloading the editing interface with tools, which is something that I expect will be appreciated for its familiarity by existing users, and dramatically reduces the barrier to getting started for newcomers.
That streamlined design is one of the keys to Procreate. It conceals a lot of power under the hood, including most of the features that are new to version 5, and makes it easy to get started with the app. Buttons to access the app’s brush, eraser, smudge, and color picker tools should be familiar to anyone who has tried an art-creation app before. However, behind the buttons in Procreate’s toolbar is a deep set of tools and settings to explore. This review focuses on what is new in Procreate 5, but to learn more about the full capabilities of the app, I recommend checking out Savage Interactive’s support pages, which are a fantastic resource filled with tutorials, detailed instructions, and tips.
Colors
The first major revision in Procreate 5 that I want to cover is the color picker in the top right-hand corner of your iPad’s screen. Before version 5, the color picker was a popover that dropped down from the toolbar so you could pick colors. The trouble was that if you wanted to switch colors often, you had to reach for the corner of the screen continually.
In version 5, Procreate’s color picker is still a popover located in the top corner of the screen, but it can be detached from the toolbar by dragging it by the drag handle at the top of the picker. In its detached form, the color picker is more compact than in popover mode, which is an excellent way to conserve valuable screen space and put your color palette close at hand where it’s most useful.
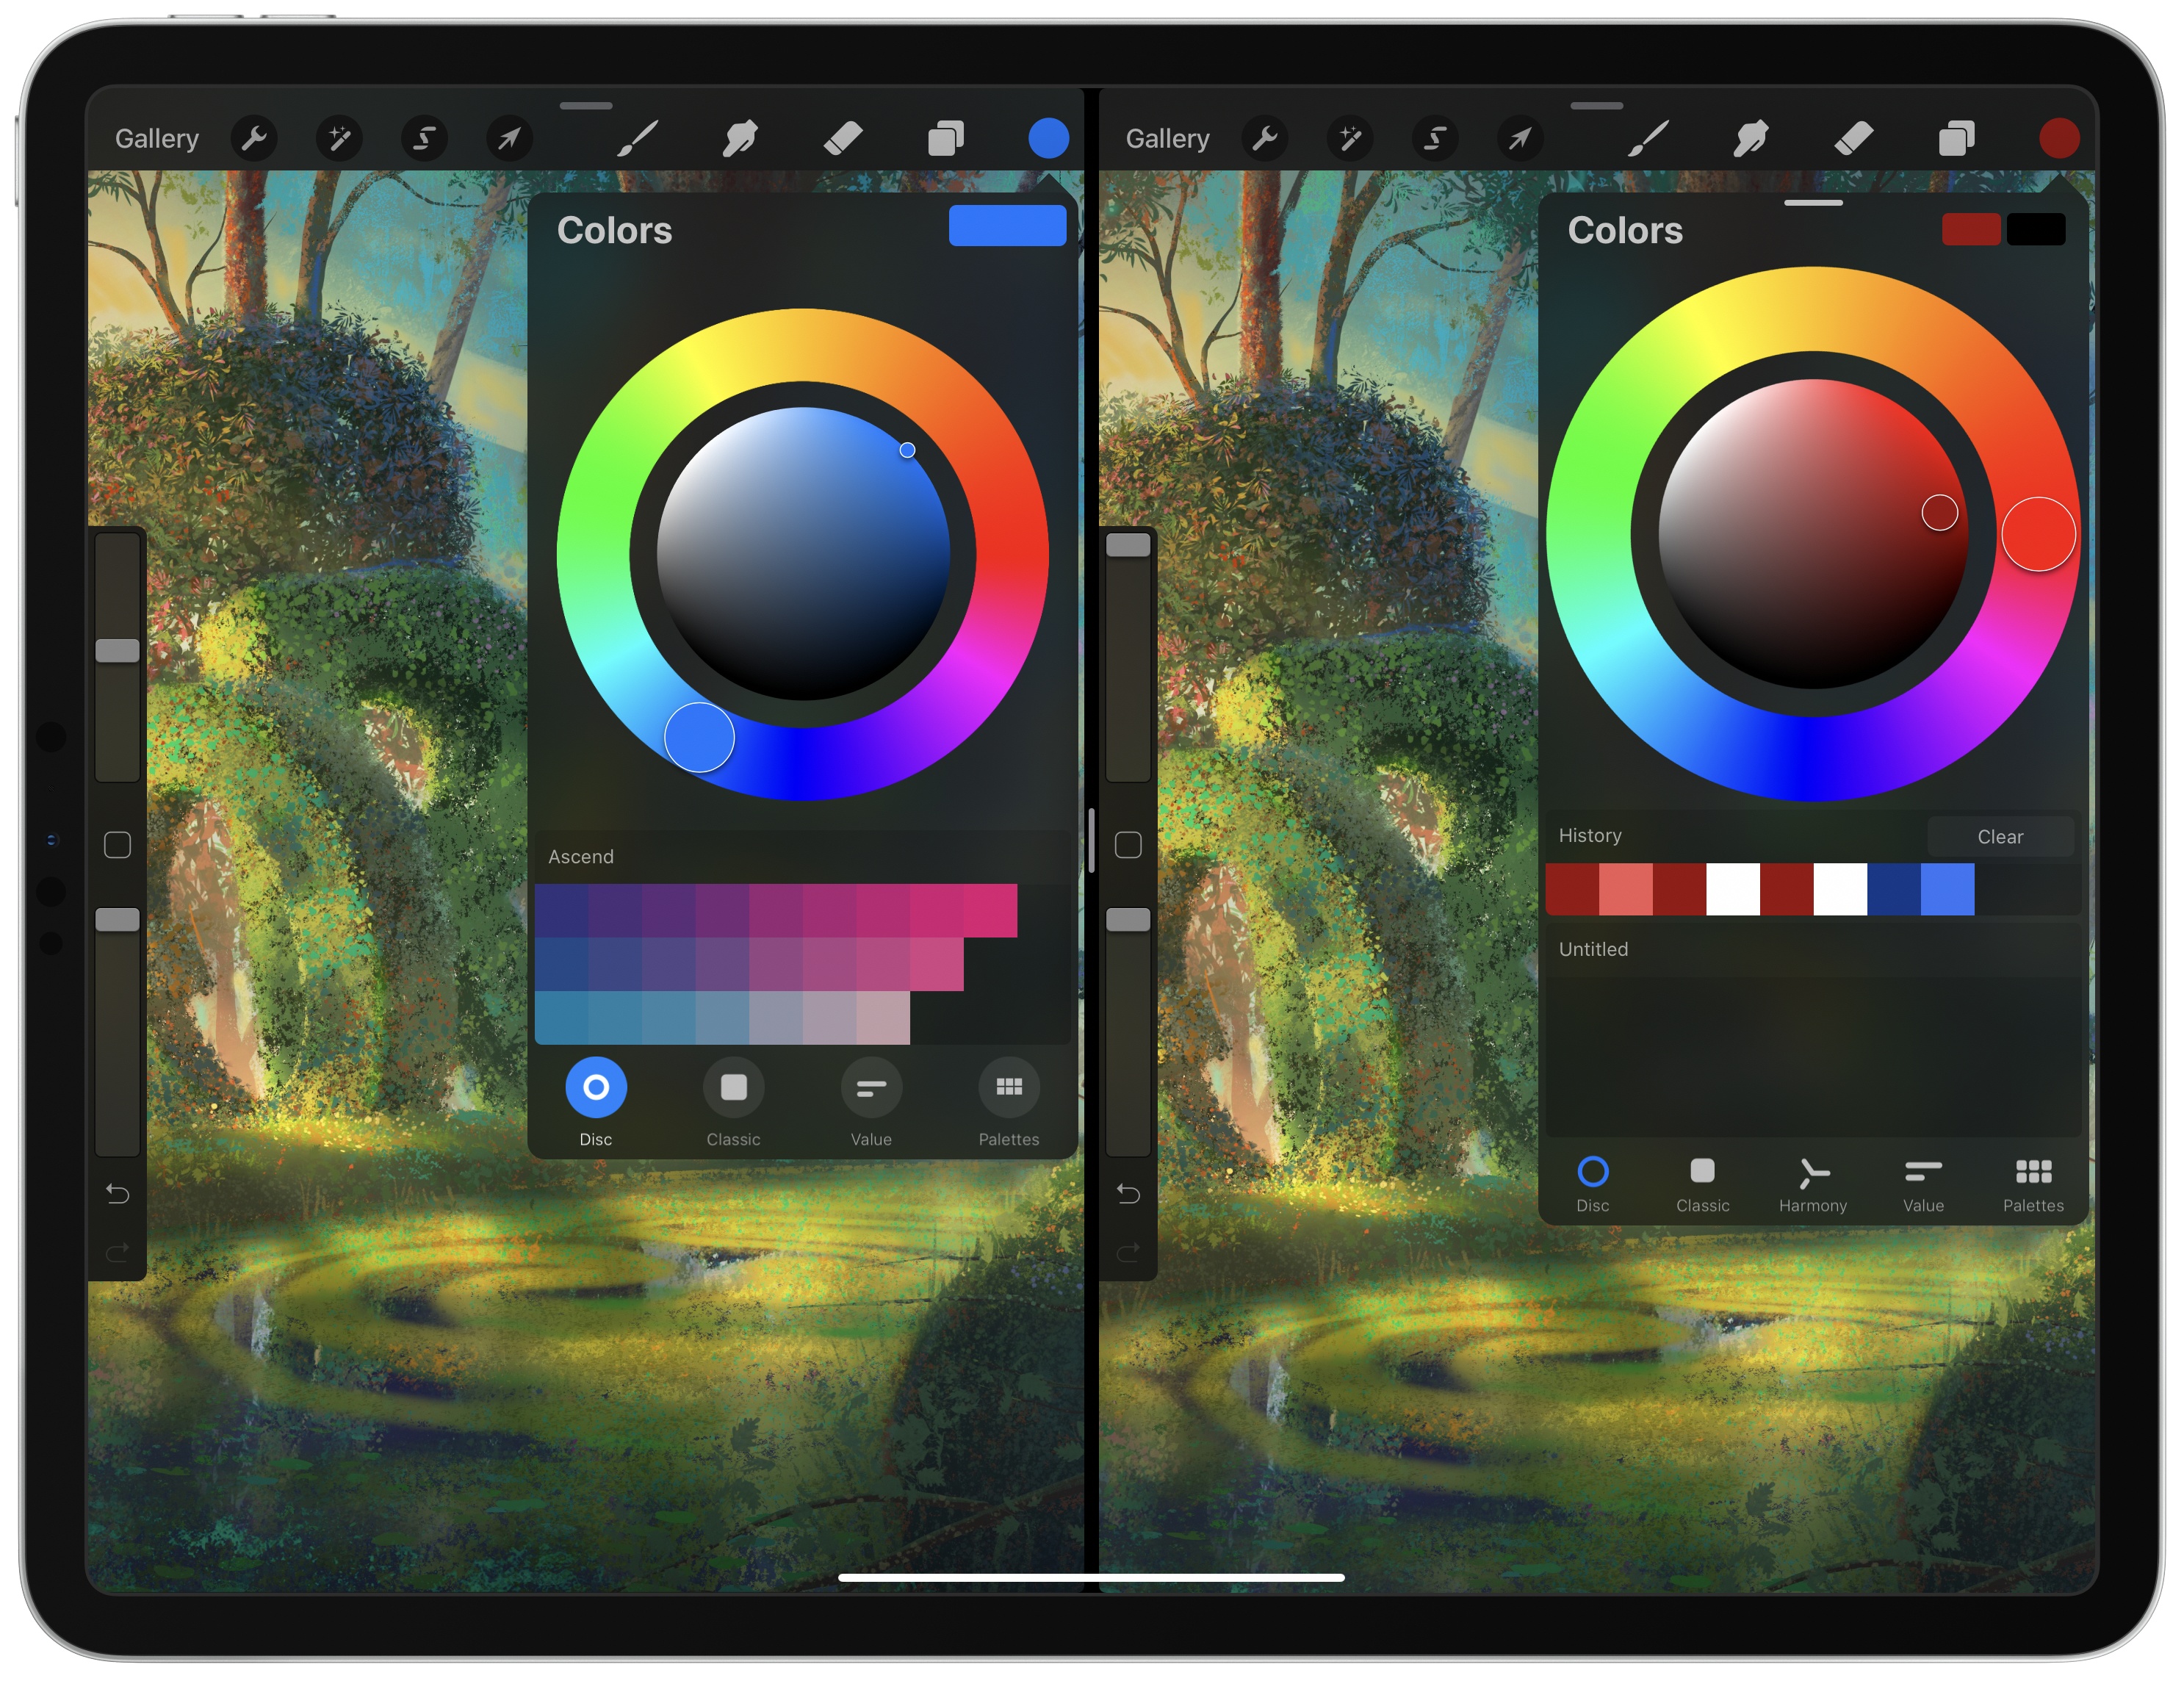
Procreate’s previous color picker (left) and the new detachable color picker in Procreate 5 (right).
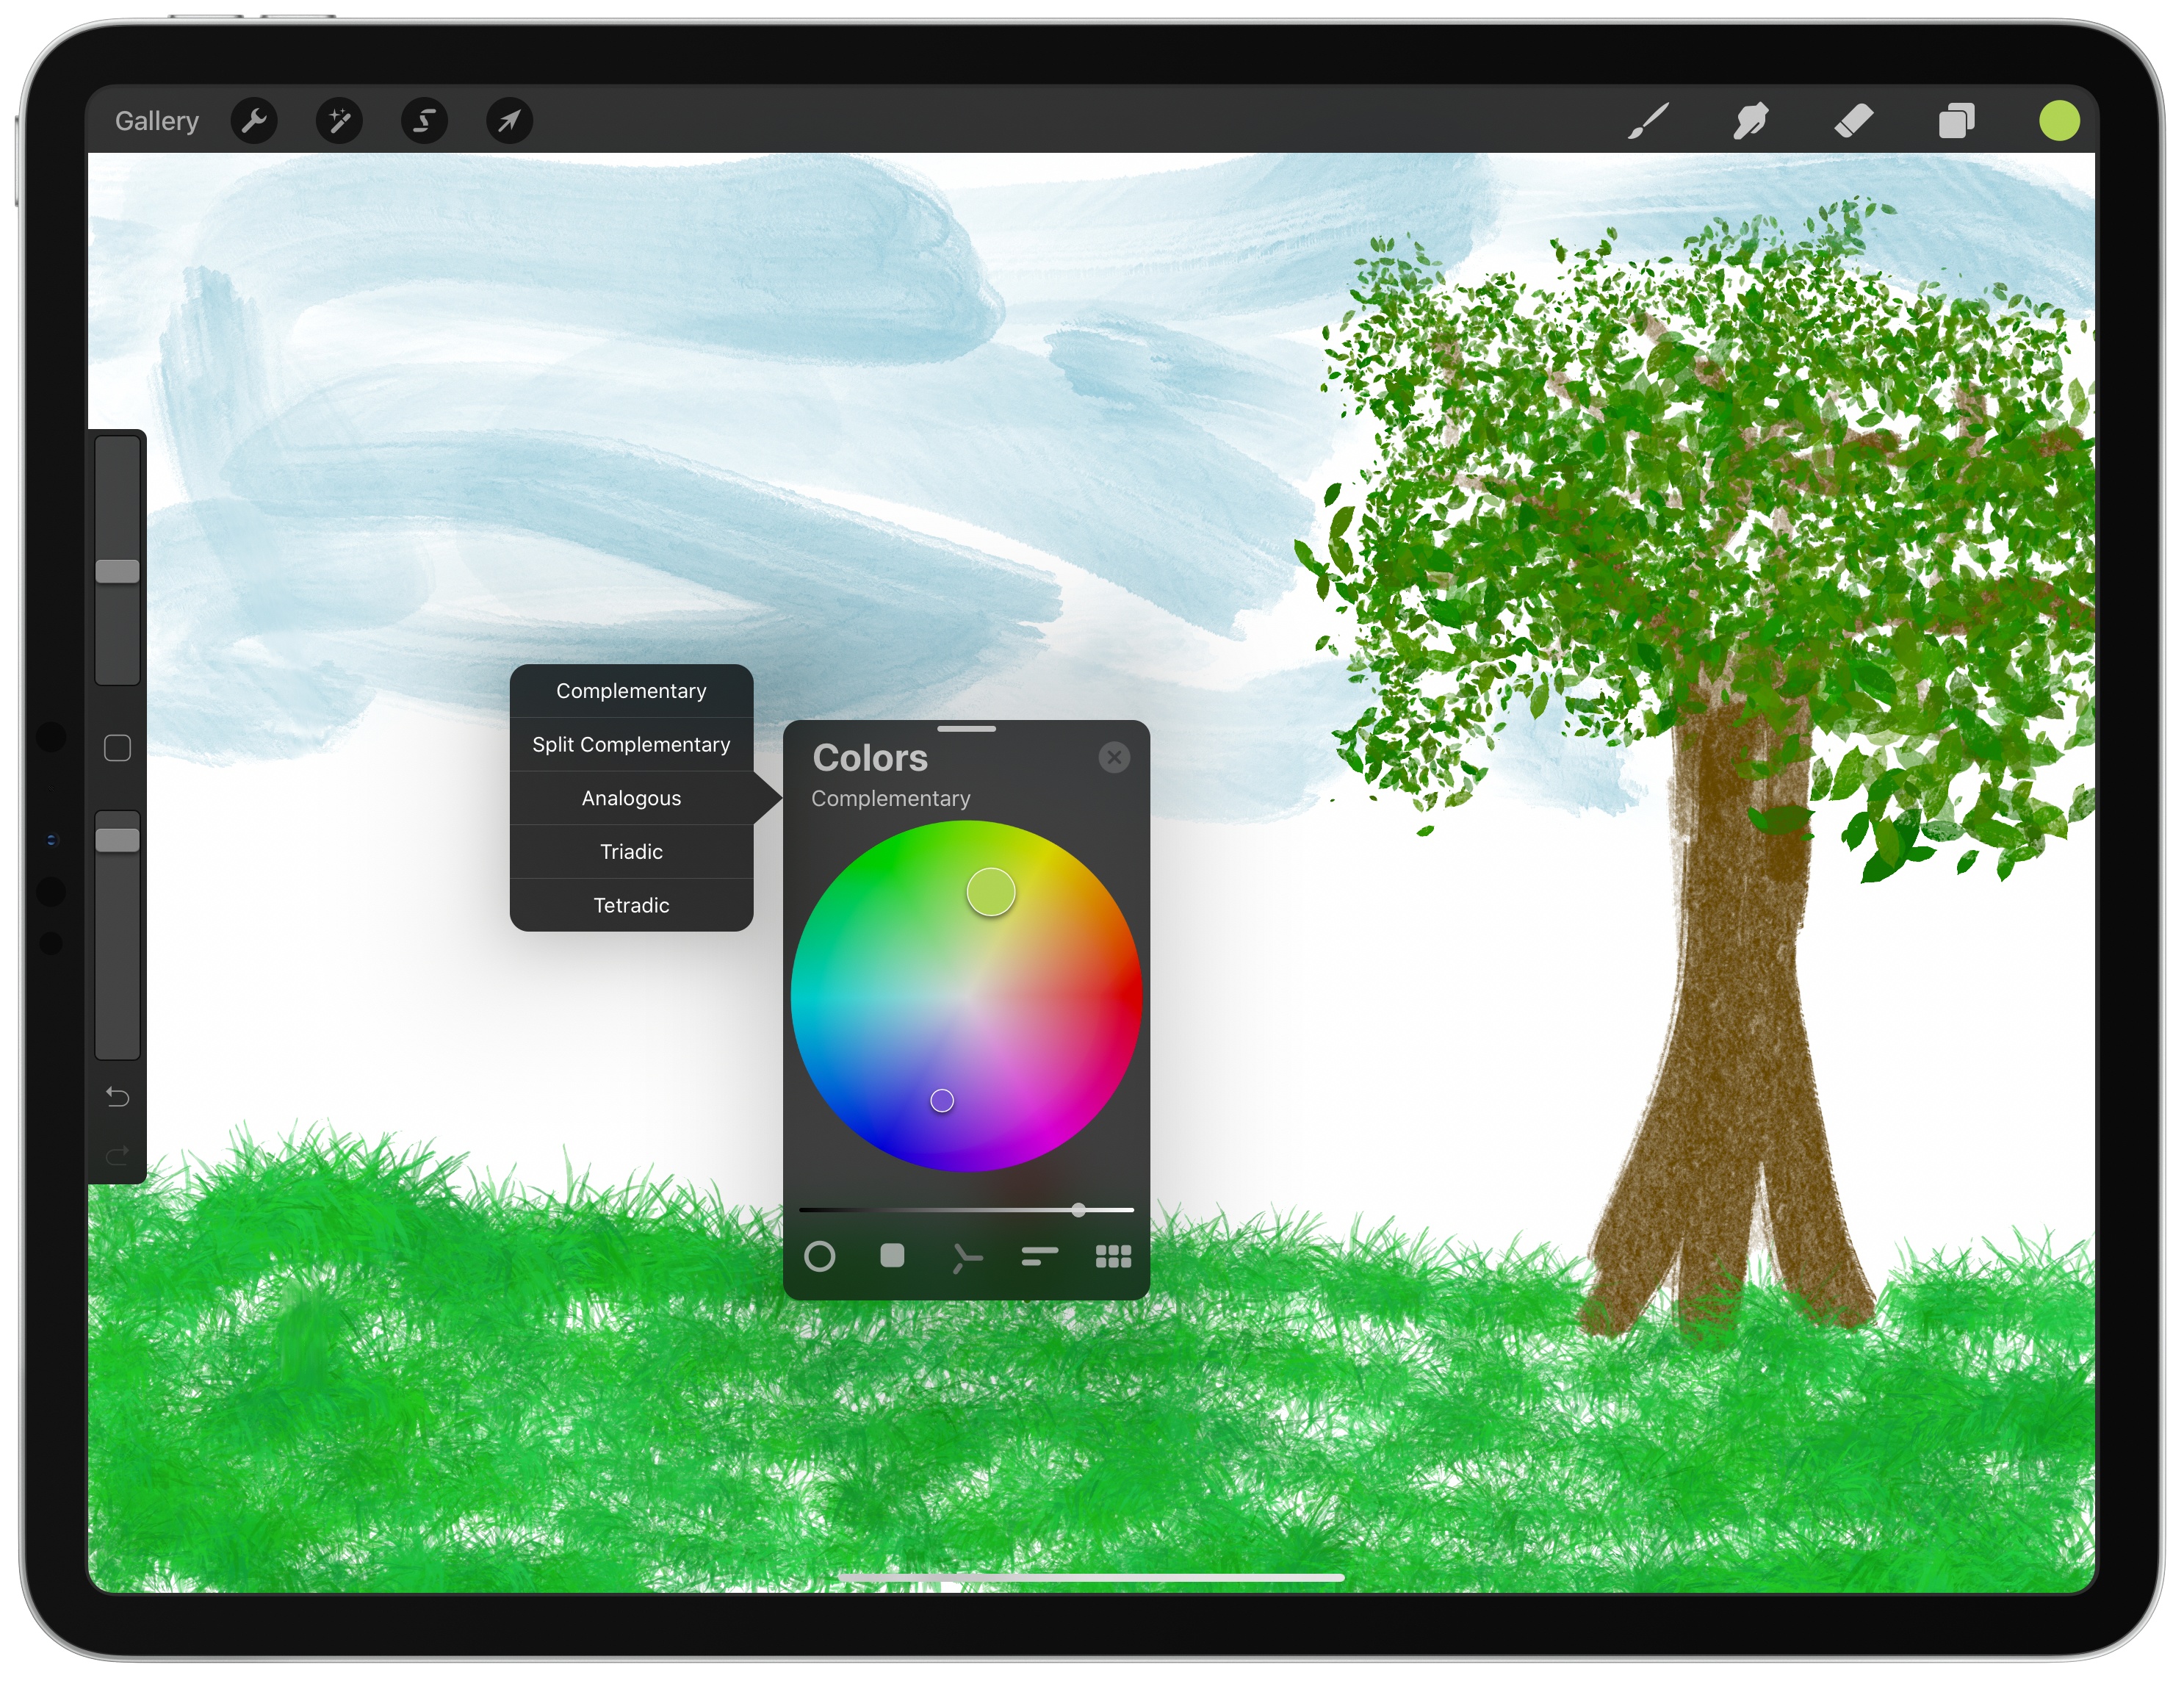
Procreate 5 also includes a new Color Harmony feature that displays complementary, split complementary, analogous, Triadic, and the Tetradic colors to help make picking ones that work together easier. There’s a 10-color history strip that provides access to recently-used colors too.
The app also adds the ability to control color dynamics with the Apple Pencil’s pressure and tilt sensors. Hue, saturation, brightness, and other variables can all be tied to the Pencil, opening up a wide range of on-the-fly color transformations. Print artists should appreciate that Procreate now supports CMYK and RGB ICC color profiles too.
The combination of new color tools in Procreate 5 adds both convenience and depth. The draggable color picker, color history, and color harmony tools are the sorts of features that beginners and pros alike will be able to take advantage of immediately. In my testing of the app, I found myself using all three features regularly. Compared with earlier versions of Procreate, the changes reduce the friction of picking colors, making the process less of a disruption to the thing you’re creating. Color dynamics and CMYK and RGB ICC profile support aren’t something that I expect to use myself. Still, they’re essential additions for anyone who uses Procreate in print workflows and who is looking for greater flexibility in creating art on the iPad.
The Brush Studio
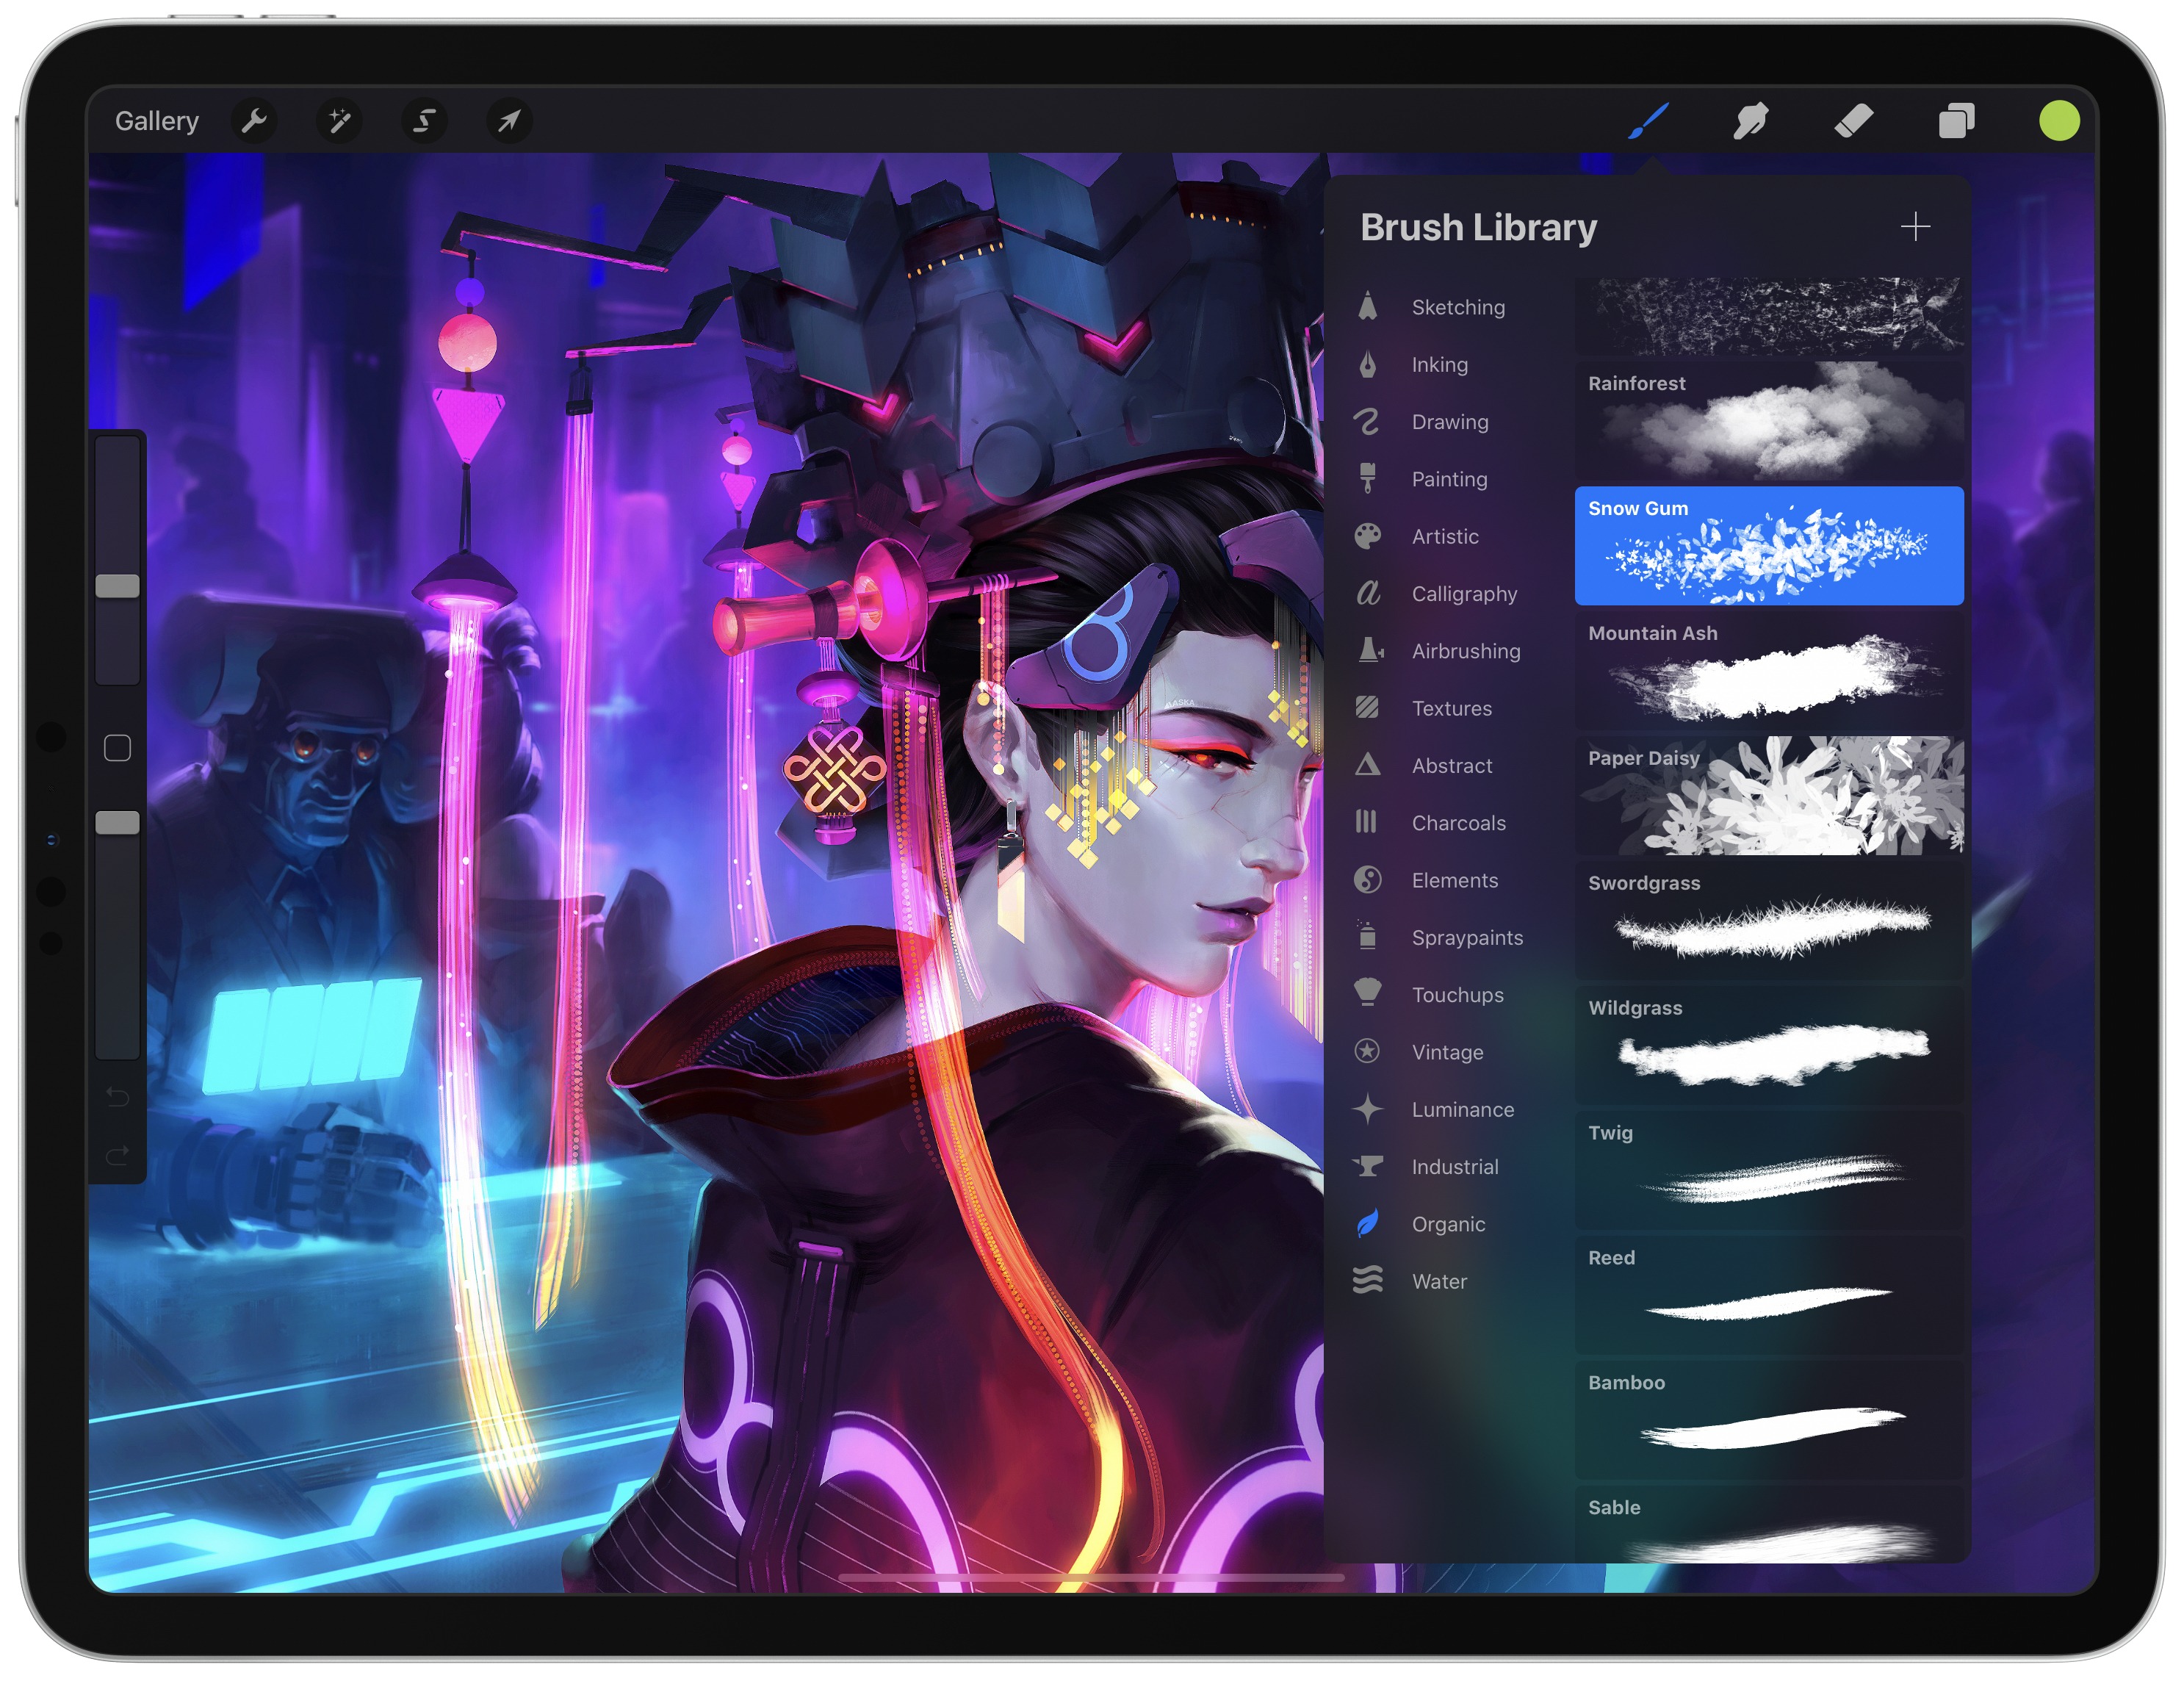
Procreate 5 has an extensive collection of default brushes. (Image via Procreate’s default gallery.)
At the core of the Procreate 5 update is a new graphics engine called Valkyrie, which is based on Apple’s Metal framework. The new engine underlies everything you create onscreen in Procreate, allowing the app to do things that were not previously possible, including some of the new capabilities built into its brush system.
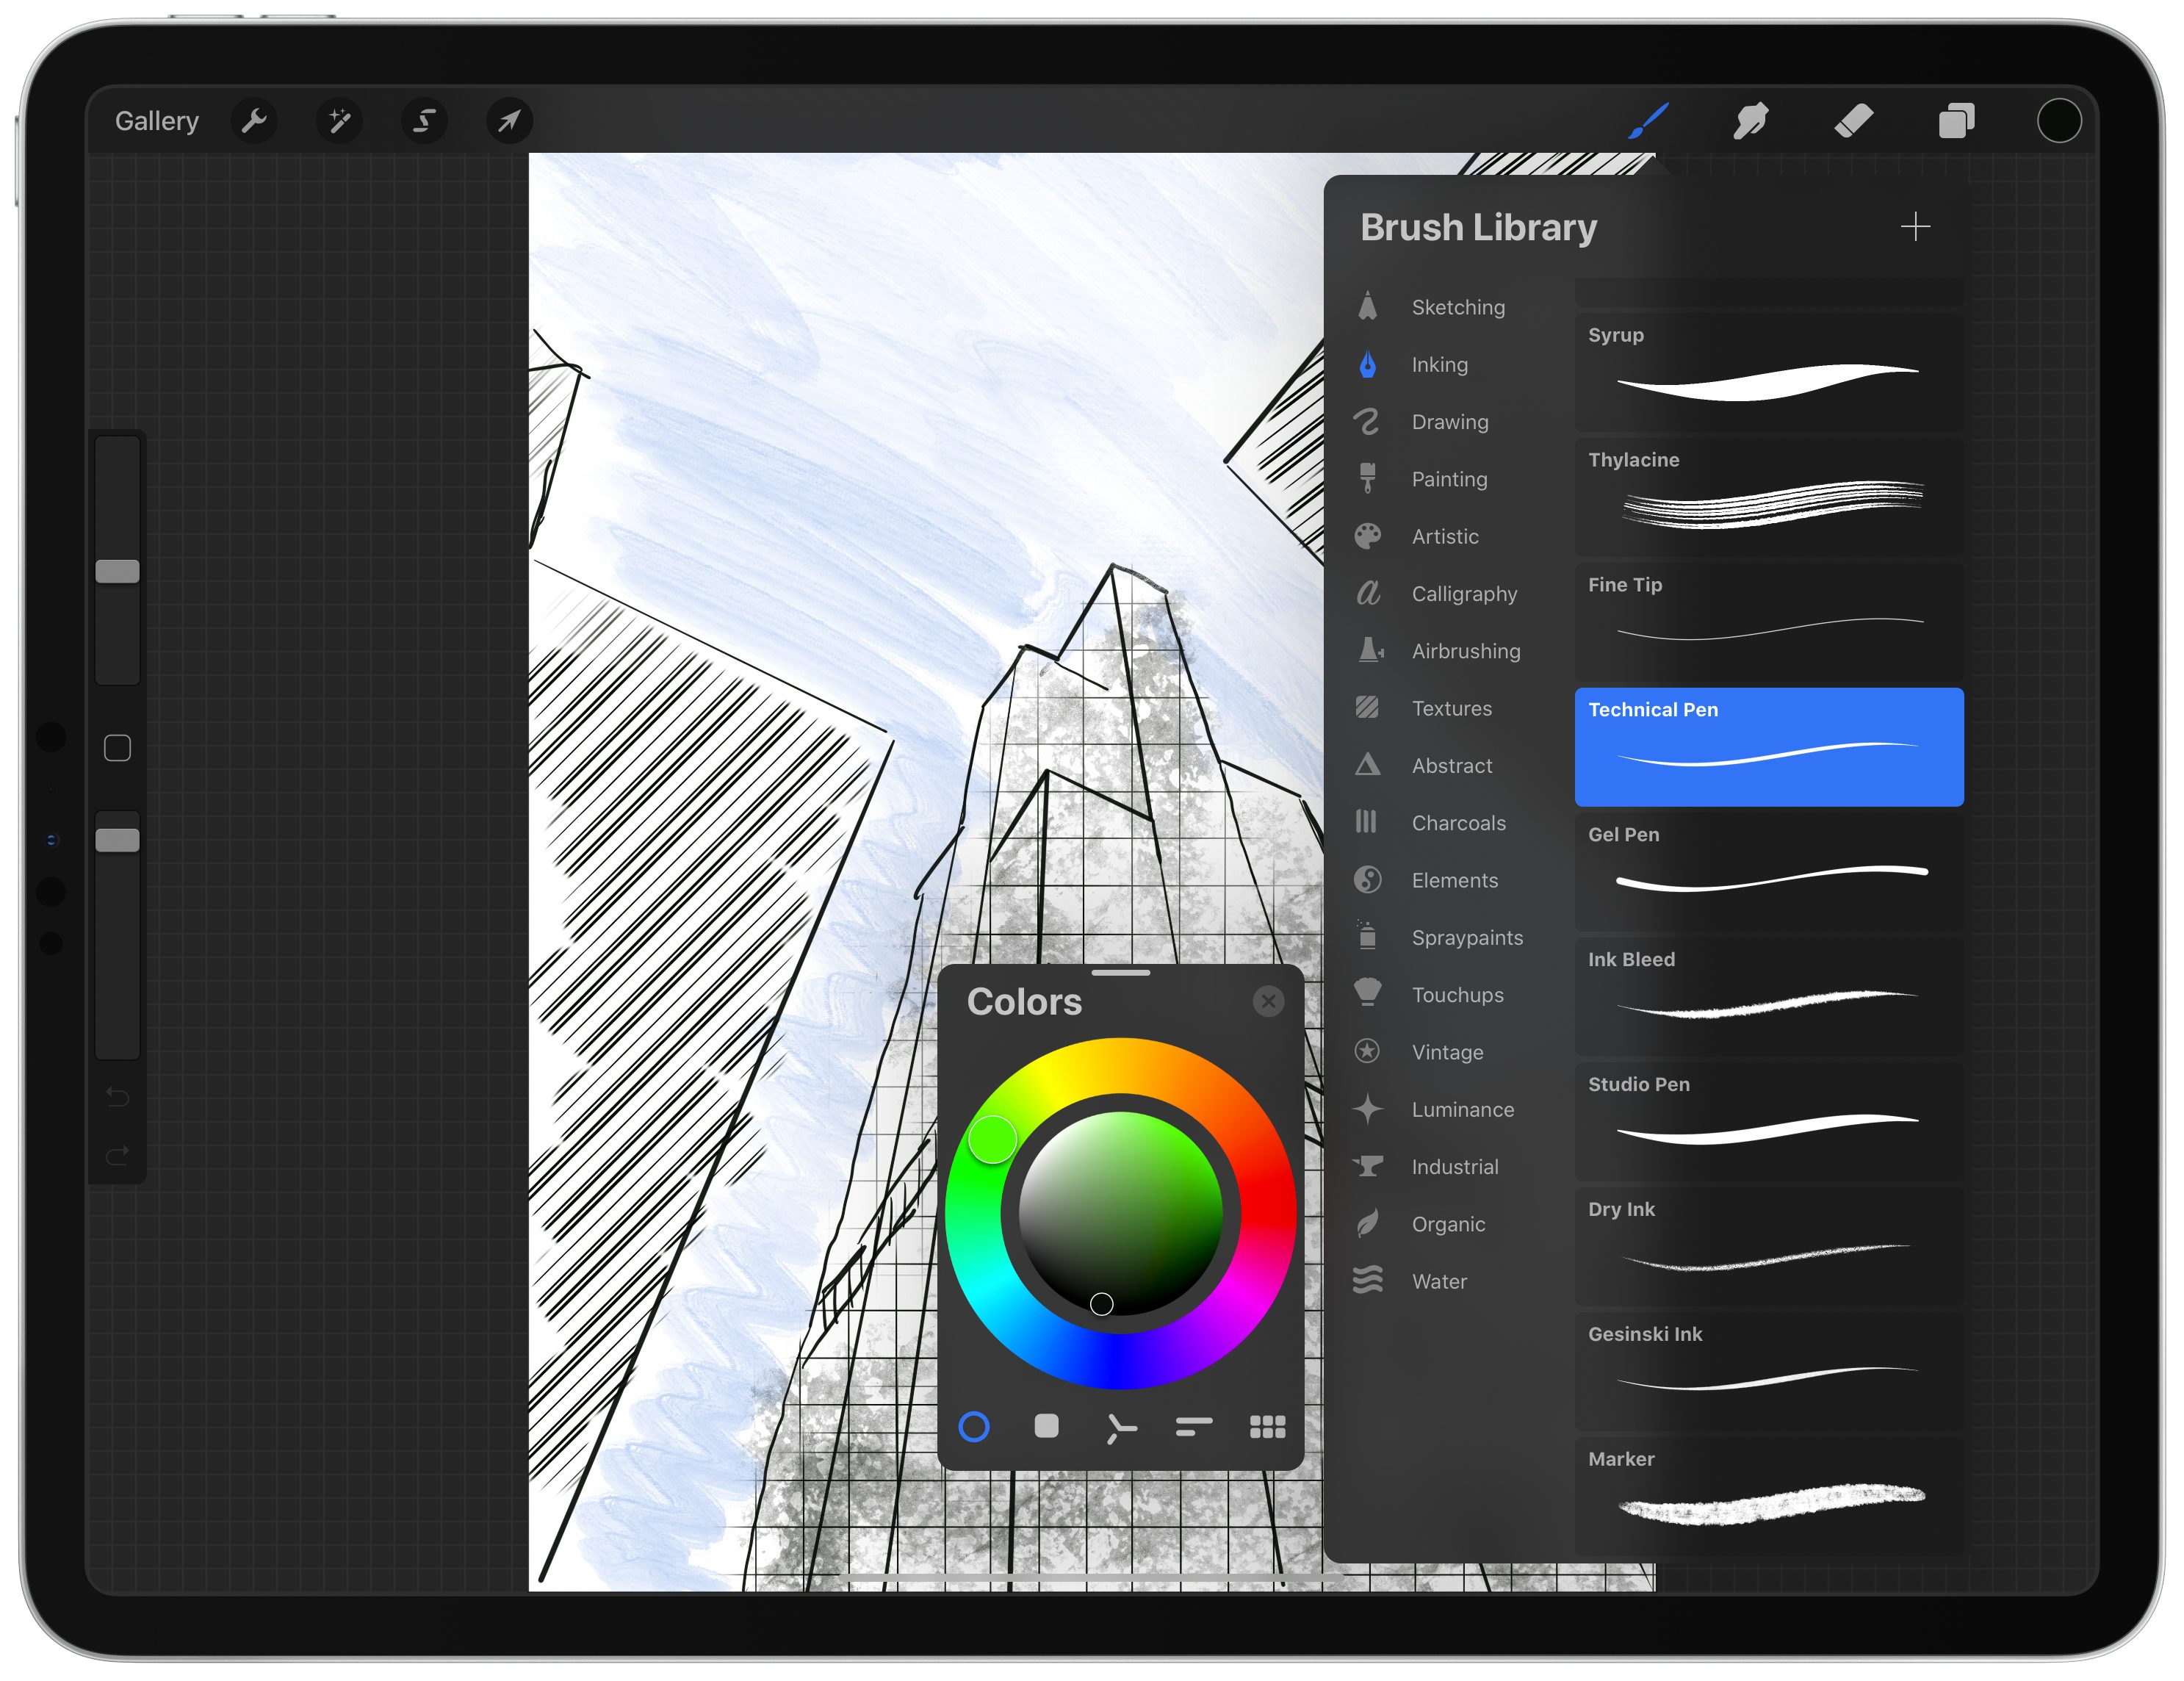
Tapping the paintbrush icon in the toolbar switches you to the brush tool for drawing and painting on Procreate’s canvas. Tapping the button a second time opens a popover of 18 categories of brush styles that organize a total of 190 brushes. That’s plenty of brush options to keep any beginner like me busy exploring options for a very long time.
Procreate’s brush support doesn’t stop there, though. Users can also create their own brushes, including combining two brushes into one, which the Procreate team says takes advantage of Apple’s Metal framework to seamlessly integrate the characteristics of each. You can also import Adobe Photoshop brushes and use them natively in Procreate.
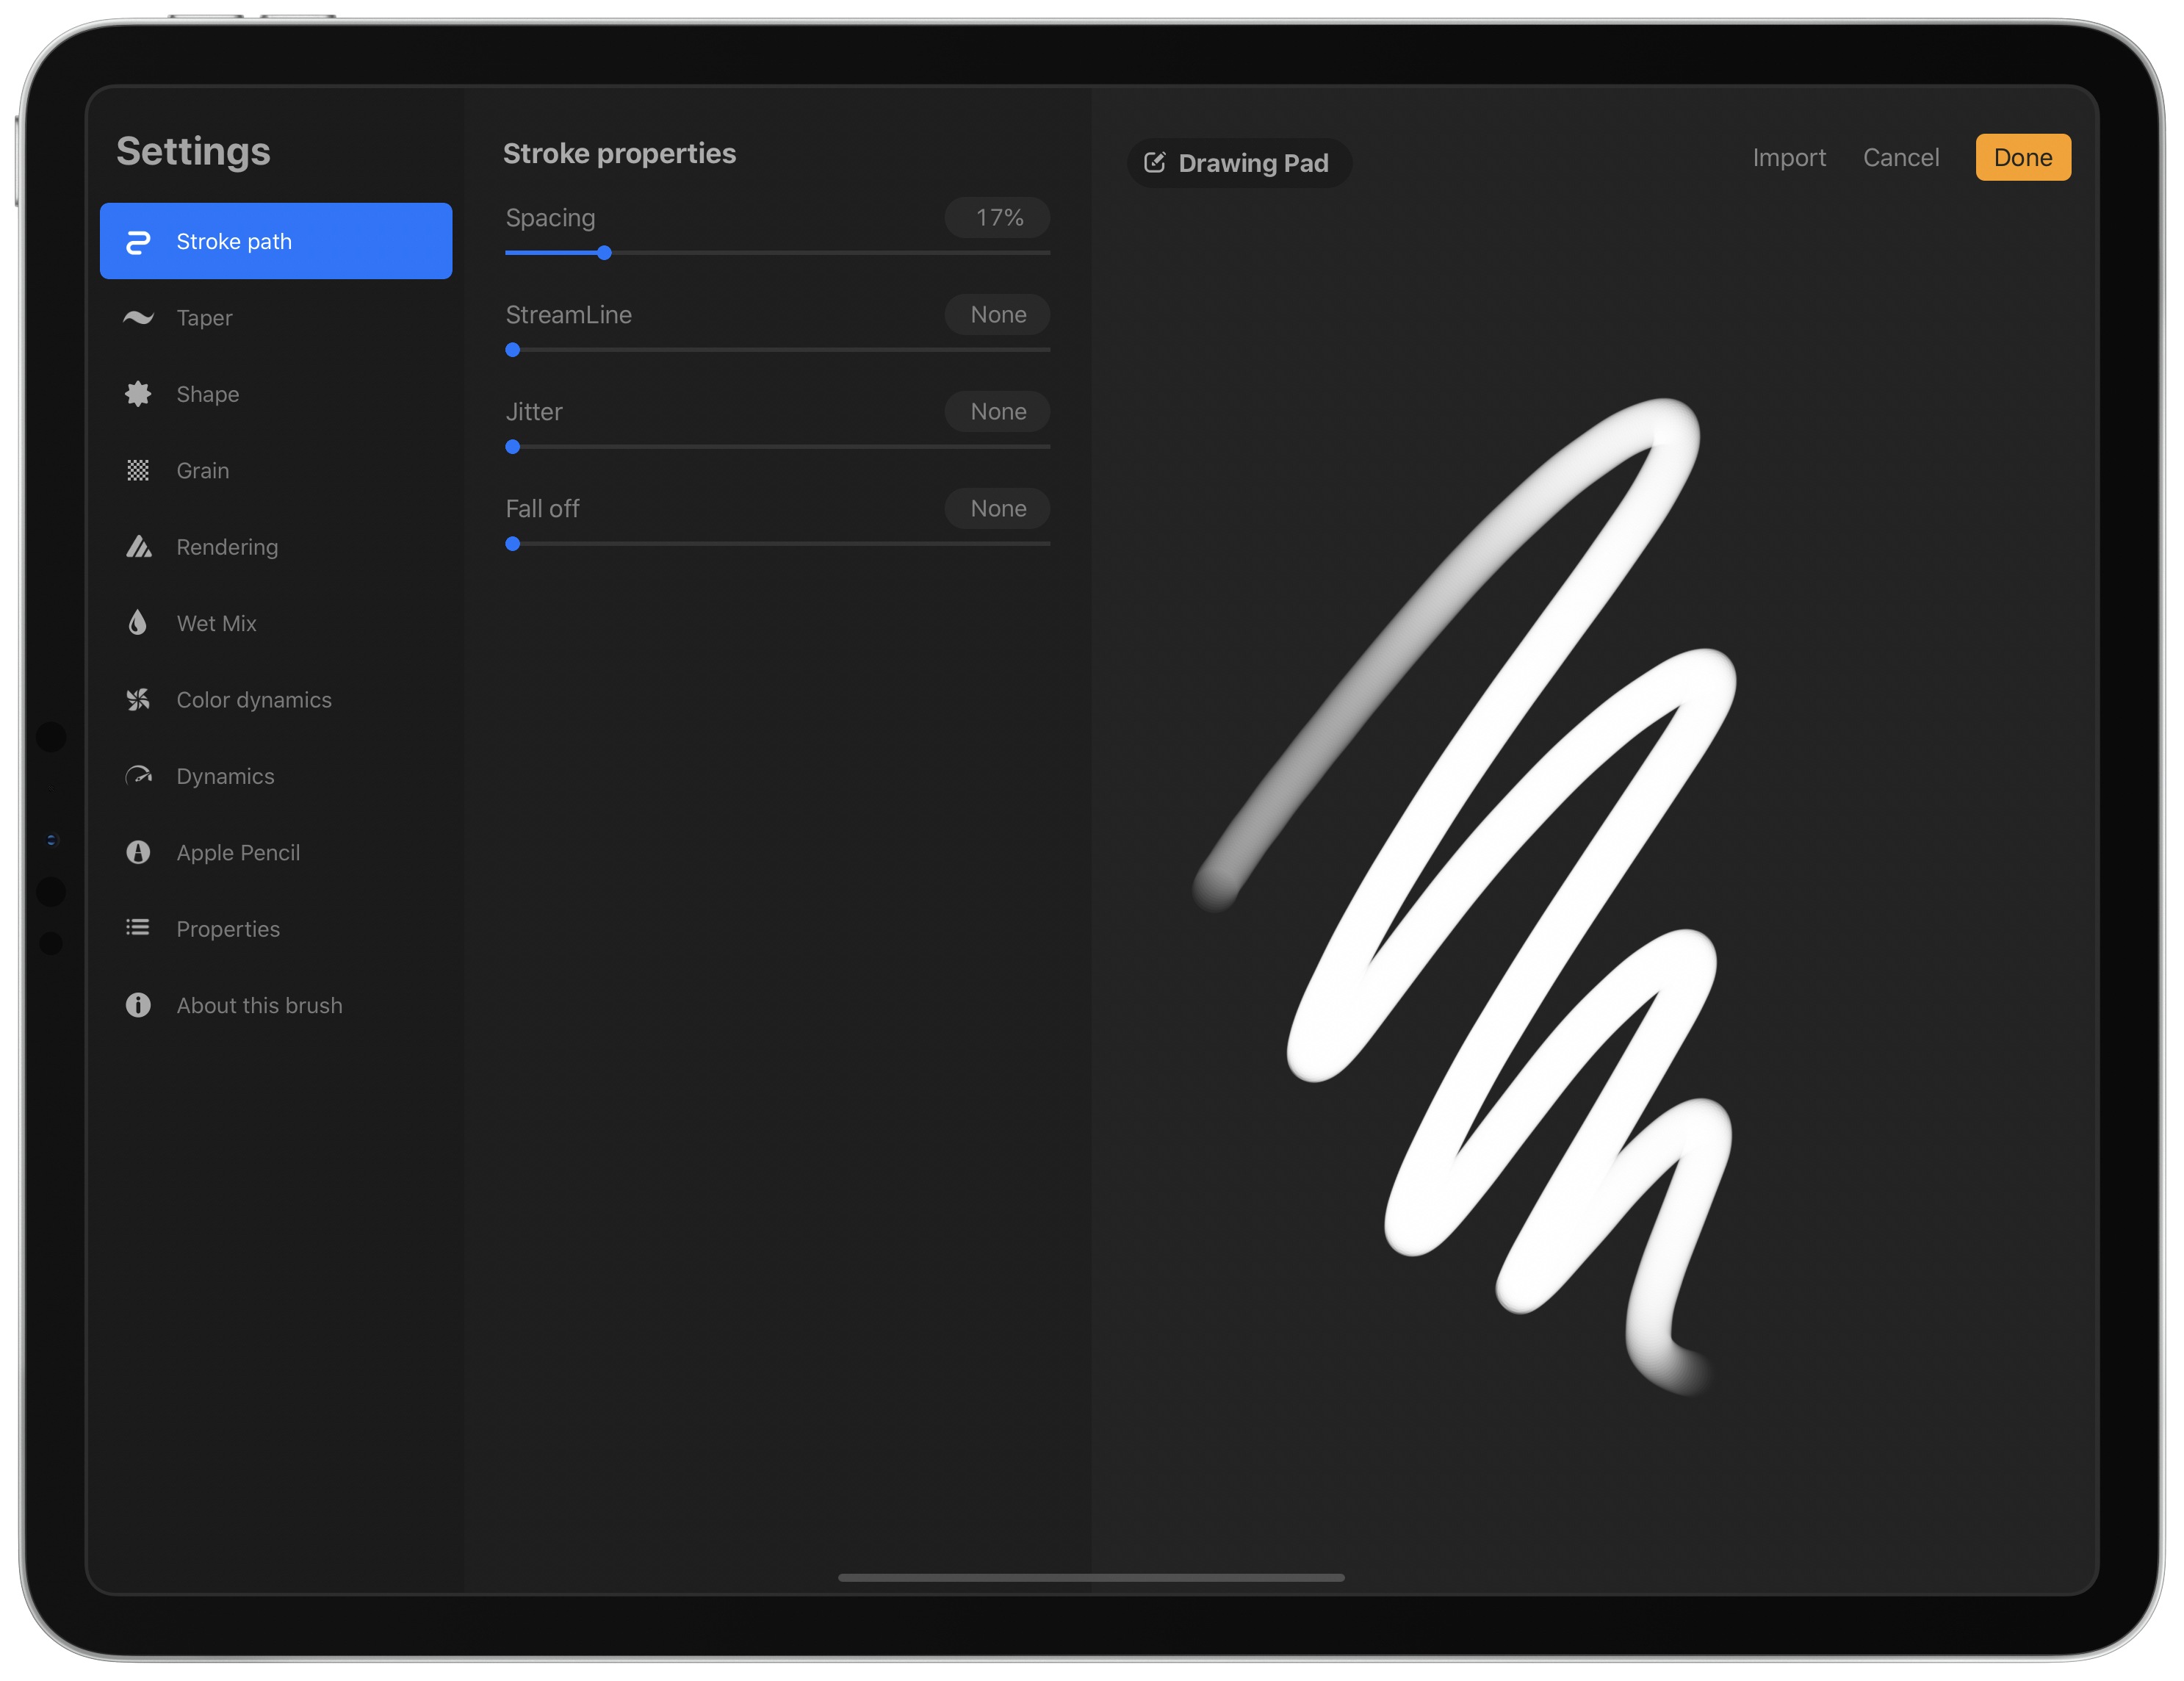
Creating new brushes happens in Procreate’s Brush Studio. It’s an appropriate name for the full-screen feature that could be a standalone app itself. Tapping on the plus button in the brush tool’s popover opens the Brush Studio, which includes 10 categories of brush characteristics and settings that can be adjusted. The Brush Studio also has a drawing pad that changes as you modify settings, providing a preview of your newly-created brush stroke and a place you can test your brush. Once you’ve created a brush you’re happy with, you can share it by swiping left on it from the brush popover and using the share sheet.
The flexibility available for designing brushes is hard to convey. With so many ways to adjust and combine brushes, users can create an endless variety of unique styles that broaden the scope of what is possible with Procreate. Personally, I’m not likely to spend a lot of time creating brushes from scratch, but I appreciate the ability to start with an existing brush, duplicate it, and tweak a few parameters to suit my needs. With the feedback provided by the built-in drawing pad, the process is intuitive regardless of your experience level.
Animation
Perhaps my favorite new feature of Procreate 5 is its animation tool. As a doodler, nothing pulled me into Procreate 5 more than experimenting with bringing my doodles to life with animation.
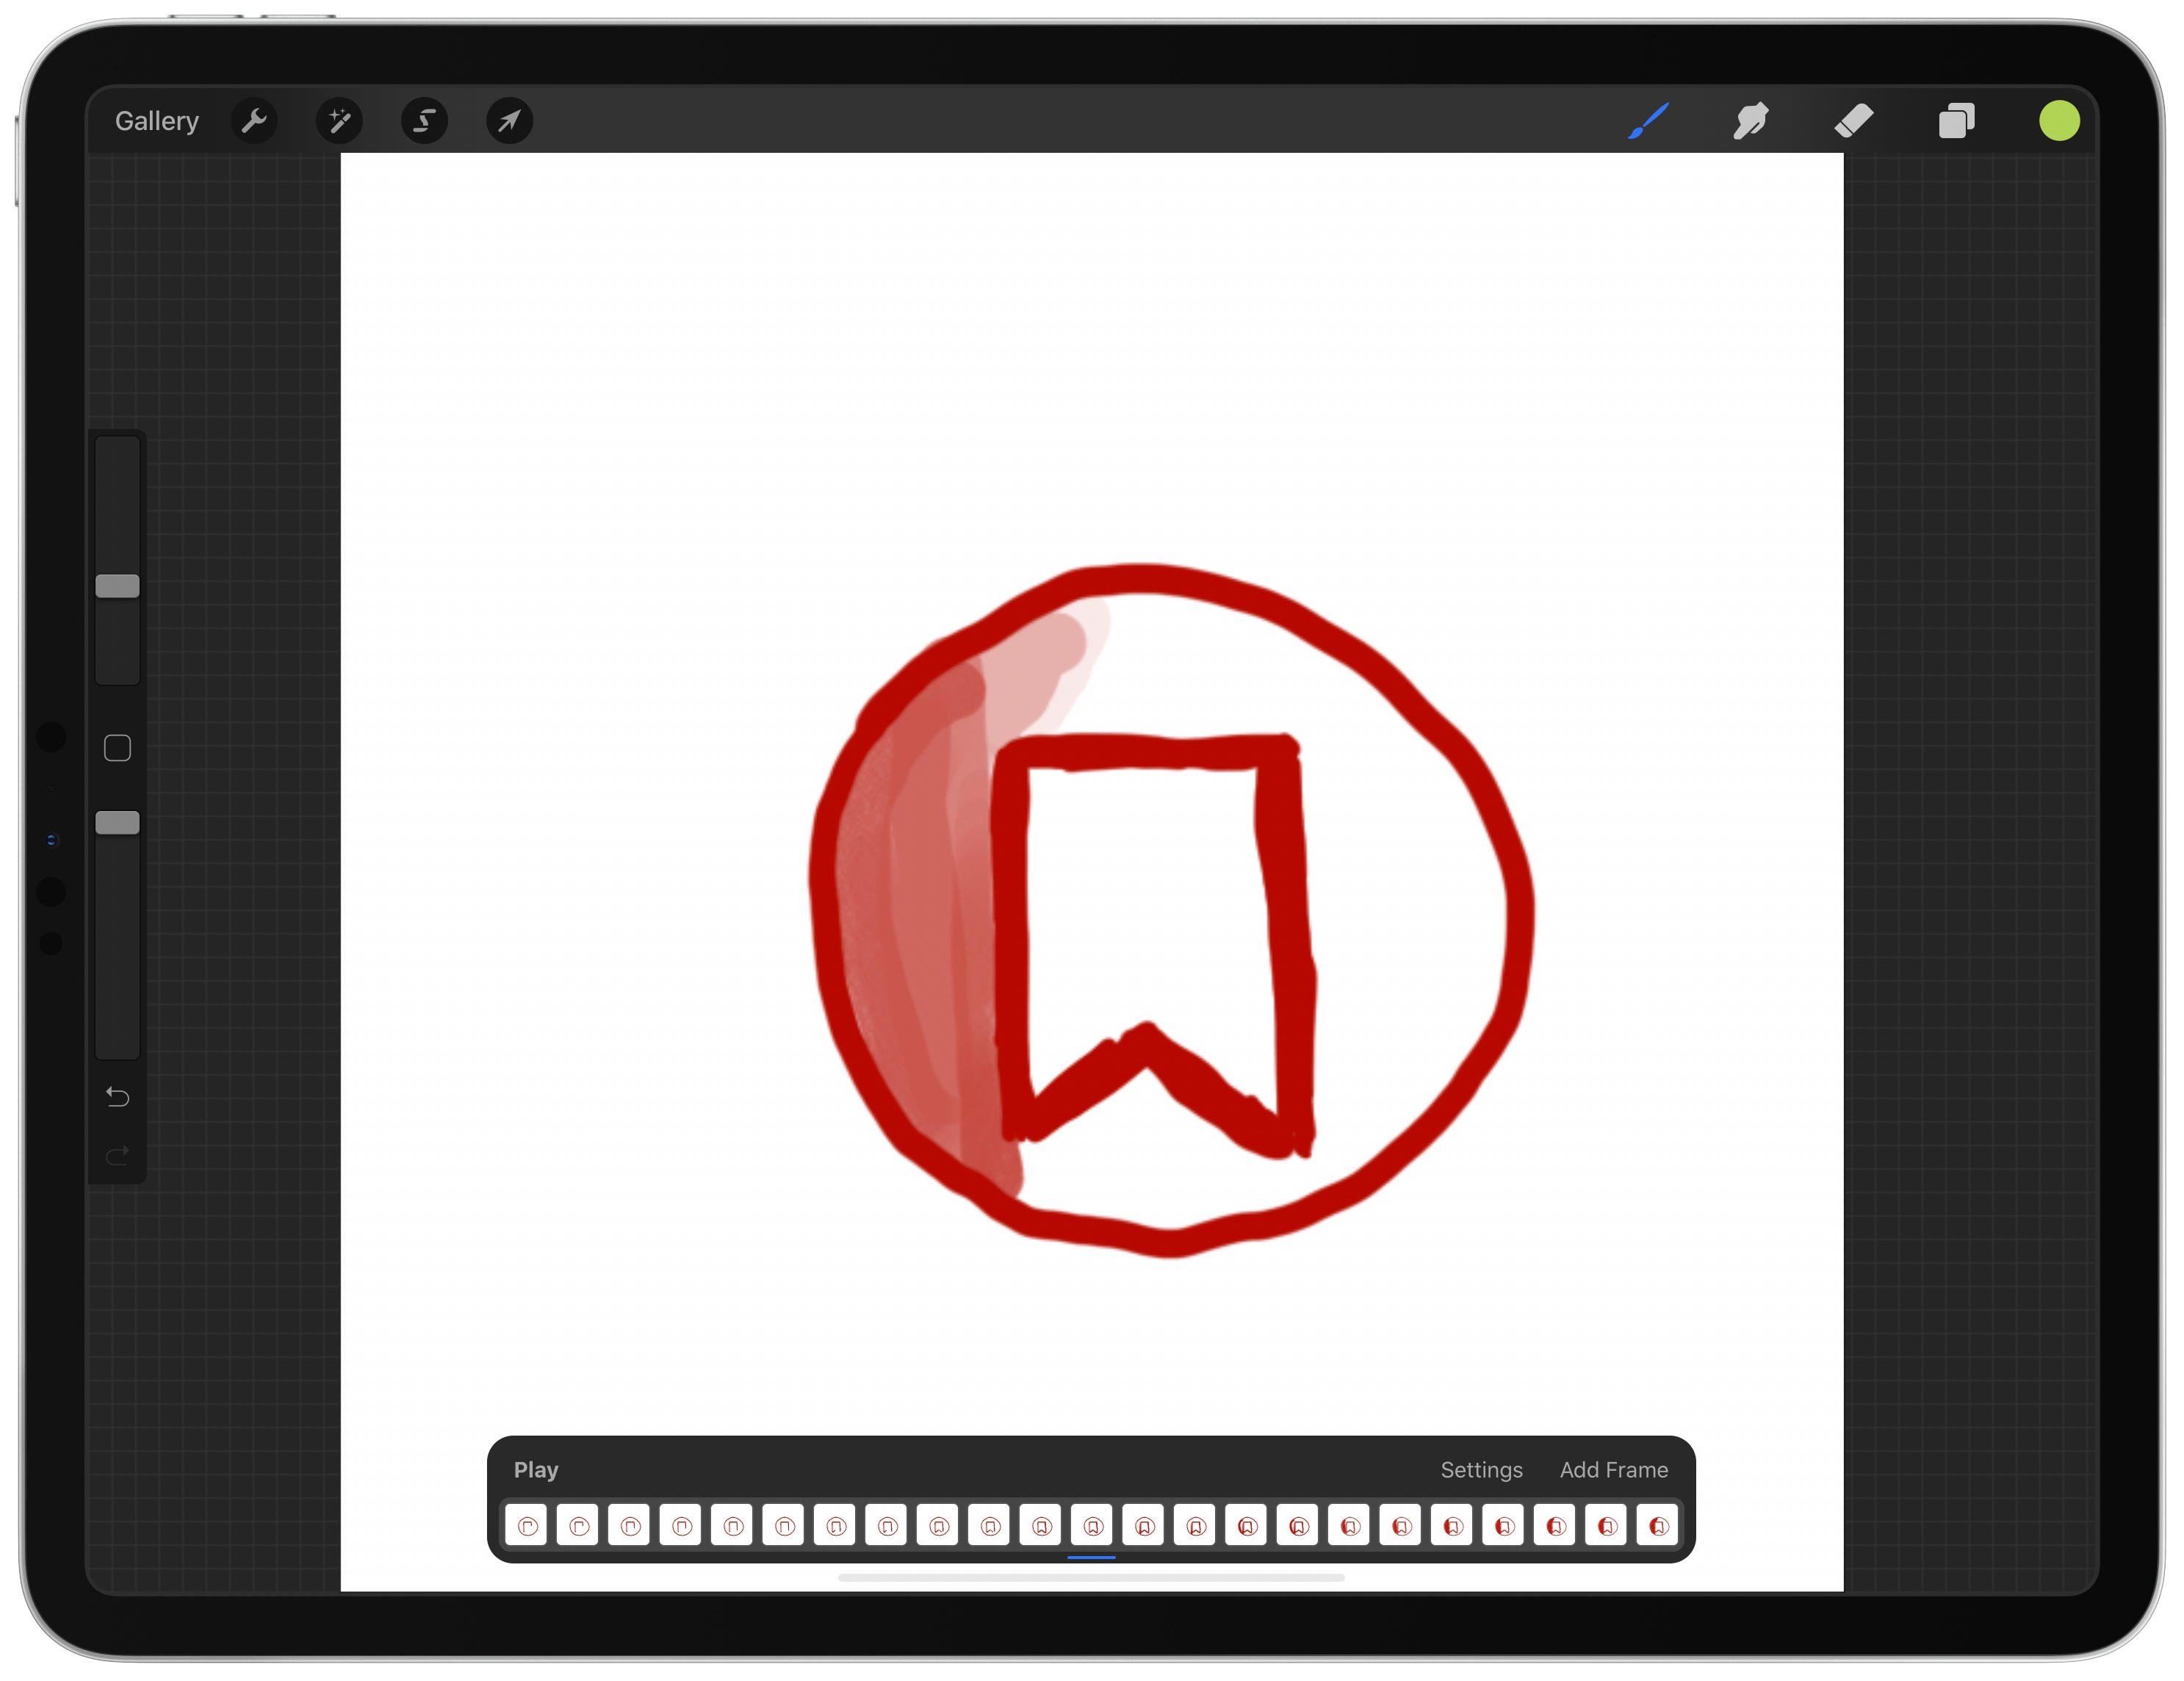
To get started, tap the wrench button on the left side of the toolbar to access settings. In the Canvas section of the settings popover, toggle ‘Animation Assist’ on. As soon as you do, a new set of controls appear at the bottom of the screen, which will include the animation frames you create plus a few other controls.
Think of the strip of frames at the bottom of the screen like a flip book. Start drawing, adding frames as you go, and frames will use an onion skin technique to display echoes of earlier frames as you draw new ones, greatly aiding the animation process. Just above the strip of frames is a Play button for testing your animation, a Settings button for changing the frame rate, onion skin characteristics, the playback mode, and other settings. The final button adds a frame to the strip. Double-tapping a frame opens a popover with additional options, including the ability to set a hold time for individual frames, duplicate them, or delete them.
The steps necessary to create an animation couldn’t be more natural. At the same time, though, all of the image creation tools are available to create each frame, bringing the full breadth and depth of Procreate’s tools to bear as you craft an animation. When you’re finished, you can export your creation in a wide variety of formats, including as an easily-shareable GIF.
I expect animation will be the Trojan Horse that entices many users to try Procreate for the first time. Animation Assist was where I spent a lot of my time as I explored the beta of Procreate 5. It’s fun to play around with even if you’re only animating doodles and stick figures. At the same time though, each frame is a new drawing, which helps to quickly build experience using the app’s tools and encourages exploration of the other features Procreate has to offer.
Everything Else
As I mentioned at the outset, the Gallery and image editing views of Procreate remain the same as before, but that doesn’t mean there haven’t been changes to the design elsewhere. Most of the changes are subtle, but there are new icons, reorganized settings, and other tweaks that give the app a more contemporary look and feel while lending additional clarity and minimizing chrome that blocks the view of the canvas, which makes Procreate easier to use. Procreate also features a new clone tool that allows you to use any of the app’s brushes to paint one part of an image onto another area of the canvas.
Procreate 5 is a perfect example of the sort of sophisticated iPad tool that plays to the hardware’s strengths. The app harnesses the Apple Pencil, direct touch input, the power of the iPad’s graphics system, and Apple’s Metal framework, all in a way that is greater than the sum of its parts and uniquely an iPad experience.
What’s more, the design of the app makes that power approachable, and the price makes it accessible to a broad audience. The simplicity of Procreate’s canvas view and fun, engaging features like animation make the app approachable. With experience, though, users can easily discover and experiment with Procreate’s more advanced functionality, which is supported by extensive help and tutorial materials created by Savage Interactive, plus a large community of users.
The business model makes a difference too. Many beginners wouldn’t be willing to commit to a recurring subscription model for an app that they may not stick with, but at just $9.99, Procreate is an easy purchase for anyone who aspires to make art on their iPad and a bargain for pros.
If you’re looking to get more out of your iPad, Procreate is a great place to start. I’ve enjoyed the new features of version 5 and plan to spend more time exploring everything the app has to offer over the holidays, when I have a little extra downtime.
Procreate 5 is available on the App Store as a free download to existing users and $9.99 for new users.