Want a cool way to share your presentation on your website or social media? Here’s how to export your Keynote presentation as an animated GIF from your Mac, iPad, or iPhone.
You can do all sorts of things with Apple Keynote presentations. From creating slideshows of photos for a family gathering to presentations for business meetings, Keynote offers the flexibility and features to do it all.
So, once you create your presentation, you might want to pop it up on your website or share it on social media. With this in mind, you can turn your slideshow into an animated GIF.
Create an animated GIF in Keynote on Mac
1) Open your presentation in Keynote and click File > Export To from the top menu bar. Now, select Animated GIF.
2) When the pop-up window appears, you will select the slides to use and can make adjustments. It should automatically be on the Animated GIF tab, but if not, just click it.
- Select the Slides from your presentation that you want to use in the GIF.
- Choose the Resolution from small up to extra large.
- Pick the Frame Rate from 15, 24, or 30 frames per second.
- For Auto-advance, move the slider for the timing spent per slide.
3) Click Save.
4) Browse for a location to save your GIF and click Export.

And that’s all there is to creating an animated GIF of your presentation in Keynote on Mac!
Create an animated GIF in Keynote on iOS
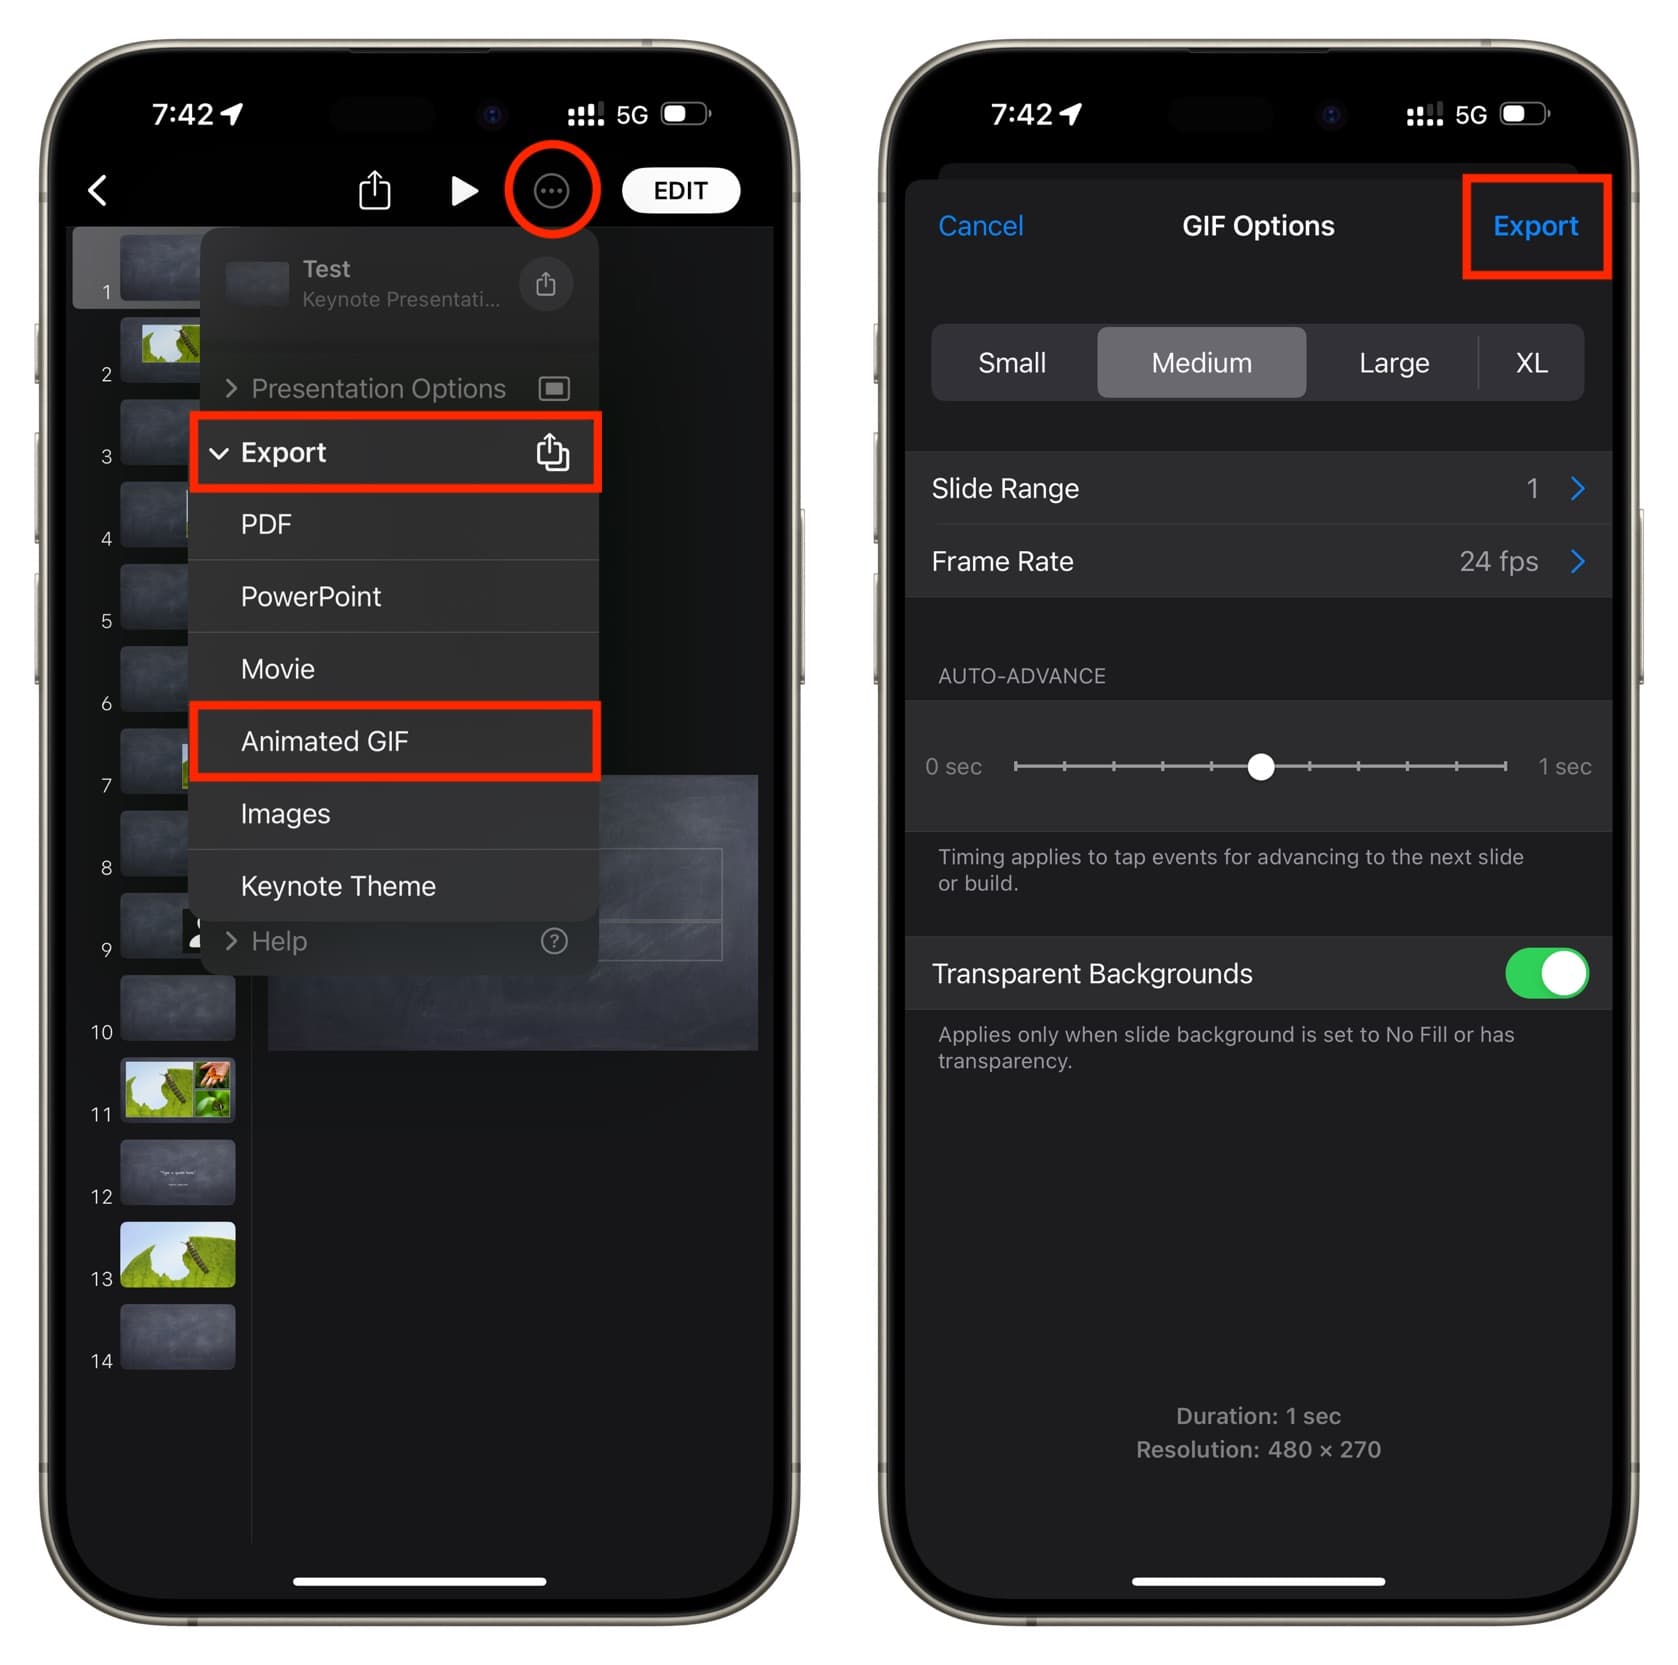
1) Open your presentation in Keynote on your iPhone or iPad and tap the More button (three-dot icon).
2) Select Export and pick Animated GIF.
3) Like on Mac, you’ll select the Slide Range, Frame Rate, Resolutions, and Auto-advance settings.
4) Tap Export.
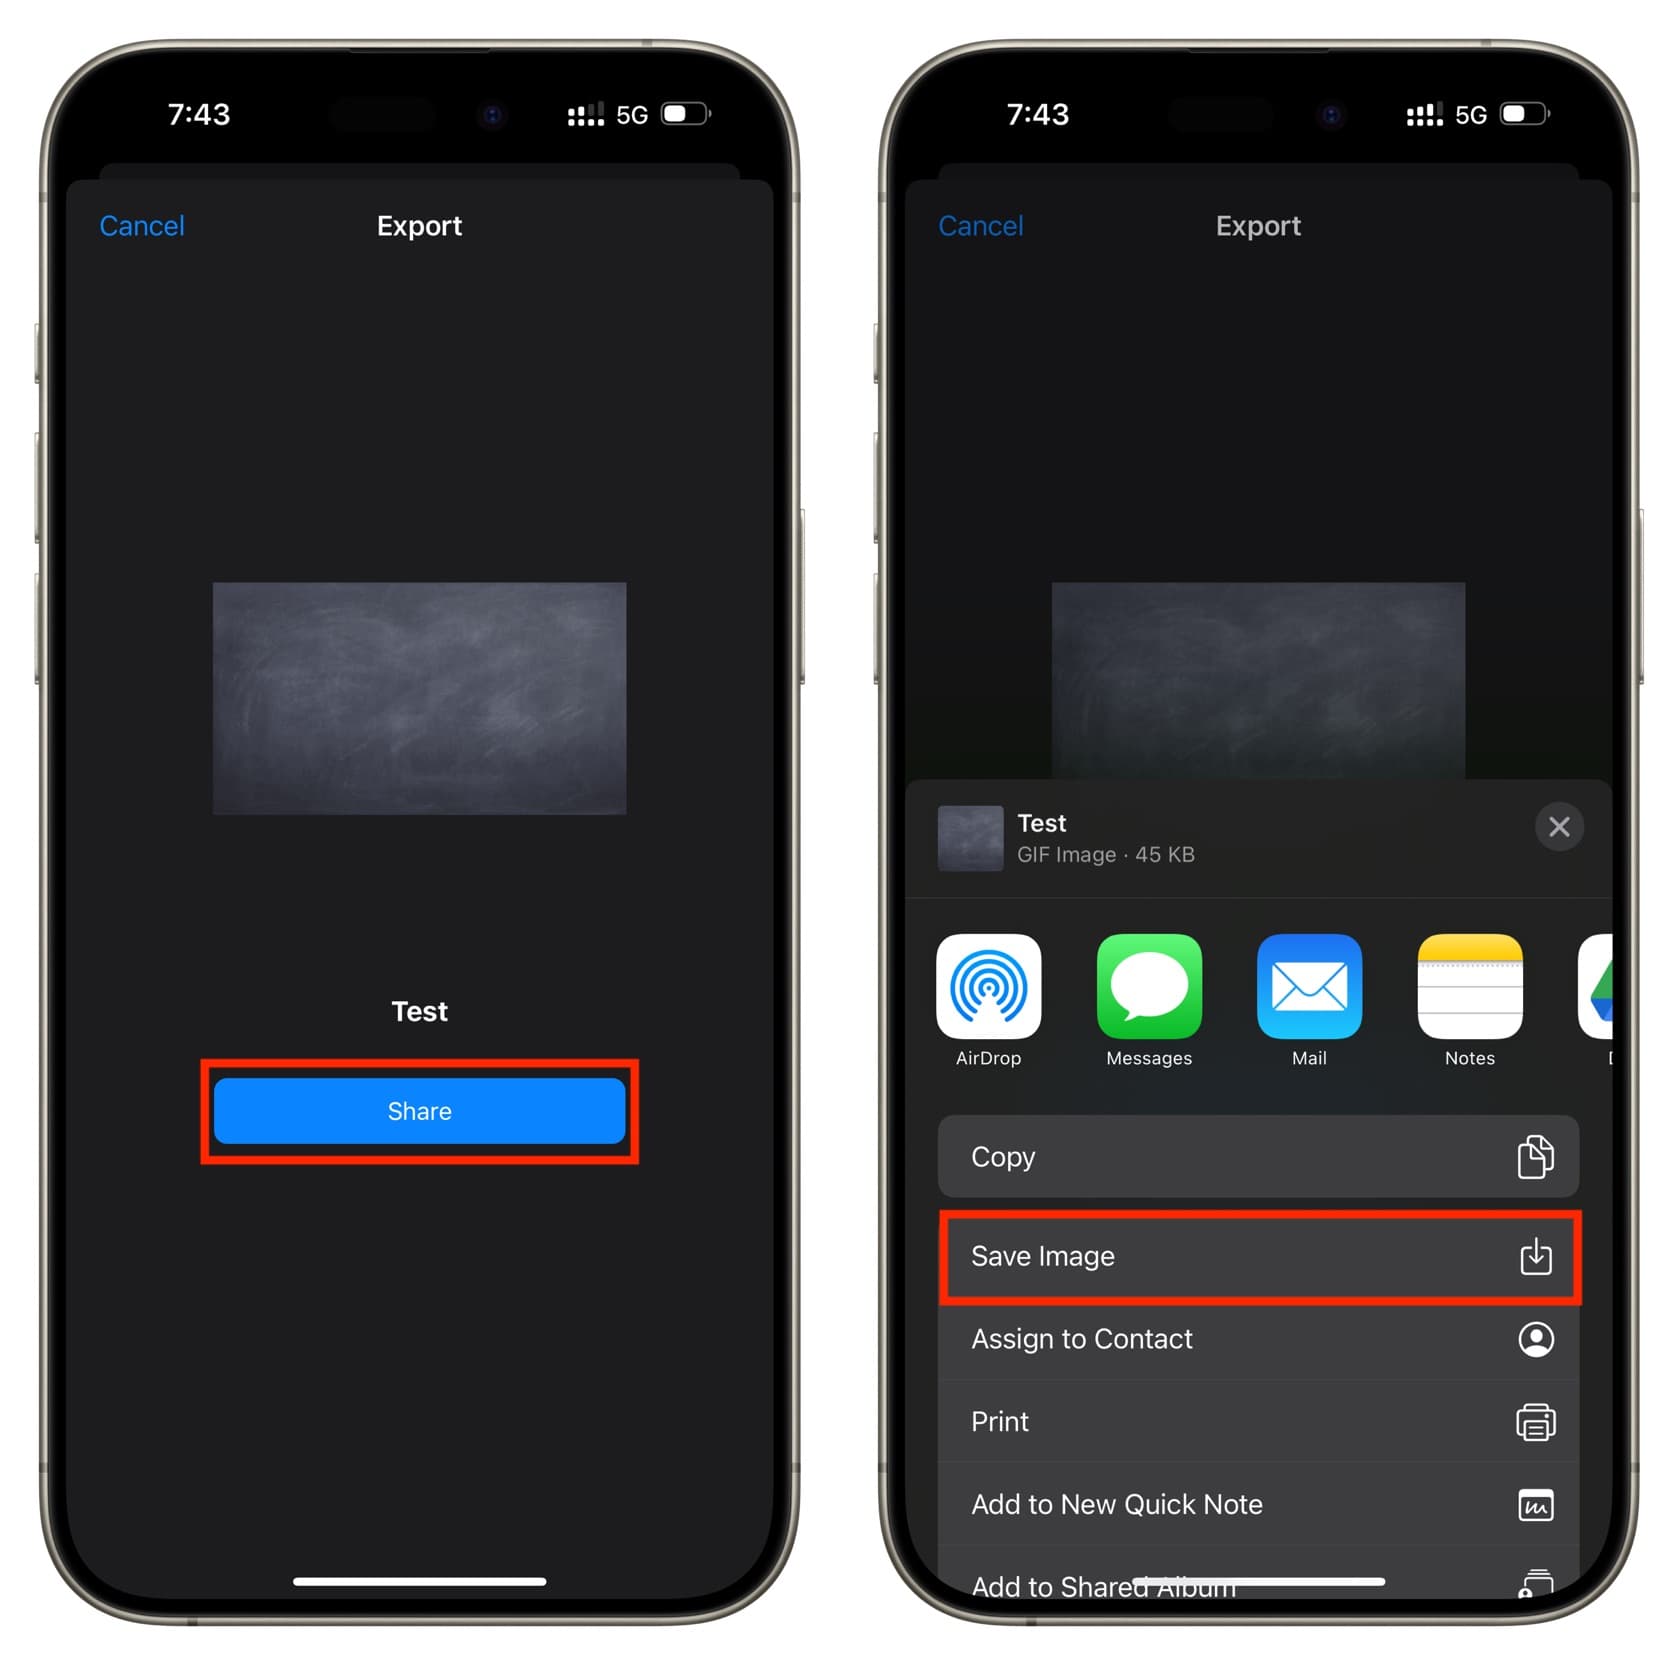
5) Tap Share and then send, share, or save your animated GIF.
On a related note: