How to factory reset a MacBook Pro, and when to do it
 William Gallagher
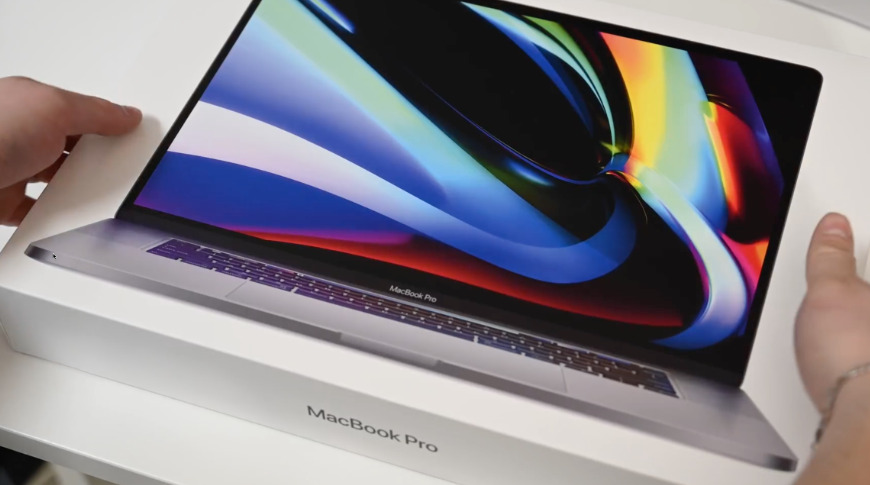
You can reset your MacBook Pro so that it's just as it was when you got it. You kept the box, right?
When you're preparing a MacBook Pro to sell, these are the steps you need to take to put the machine ready for a new user — and making sure all your personal and account details are removed.
Resetting your MacBook Pro to the way it was when you got it from the factory isn't difficult, but it isn't quick, either. You could do it if you've been consistently having serious problems with the MacBook Pro. However, the only time you should definitely do it is when you're about to sell or give away the machine.
If you do a factory reset, you're politely preparing the MacBook Pro for the new user — and you're also guaranteeing that there's nothing of yours left on it. Not software, not licences, and most definitely not any login account details.
What it means
While on iOS there is a Reset option under Settings, General, there is no such button on the Mac.
Whether it's on iOS or Mac, though, what the term means is setting everything back to the way it was when the machine was new.
That means removing your personal data, wiping the drive completely, and then setting it up again ready for the new user.
It also means, before you do anything else whatsoever, you make at least one backup of everything. This is not the time to put backing up off.
Removing your personal data
These days we're so seamlessly dependent on iCloud that removing your data chiefly means signing out.
Before you do that, though, make sure you have deauthorized your MacBook Pro from the Music app.
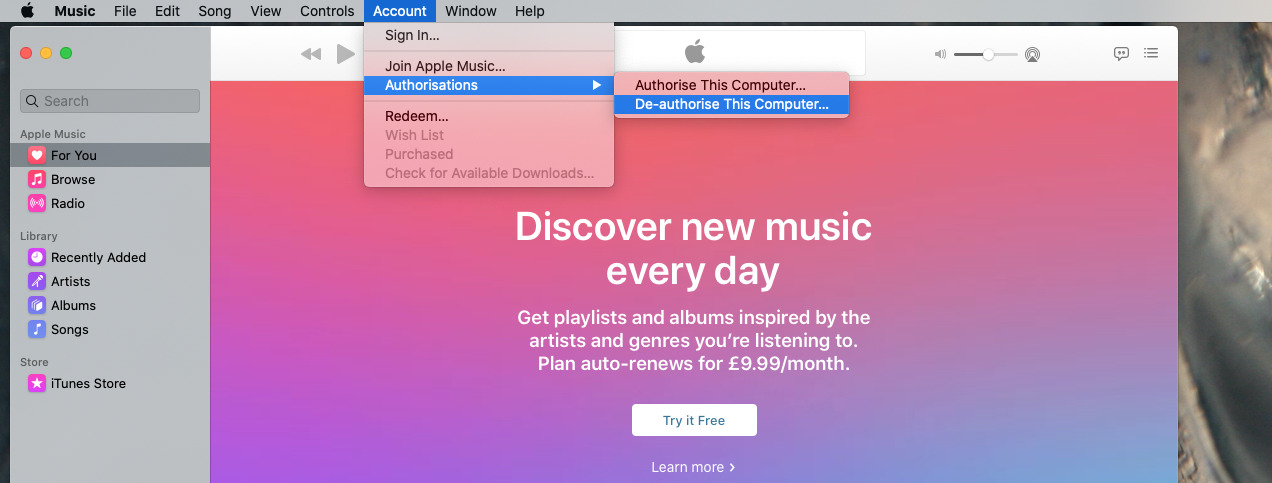
- Open Music
- Choose Account
- Click on Authorizations...
- Select De-authorize this computer
- Quit Music
Do the same thing with the TV app. Since both that and Music used to be part of iTunes, they continue to use the old iTunes authorization that meant you only had so many computers that could play music or video.
Next, launch the Mac App Store.
- Click on the Store menu
- Choose Sign Out
If you're now used to opening the app associated with an Apple service and choosing either de-authorize or sign out, there's one left that will throw you. It's the same idea, the Sign Out button is just in an odd place.
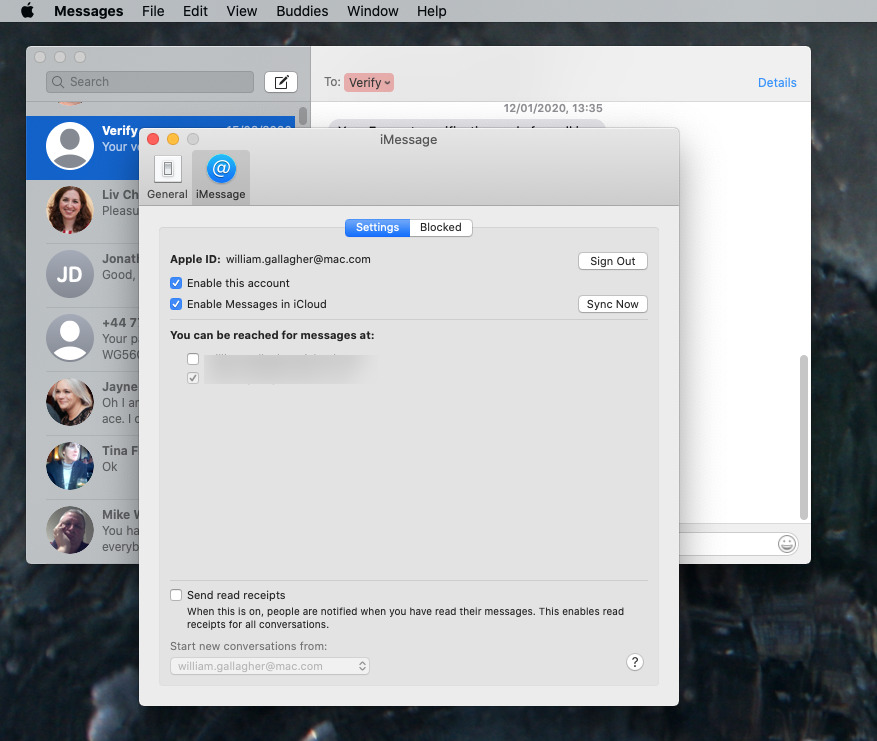
- Open Messages
- Choose Preferences
- Click on iMessage
- Choose the Sign Out button
Lastly, for this part, sign out of iCloud too.
- Open System Preferences from the Apple menu
- Choose Apple ID from the top right corner
- Click on Overview
- Click Sign Out toward the bottom left
At stages during all of this, you will be asked to confirm that you want to sign out, but you do.
Hardware issues
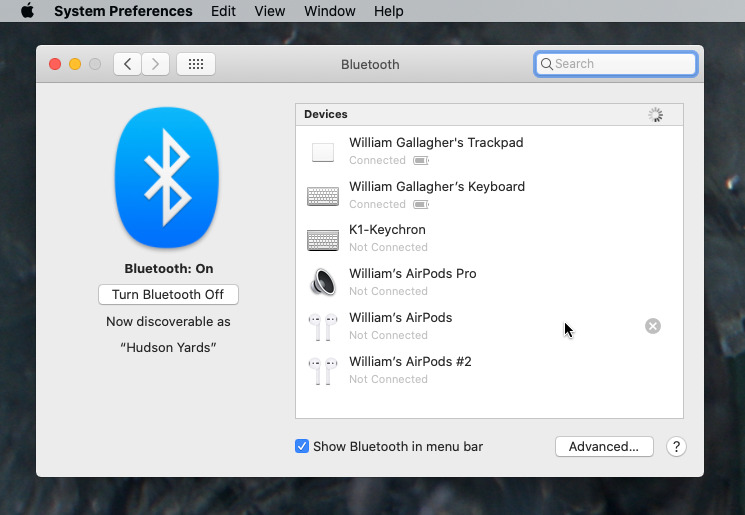
If you currently use your MacBook Pro closed, with an external keyboard and display, the odds are that the keyboard is Bluetooth wireless and the display is not.
You can leave the display connected until you hand over the MacBook Pro to someone. But you'd best disconnect the keyboard or any other wireless devices you have, such as AirPods or a separate trackpad.
This isn't necessary if you're also giving them these wireless devices, but there's got to be a limit to how generous you are. And that limit, plus your patience, will be severely tried if don't unpair the devices. The next time they're with you, and you happen to start typing on your own computer, you could end up controlling theirs.
- Go to System Preferences
- Choose Bluetooth
- Hover your mouse over the device name in the list that appears
- Click circular close box that appears
Even though the next step is possibly going to be a little inconvenient, do this unpairing of wireless devices anyway. Since you're resetting a MacBook Pro, then even though you've been using it closed, you can, and now have to open the lid to use its keyboard.
Wipe the drive
Tell us again that you've done a backup. Better yet, don't tell us, just make another backup right now.
When you're done, reboot the MacBook into macOS Recovery using these steps.
- Restart your MacBook and immediately hold down Command-R
- You'll see a startup screen, which varies between different Macs
- If prompted, enter your password. It must be an admin password, but if you're the only user of the Mac, that's you.
- Wait for the macOS Utilities window to open
This macOS Utilities app includes various options but the one you want this time is to launch Disk Utility.
On the left of the screen that appears, you'll see a list of drives connected to the Mac. Look under the heading Internal to find your startup disk. As well as that, which may be called Macintosh HD, there will be at least one other volume called Macintosh HD - Data.
You're going to delete this, but you're going to be careful, and you're not going to use the obvious Erase button. Instead, go to the Edit menu, and choose Delete APFS Volume.
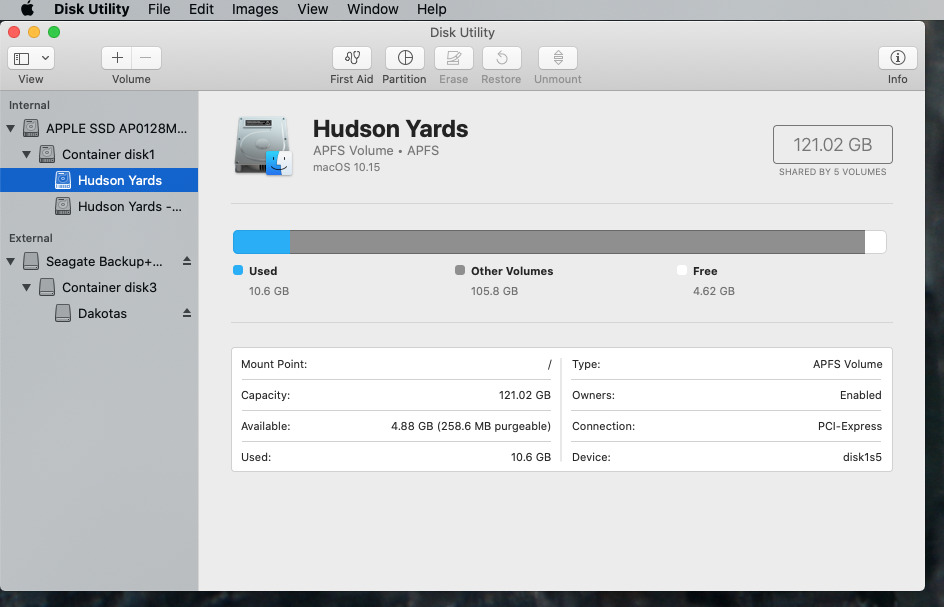
There will then be a confirmation dialog but it needs even more care than usual. For as well as a Delete button that you want, there is also a Delete Volume Group button — and you do not want that.
Choose only the Delete button.
Delete any of the - Data volumes, then finally select your Macintosh HD drive or whatever name you've given to the internal one.
You'll need to give the drive a name, but since you're trying to replicate the straight-from-factory environment, call it "Macintosh HD."
Then you will also be given a choice of drive formats, but just choose whichever Disk Utility is showing by default.
Setting up
Remember that you've booted up into this macOS Utilities volume and that Disk Utility is just one of the apps available to you. Quit it, and you're returned to the list of those apps.
Choose Reinstall macOS.
- If prompted, enter your password
- Confirm you want to install the latest macOS that will run on this MacBook Pro
This last step may take some time. Leave the MacBook Pro open and allow it to restart as it requires.
When it's finished, the MacBook Pro has been reset to the way it was when it got to you from the factory.
Keep up with AppleInsider by downloading the AppleInsider app for iOS, and follow us on YouTube, Twitter @appleinsider and Facebook for live, late-breaking coverage. You can also check out our official Instagram account for exclusive photos.


 David Schloss
 Marko Zivkovic
 Malcolm Owen

 Mike Wuerthele
 Christine McKee