

It's inevitable when using your Mac that you will eventually compress files into a zip archive; either for storage, backing up, to email or to save a bit of hard drive space. But such is life that if something can go wrong, chances are it eventually will, and you will be left with a damaged zip archive that you can't seem to open. I want to show you how to use Terminals zip commands to target a damaged zip archive and, if all go well, repair the archive; and if not, then try to salvage as much as you possibly can.

To demonstrate, I have a zip archive of all the Logic Pro project files of a production I recently finished. I had a friend over and I wanted to show him how I achieved some of the sounds in the song, so I clicked to unzip the archive using OS X's built in Archive Utility. All was well until I saw an error saying Archive Utility could not extract the archive. I tried to extract the archive using a few other Apps without success. I finally accepted that the archive was gone, and with it my project files and all my hopes and dreams of being a musician; but then my friend chimed in and suggested I try using Terminals zip commands.
Terminal's Zip Commands
If you open up terminal, in addition to making single line command changes, you can also use Terminal to make changes to files and folders. If you type into Terminal the word zip and hit return, you will be presented with a text based menu of Terminal commands that can be used when making changes to zip files. At the top, right below the copyright information, you will see a sort of command line formula for entering in actions, and right below that you will see all the options that can be preformed.
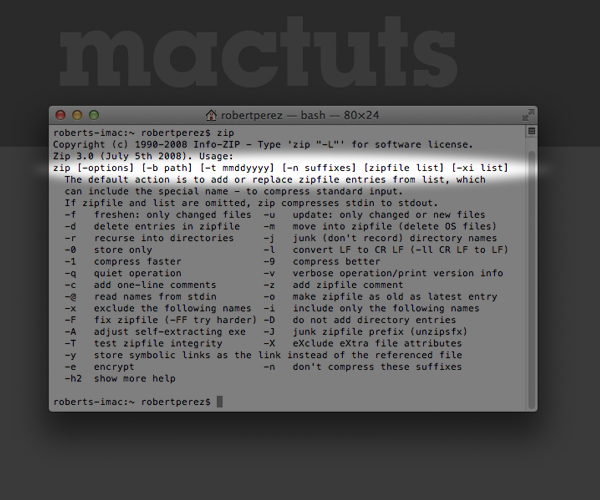
The one we're interested in is -F fix zipfile (-FF try harder).
Going by the guide at top we can see that we need to first type zip, then the option we want to preform from the list, then the path to the file. If you place the zip archive in your home folder, you can omit the path, as the home folder is the default place Terminal will look for the file. For this example I'll place the zip archive in my home folder, then I'll rename the archive to broke.zip, so there are no spaces in the name.
I'll type into Terminal the following command line:
zip -F broke.zip --out pleasework.zip
This Terminal command is telling Terminal to target the archive named broke.zip in my home folder with the zip command -F, for Fix Archive, and if able, create a new archive named pleasework.zip. If I hit return in this specific example, I will get a warning:

Terminal is actually talking back to us now about our damaged archive. Terminal is telling us that it can see it is a mostly intact archive, that it is missing the end signature, and to try the -FF command to try and repair the archive. I'll type the new command into Terminal, this time using -FFoption, for Fix Archive (Try Harder):
zip -FF broke.zip --out pleasework.zip

Terminal is now asking if this is a single-disk archive, meaning it is a complete archive and not part of a larger archive. Enter Y for yes and press return. Terminal will begin extracting what it can from the damaged archive and repack the files in a new archive that it is creating using the name of the archive you specified in the Terminal command. If you go to you home folder, there will be a new archive with the name that you specified in the Terminal command after the --out function.

Conclusion
Losing files due to a corrupted archive can range from annoying to something potentially devastating depending on what they are. But as always, OS X offers up some very useful tools that, as I've demonstrated here, can really save the day. Using Terminal to repair any damaged archive is a save first course of action if you ever find yourself unable to extract the archive.


