We’ve been able to print from our iOS devices for quite awhile: Third-party apps have been available since early 2010, and with the introduction of AirPrint in iOS 4, Apple officially added built-in support for printing to compatible wireless and networked printers.
For three years now, Print Center has been the place to manage and cancel your print jobs; it lived in the multitasking bar, its icon only appearing when needed. But iOS 7 gets rid of the multitasking bar—and seemingly, of Print Center itself.
But not so fast: Print Center’s still around; you just have to know where to look for it.
Print from iOS 7
The basic Print function is largely unchanged in iOS 7—when you find something you want to print, tap the Share button and then scroll the list of system icons to the left until you find Print.
Once you tap on the icon, you get the same options present in earlier versions of iOS: what printer to select, how many copies you want, and (assuming your printer supports it) if you want a double-sided document. Tap Print, and the document is sent to the printer.
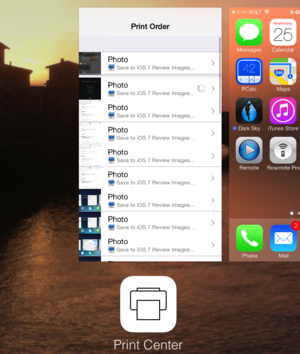
As we mentioned previously, you used to be able to check up on that document’s progress by opening the multitasking bar and tapping the Print Center icon. In iOS 7, Print Center moves to the multitasking screen—just double-press the home button and swipe all the way to the right to view it. Print Center now lives to the left of your Home screen; you can then tap it to open your print queue and alter any settings you need changed.
One thing to note: Like the old Print Center in previous versions of iOS, the Print Center screen disappears as soon as the job completes. As such, if you’re sending a single-page document, be prepared to have to dash into the multitasking screen if you want to view your job settings or cancel anything before Print Center vanishes from the scene.
Author: Serenity Caldwell, Associate Editor

Serenity has been writing and talking and tinkering with Apple products since she was old enough to double-click. In her spare time, she sketches, writes, acts, sings, and wears an assortment of hats.