 Photo: Chris Barylick
 Rory Pierce of Fix That Mac
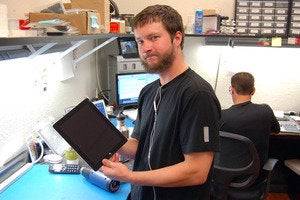
I’ve been both curious and terrified about the process of replacing damaged front glass on a first-or second-generation iPad, but this was the last thing I wanted to attempt on my own. I ventured over to Fix That Mac in Berkeley, California to talk to Rory Pierce and get the perspective of someone who repairs several iPad screens per week and is confident in what he’s doing.
As of this writing, Apple Certified Macintosh Technician training doesn’t require iPad or iPod repair. As such, iPad repair knowledge isn’t readily available to the public and falls into the category of “catch as catch can” with technicians training each other. Apple apparently trains assorted Geniuses at its retail locations and often sends broken iPads to Austin, Texas for repair.
For the brave of heart, here’s how to replace the glass on a first- and second-generation iPad, as demonstrated by Rory Pierce. This isn’t a simple procedure, so don’t hesitate to take your iPad in to the store if you have any doubts about performing the repair. Wear safety goggles to protect against any airborne pieces of glass from the shatter screen.
iPad unglued
 Photo: Chris Barylick
 As always, have a clean, well-lit work area.
Place your iPad vertically in front of you. You’re going to be heating and cutting through a fair amount of glue, so begin warming the right side of the iPad with a heat gun at a low setting for 10 to 20 seconds. “Keep the heat gun on it, but not completely or the bezel will melt,” Pierce warned me as he distributed the heat along the right side of the iPad. From here, take a disposable steel razor and begin working it between the glass and the frame.
 Photo: Chris Barylick
 Using a razor blade to cut through the glue that seals the iPad.
Once the razor is in place, work your way up the frame, gently prying up the broken glass as you go. Take care to avoid using the razor around the upper right hand corner of the iPad, as this region contains cabling you don’t want to cut.
 Photo: Chris Barylick
 Be careful when you cut through the glue. You want to avoid the cables inside the iPad.
Begin heating the glue around the top and cutting it with the razor. Be careful with the razor around the lower left hand corner of the iPad, as this tends to be where the AirPort and Bluetooth cables are located.
This is also the point where things might become a little scary. As the broken glass is being pried and stressed in the removal process, there’s a good chance that it will begin to splinter and break. Take care not to cut the iPad camera cabling when your razor’s in that area.
 Photo: Chris Barylick
 The glass on your broken iPad may splinter. Keep the glass out of the iPad’s internals.
The left side of the iPad is a bit easier to cut through. You don’t have to worry about cables that could be sliced along the path. If you happen to accidentally hit the power switch and turn the iPad on, don’t worry.
Pry and pry again
 Photo: Chris Barylick
 Take your time when prying off the old glass.
Once the iPad’s glue has been heated and you’ve made a run through with the razor, it’s now relatively easy to begin prying out the glass with either the razor or a prying tool of your choice. Find a balance between gentle and “use some elbow grease,” give the entire iPad frame a last run with the heat gun to melt any glue still holding it together, pry up the sides and use both your hands to peel the broken glass from the iPad.
 Photo: Chris Barylick
 One of two connectors that attach the display to the iPad.
After the broken glass has been pried off, leave it connected to the iPad and remove the four screws holding the display in place. Once the screws have been removed, you can move the display out of the way and remove the two connectors attached to the broken glass.
You’ll need to recover your iPad’s camera module and the home button and swap it over to the new glass. This requires close work with your razor. Detach the camera module, make sure to cut off any bits of detritus from the old iPad glass and install it into the new glass. Pierce recommended using Krazy Glue to keep the camera module in place and this helps hold things in place as needed.
 Photo: Chris Barylick
 You’ll need to glue the camera module to the new glass.
You’ll need to unscrew the module holding the Home button in place, then cut off any bits of detritus still clinging to it. The home button can be cleanly inserted into the new glass and held in place with the rest of its transferred components.
 Photo: Chris Barylick
 The home button needs to be installed into the new glass.
New glass
It’s time to bid your broken iPad glass farewell and swap in the new glass. You get what you pay for in terms of replacement iPad glass and Pierce intoned that there are good vendors out there, so expect to pay about $30 to $40 on average for a piece of iPad glass available online.
 Photo: Chris Barylick
 Testing the new glass.
Carefully attach the connectors, put the screws back in to hold the display in place, slide the glass into place, turn the iPad on and it’s time to begin testing the touchscreen functionality. Once you’re satisfied with its performance, it’s time to flip the new glass over and begin clearing the work area for the next steps.
 Photo: Chris Barylick
 Applying glue for the new glass.
Compressed air is your best friend and a critical ally at this juncture and you’re going to want to make sure there are no small pieces of glass or dust remaining in or around your iPad, as leftover glass can crack the replacement glass you’re installing. It’s now time to replace the glue and 3M Scotch Weld 4799 sells for about $21 a tube and applies smoothly as if you were laying down cake frosting into your iPad’s frame, dodging sensitive cables and circuitry along your path. Apply a thin layer of adhesive around the frame, then gently lower the new iPad glass into place, putting even pressure around the edges as you settle the glass into the iPad.
It goes almost without saying that a good clamp is about the most useful thing in the known universe. Once the new glass is in place and settled into the glue, it’s time to break out six Irwin Handi-Clamp Clamps, which tend to retail for about $5 each at Home Depot but can be found on Amazon for about $3.41 each to hold the new screen in place. Distribute the clamps evenly around the edges, leave the glue to dry for a couple of hours and you’re good to go.
 Photo: Chris Barylick
 Waiting for the glue in the iPad to dry.