
It’s never been easier to take high quality photos. Almost any smartphone’s camera produces nicer photos than any point and shoot from a few years ago. Sometimes, to take your images to the next level, you need to do a bit of post-processing. The gold standard application is Adobe Photoshop and, more recently, Photoshop Lightroom but even with the special photographer’s subscription price, they cost more than $100 a year.
Pixelmator is a great alternative but even that is $30—a lot to spend on an application you may only use occasionally. If you want something free, just for occasionally editing photos, the GNU Image Manipulation Program, or GIMP, is open source and has been around for almost 20 years.
In this tutorial I’ll show you how to make simple photo edits using GIMP. After this tutorial you’ll know how to crop your photos, increase their brightness and contrast, adjust the saturation, convert them to black and white, sharpen them and export them for social media. Watch the screencast to see me go through the whole process with one of my images. To get the Cliff’s Notes of what I do in the screencast, check out the written tutorial below.
Screencast
Getting Started With GIMP
GIMP is the closest thing there is to a free and open-source Photoshop. While it does not offer some of Photoshop’s best features—such as non-destructive image editing—or have the same level of polish, it has all the tools you need to perform simple, and not-so-simple, image edits.
As GIMP is open source there are alternative builds with different plug-ins and features. For this tutorial, any recent version will do. If you do not have a copy of GIMP on your system, you can get one from the GIMP on OS X website.
Open GIMP once you have it installed in the Applications folder.
Opening Images
To open an image in GIMP select Open from the File menu. Navigate to the location of the photo you want to edit and select it. Press Open to load the image into GIMP.


Cropping Images
To crop an image in GIMP select the Crop Tool from the toolbar. Click on the image and drag a marque around the area you want to crop to. To constrain the aspect ratio of the crop hold down the Shift key while you drag. To crop to a specific size use the options in the Toolbar Options panel. Press Return to accept the crop you have made.


Editing Brightness and Contrast
There are many ways to to change the brightness and contrast of an image in GIMP. The simplest is to use a Brightness-Contrast adjustment. From the Colors menu select Brightness–Contrast…. To increase the brightness or contrast, drag the relevant slider to the right. To decrease them instead, drag the slider to the left. Once you are happy with the changes click OK or press Return.


Tip: Make sure the Preview checkbox is checked so you can see how the changes effect the image.
Editing Saturation
Select Hue–Saturation… from the Colors menu. You can adjust the saturation of a specific colour by selecting it from the colour wheel. To adjust the saturation of the whole image select Master. For most simple image editing you will only use the Lightness and Saturation sliders. To change how light or dark the colours in the image are, use the Lightness slider. To change their saturation, use the Saturation slider. Once again, dragging the slider to the right increases the values and dragging it to the left decreases them.


Tip: Many OS X default keyboard shortcuts—such as Command-Z for undo—work in GIMP.
Converting to Black and White
The simplest way to convert an image to black and white is to use a Desaturate adjustment. Select Desaturate… from the Colors menu. The desaturate menu lets you convert an image to grayscale based on its Lightness, its Luminosity, or the Average of the two. Click between the options with Preview checked and select the one that you feel gives you the strongest image.


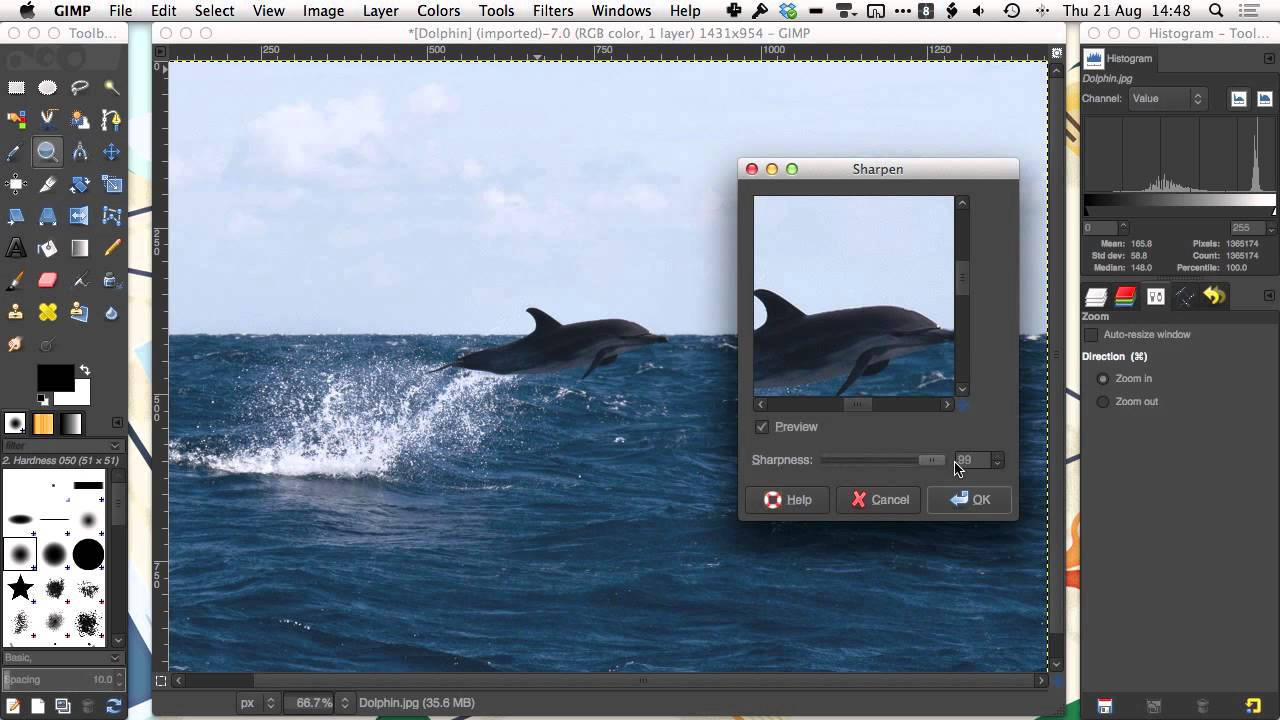
Sharpening the Image
Sharpening an image before saving or printing is a common final step. Select Enhance from the Filters menu and then choose the Sharpen… option. Adding too much sharpness creates very unappealing images. In general a value of between 5 and 15 is perfect. If in doubt, err on the side of caution.


Saving Your Work
Often you will be editing high-res versions of your images. For emailing to friends, posting on your blog or uploading to social media low-res files are better. The best way to export images is to use the Save for Web… tool from the File menu. To save a photo, make sure JPEG is selected. If you need a smaller file size you can reduce the Quality slider. For most purposes the default value gives a good balance.
You can also reduce the resolution of your images. If you are editing pictures from your smartphone or camera they can be more than 3000 pixels wide; I like to reduce this to around 1200 pixels.
Click Save and then enter a name and select a location for your new file. Once you have finished click Save again.


Tip: It is better to save copies of your edited GIMP images rather than overwriting the original.
Conclusion
In this tutorial I’ve shown you how to perform simple photo edits, such as cropping and adjusting the brightness and contrast of your images, using GIMP. GIMP has many more powerful features that I have not even touched on.
While it may not be as powerful or as polished as Photoshop, it is still a worthy competitor, especially given the price difference. If you are only looking to improve a few photos you’ve taken with your smartphone or point and shoot, GIMP is perfect.


