Creative Cloud turned three this month, an age when most children finally begin to walk more confidently as they grow out of the toddler stage. The same could be said of Adobe’s latest steps—the company took an adult-sized stride last week with the release of new mobile apps, and technology that connects them to a traditional desktop workflow like never before.
The feature that makes this possible is Libraries, a cloud-based repository for colors, text styles, brushes, graphic assets, and even full images. Content added to Libraries from mobile or desktop apps gets synced immediately to Creative Cloud, ready to serve other compatible software connected to the same account.
Support your local Libraries
For the time being, desktop access to Libraries is limited to Photoshop CC and Illustrator CC—shared content won’t show up in Premiere Pro, Dreamweaver, or InDesign, for example. However, it’s not hard to imagine Adobe will eventually expand the reach of Libraries to other members of the CC family with future updates. While Photoshop can access all asset types, Illustrator is slightly more limited, recognizing everything except for layer styles.
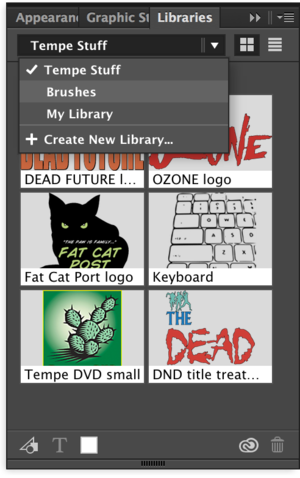
It’s easy to switch between Libraries, which can be used in either grid or list view.
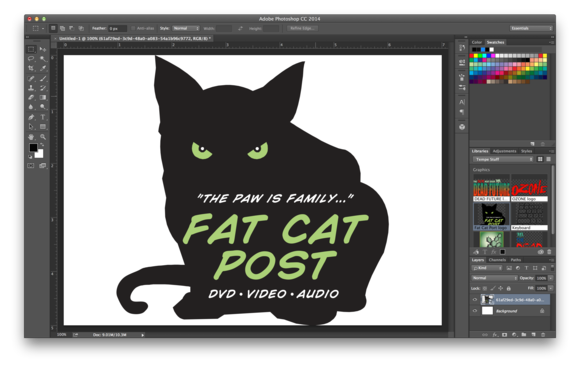
Libraries are positioned as a universal method for storing assets across platforms, but users should expect some legacy roadblocks. For example, vector-based Illustrator files can be dragged and dropped into Photoshop with no problem, but bitmapped images can only be placed into Illustrator, since such files can’t be natively edited there.
The new Assets section of the Creative Cloud web portal can also be used to view or delete—but not edit—Libraries. Here, you can see the format of saved content, file sizes, and dimensions (the latter only for bitmapped elements), and sort your content by name or date.
Unlike the local brick-and-mortar book repository of the same name, Libraries exist as bits of code hidden within a user’s Creative Cloud account. Opening the Creative Cloud Files folder from the Finder on a Mac reveals no trace of such content alongside other types of synced data—Libraries will only show up inside supported applications.
Shared assets
To open Libraries on the desktop, select Windows > Libraries from the latest version of Photoshop or Illustrator. Adding content to an existing library is as easy as selecting it from an open document, then dragging and dropping it onto the panel, or just click the Add button in the lower-left to do the same. Assets are automatically grouped by type, and each library can contain an unlimited number of content types.
For now, Photoshop CC is the only application capable of using all library asset types.
Double-clicking an asset’s name lets you change it to something more descriptive; doing the same on the icon opens a temporary file in the original application so you can make revisions. And then saving that temp file automatically updates the asset across all of your Creative Cloud-connected devices.
Colors and type styles can also be added to a library with a drag and drop onto the respective icon in the lower-left of the panel. Assets can be viewed as a grid or list, with additional details, such as which application created the original file, or the font name and size for type styles. Synced content is cached locally so you can work on it offline.
Although you could theoretically toss shared content into a single library, this type of disorganized approach offers little advantage over the way designers already work. Instead, you can create new Libraries for specific projects, clients, and jobs, because switching between them is as easy as clicking a panel menu. That means fewer trips to the traditional file browser, and ultimately a more efficient workflow.
Capture your world
Another way to load up your Libraries is using one of Adobe’s new connected mobile capture apps. Adobe Color CC (formerly Kuler) let you capture color palettes with your iPhone’s camera, while Adobe Brush CC and Adobe Shape CC allow you to create custom marks or clip art-style graphics on any iOS device.
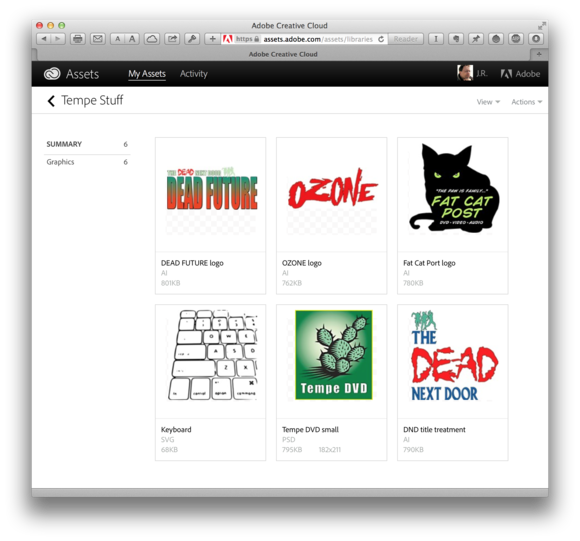
The new Assets section of the Creative Cloud website now shows all of the content in a user’s library.
While Libraries require a paid Creative Cloud subscription to use on Photoshop or Illustrator, the mobile apps do not—they can be used by anyone who signs up for a free Adobe ID, a deal that also includes 2GB of cloud storage. Regardless of account type, there are a few limitations worth noting.
Which library assets you’re shown depends on the app you’re using at the time. For example, Color CC can only access color themes, Shape CC is limited to vector shapes, and Brush CC can only see brushes. iPad-only apps like Adobe Illustrator Draw can access images and shapes, Illustrator Line is limited to images, and Adobe Photoshop Sketch can only access brushes.
Brushing up
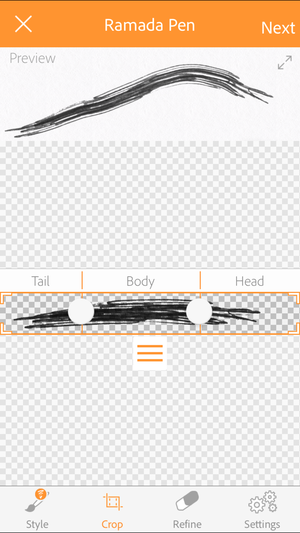
Adobe Brush CC makes it a snap to convert drawn marks into custom brushes for Photoshop Sketch on iPad or Photoshop and Illustrator on desktop.
Adobe Brush CC acts as a companion for the Photoshop Sketch app, but can also be used to create brushes for Photoshop CC or Illustrator CC on the desktop. It’s important to choose the appropriate target for a new brush, since that will ultimately determine where it can actually be used. (Brushes created for Sketch will show up in Photoshop or Illustrator, but can’t be used. However, you can change brush type with Brush CC at any time.)
Although I don’t fancy myself an artist, it was quite easy to scribble out a custom mark using a pen and notepad, capture, and convert it into a Photoshop Sketch brush in just a few steps. Selecting the Ribbon type allowed me to adjust the tail and head of the brush so it flowed seamlessly while using it to paint on an iPad.
Brush CC also includes full control over crop and masking, as well as fine-tuning brush size, flow, pressure, velocity, and texture. Artists can preview how the brush will work without having to leave the app, and once synced, the new mark will be available for use on the iPad from the Photoshop Sketch app. Brushes can also be given unique names, but be sure to save them in the correct place—there’s currently no way to move them between Libraries.
Getting into Shape
Adobe Shape CC has a similar, but even more impressive mission: Convert whatever the iPhone or iPad can see into editable vector graphics within seconds. The resulting SVG file can be further edited with Illustrator CC, or used as-is from any compatible software.

Adobe Shape CC converts bitmapped objects into editable vector graphics, which are then synced as SVG graphics via Libraries.
Shape CC isn’t quite as robust as Brush CC when it comes to editing—you simply import an existing image or aim the device camera at an object you’d like to capture, adjust contrast, and then use a fingertip to remove unwanted areas prior to conversion. It’s important to properly frame the desired area, because the app can’t rotate a captured area or correct for surplus bleed between vectors.
Despite this simplicity, the very act of converting a captured image into high-quality, editable vector artwork on a mobile device is quite magical. Adobe Streamline once cost $199 to convert raster scans into vectors using processor-intensive desktop software—and now here it is, free to anyone with an iOS device. (Adobe rolled Streamline into the Live Trace tool starting with Illustrator CS2.)
The future is now
Adobe’s October 2014 releases display a more focused company intent on changing the way designers will work in the future. Free from the shackles of the desktop, inspiration can now come from nearly anywhere as connected mobile devices are no longer considered second-class citizens for creating content.
Creative Cloud may be young, but Libraries and the new connected capture apps finally put the service on solid footing—and with the kind of poise and grace we don’t often see from kids during adolescence.