When it comes to retouching portraits, whitening teeth is one of the most common edits you’ll ever make. In this column you’ll learn how to whiten teeth without messing up your original image and without having to make a single selection. As a bonus, this technique works in nearly any version of Adobe Photoshop or Photoshop Elements. (For the curious, you can’t do this in iPhoto or Photos, but you can do it in Aperture, Lightroom, and Pixelmator.)
The power of adjustment layers
Both Photoshop and Elements include a handy array of adjustment layers that you can use to change the color and lighting in your image. When you employ an adjustment layer, the adjustment itself happens on a new layer, which safeguards your original image. Since the adjustment is isolated on a layer all by itself, you can lower its layer opacity to lessen the strength of the change you made and you can easily trash the layer if you don’t like the results. Each adjustment layer also come with a layer mask, which you can use to hide the change from the parts of the image that don’t need it. All this adds up to a very efficient and very safe way to edit, as you’re about to learn.
Whitening teeth
Open an image in Photoshop or Photoshop Elements and choose Layer > New Adjustment Layer >Hue/Saturation (in Elements you need to be in Expert or Full Edit mode). In the dialog box that appears, enter teeth for the layer name and then click OK. A new adjustment layer appears in your Layers panel and, depending on which version of Photoshop you have, a panel or a dialog box pops opens containing the sliders shown here. Drag the Lighten slider rightward to approximately +50, and the whole image gets lighter. (Don’t panic—we’ll fix that in a second).
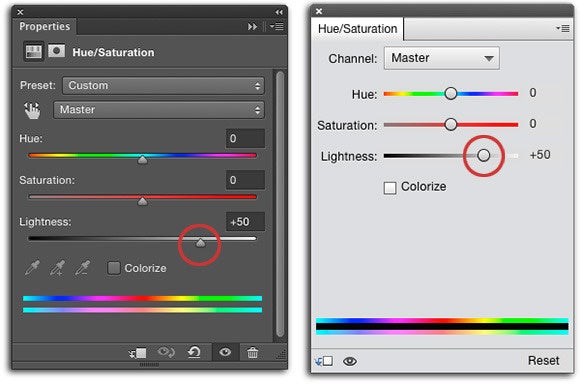
Here you can see the Hue/Saturation controls in Photoshop (left) and in Elements (right).
Now let’s use the adjustment layer’s mask to hide the lightening we just applied. Take a peek in your Layers panel and make sure the mask is active (it’s circled below). Think of a layer mask as digital masking tape, though whereas real masking tape is beige or blue, digital masking tape is black. By adding black to the layer mask, you hide the layer’s content in that corresponding spot in your image. With the mask active, press Command + I to invert it so it goes from white to black.
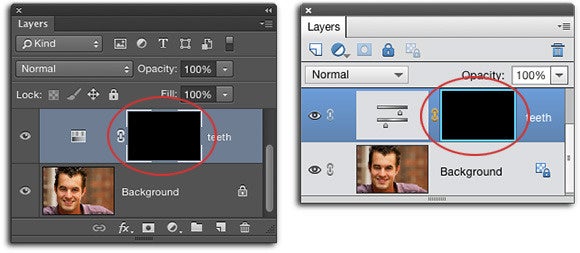
A border appears around the mask whenever it’s active. It’s light gray in Photoshop (left) and light blue in Elements (right). When working with masks, remember that black conceals and white reveals.
To see the teeth better, zoom into your image by pressing Command + a few times, and then press and hold the spacebar while dragging your mouse to reposition the teeth so you can see them. To reveal the lightening atop the teeth, we need to paint that area of the mask with white. So press D to set the color chips at the bottom of your Tools panel to the default of black and white and then press X until white is on top. Press B to grab the regular Brush tool and from the Brush Preset picker in the Options bar, choose a soft-edge brush that’s roughly teeth-sized.
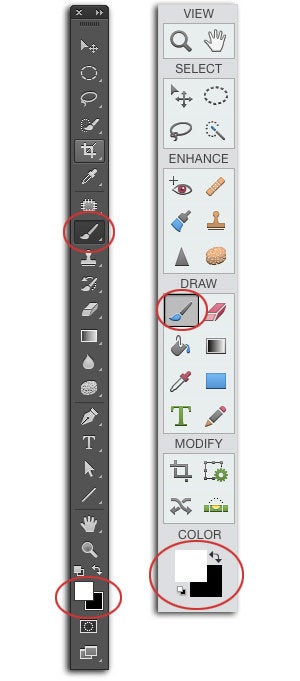
Here’s the Tools panel in Photoshop (left) and in Elements (right). The Brush tool and the color chips are circled in each panel.
Mouse over to your image and then paint across the teeth to reveal the lightening in that area. If you mess up, press X to flip-flop your color chips so black is on top and then paint over that area again to hide the lightening. To adjust brush size while you’re painting, tap the left bracket key ([) to decrease brush size, or the right bracket key (]) to increase it. (There are other brush resizing keyboard shortcuts, but this one is the simplest to remember).
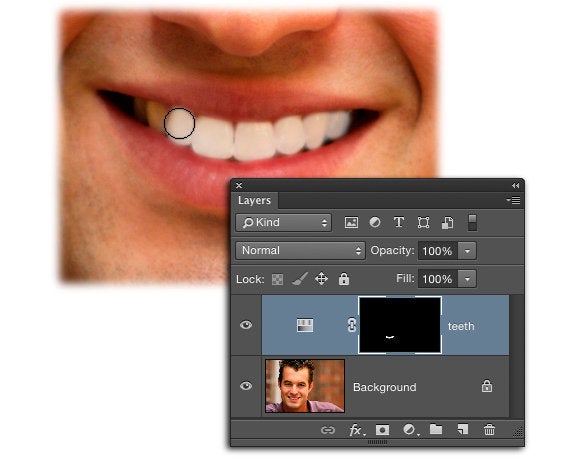
As you paint inside the mask with a white brush, you reveal the lightening atop the teeth. Nifty, eh?
If the teeth look a little yellow, turn your attention back to the Hue/Saturation controls (double-click the Hue/Saturation layer thumbnail to reopen its panel if you need to) and from the Channel menu above the Hue slider, choose Yellow. Slowly drag the Saturation slider leftward until the yellow color cast disappears.
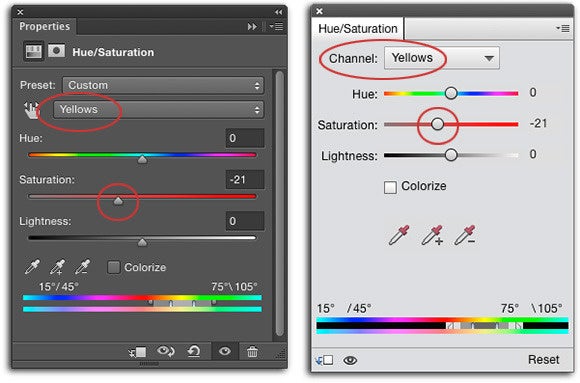
By reducing the saturation of the problematic color channel, you can easily nix a color cast. This trick works for taking the red out of skintones, too—just use the red channel instead of yellow to get it done.
When you’re finished, set the Opacity setting at the top of the Layers panel to around 40 percent, so the teeth aren’t overly and obnoxiously white. Save your document by choosing File > Save As and then pick Photoshop from the format menu so your layers remain intact.
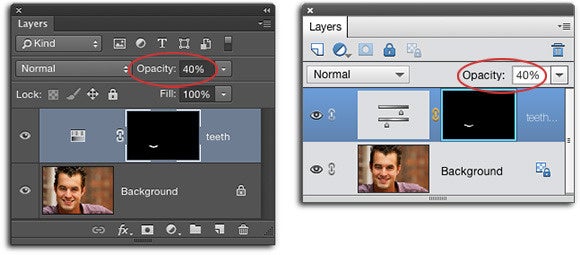
Here’s the final Layers panel in Photoshop (left) and Elements (right).
As you can see, this teeth lightening trick is worth having up your Photoshop or Elements sleeves. Until next time and may the creative force be with you all!